
When you are working with an Azure environment, you may encounter situations where you mistakenly create Azure VM resources in the wrong VNet (Virtual Network) that you do not expect to create it. Or else you may provision Azure VM resources in the wrong subnet inside the same VNet. So in that case how do you move them to the correct VNet or the subnet in the same VNet?
Unfortunately, it’s not possible to migrate Azure VM from one Vnet to another. So the Azure VM must be recreated by deleting the VM but keeping the disks and creating the new Azure VM with the new VNet using the existing disks.
In this article, I will show you how to do the following two scenarios step by step using Azure Portal and Azure PowerShell.
- Move Azure VM to a different subnet in the same VNet.
- Move the Azure VM to a different VNet.
Move Azure VM to a different subnet in the same VNet
Within a VNet it is a very easy task to move Azure VM between subnets. As a prerequisite, you should follow the below steps before proceeding.
- The IP configuration must be dynamic before you change the subnet.
- You need to know the Azure VM interface name that you going to change the subnet and the VNet and the new subnet name.
Using Azure Portal
This is a straightforward process. What you need to do is, go to the VM you wanted to move to the different subnet and click on Networking under settings from the left side pane.
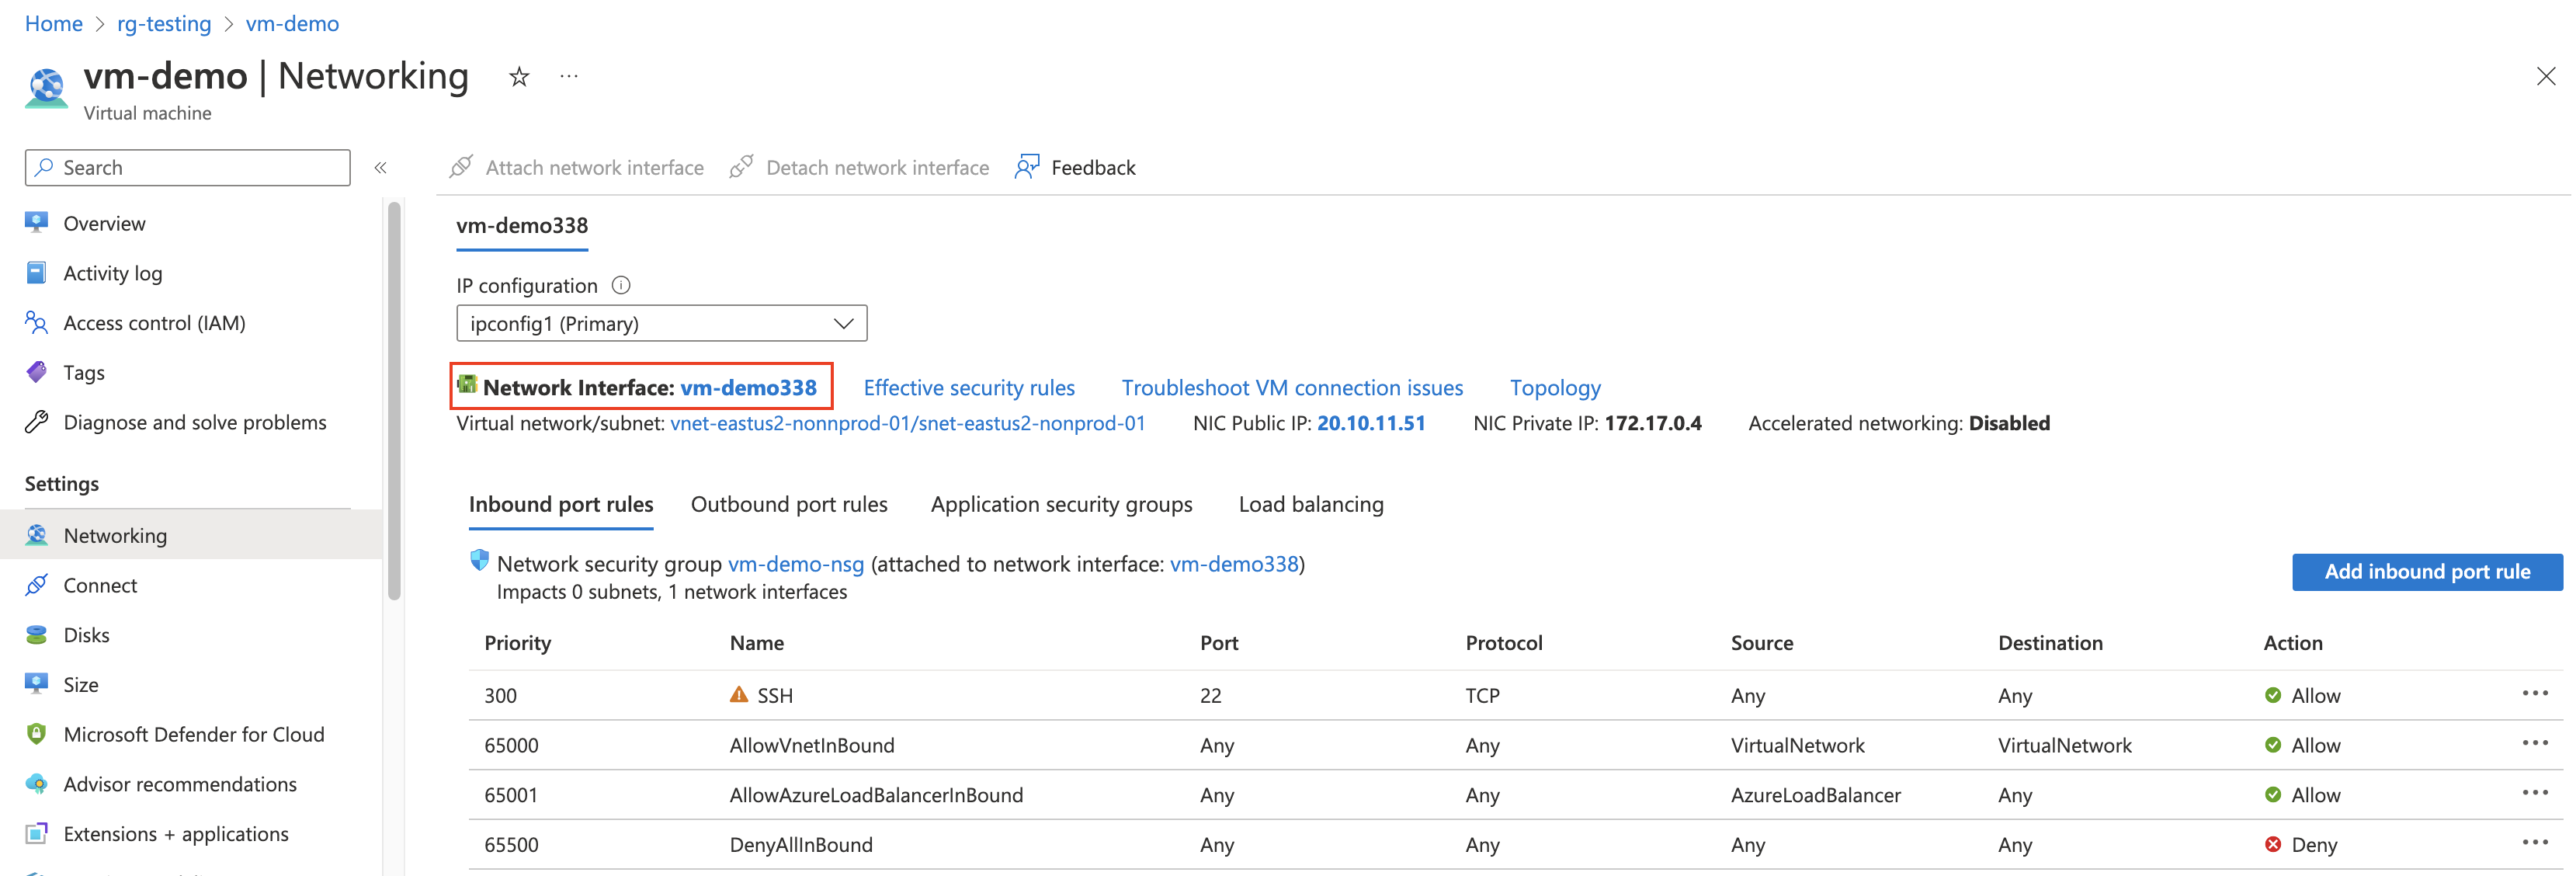
Click the Network Interface and go to the IP configurations section from the network interface settings.
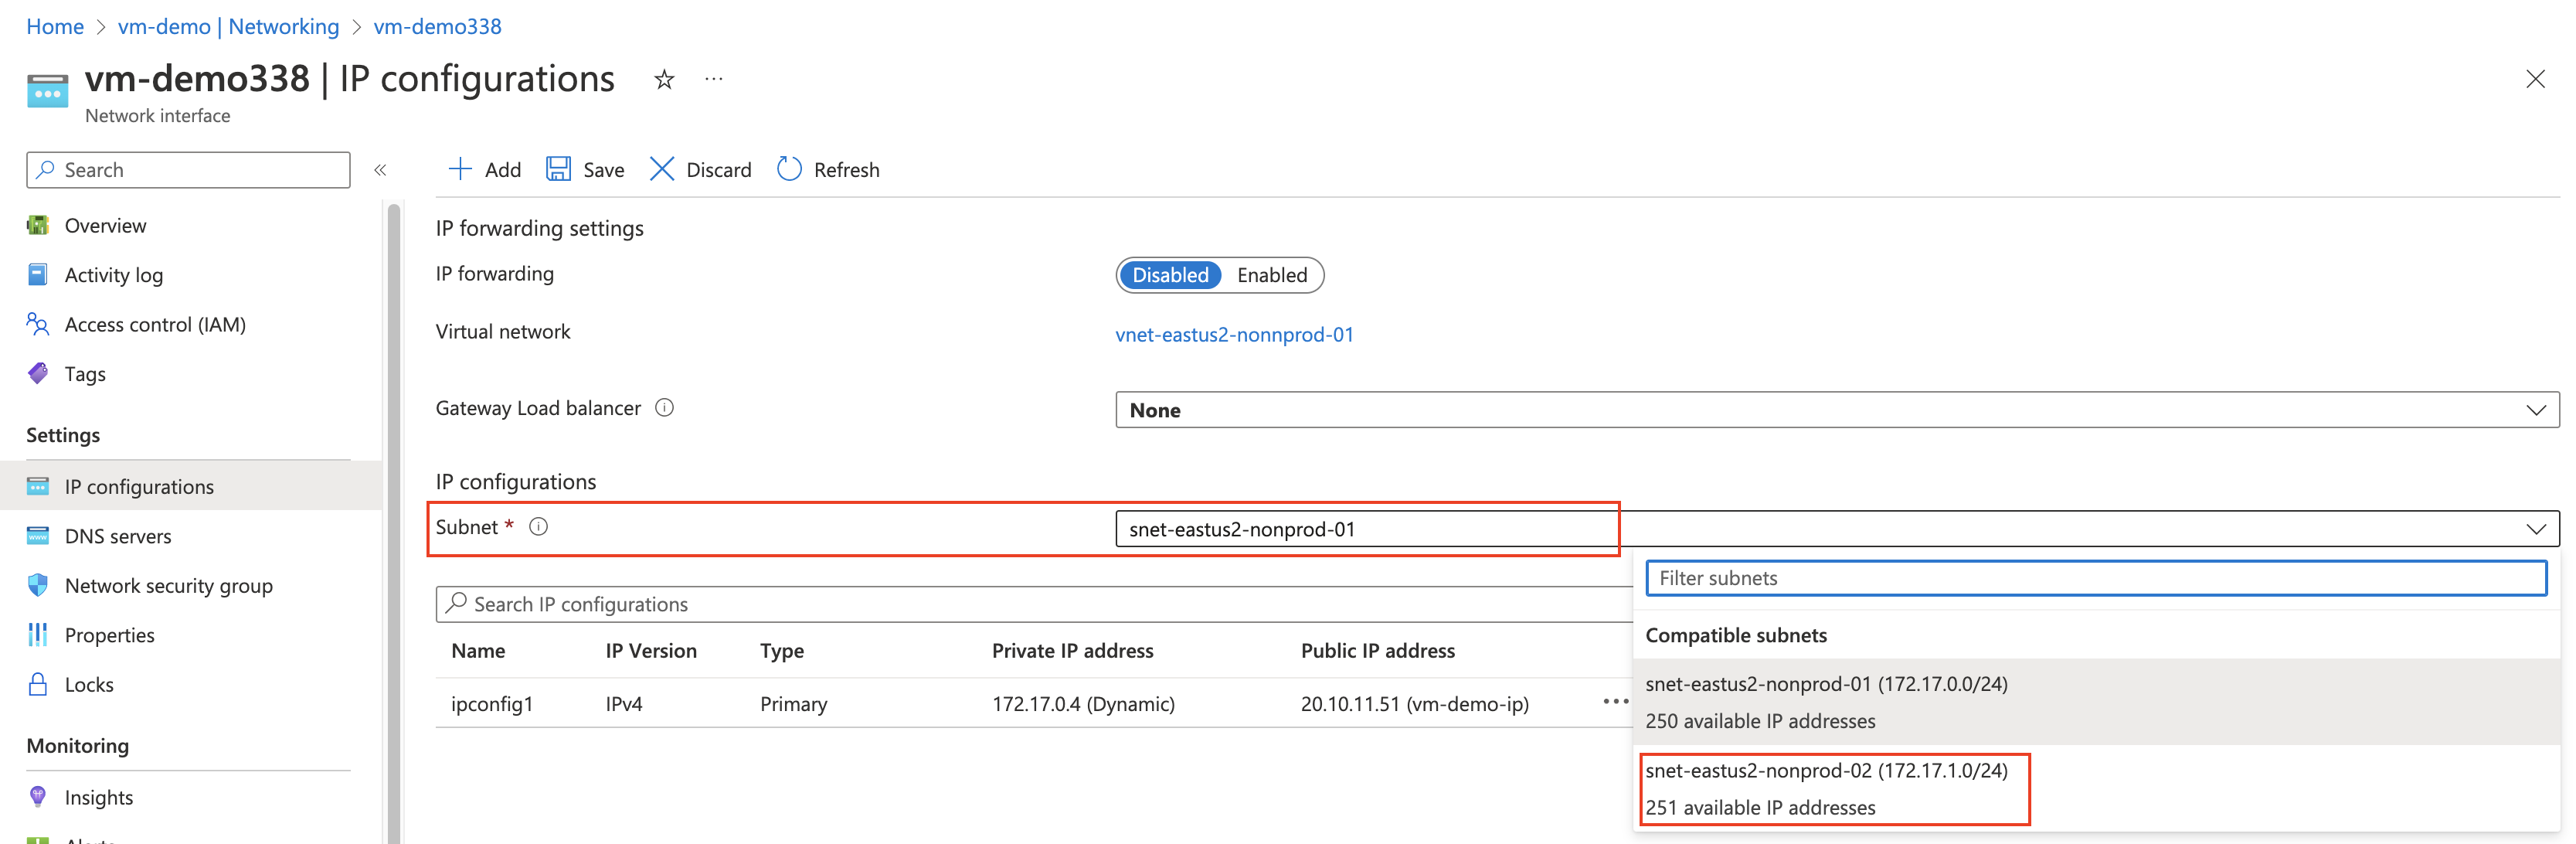
Then you will get a warning saying “The virtual machine associated with this network interface will be restarted to utilize the new subnet.” Finally, you can Save the settings.
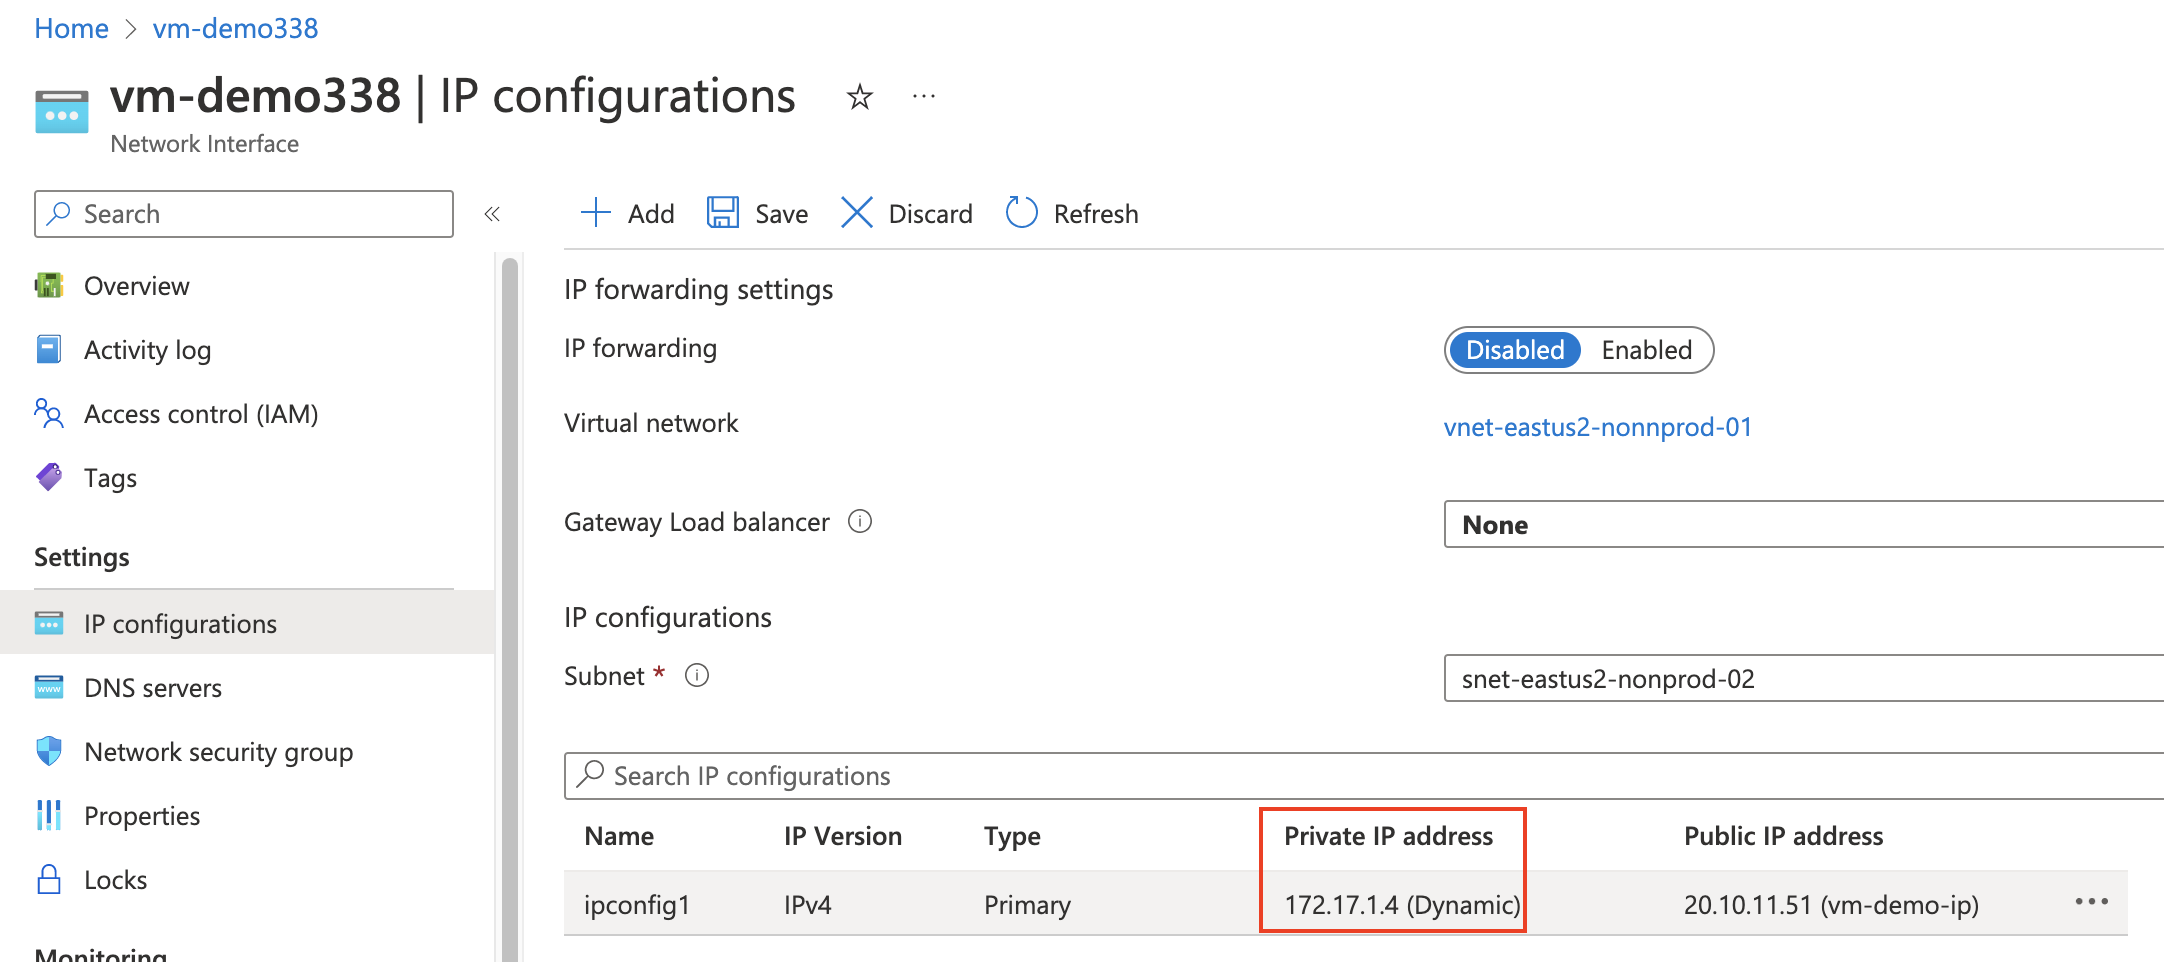
Now you can see Azure VM private IP has been changed to the new IP based on the new subnet configurations.
Using PowerShell
In here also you have to check the above prerequisite before proceeding.
#Get the network interface vm-demo338 and store it in the $nic variable.
$nic = Get-AzNetworkInterface -ResourceGroupName "rg-testing" -Name "vm-demo338"

#Get the virtual network associated with the subnet that the network interface is going to be associat with.
$vnet = Get-AzVirtualNetwork -Name "vnet-eastus2-nonnprod-01"

#Get the new subnet details and store it in the $subnet2 variable.
$subnet2 = Get-AzVirtualNetworkSubnetConfig -Name "snet-eastus2-nonprod-02" -VirtualNetwork $vnet

#Associate the primary private IP address of the network interface with the new subnet.
$nic.IpConfigurations[0].Subnet.Id = $subnet2.Id

#Finally apply these changes on the network interface.
$nic | Set-AzNetworkInterface
Note:
If the network interface has multiple IP configurations, the fourth command “0” value must be changed as follows.
The network interface has N IP configurations, then the N-1 value should be included inside IpConfigurations["value"].
Once you enter the final command you will see the ProvisioningState as Succeeded. Please note that the execution of this cmdlet will take about two minutes or less.

Move the Azure VM to a different VNet
As I mentioned earlier, Microsoft does not support migrating Azure VM between VNets. That means you cannot remove the existing associated VNet and attach a new VNet to the Azure VM. Instead of that, you have to recreate the Azure VM by deleting the existing VM (without deleting the OS and Data disks) in the new VNet.
As this suggested method implies touching the OS and Data disks, make sure you have proper backups in place. Also, since this required redeploying your VM, this will face downtime!
When following this procedure, remember that you will have to recreate all configurational aspects of the Azure VM including Network Interface, NSG, Public IP and etc.
Note:
There are two ways to accomplish this task. Either create a new Azure VM with the existing disk manually or else use Azure Backup (using recovery service vault).
Using Azure Portal
Delete Existing Azure VM and Recreate it using the Existing Disk
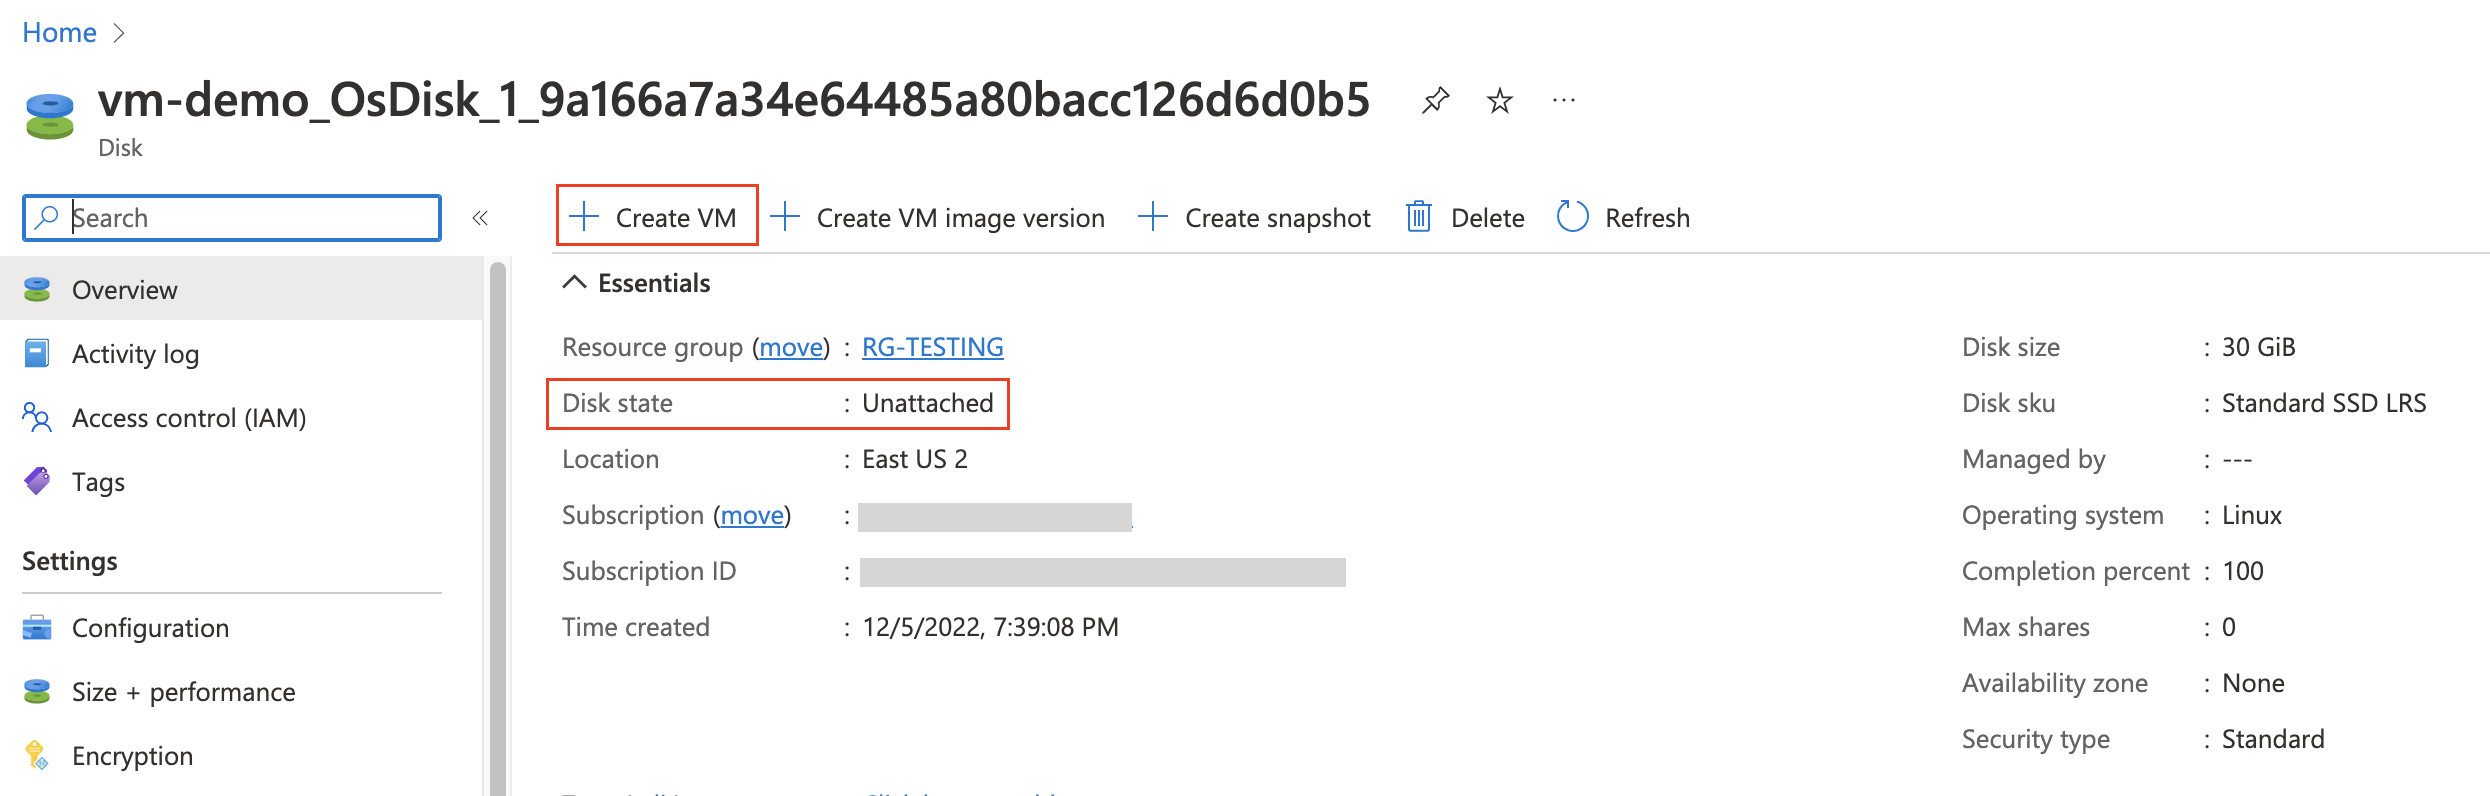
The first step you need to do is delete the mistakenly placed Azure VM. Therefore navigate to the Azure VM and click Delete.
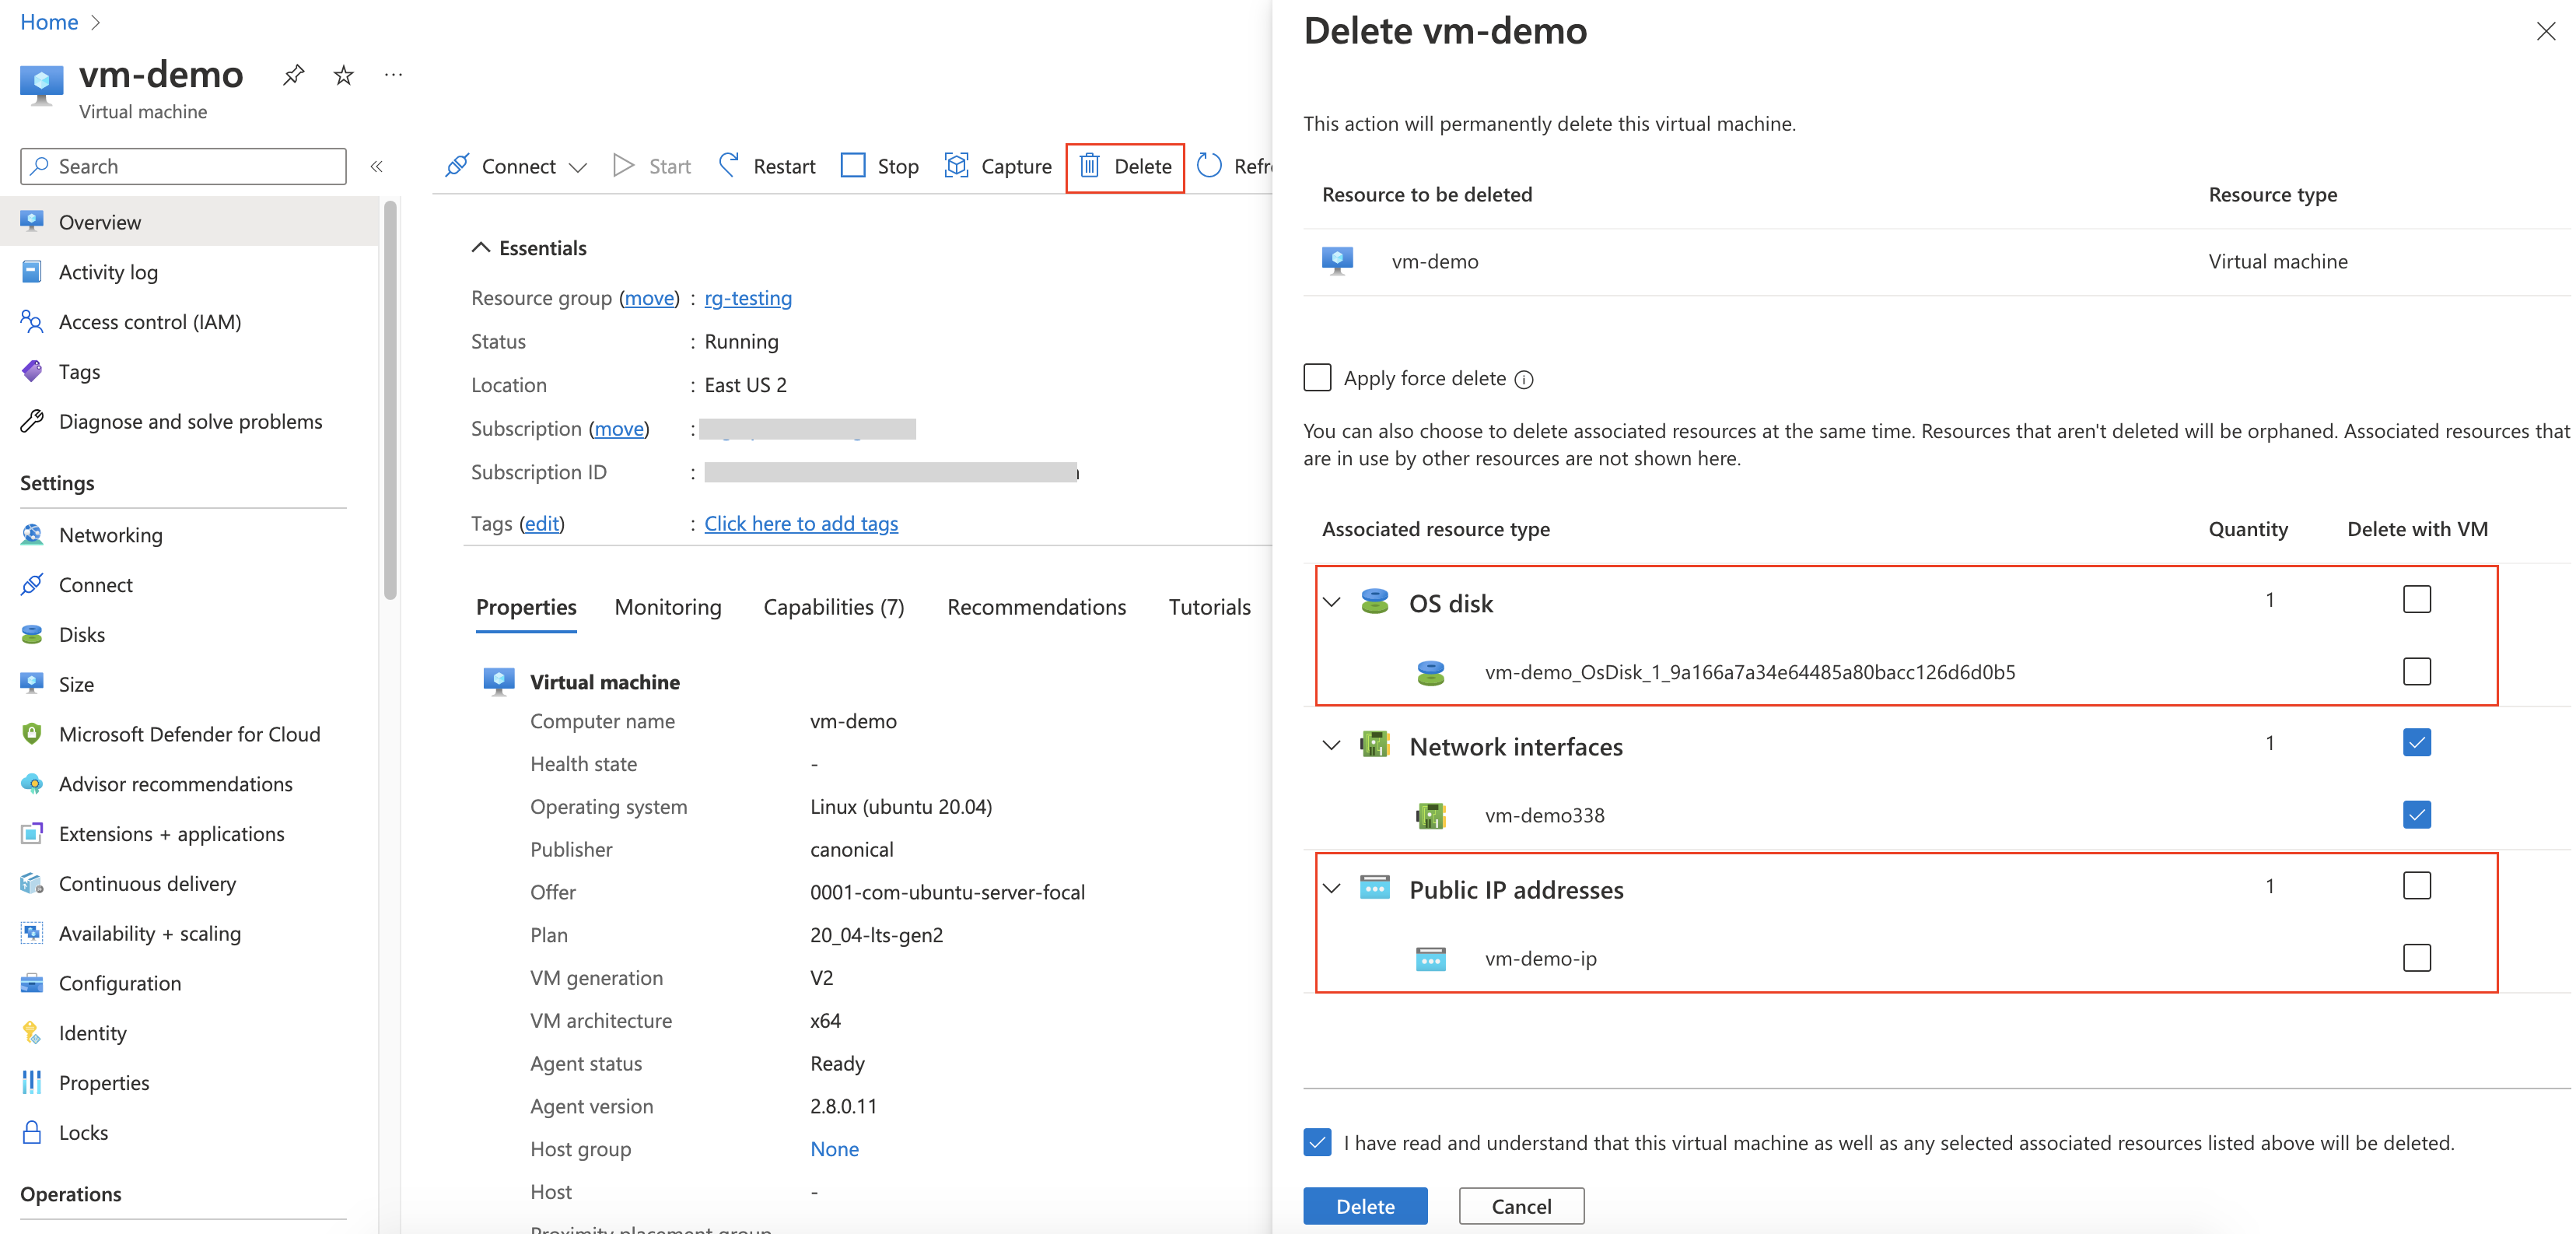
Please make sure to uncheck the OS disk and Public IP address from the Delete with VM check box.
Once the Azure VM deletion is successful, Next, we can recreate a new VM from the existing disk and choose the correct VNet this time.
Restore a New VM using Azure Backup
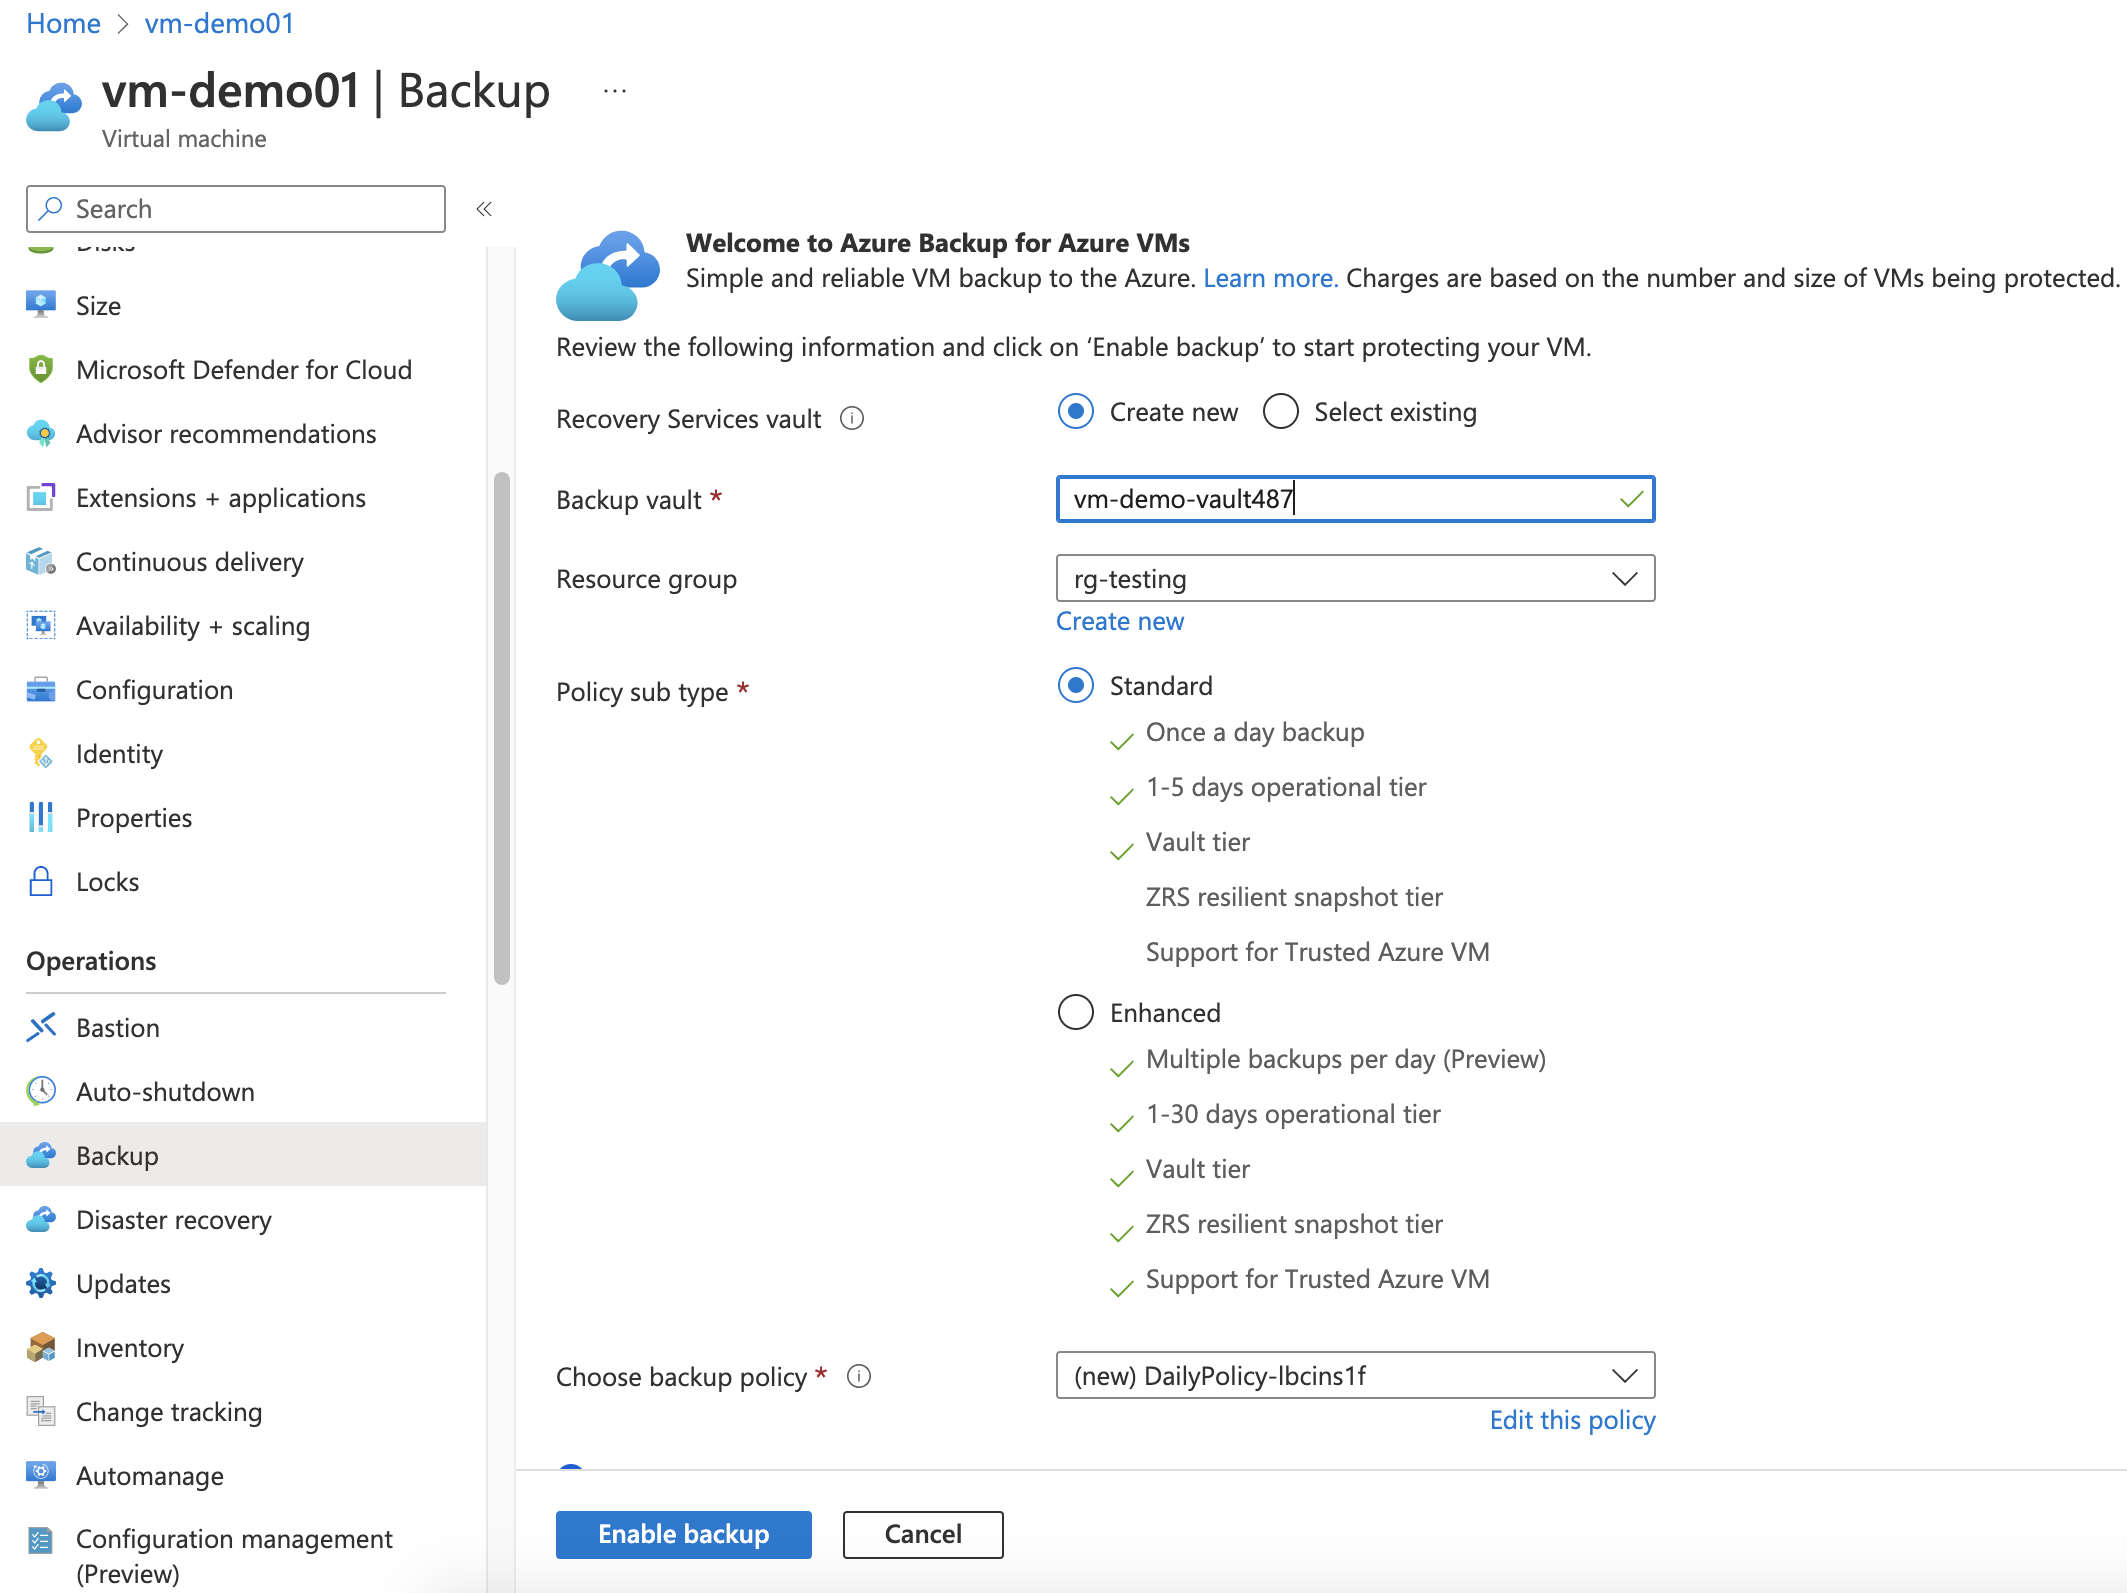
First, you have to enable the backup on Azure VM. Therefore go to the existing Azure VM and navigate to the Backup under the Operations section from the left side pane.
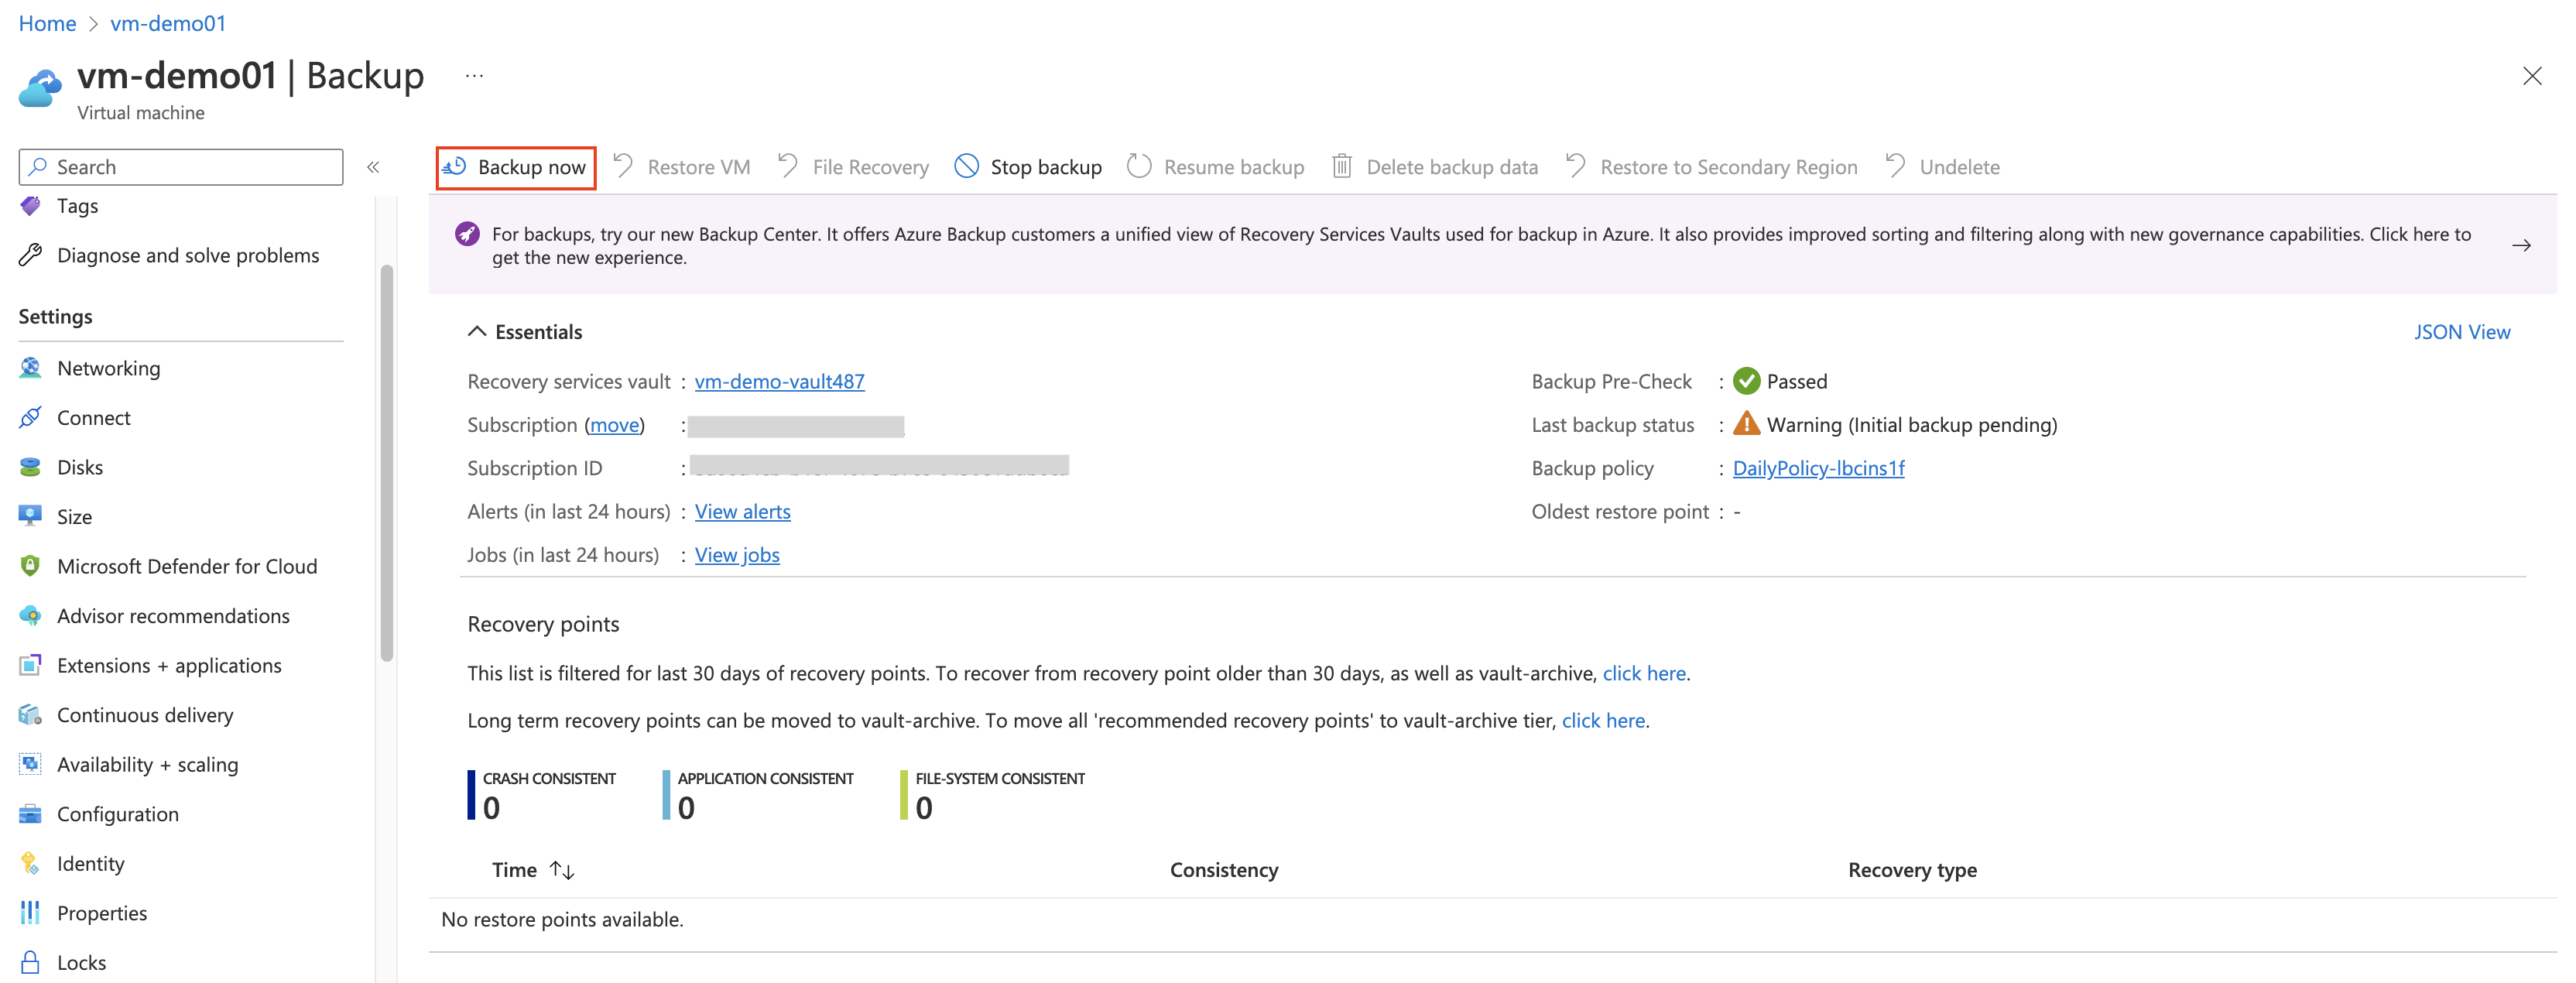
Once you enable the backup you can see the same window as follows. Then click Backup Now and give the retention period accordingly. By clicking the View jobs link you see the backup job status.
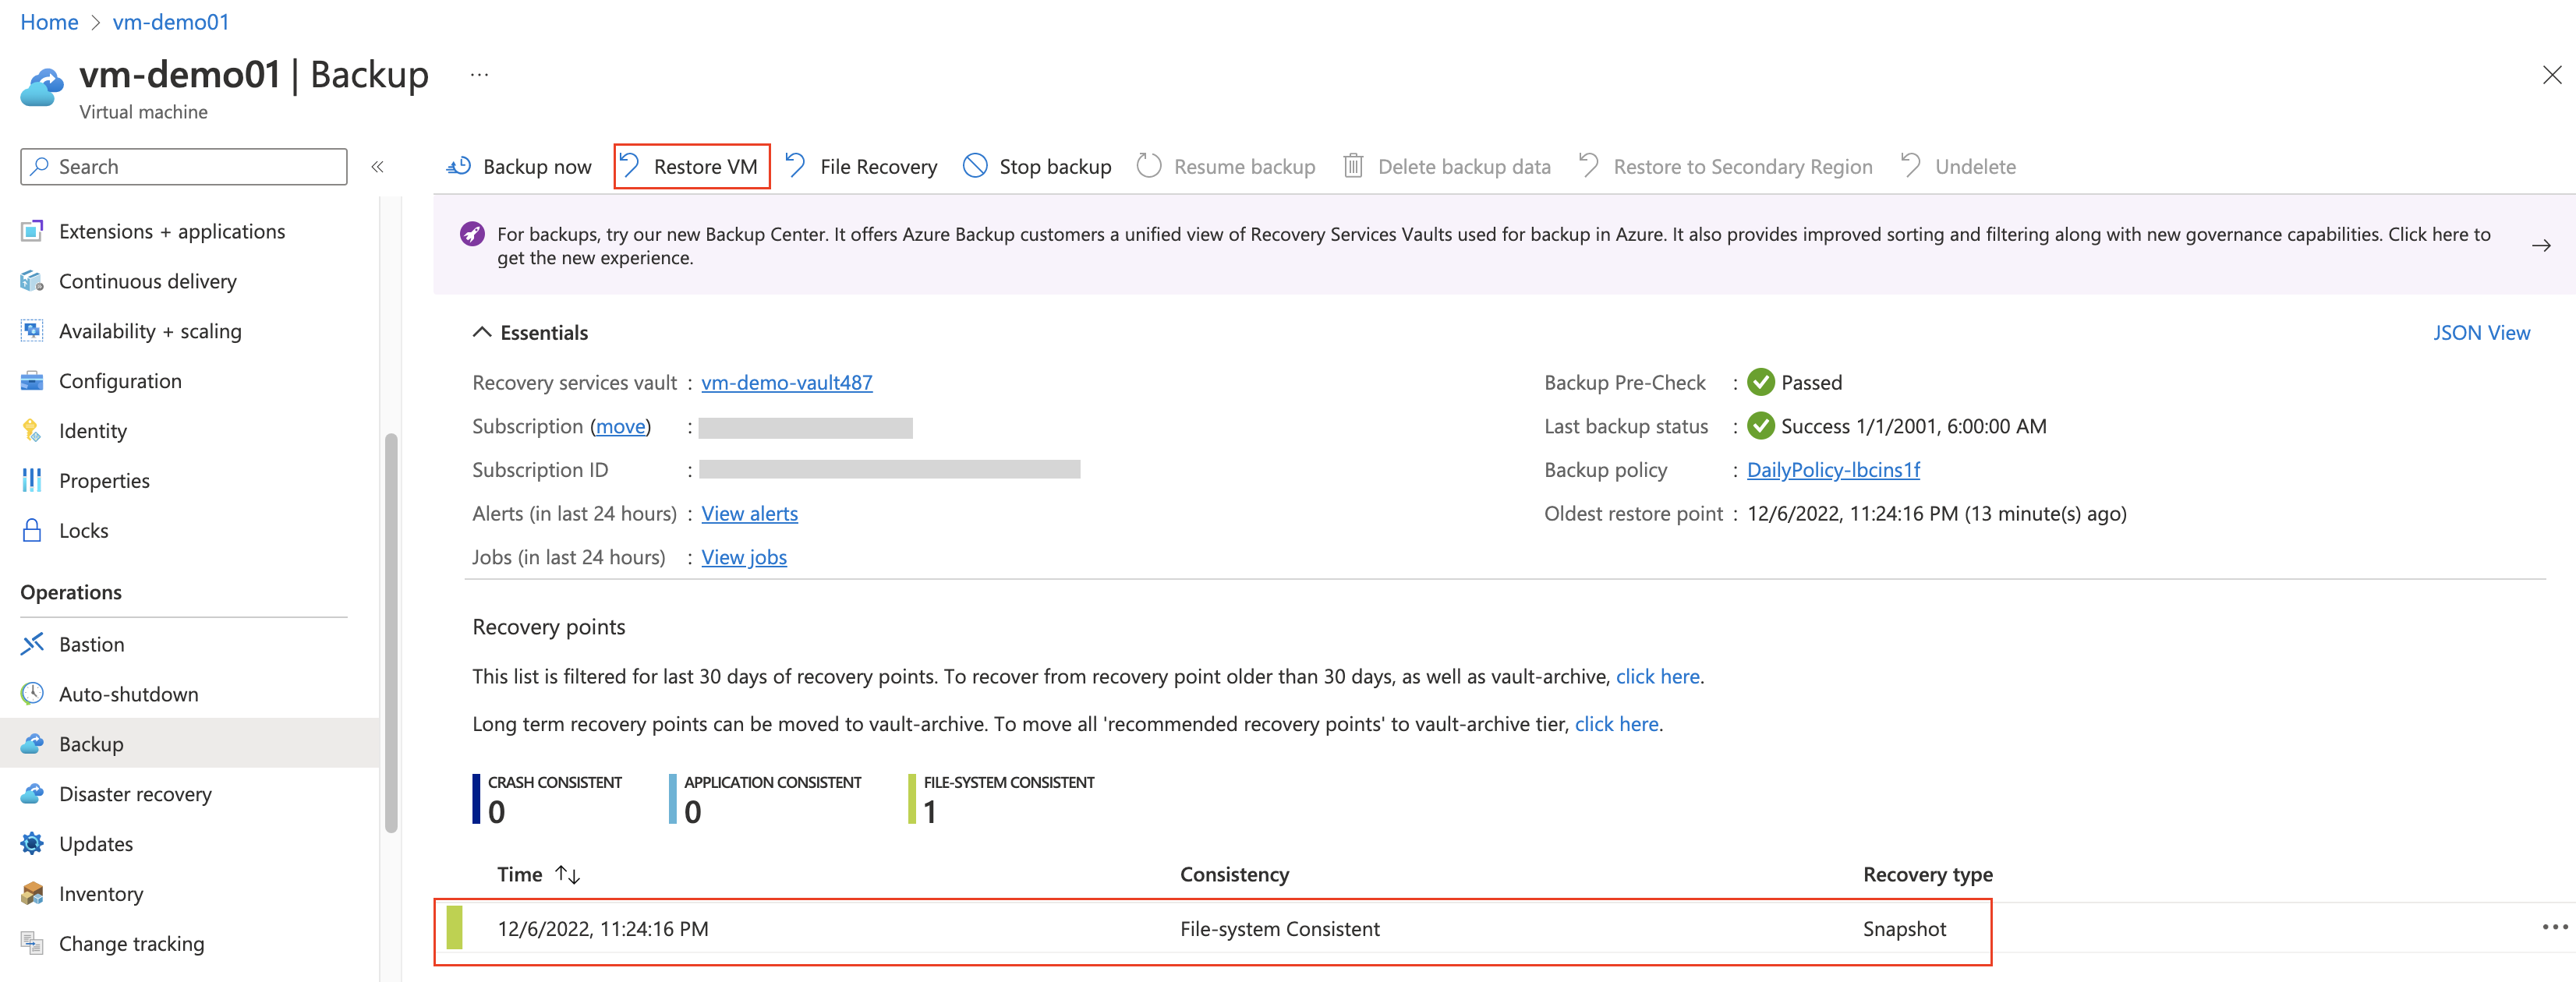
Once the backup has been successful you can see it as follows. Then click on Restore VM. Here, we don’t need to delete the existing VM but if you need to reuse the same VM name, NSG, and Public IPs you have to delete the VM and use the Azure Backup Center to do this restore process.
Here first, select the recovery point and then choose Create new and select the correct virtual network and subnet details. Make sure at this step you have a general-purpose v2 storage account that resides in the same regions as the Azure VM.
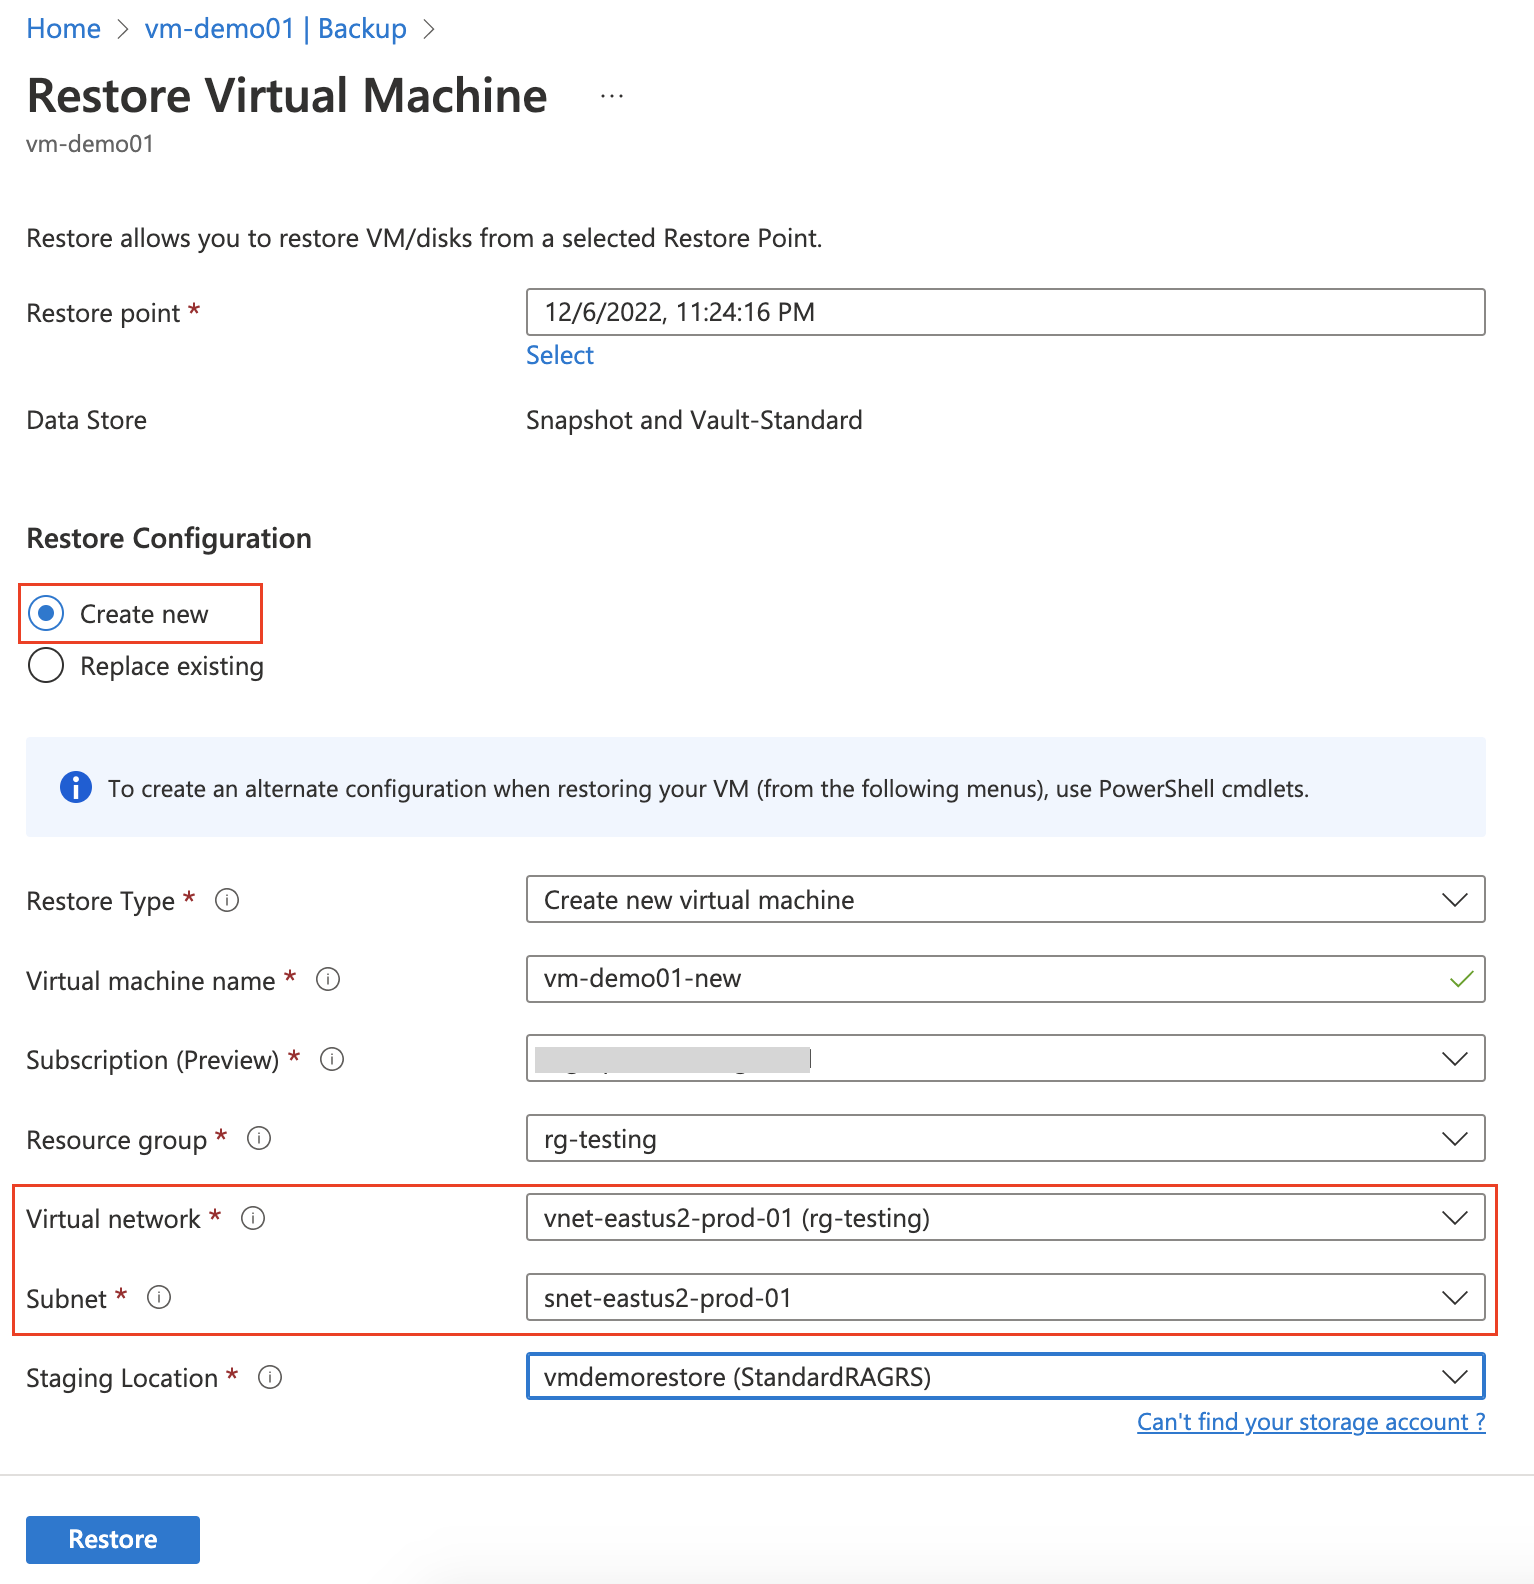
That’s it, now the new Azure VM will be on the new VNet. Later you can delete the old VM and get the NSG and Public IPs and attach them to the new VM.
1 comment
Do you have a script to move a vm to another subscription?