
Any service endpoint exposed to the public internet is susceptible to so many attacks by hackers. Your service may be a website, API endpoint, or any other application layer service. Malicious users and bots will attempt to break into your system by repeatedly sending requests with higher frequency. In this post, I will brief you about DDoS attacks and a mitigation solution using Fail2ban.
What is a DDoS attack?
A distributed denial-of-service (DDoS) attack is a malicious attempt to interrupt the usual traffic of a specific targeted server or service with a flood of network traffic from multiple attack sources. That results in the site or service availability suddenly becoming slow or unavailable because of resource exhaustion.
Application‑Layer DDoS Attack
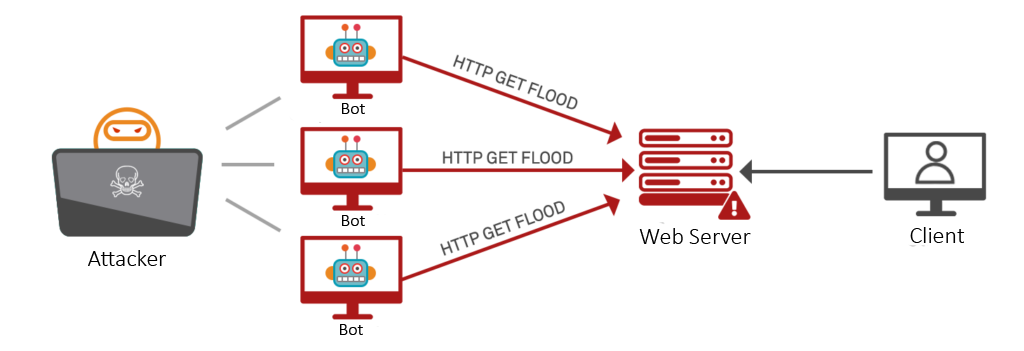
The application layer DDoS attacks target layer 7 (the 7th layer of the OSI model) where the websites are generated on the server and delivered in response to HTTP requests. As an example, the systems that don’t handle a huge number of concurrent connections, which opens a large number of connections and keeps them established, can exhaust the system’s capacity for new connections. That is similar to refreshing a web page over and over from many different computers at once will generate a large number of HTTP requests flooding the server.
These attacks are carried out by botnets rather than actual users, the attacker can easily generate large numbers of connections and send large numbers of requests with higher frequency. These types of layer 7 attacks are difficult to defend against because it is hard to differentiate malicious traffic from legitimate traffic.
How can Application‑Layer DDoS Attacks be mitigated?
As I mentioned earlier, mitigating layer 7 attacks are a bit complex. Mitigation of Application‑Layer DDoS attack attempts that involve dropping or limiting traffic, and there are some methods we can implement easily which give the greatest benefit.
A Challenge to the Requests
By implementing a challenge to the requesting source to check whether or not it is a bot, it is like a captcha check when you commonly found when online form submitting online. Given a requirement such as a javascript-level challenge, many attacks can be mitigated.
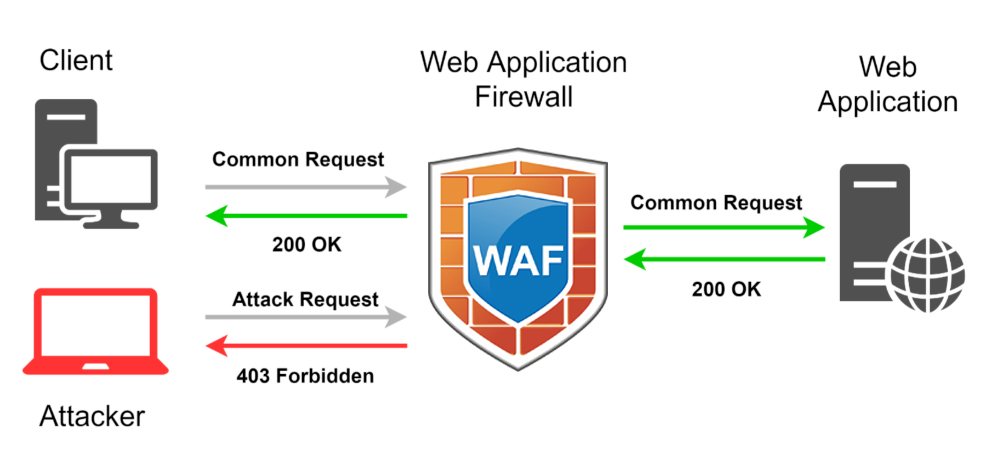
Use a Web Application Firewall (WAF)
Web Application Firewall is a kind of security-enhanced tool that can help to mitigate layer 7 DDoS attacks by placing it in front of your web server. That may act as a reverse proxy to your web server and protect it from certain types of malicious traffic based on a series of rules. One key advantage of WAF is the ability to quickly implement custom rules in response to an attack. Also can maintain an IP reputation database in order to track and selectively block malicious traffic.
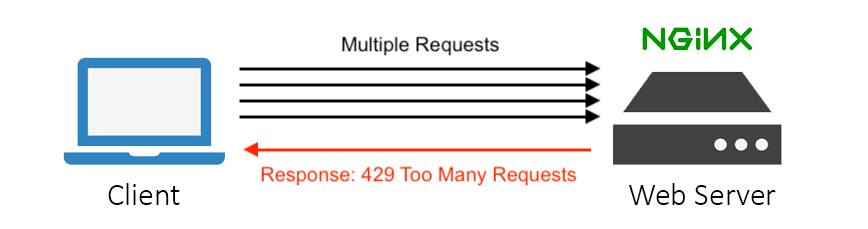
Request Rate Limiting
The Request rate limiting is an important component in an effective DDoS mitigation strategy. That will limit the number of requests, and the server will accept over a certain time window. As an example, you know that a normal human user cannot submit login details to your login API endpoint more than five times per second, then you can decide if any user sends requests more frequently and this is likely a malicious attempt. Then you can define a rate limit on your login API endpoint at five per second and lockout/ block any client IP, that violates that rule.
What is Fail2ban?
The Fail2ban is a kind of Intrusion Detection System (IDS) that continuously scan log files (e.g. /var/log/nginx/error.log) for suspicious activities and ban IPs or else take pre-configured action. Usually, Fail2ban action update firewall rules to reject the detected IP addresses from the log files for a specified amount of time, although could sending an email also be configured. Out of the box, Fail2Ban comes with filters for various services (Apache, Nginx, SSH, etc).
Let’s Start with the Implementation
There are 2 parts when implementing this DDoS mitigation solution. First, we need to configure Nginx to limit the number of requests based on IP addresses. That will use the Nginx module “ngx_http_limit_req_module”. Then Nginx will log info about the banned IP into the error log. Fail2ban parses Nginx error logs, and if it finds too many occurrences of the same IP, it will ban it for an x amount of time by creating a firewall (iptables) rule.
If you are new to Nginx and its configuration you can refer to my previous post: Nginx Best Practices & Initial Setup.
Enable Rate Limiting in Nginx
Rate limiting allows you to limit the number of HTTP/HTTPS requests a user can make in a specific time period. This also can be used for security purposes and I can help you to protect your web site/s against DDoS attacks. If you need more about NGINX rate limiting, you can check this link Rate Limiting with NGINX.
First, we have to define a limiting zone. You can have multiple zones and can assign them to different location blocks. Add the following line to your server or http context block:
# vim /etc/nginx/nginx.conf

limit_req_zone $binary_remote_addr zone=myzone:20m rate=5r/s;
Let me explain what is going on here:
- $binary_remote_addr – IP address of the client.
- zone=myzone:20m – “myzone” is the zone name and it allocates a memory block. In this case, 10m allocates 10 megabytes of memory which is enough for 160,000 connections per second.
- rate=5r/s – Defines the default number of connections each client is allowed. Here it is set to 5 requests per second, with 10 being the maximum, though you can set it slower by formatting it as 30r/m (for 30 requests per minute).
Once the zone configuration is completed, apply it to the required location block.
vim /etc/nginx/sites-enabled/example.com.conf

location / {
    limit_req zone=myzone burst=5 nodelay;
}
Let me explain what is going on here:
- burst=10 – The number of requests that can be queued by single IP per second, giving us a total of 10 requests per IP (5 in process and 5 in the queue).
- nodelay – Queued requests to be processed as soon as possible.
Restart the Nginx service to affect the changes.
systemctl restart nginx
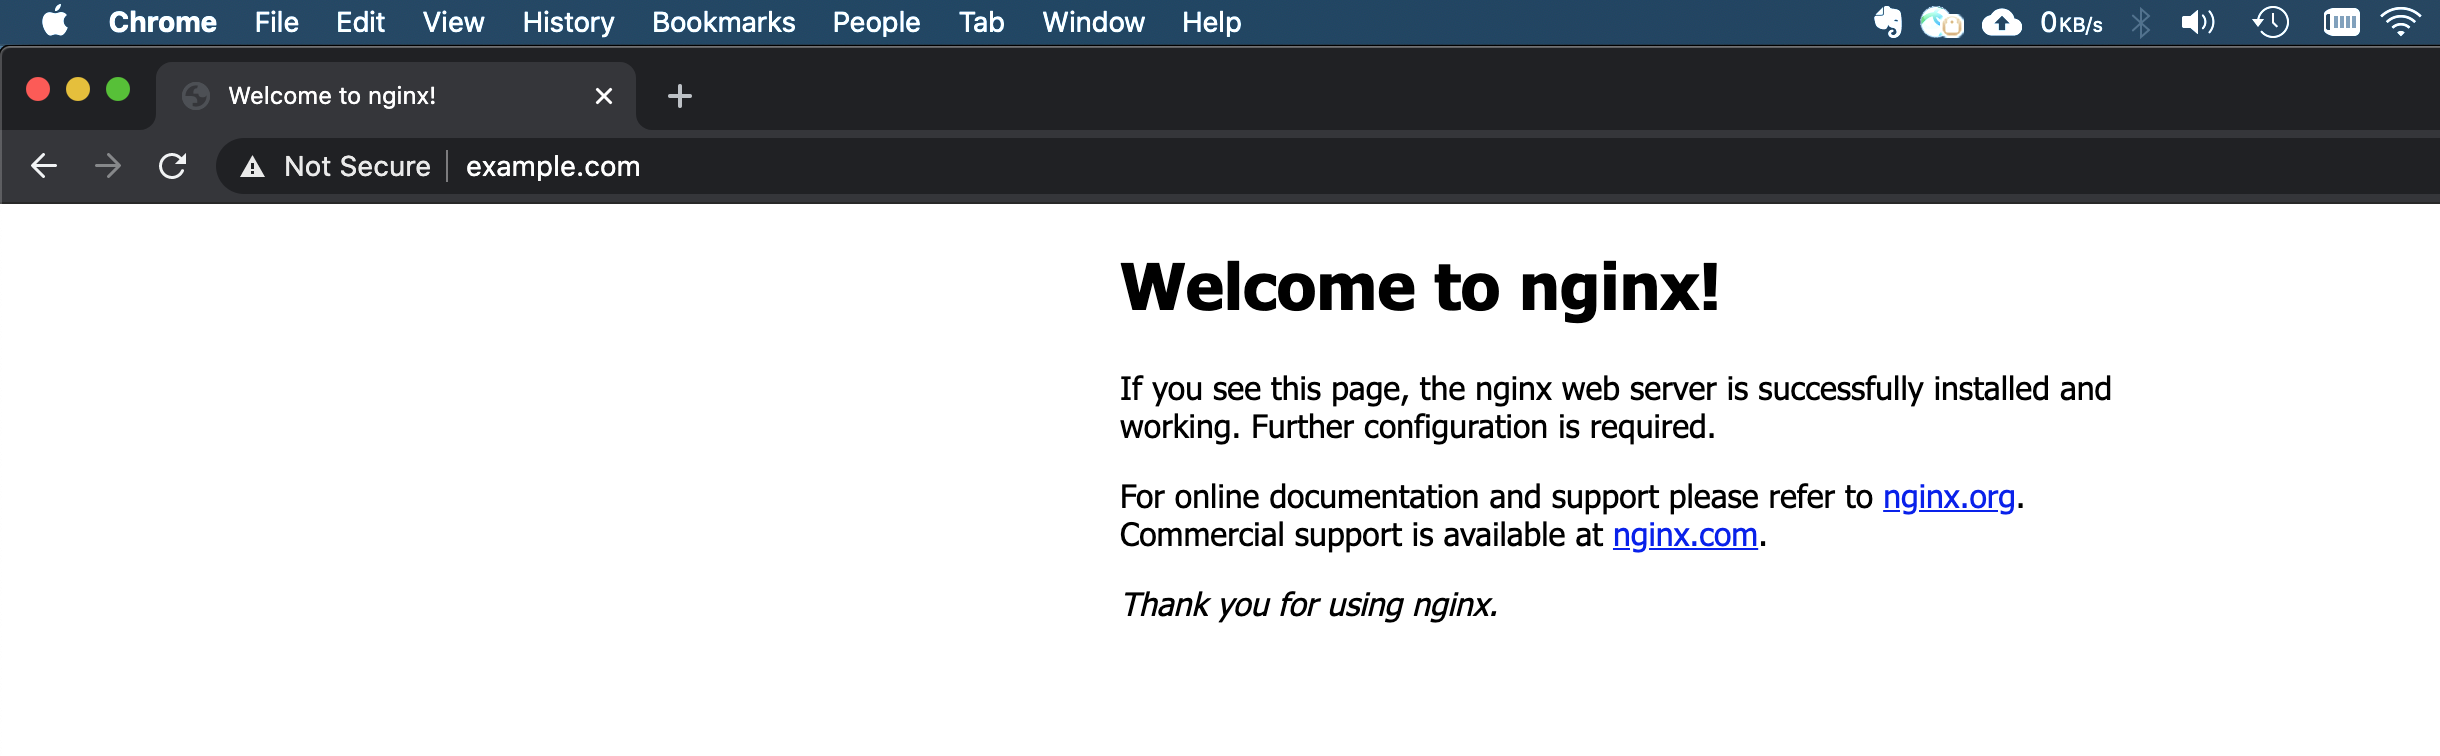
I have added the server’s public IP to my /etc/hosts file and given the name “example.com” and now the site is loading properly.
Install Fail2ban
apt-get update
apt-get install fail2ban
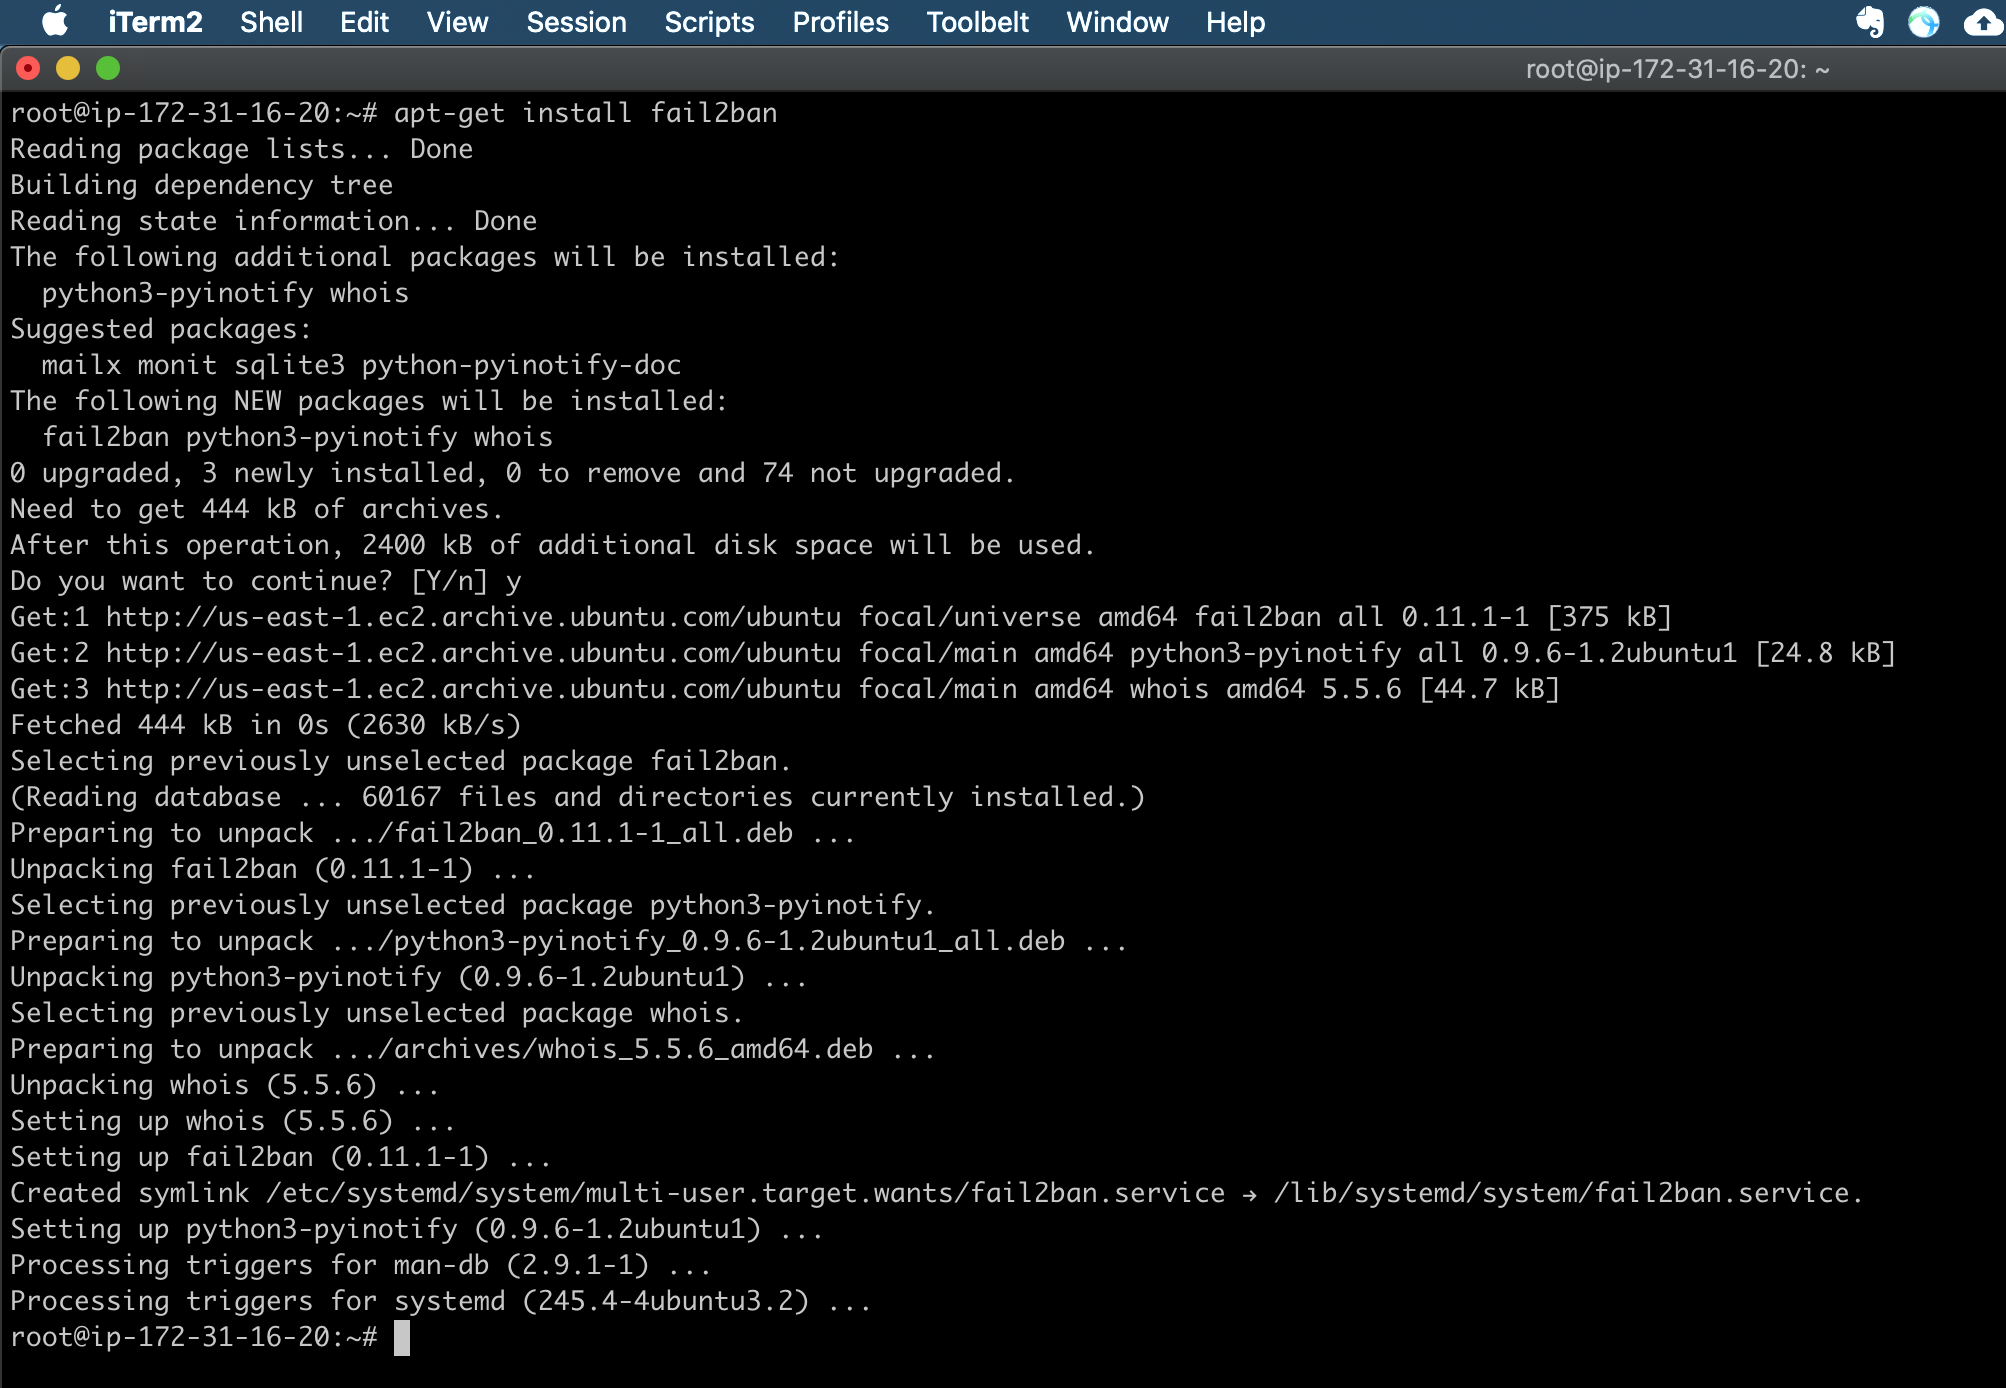
Out of the box, fail2ban is configured to only ban failed ssh login attempts IPs. Hence we need to enable some rules that will configure to check the Nginx logs.
Configure General Settings of Fail2ban
Once installed the fail2ban, needs to configure the local configuration file. In fail2ban they are called “jails”. Make a local copy of the jail.conf file with the following command:
cp /etc/fail2ban/jail.conf /etc/fail2ban/jail.local
vim /etc/fail2ban/jail.local
#Find the "[nginx-limit-req]" line and comment on the existing lines under it and add the following lines, which define the bantime, findtime, retries, and actions.
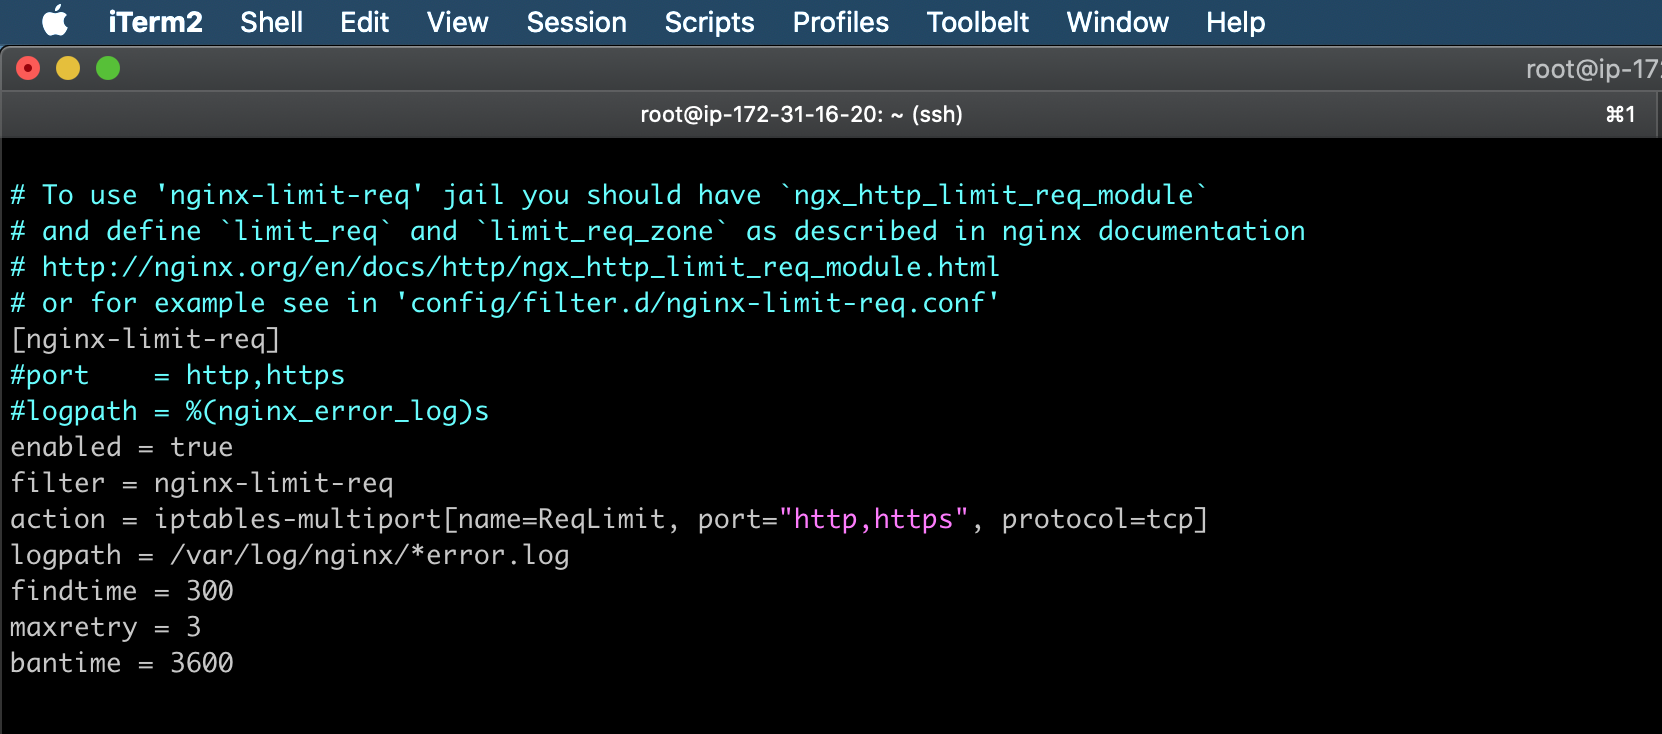
[nginx-limit-req]
enabled = true
filter = nginx-limit-req
action = iptables-multiport[name=ReqLimit, port="http,https", protocol=tcp]
logpath = /var/log/nginx/*error.log
findtime = 300
maxretry = 3
bantime = 3600
Let me explain what is going on here:
- [nginx-req-limit] – Filter name, you can give any name for this.
- enabled = true – Enable the filter.
- filter = nginx-req-limit – This is a default filter from fail2ban.
- action = iptables-multiport[name=ReqLimit, port=”http,https”, protocol=tcp] – This is the action that fail2nam is going to trigger when a suspicious IP is found in the Nginx error.log file.
- logpath = /var/log/nginx/*error.log – We are telling fail2ban which log file is needed to check for suspicious IP.
- findtime = 300 – Time in which fail2ban is going to limit the searches. (5 minutes)
- maxretry = 3 – The max amount of times an IP can appear on the log before it is banned.
- bantime = 3600 – How long time the IP will ban? (1 hour)
In this scenario, if an IP address appears 3 times in less than 5 minutes on our error log, fail2ban is going to ban it.
The findtime and maxretry values are important because they decide how often suspicious IPs get banned. If you tweak these values smaller, attacker IPs will get banned more often. Tweak the values as per your need.
If required, modify nginx-req-limit filter by editing the nginx-limit-req.conf file.
vim /etc/fail2ban/filter.d/nginx-limit-req.conf

[Definition]
failregex = limiting requests, excess:.* by zone.*client: <HOST>

ignoreregex =
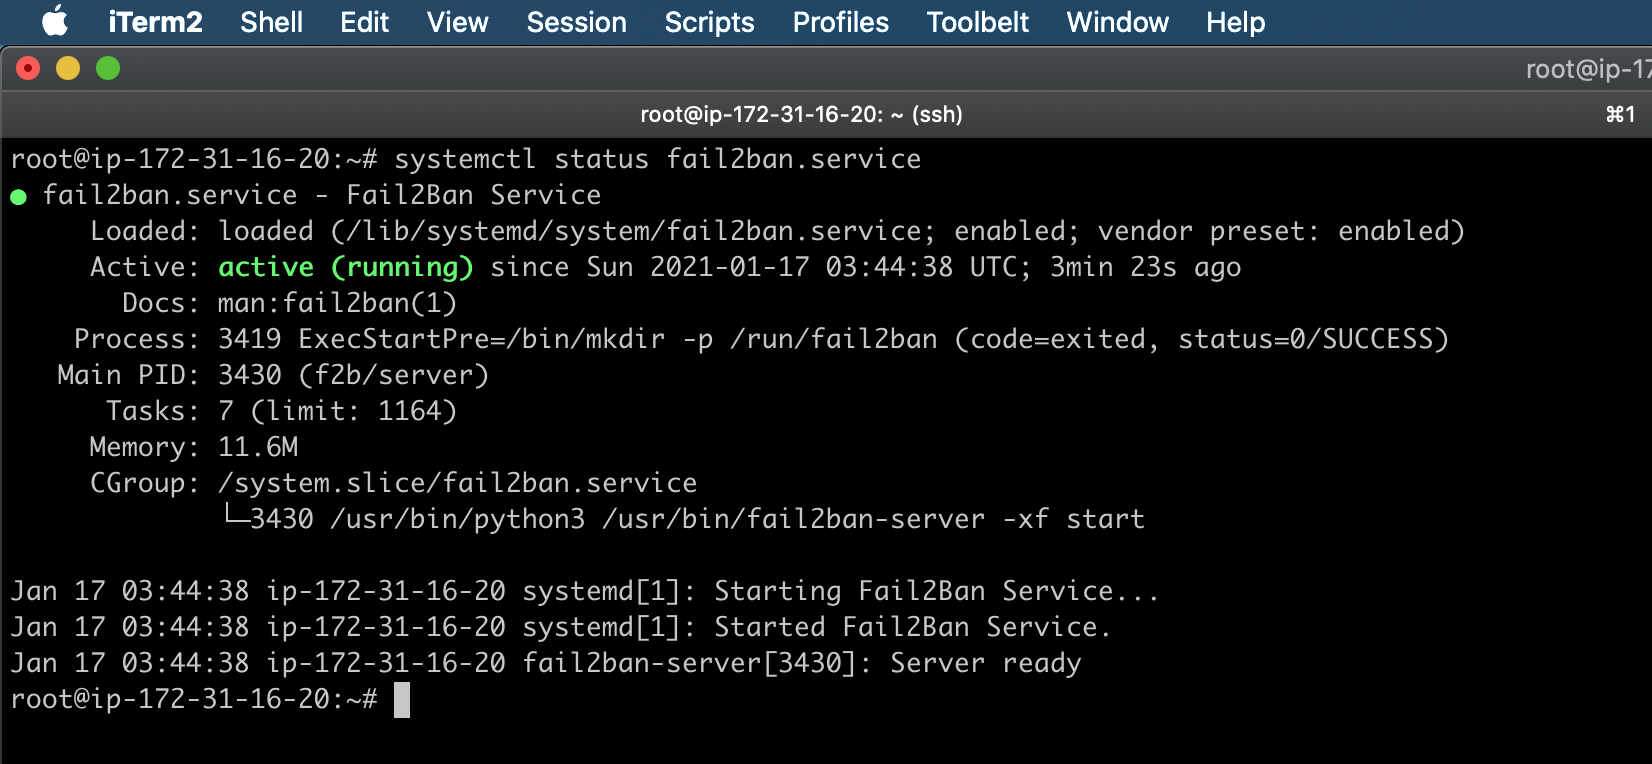
Once all fail2ban configurations are done, restart the service and check the status.
systemctl restart fail2ban.service
systemctl status fail2ban.service
Testing & Troubleshooting
Now it is time to verify the configurations are functioning as expected. Testing can be done using tools like Siege or Apache Benchmark Tool, and for this test, I’m going to use the apache benchmark tool to test rate limiting on a web page.
If you don’t have ab installed on your system, you’ll have to install the apache2-utils package using your distro’s package manager. If you’re using Windows, download the Apache Binaries .zip file, and run the ab.exe on the command prompt with the required parameters.
#On Debian Servers
apt-get update && apt-get upgrade
apt-get install -y apache2-utils

#On Redhat Servers
yum update
yum install httpd httpd-tools -y
Suppose we want to see how fast a web server can handle 20 requests, with a maximum of 10 requests running concurrently:
ab -n 20 -c 10 http://example.com/
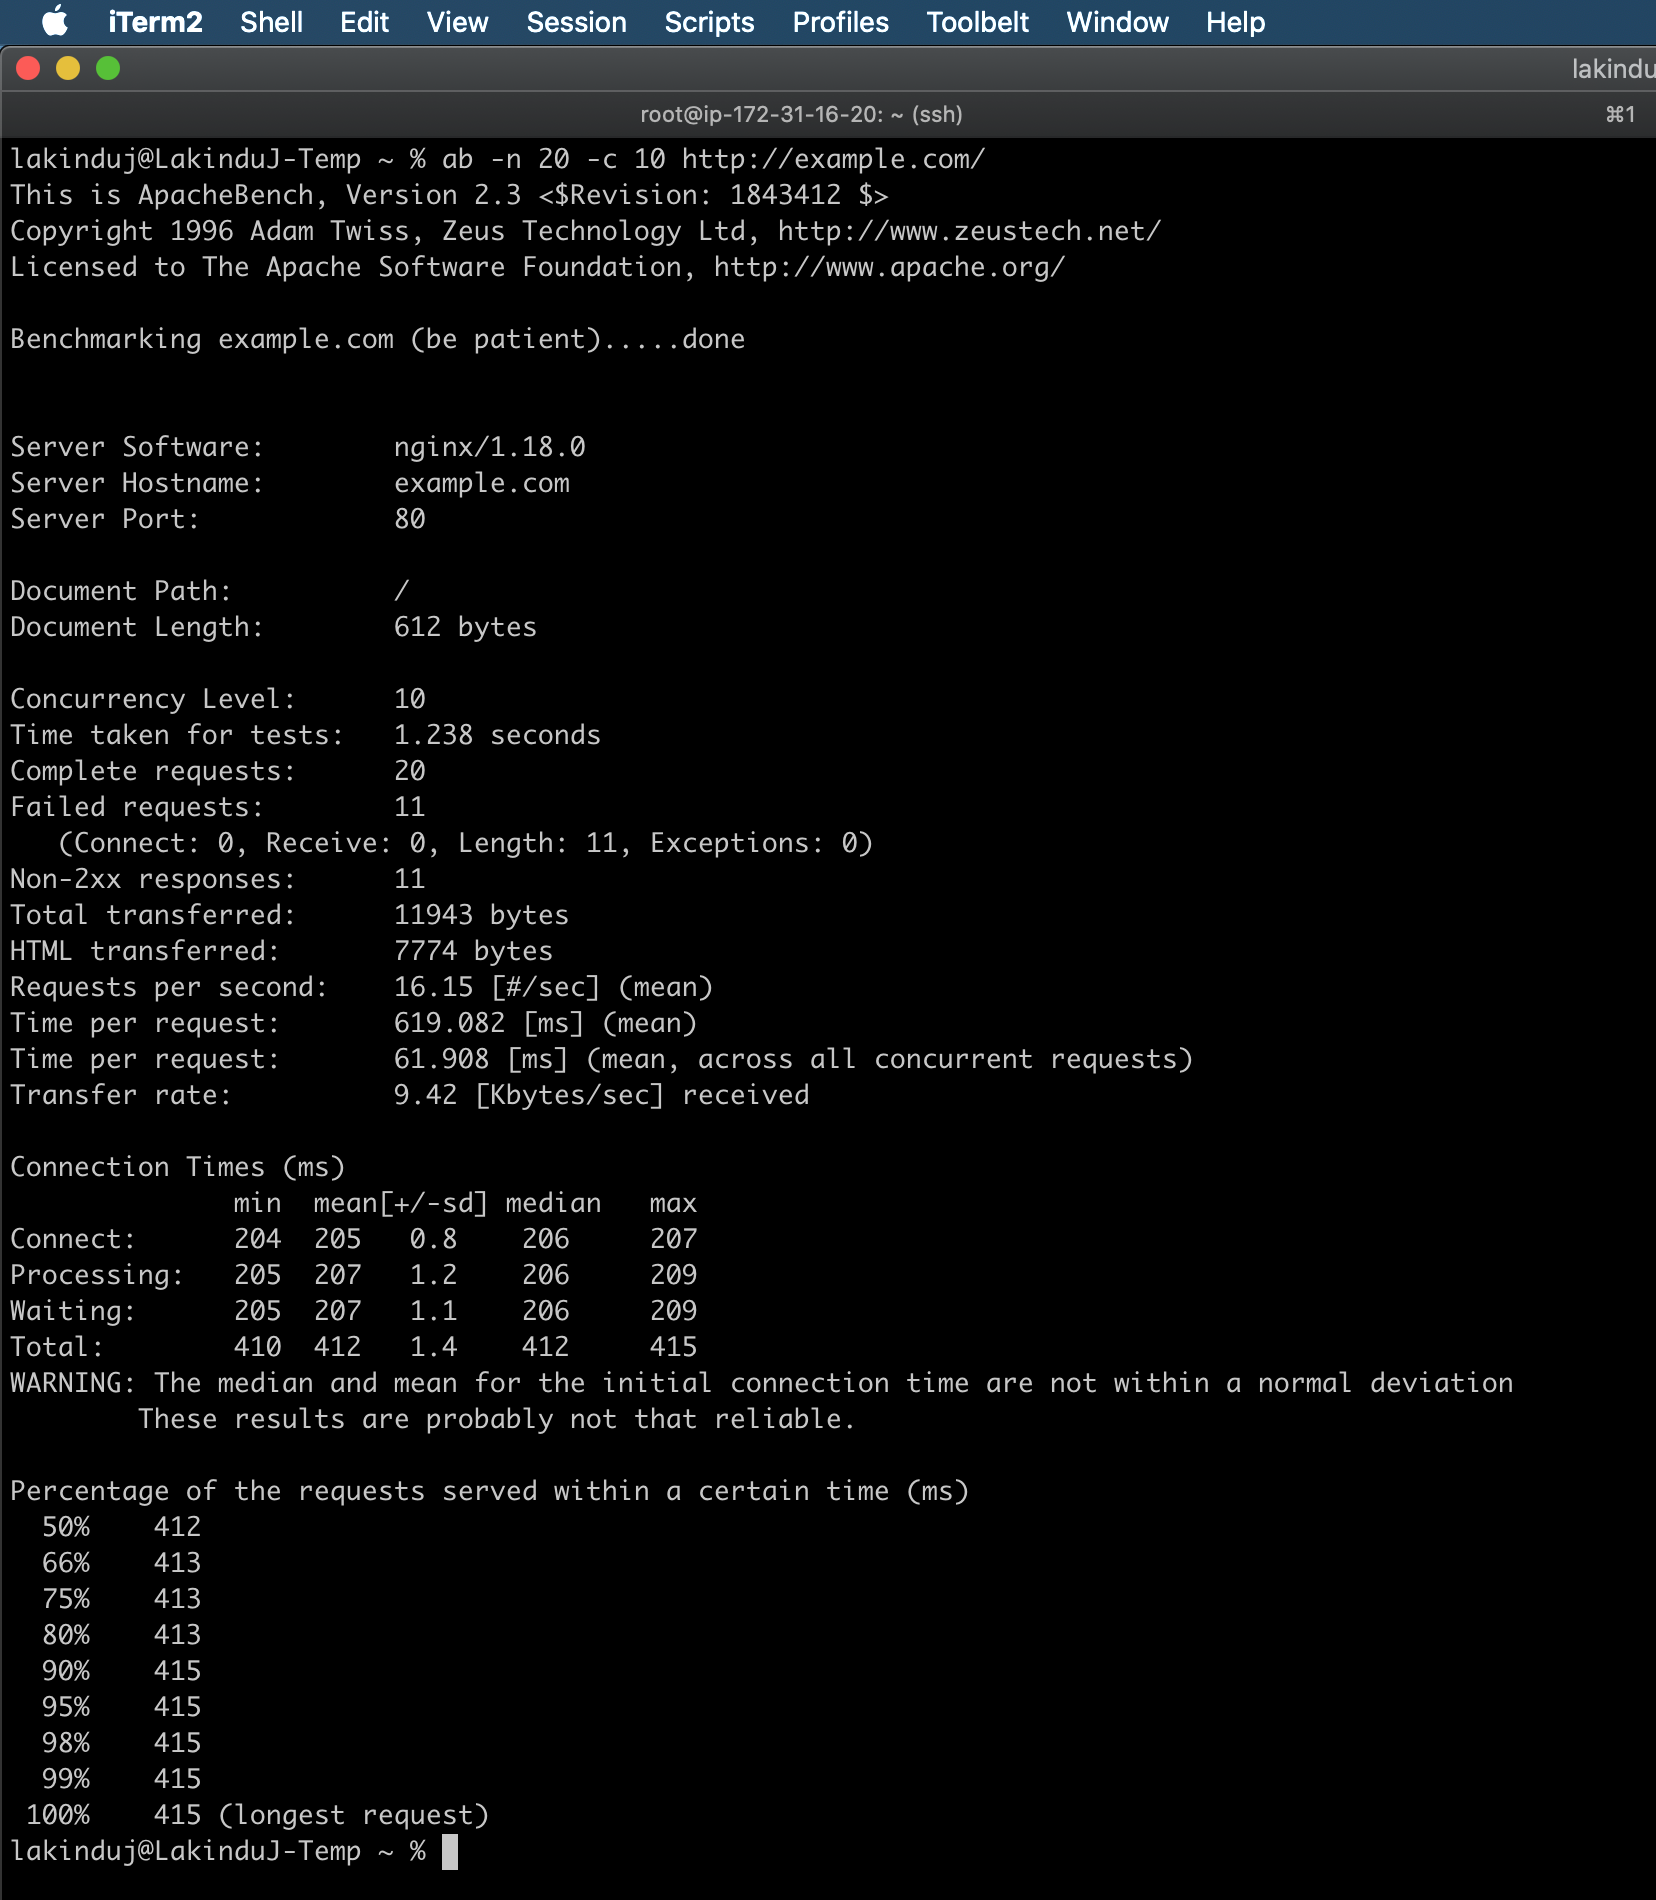
Nginx error logs:
tail -f /var/log/nginx/error.log

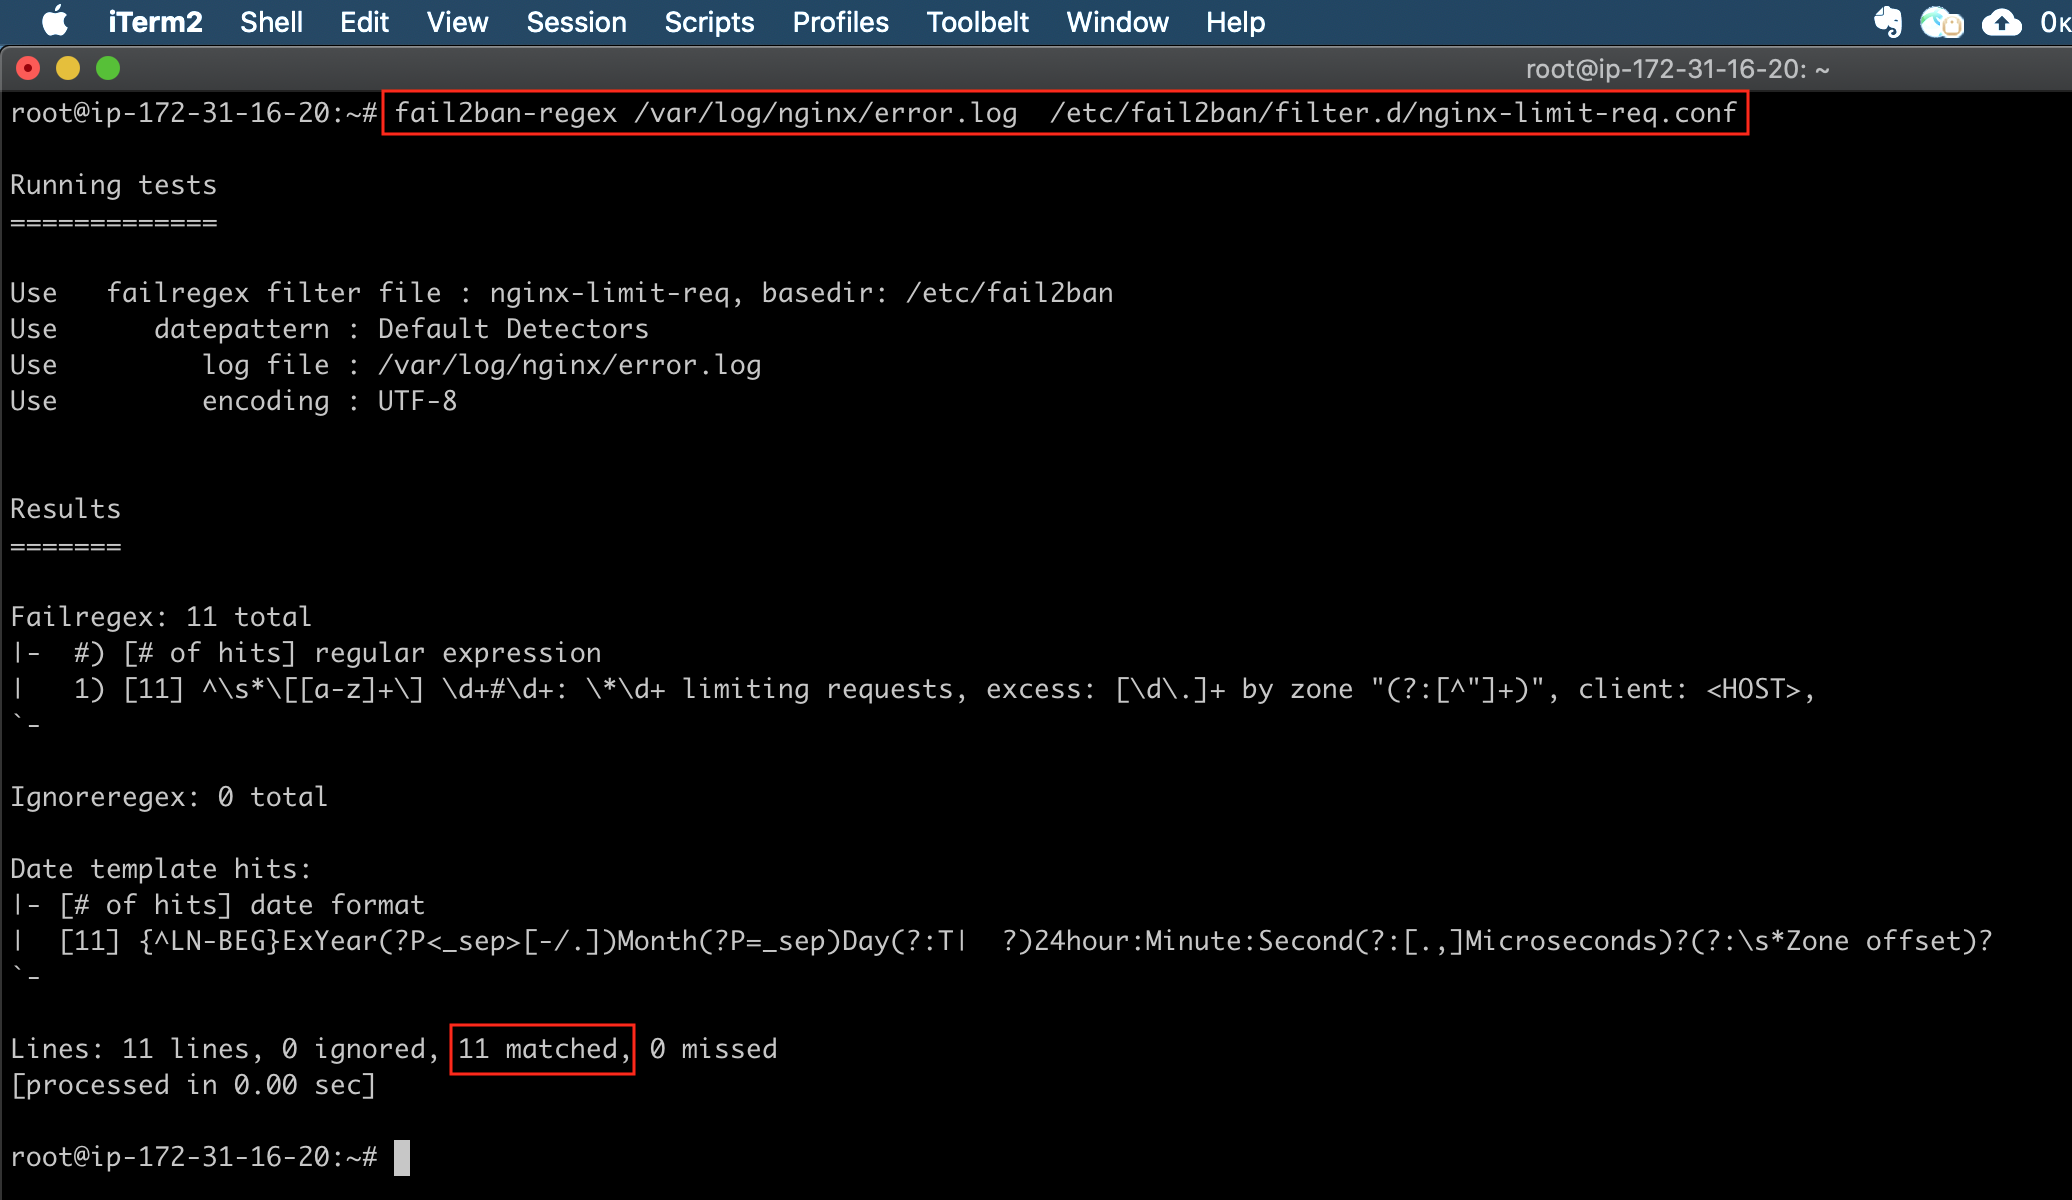
Run the following command to see if the fail2ban filter works for the above log file. If there are zero matches then there could be an issue with the regex filter.
fail2ban-regex /var/log/nginx/error.log /etc/fail2ban/filter.d/nginx-limit-req.conf
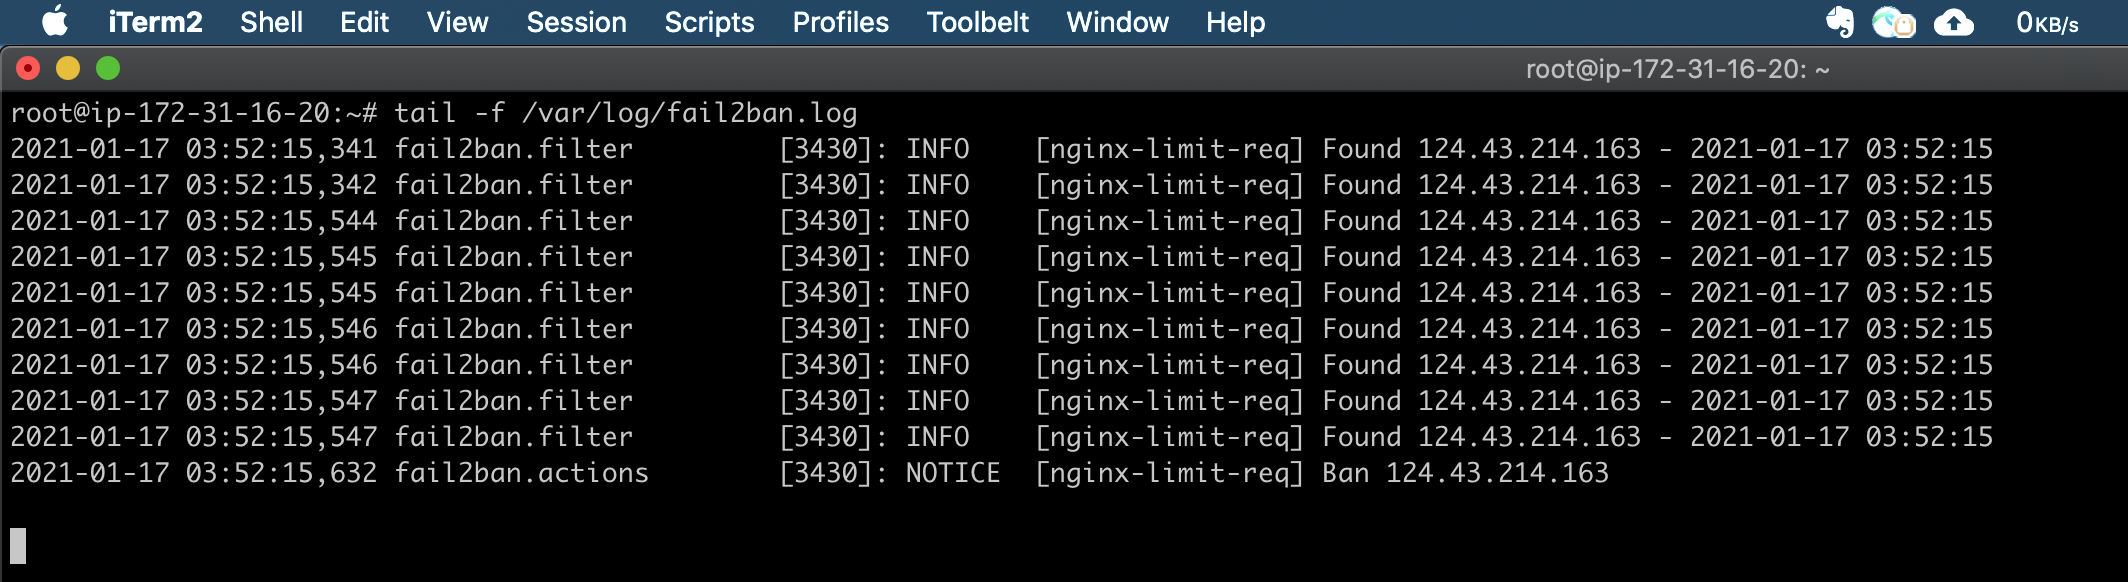
Fail2ban logs:
tail -f /var/log/fail2ban.log
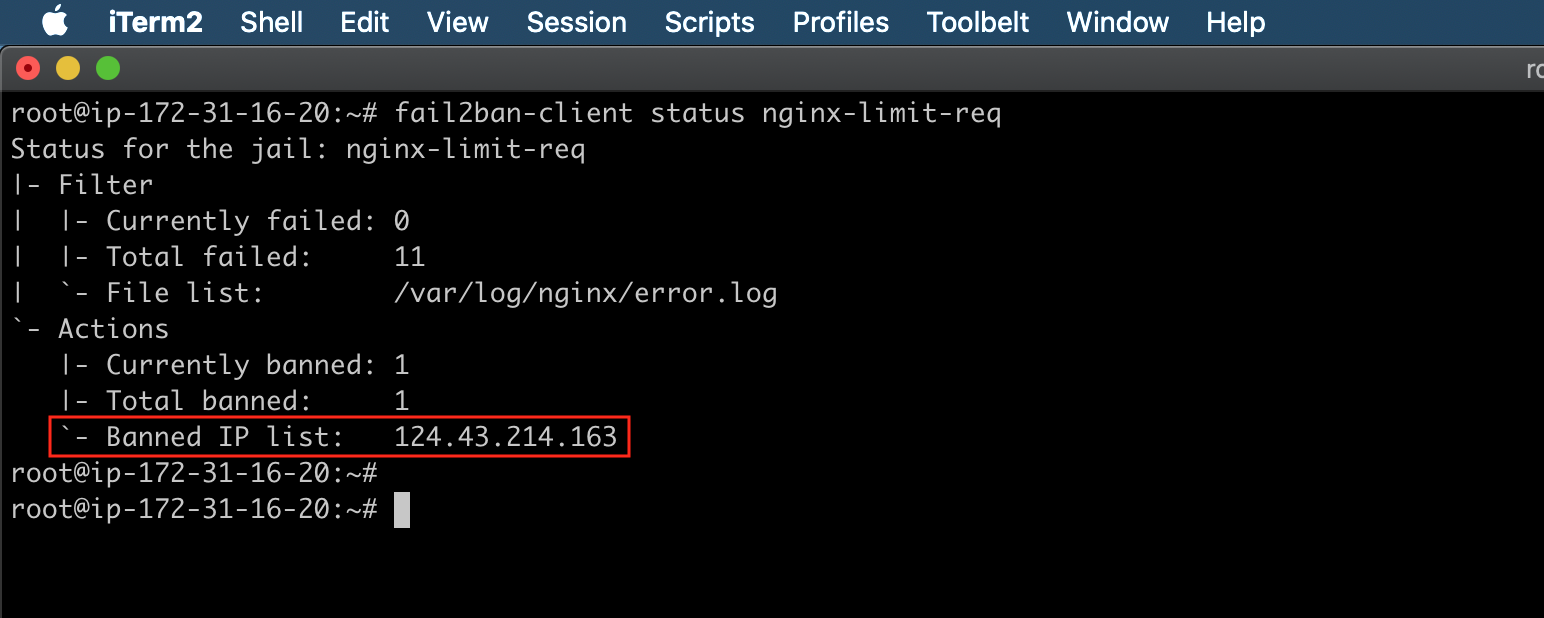
Fail2ban status:
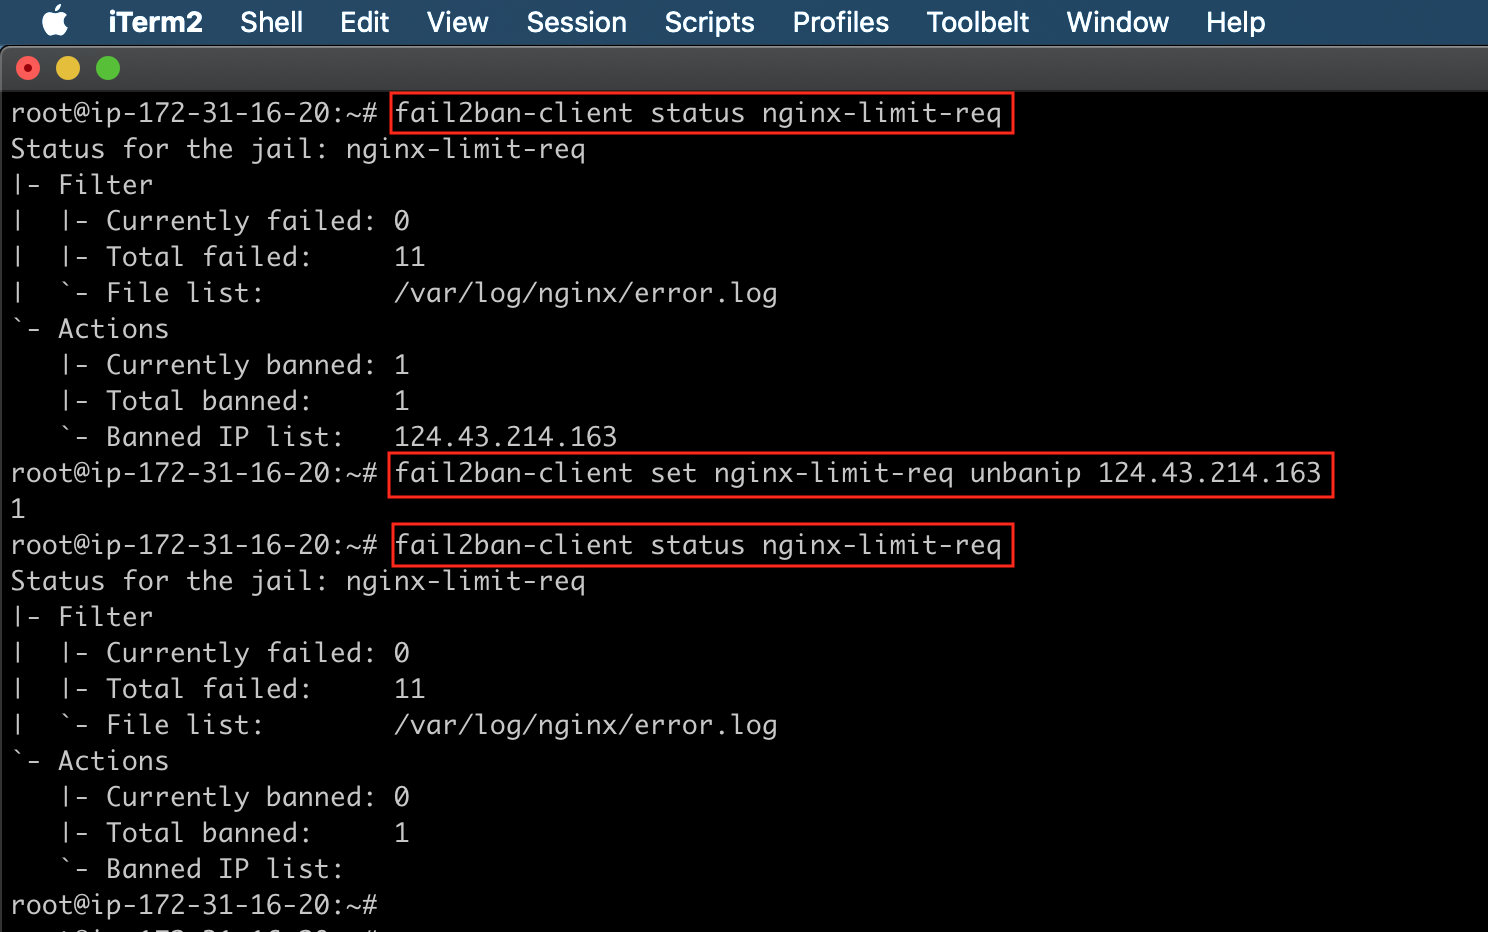
By checking the fail2ban status using the following command, you can see the banded IP list.
fail2ban-client status nginx-limit-req
To verify the rules that were added to iptables by Fail2ban, use the following command:
iptables -L
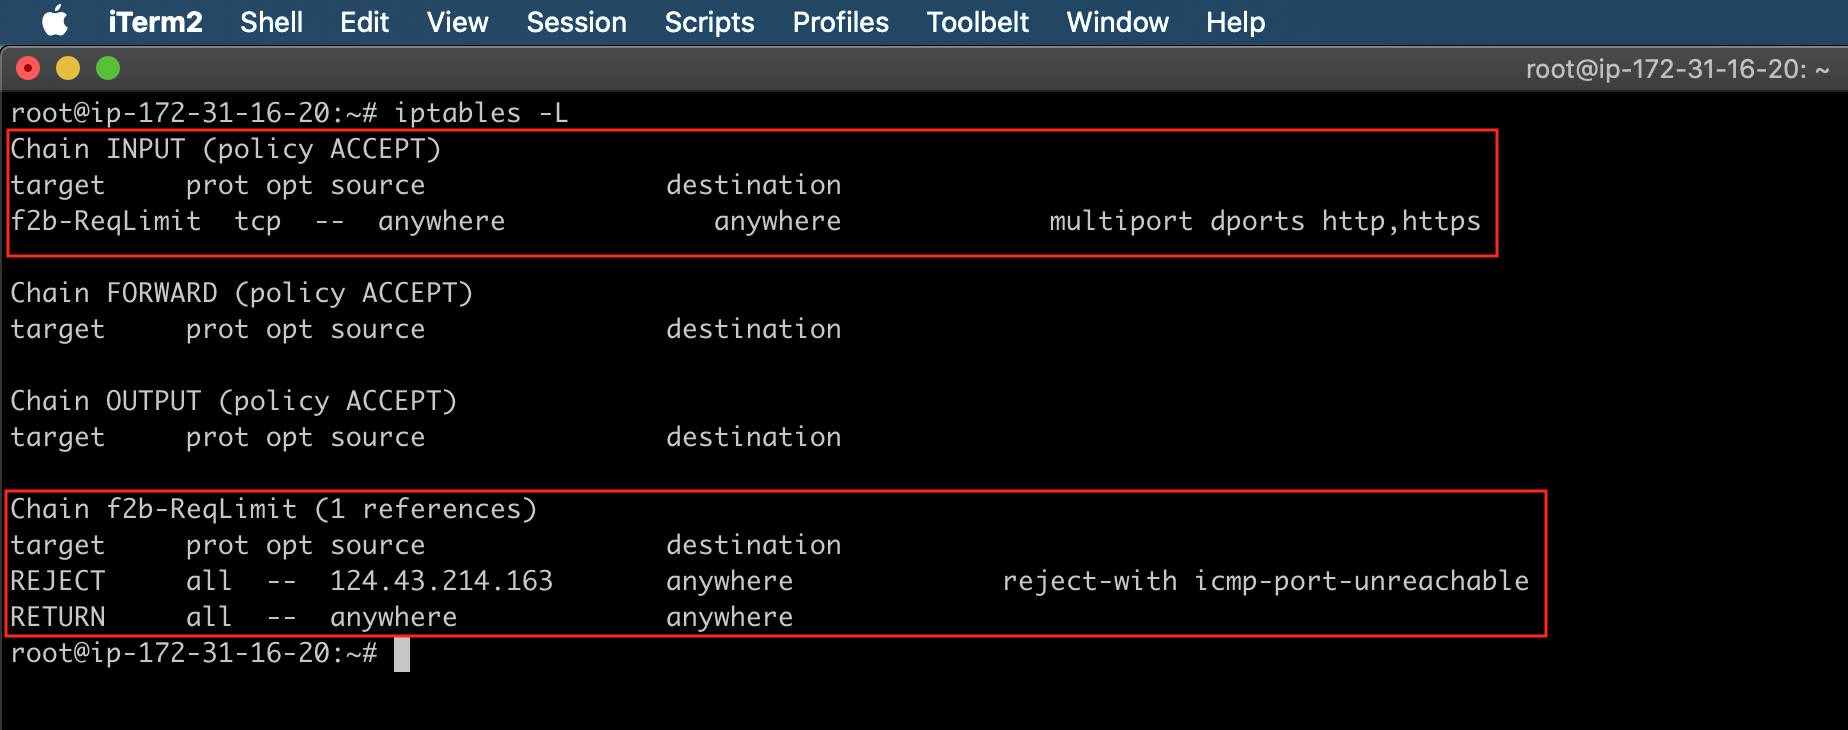
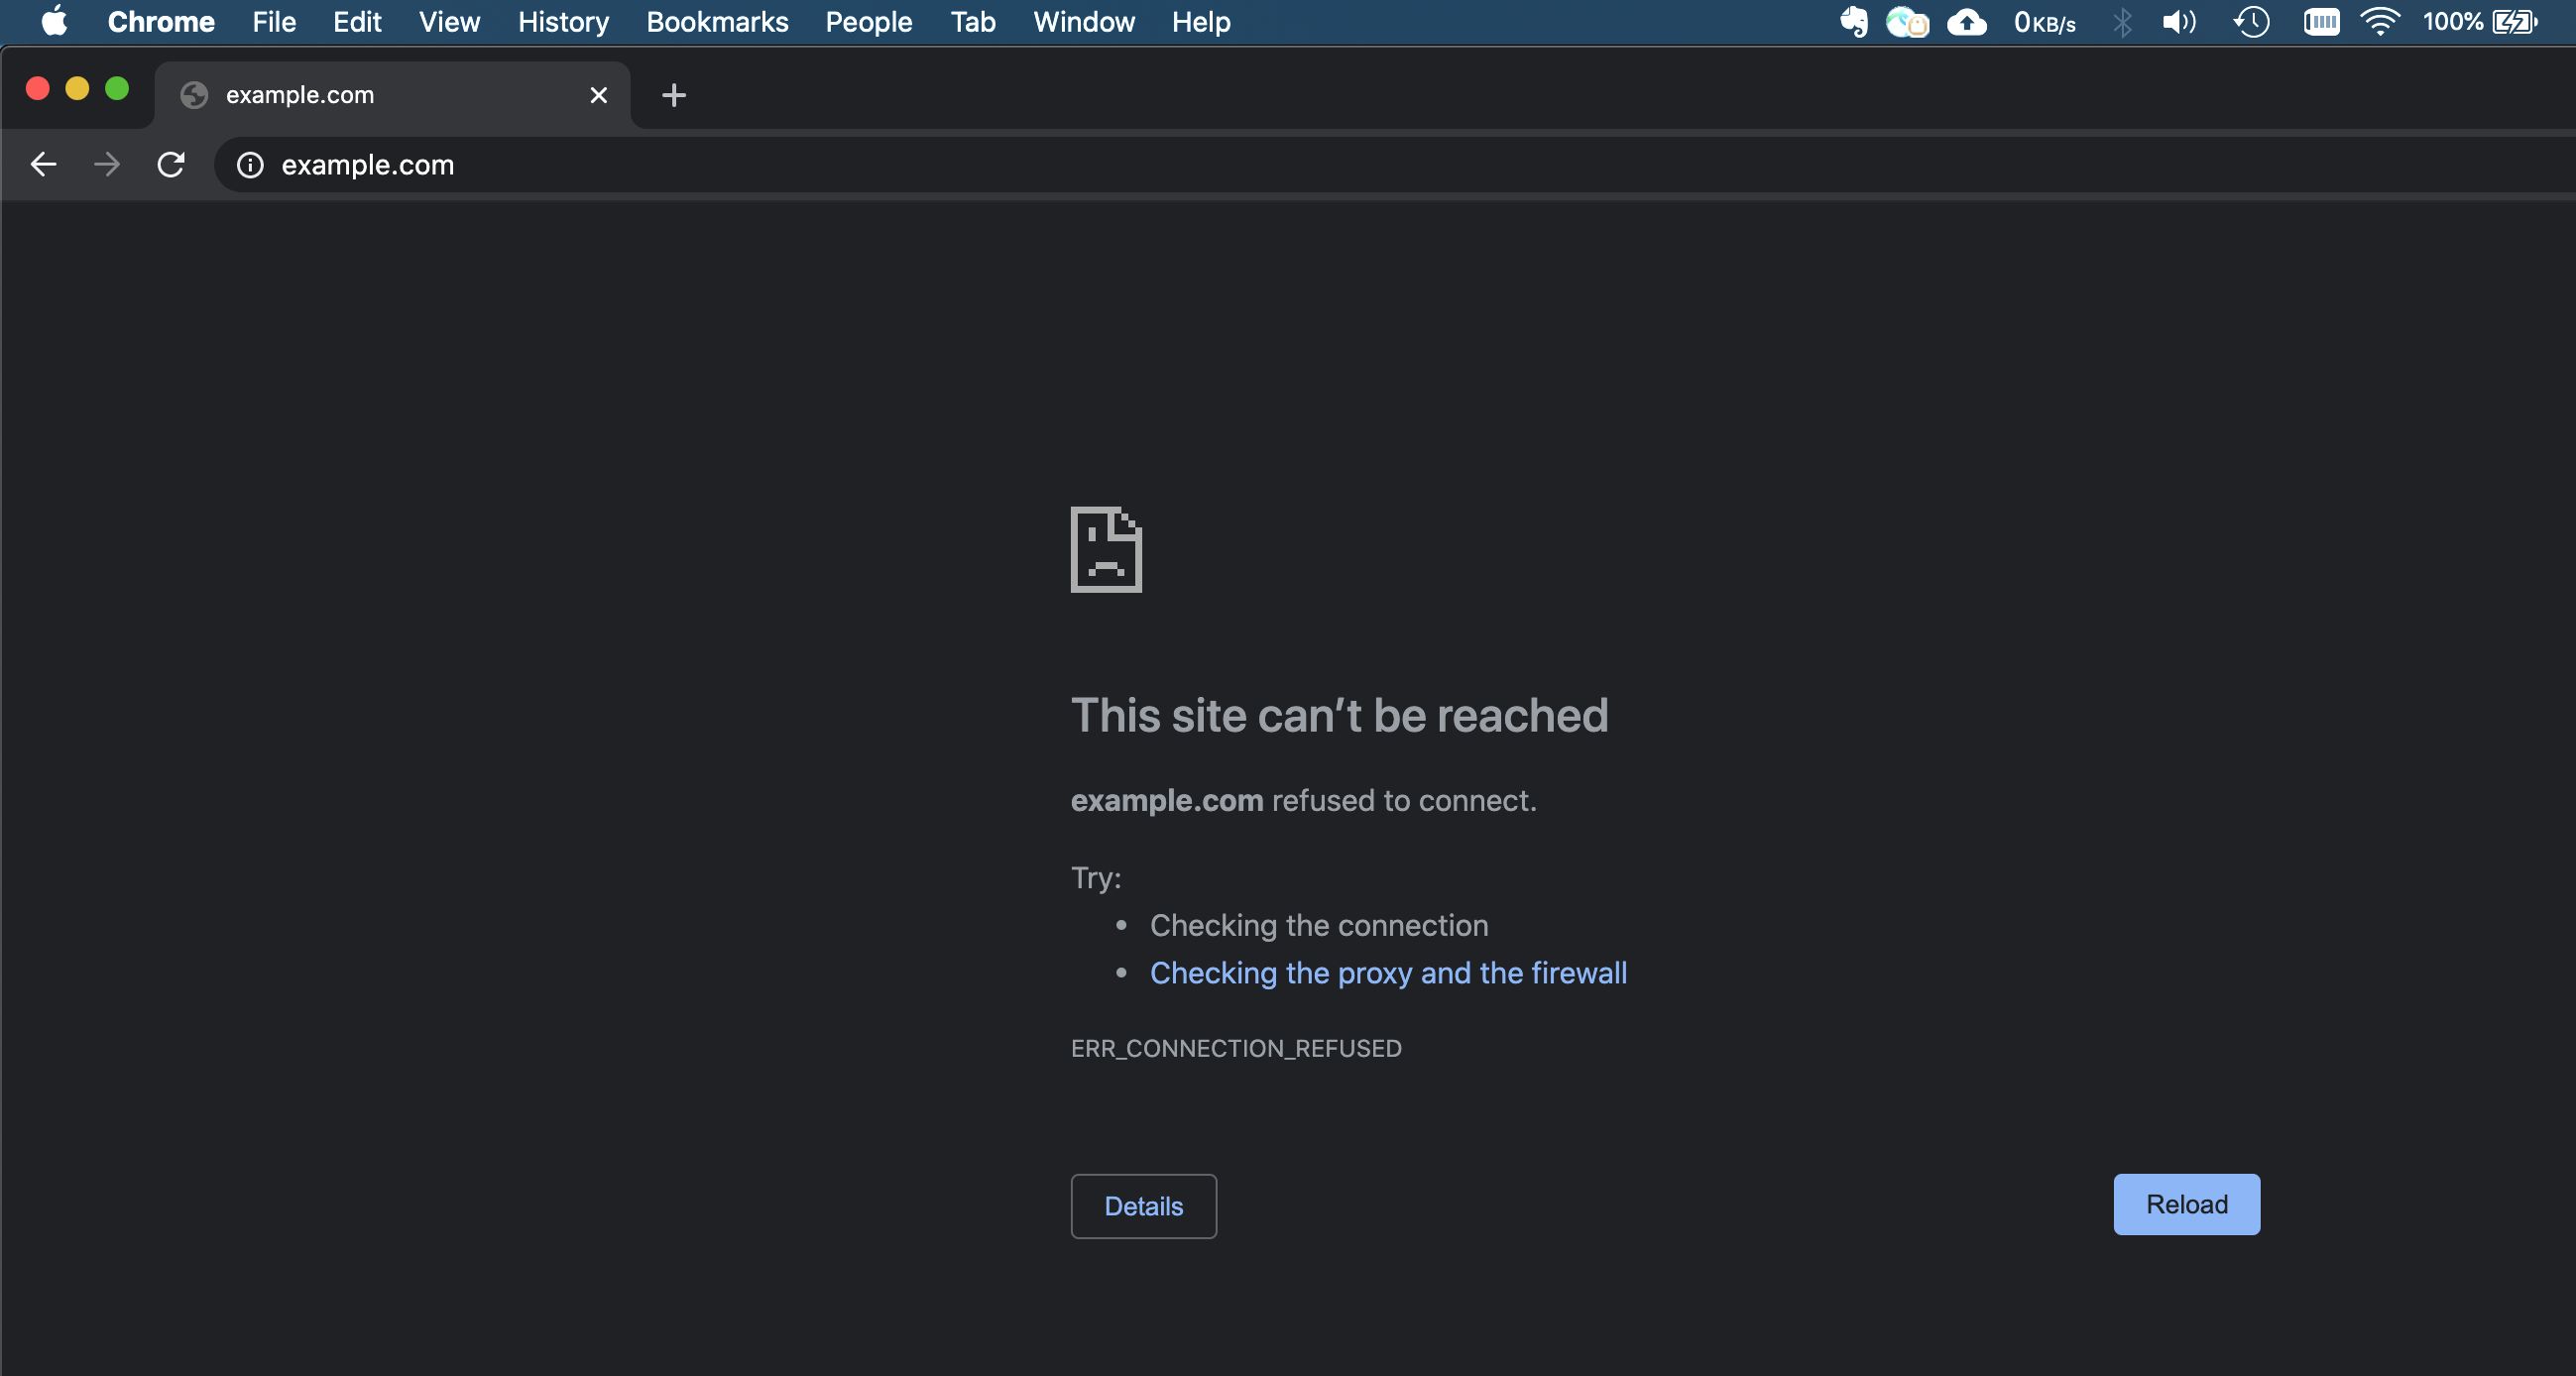
Now if you reload the site, the site will not load because it is blocked by fail2ban using iptables.
Add/Remove ban IPs manually (optional)
You can also manually ban or unban IP addresses.
#Ban a specific IP with that jail
fail2ban-client set nginx-limit-req banip 1.2.3.4

#Unban a specific IP with that jail
fail2ban-client set nginx-limit-req unbanip 1.2.3.4
Setting up fail2ban to protect your Nginx server from DDoS attacks is fairly straightforward. However, fail2ban provides a great deal of flexibility to customize policies that will suit your security needs.