
In my previous article, I have shown you how to set up the initial steps to schedule AWS Backup by creating a backup plan and how to get the notification status of the backup. So in this article, I’m going to use that same notification to automate the process of backup restore and validate the restore test. If you haven’t read my previous article, you can now go and read it by this link Configure AWS Backup and Job Status Notifications and it may help you to proceed with this article.
Why do we need AWS Backup Restore Tests?
As we all know, AWS instance backups are very important because we can quickly recover instances when a sudden instance crashes due to some unrecoverable boot-level issues. In AWS the most common issue is Status Check failures. Most of these kinds of issues get fixed after restarting the instance, but in some cases, it is unable to recover.
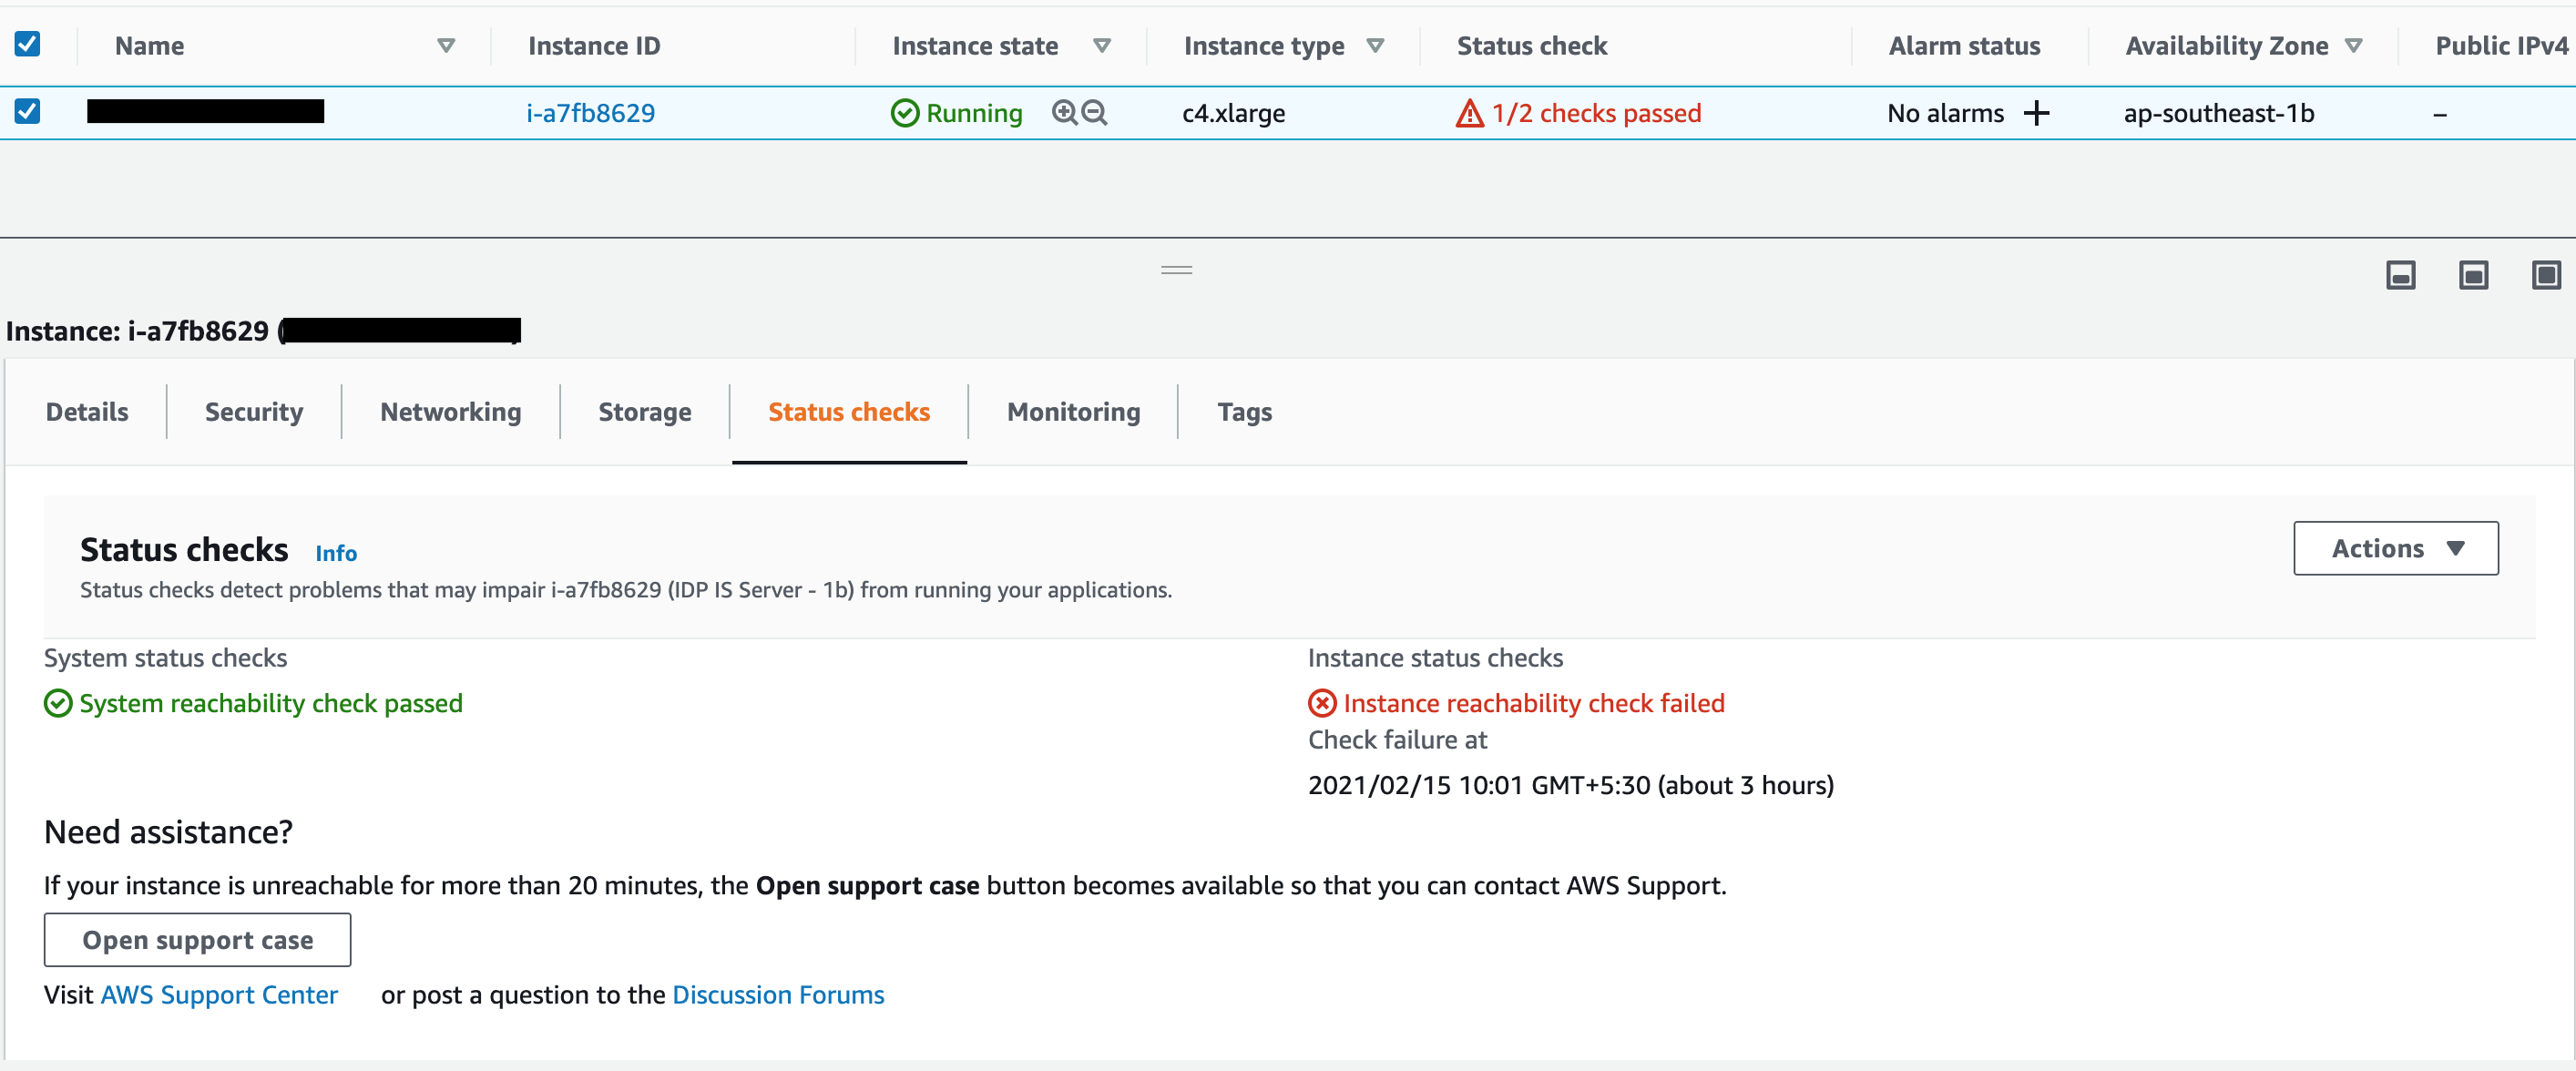
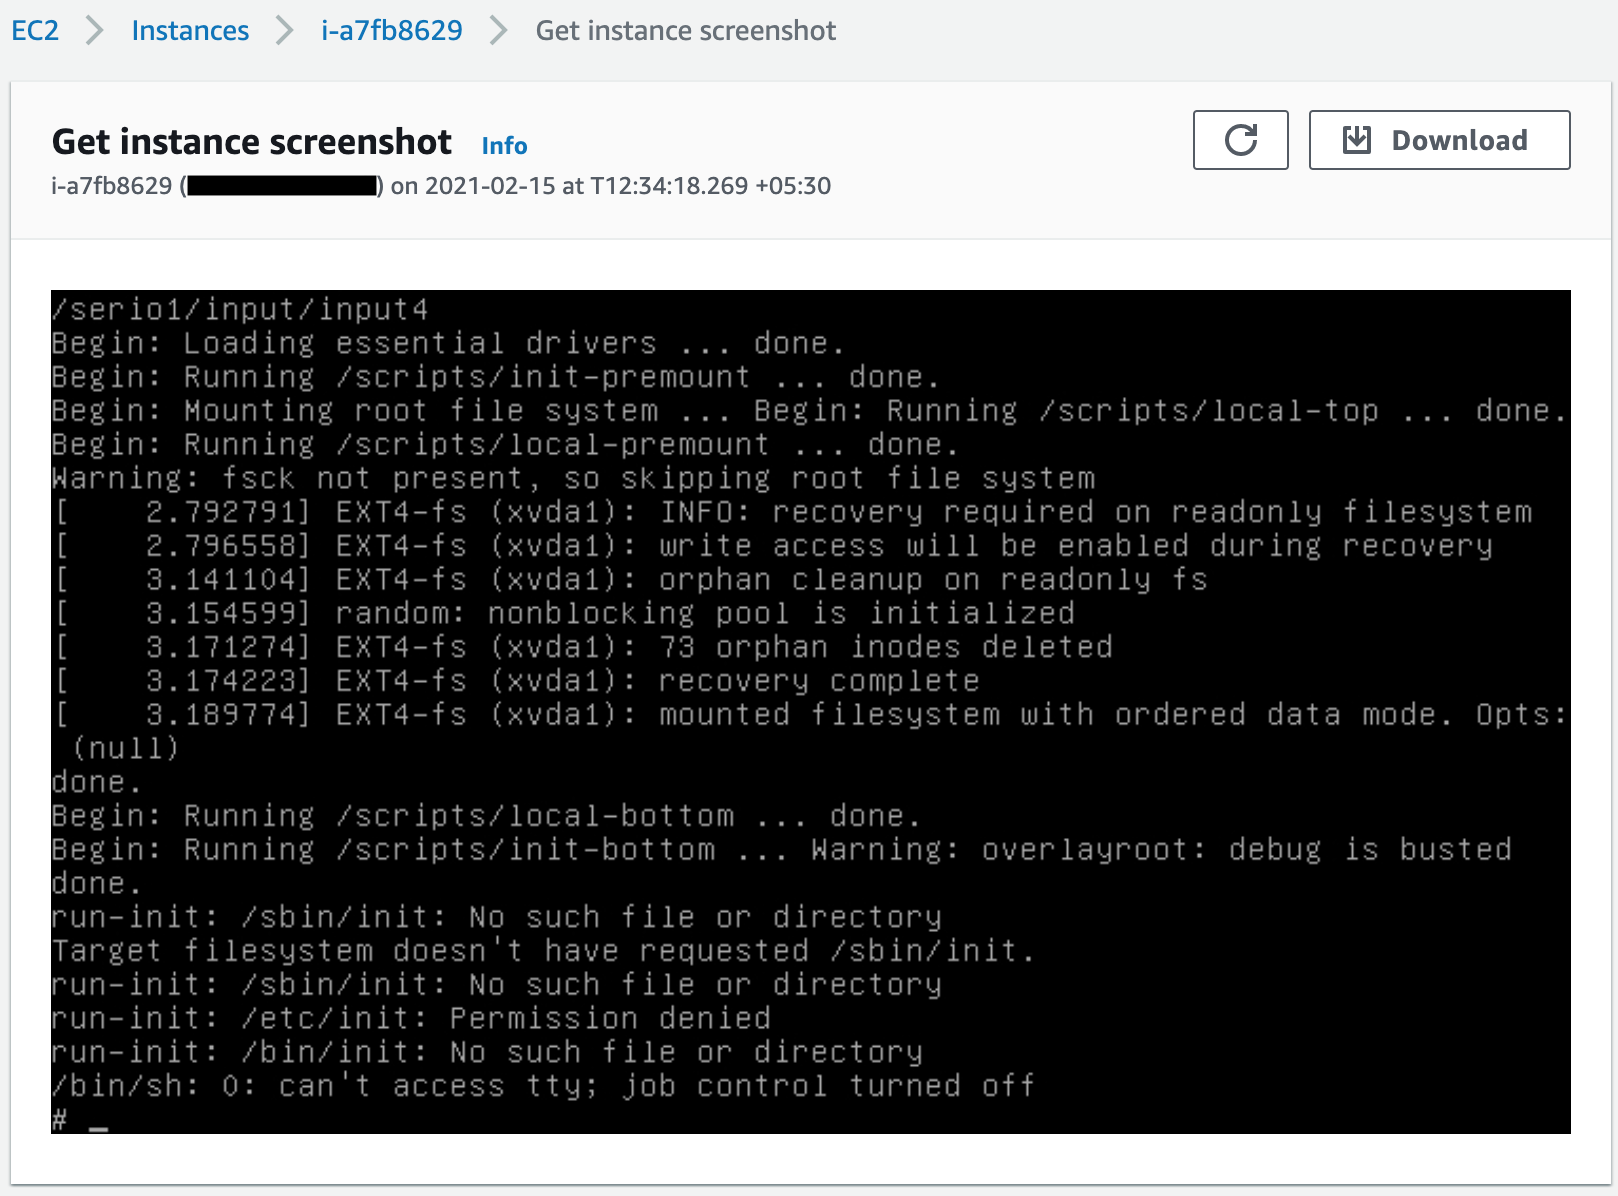
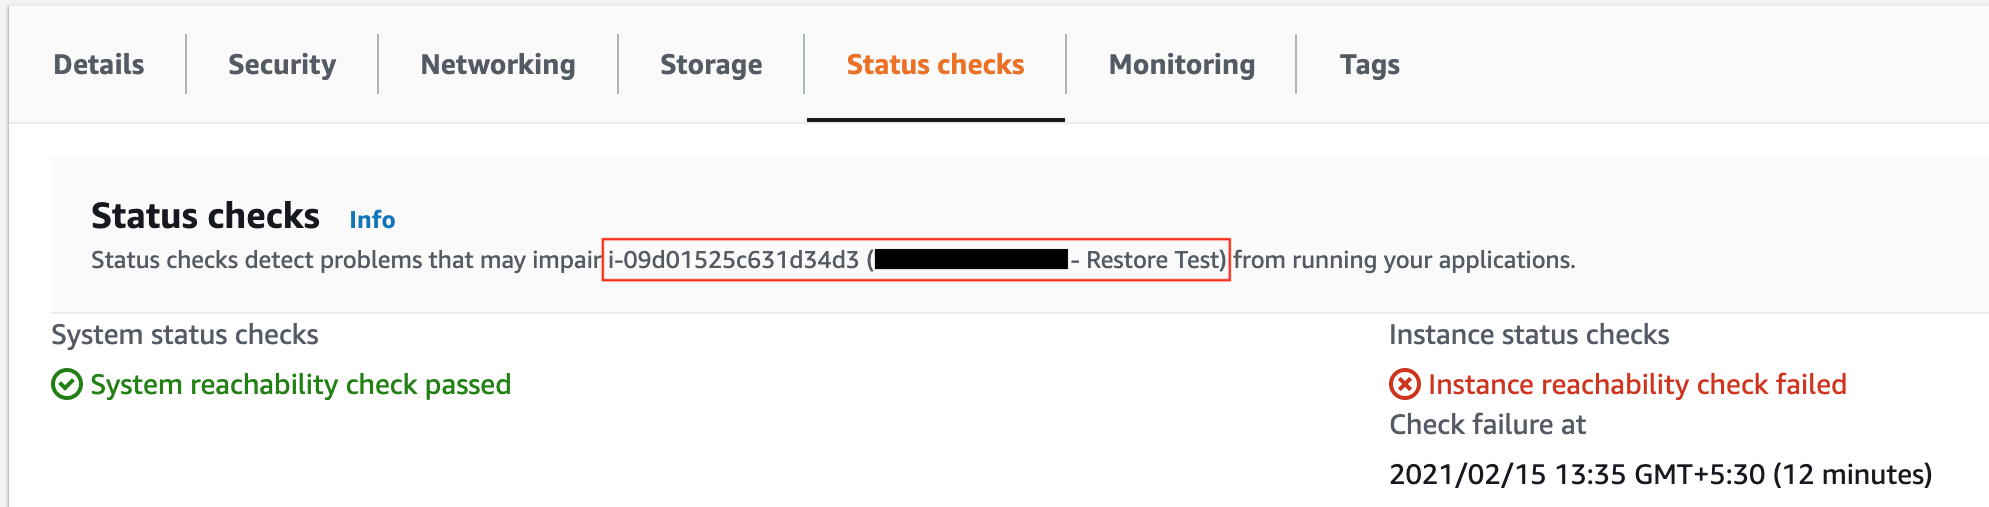
These kinds of issues may persist as long as the instance is up and running and if you restart the instance, you will notice the issue. Since we don’t have an idea when the issue occurred that impacts your backups and you will have the same issue even if you restore the backups. The following screenshot shows a similar scenario that I faced.
So What is the Solution?
Therefore, only taking the backup is not sufficient for AWS resources, you must test the backups to ensure they can be used to recover the data when it is required. A backup is useless if you can’t restore it and get the data from it. Testing the backup restore after will ensure that you are aware of any issues that might occur during the restore process.
But if you have many instances backups to restore and test process is a time-consuming task and gives you an additional overhead. Automating this process with notifications enabled will ensure there is less operational overhead and that the backup administrators are aware of backup and restore statuses.
So in this article, I will show you how to automate that backup restore test process after each successful backup by using the AWS Lambda function with integrating a few other services.
Solution Overview
This solution mainly uses AWS Backup, Amazon SQS, Amazon SNS, and AWS Lambda function with Python language to accomplish this solution. You can get a clear idea of how this solution works by the following diagram and detailed steps.
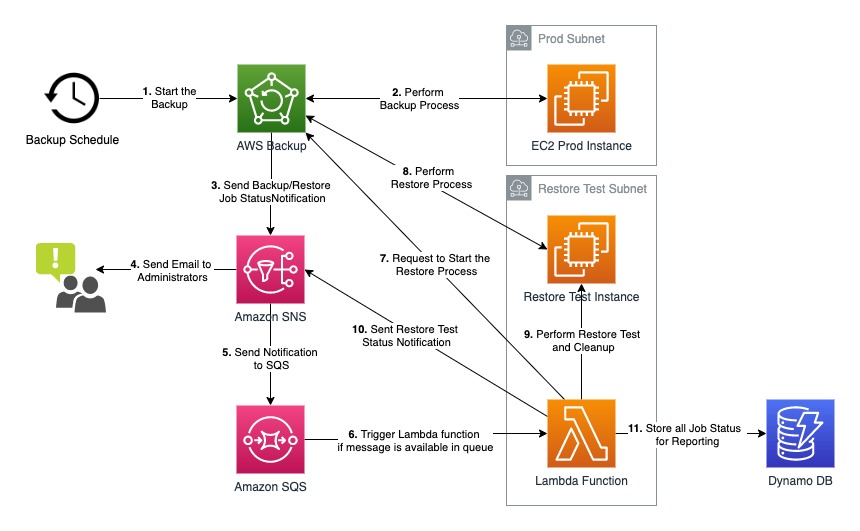
- According to the predefined AWS Backup schedule/plan, start the backup process.
- The AWS Backup will take care of the backup process with the mentioned resources inside the backup plan.
- Since the AWS backup vault is configured with an SNS topic, once the backup is successful, send the notification to the configured SNS topic.
- Send email notifications to the administrators about the job status.
- Also, send the notification to the Amazon SQS to prevent any loss of notifications.
- If SQS ready to consume its messages, the Lambda function pulls the message and runs the function.
- The Lambda function sends a request to start the Backup Restore process based on the recovery point ARN.
- Once the restore process is successful, the AWS Backup again sends the notification to the SNS and again it goes through the above cycle.
- Once the Lambda function gets the restore success notification, the function starts to check the connectivity to the restored instance via SSH.
- If the SSH connectivity to the restored instance is successful, send the Restore Test notifications to the SNS topic.
- Finally, collect all job statuses in the DybanoDB for future reporting purposes.
Prerequisites
- AWS IAM account with Full Administration access.
- Linux instance with AWS CLI installed.
- Basics of Python Programming.
Let’s Automate the AWS Backup Restore and Restore Test Validation
Deploy the Basic Infrastructure
In my previous article on AWS CloudFormation Simplify Your Cloud Deployments, I demonstrated how to implement a basic infrastructure using AWS CloudFormation. So here I’m using the same CloudFormation template to deploy the infrastructure.
Once you deploy the environment let’s start the rest of the steps to automate the backup restore test using Lambda.
Create Amazon SNS Topic
As I mentioned earlier in my “Configure AWS Backup and Job Status Notifications” article, I have created an SNS topic and configured it with a backup vault to get backup status notifications. Here I’m using the same configuration to send notifications to Amazon SQS.
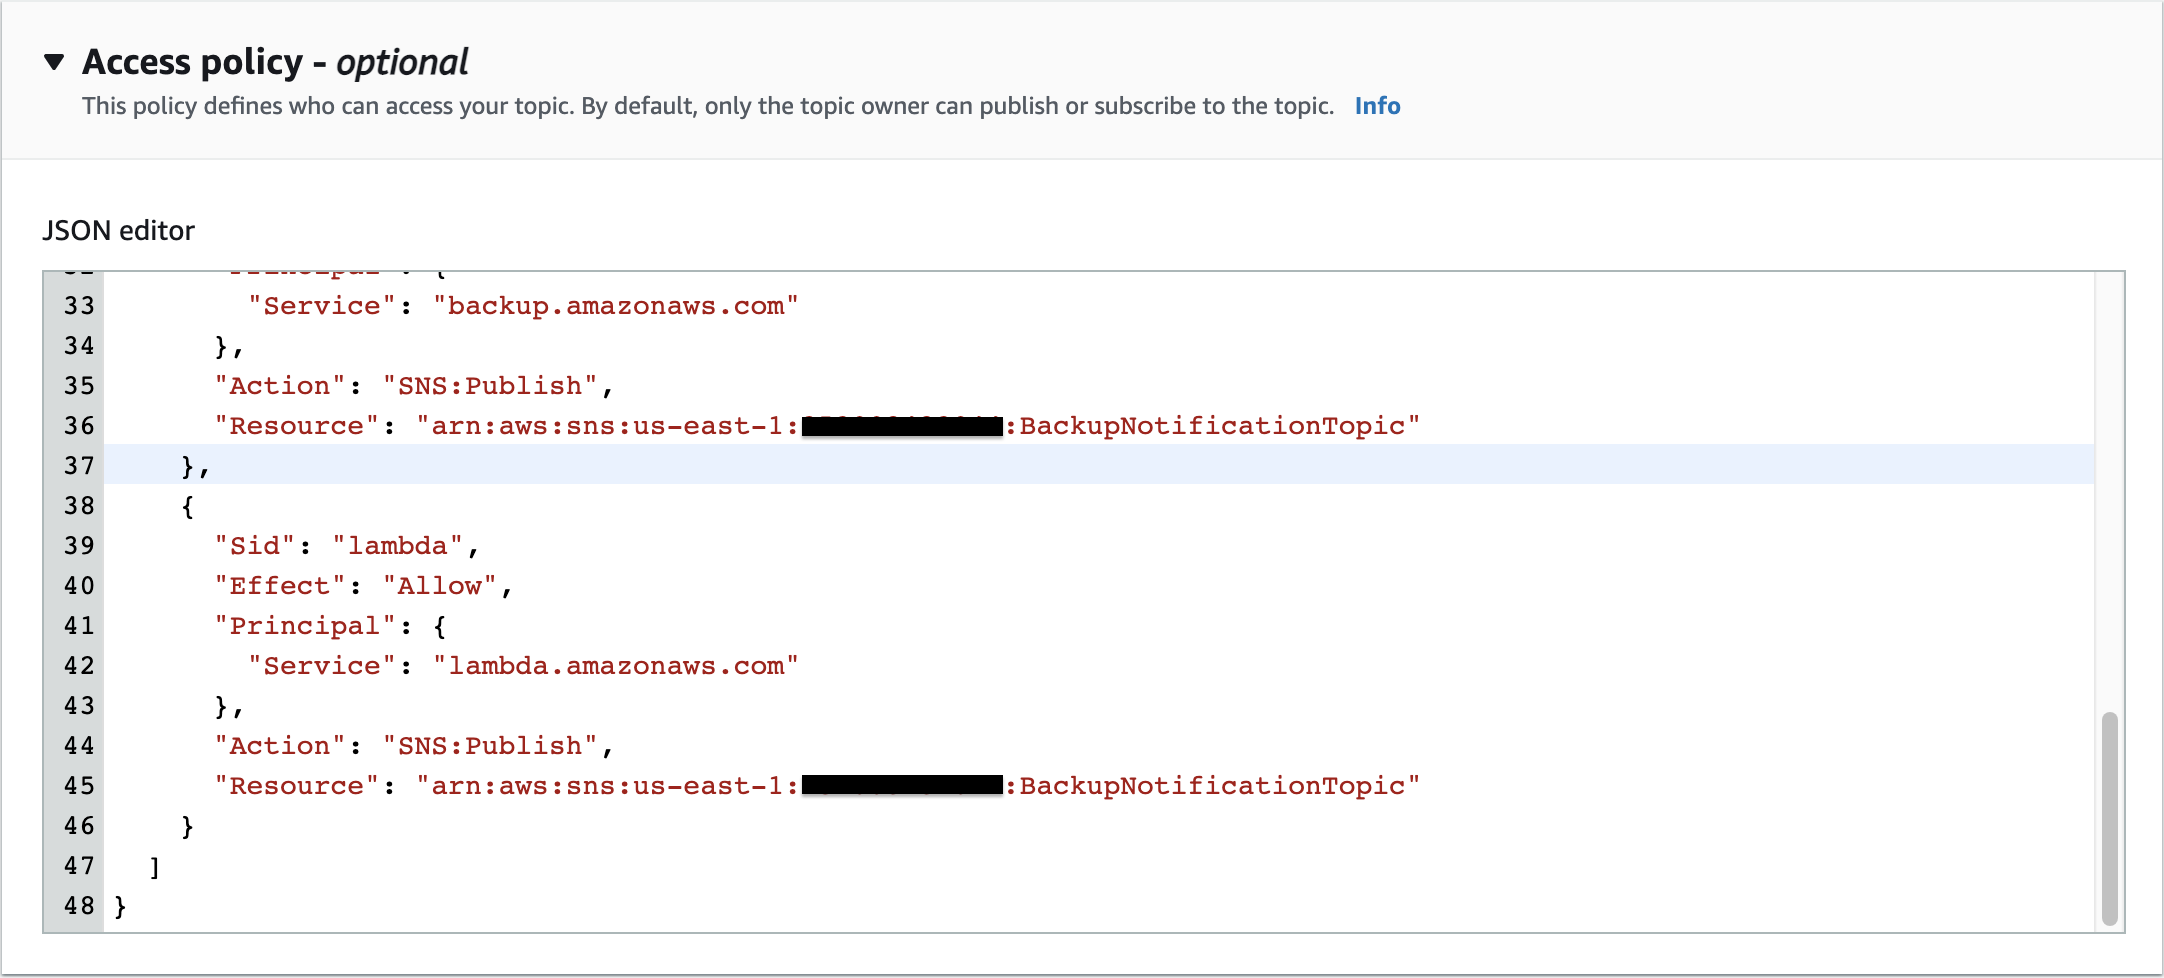
Additionally, you need to modify the SNS topic Access policy by adding the following statement in order to access it from the Lambda function.
{
      "Sid": "lambda",
      "Effect": "Allow",
      "Principal": {
        "Service": "lambda.amazonaws.com"
      },
      "Action": "SNS:Publish",
      "Resource": "arn:aws:sns:us-east-1:account_id:BackupNotificationTopic"
}
Create Amazon SQS
Here I’m using Amazon SQS to prevent losing messages produced by backup notifications. As a consumer, the lambda function polls the queue and triggers the lambda function synchronously with an event that contains queue messages. It reads messages in batches and triggers the function. Once successfully processes a batch, the lambda function deletes its messages from the queue.
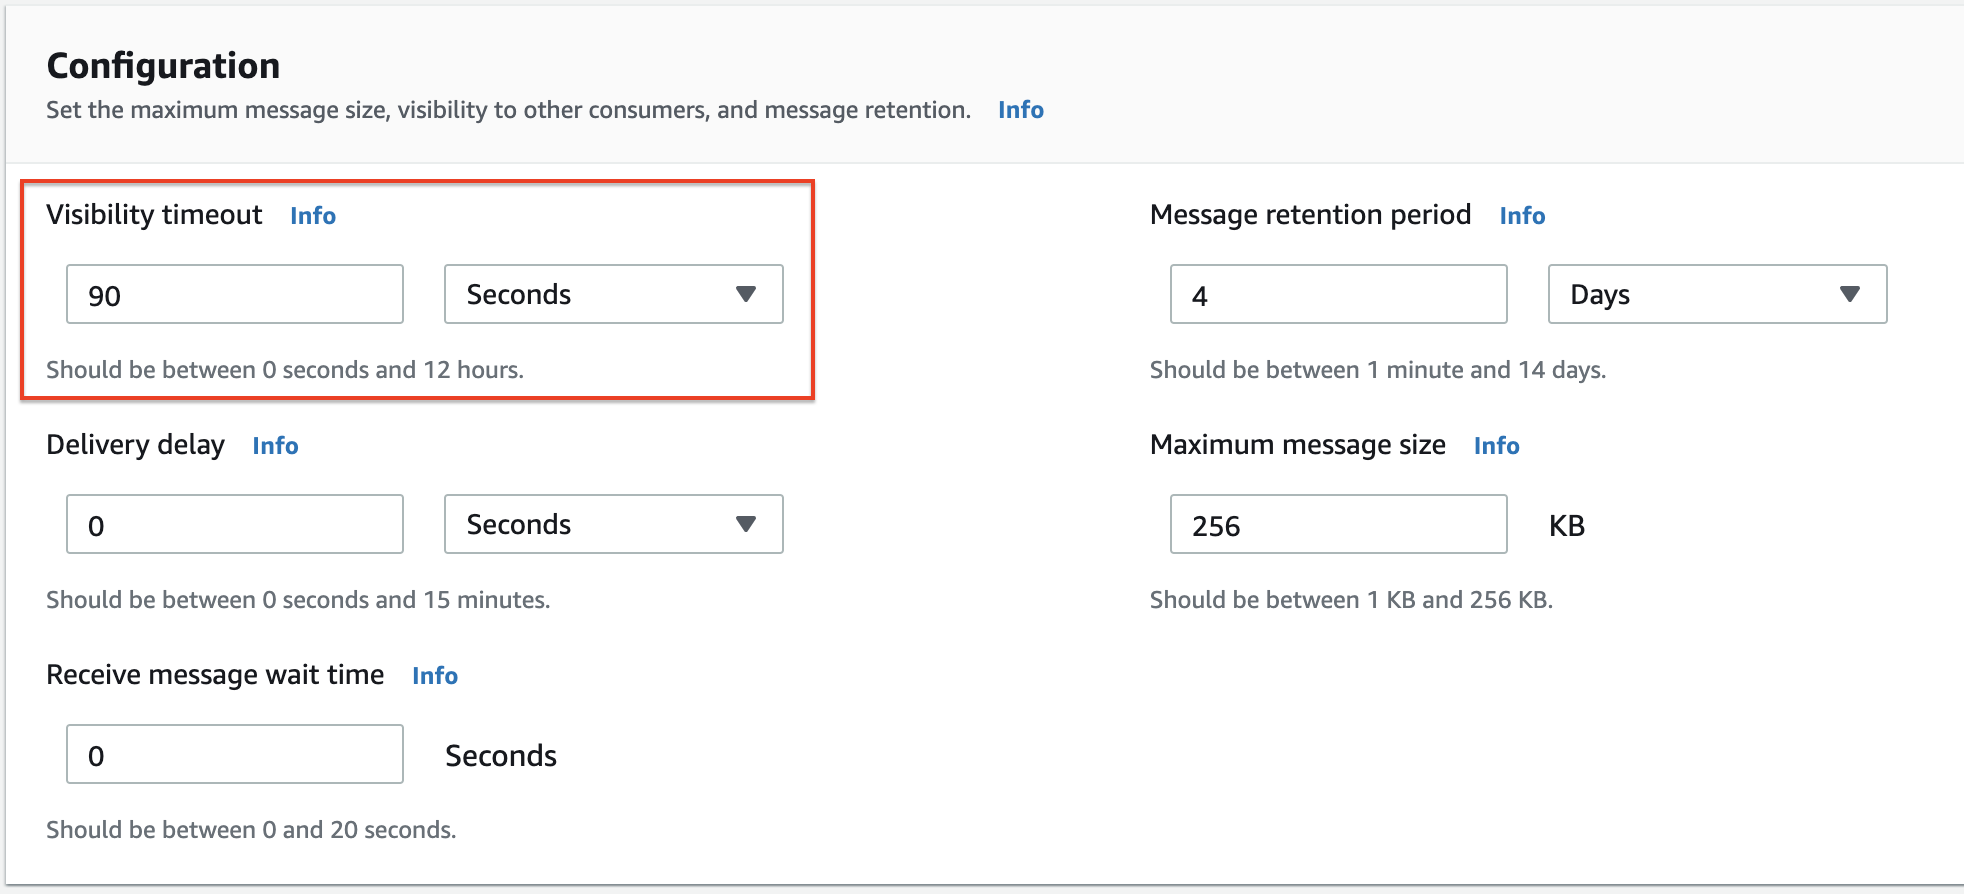
Go to the Amazon SQS console and create a Standard Queue with the name “BackupNotificationsQueue” and configurations as follows.
Visibility timeout simply means when a consumer (lambda function) receives and processes a message from a queue, the message remains in the queue until the consumer must delete the message from the queue after receiving and processing it. In the SQS configuration section, I changed the visibility timeout parameter to 90 seconds because my lambda function will take more than one minute to run. Therefore depending on your scenario make sure to modify the visibility time-out value to greater than or equal to the Lambda function execution time.
Once you create the SQS, go inside it and navigate to the SNS subscriptions section. Then click the Subscribe to Amazon SNS topic button and add the created SNS topic in the previous step.

Create IAM Policy for Lambda Function
Before creating the lambda function it required certain tasks to perform against some AWS services. Therefore we need to create and grant access privileges by creating an IAM policy. This policy should require performing the following tasks.
- Describe, create, and delete network interfaces.
- Detach and delete volumes.
- Describe and terminate the instance.
- Create tags.
- Modify instance attributes.
- Delete SQS messages, Get queue attributes, and Receive messages.
- Publish to SNS topic.
- Put items into DynamoDB.
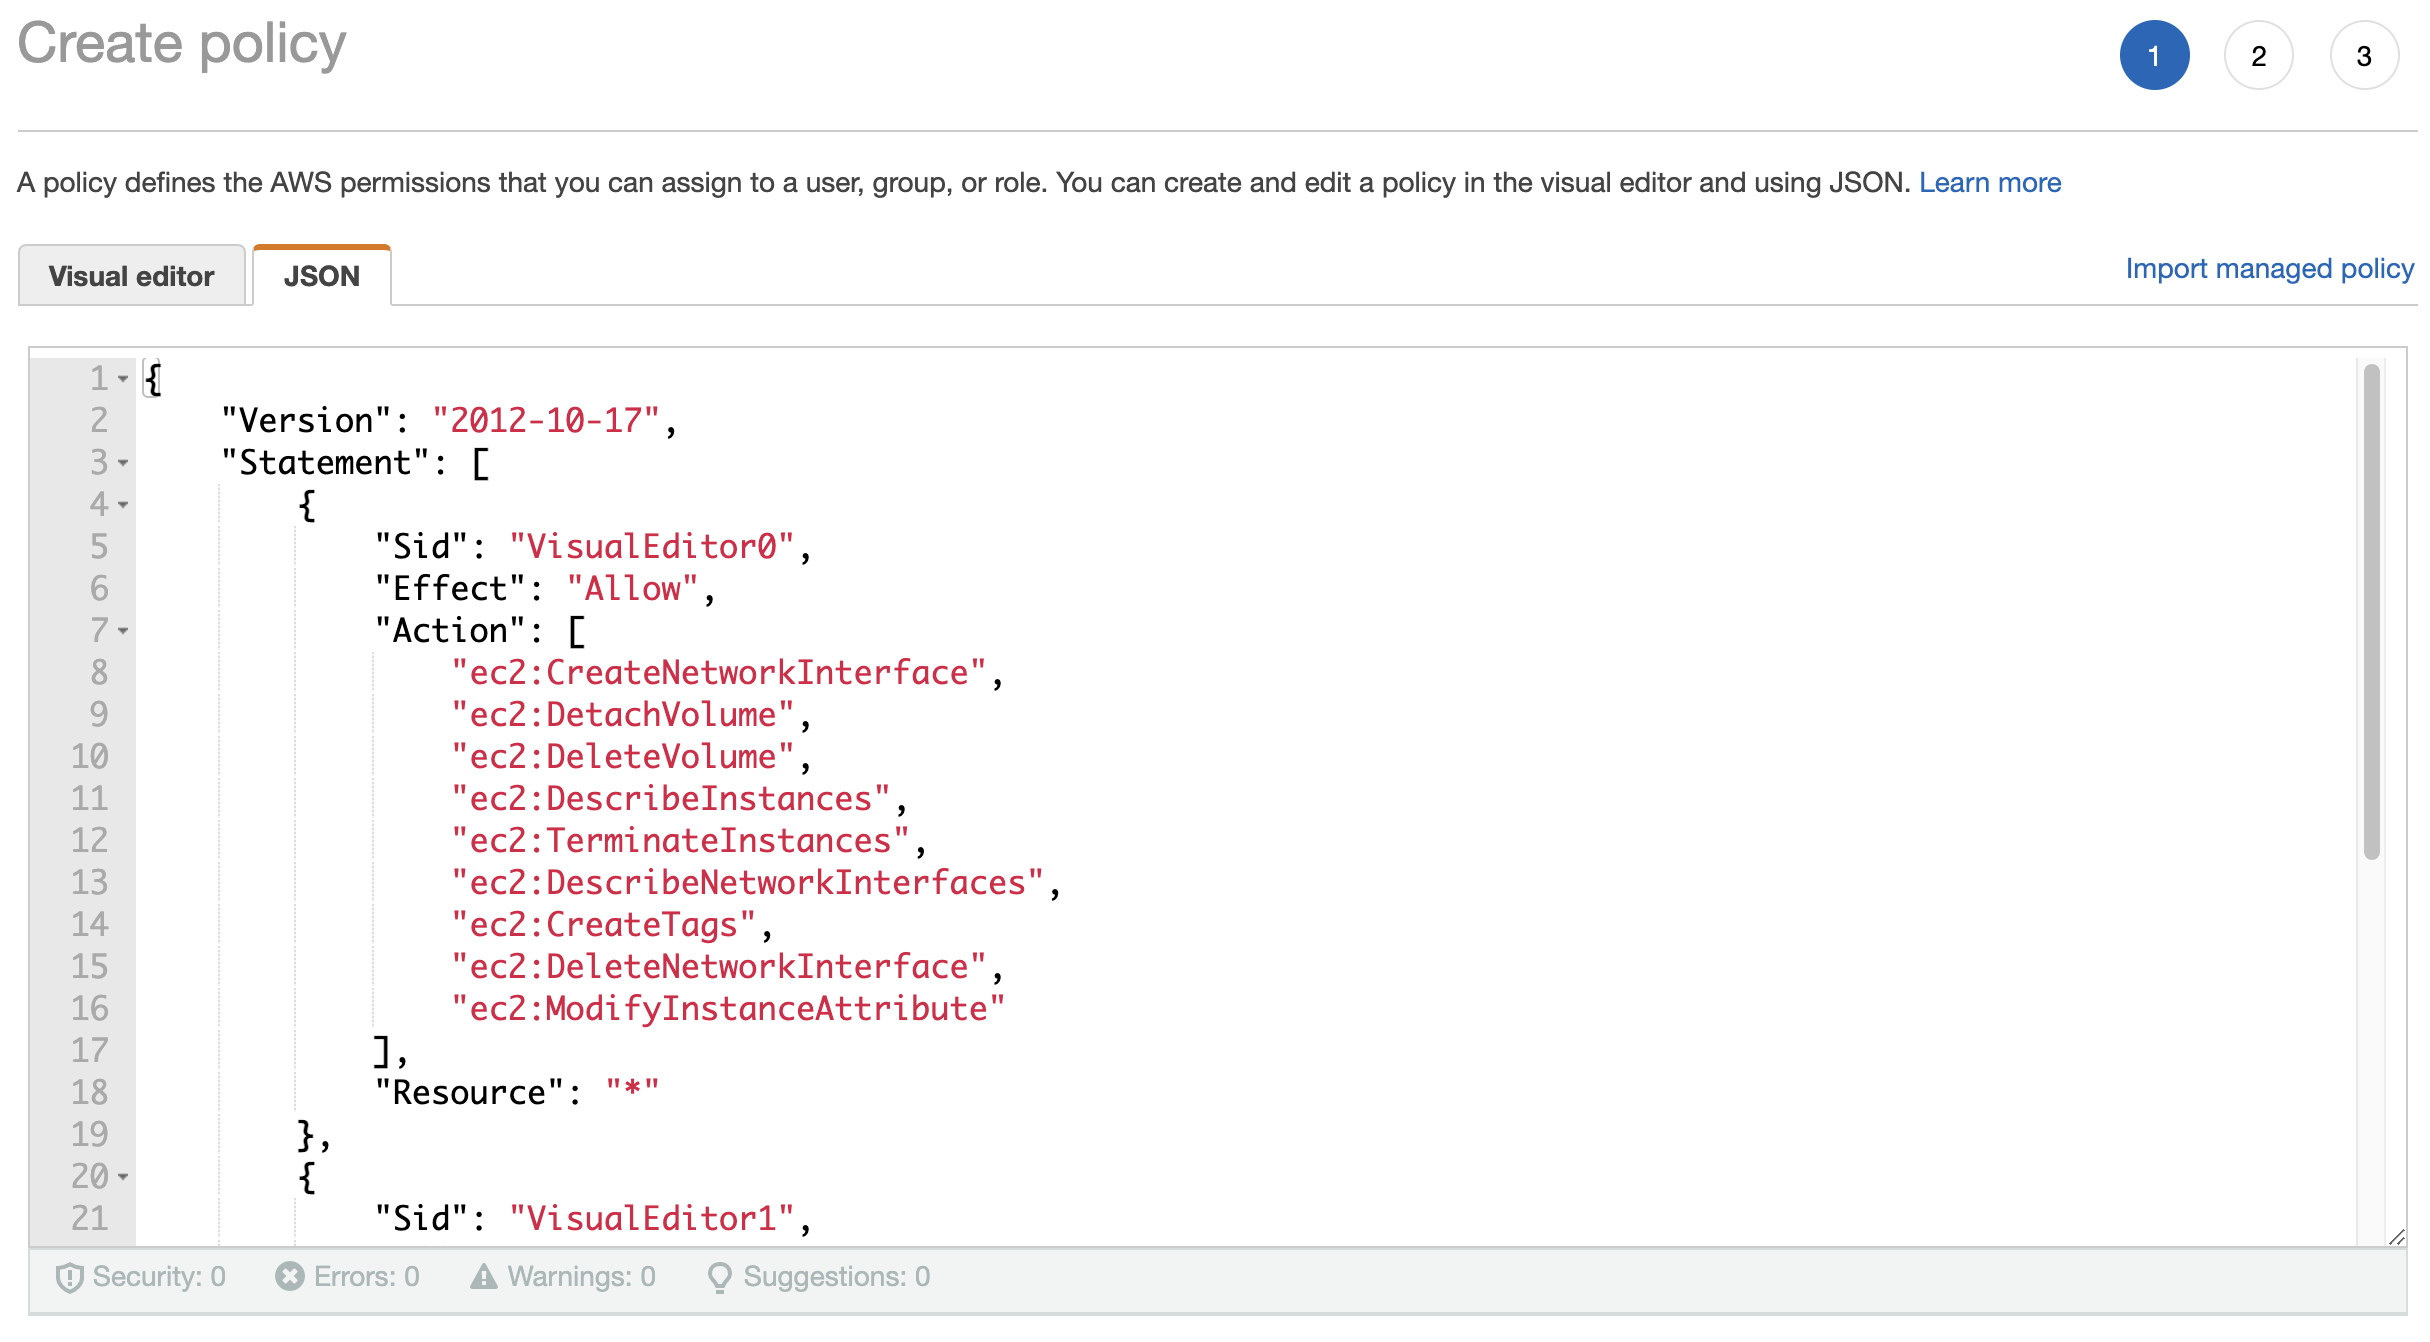
Navigate to the AWS Identity and Access Management (IAM) console and select Policies from the left side pane. Then create a new policy in the JSON editor.
Paste the following JSON snippet and modify the SNS topic ARN and SQS ARN accordingly.
{
    "Version": "2012-10-17",
    "Statement": [
        {
            "Sid": "VisualEditor0",
            "Effect": "Allow",
            "Action": [
                "ec2:CreateNetworkInterface",
                "ec2:DetachVolume",
                "ec2:DeleteVolume",
                "ec2:DescribeInstances",
                "ec2:TerminateInstances",
                "ec2:DescribeNetworkInterfaces",
                "ec2:CreateTags",
                "ec2:DeleteNetworkInterface",
                "ec2:ModifyInstanceAttribute"
            ],
            "Resource": "*"
        },
        {
            "Sid": "VisualEditor1",
            "Effect": "Allow",
            "Action": [
                "sqs:DeleteMessage",
                "sns:Publish",
                "dynamodb:PutItem",
                "sqs:ReceiveMessage",
                "sqs:GetQueueAttributes"
            ],
            "Resource": [
                "arn:aws:sqs:us-east-1:account_id:BackupNotificationsQueue",
                "arn:aws:sns:us-east-1:account_id:BackupNotificationTopic"
            ]
        }
    ]
}
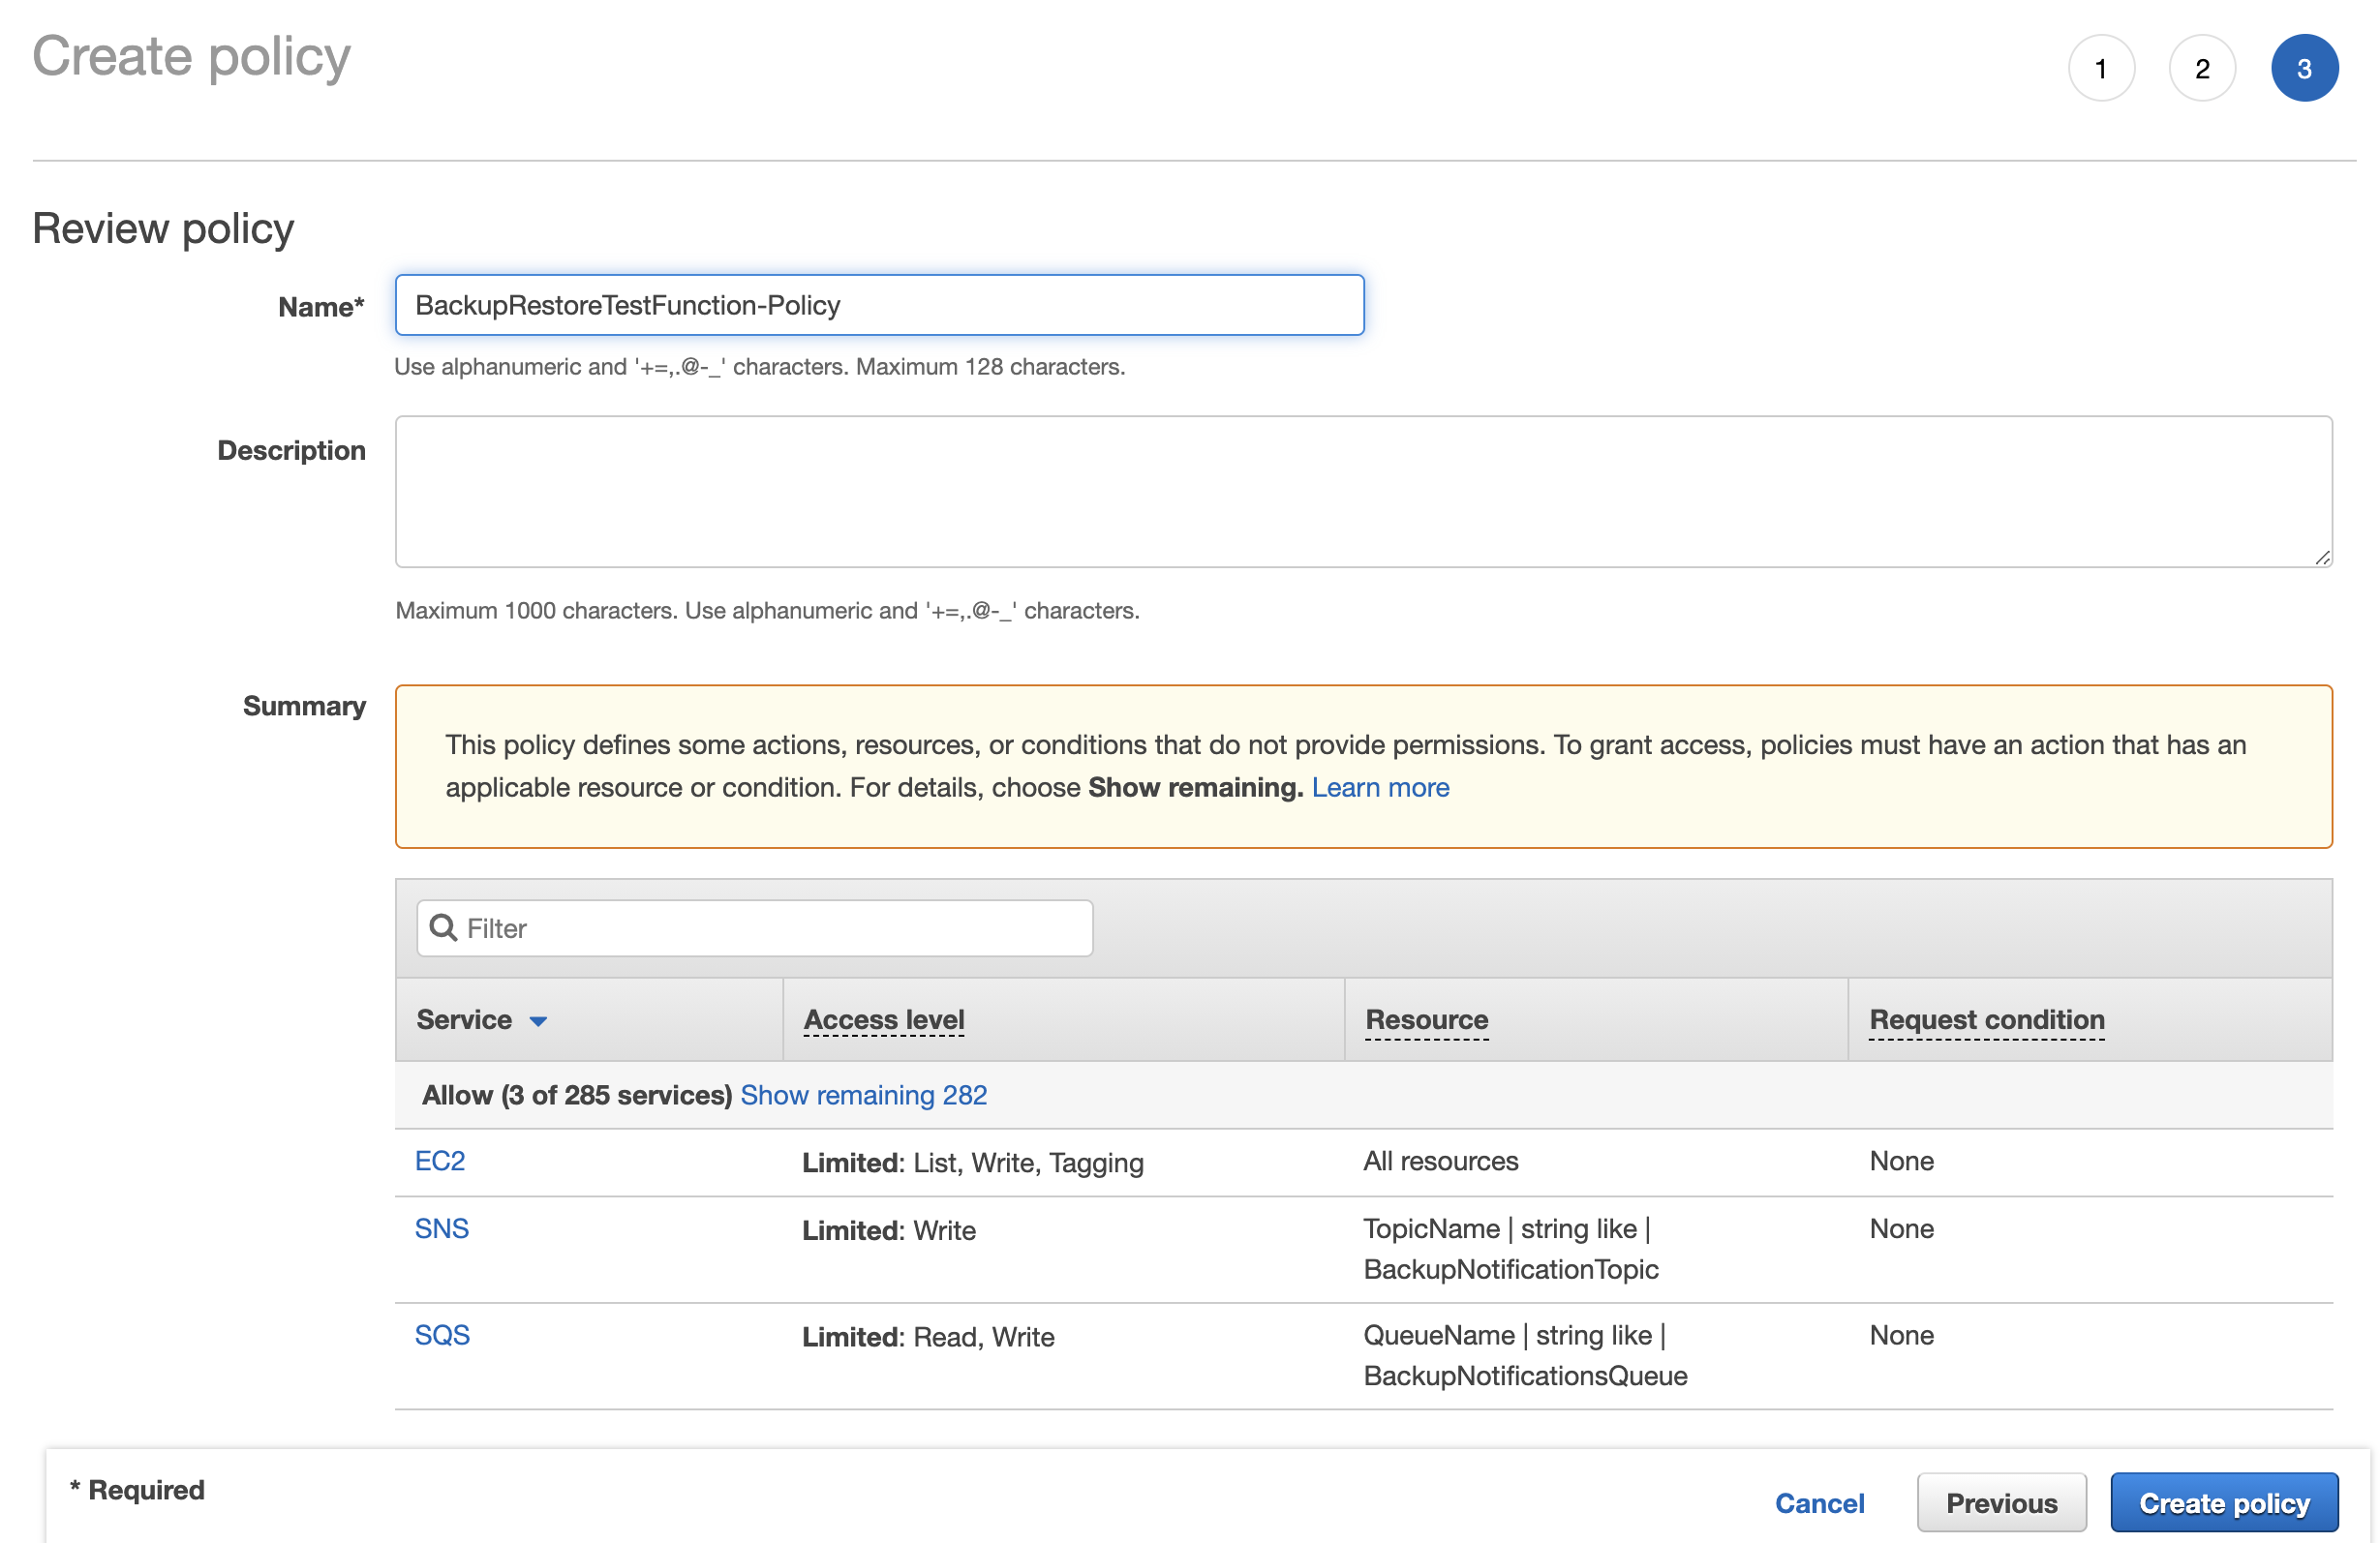
Once it is done, save it by giving it a proper name.
Create the Lambda Function
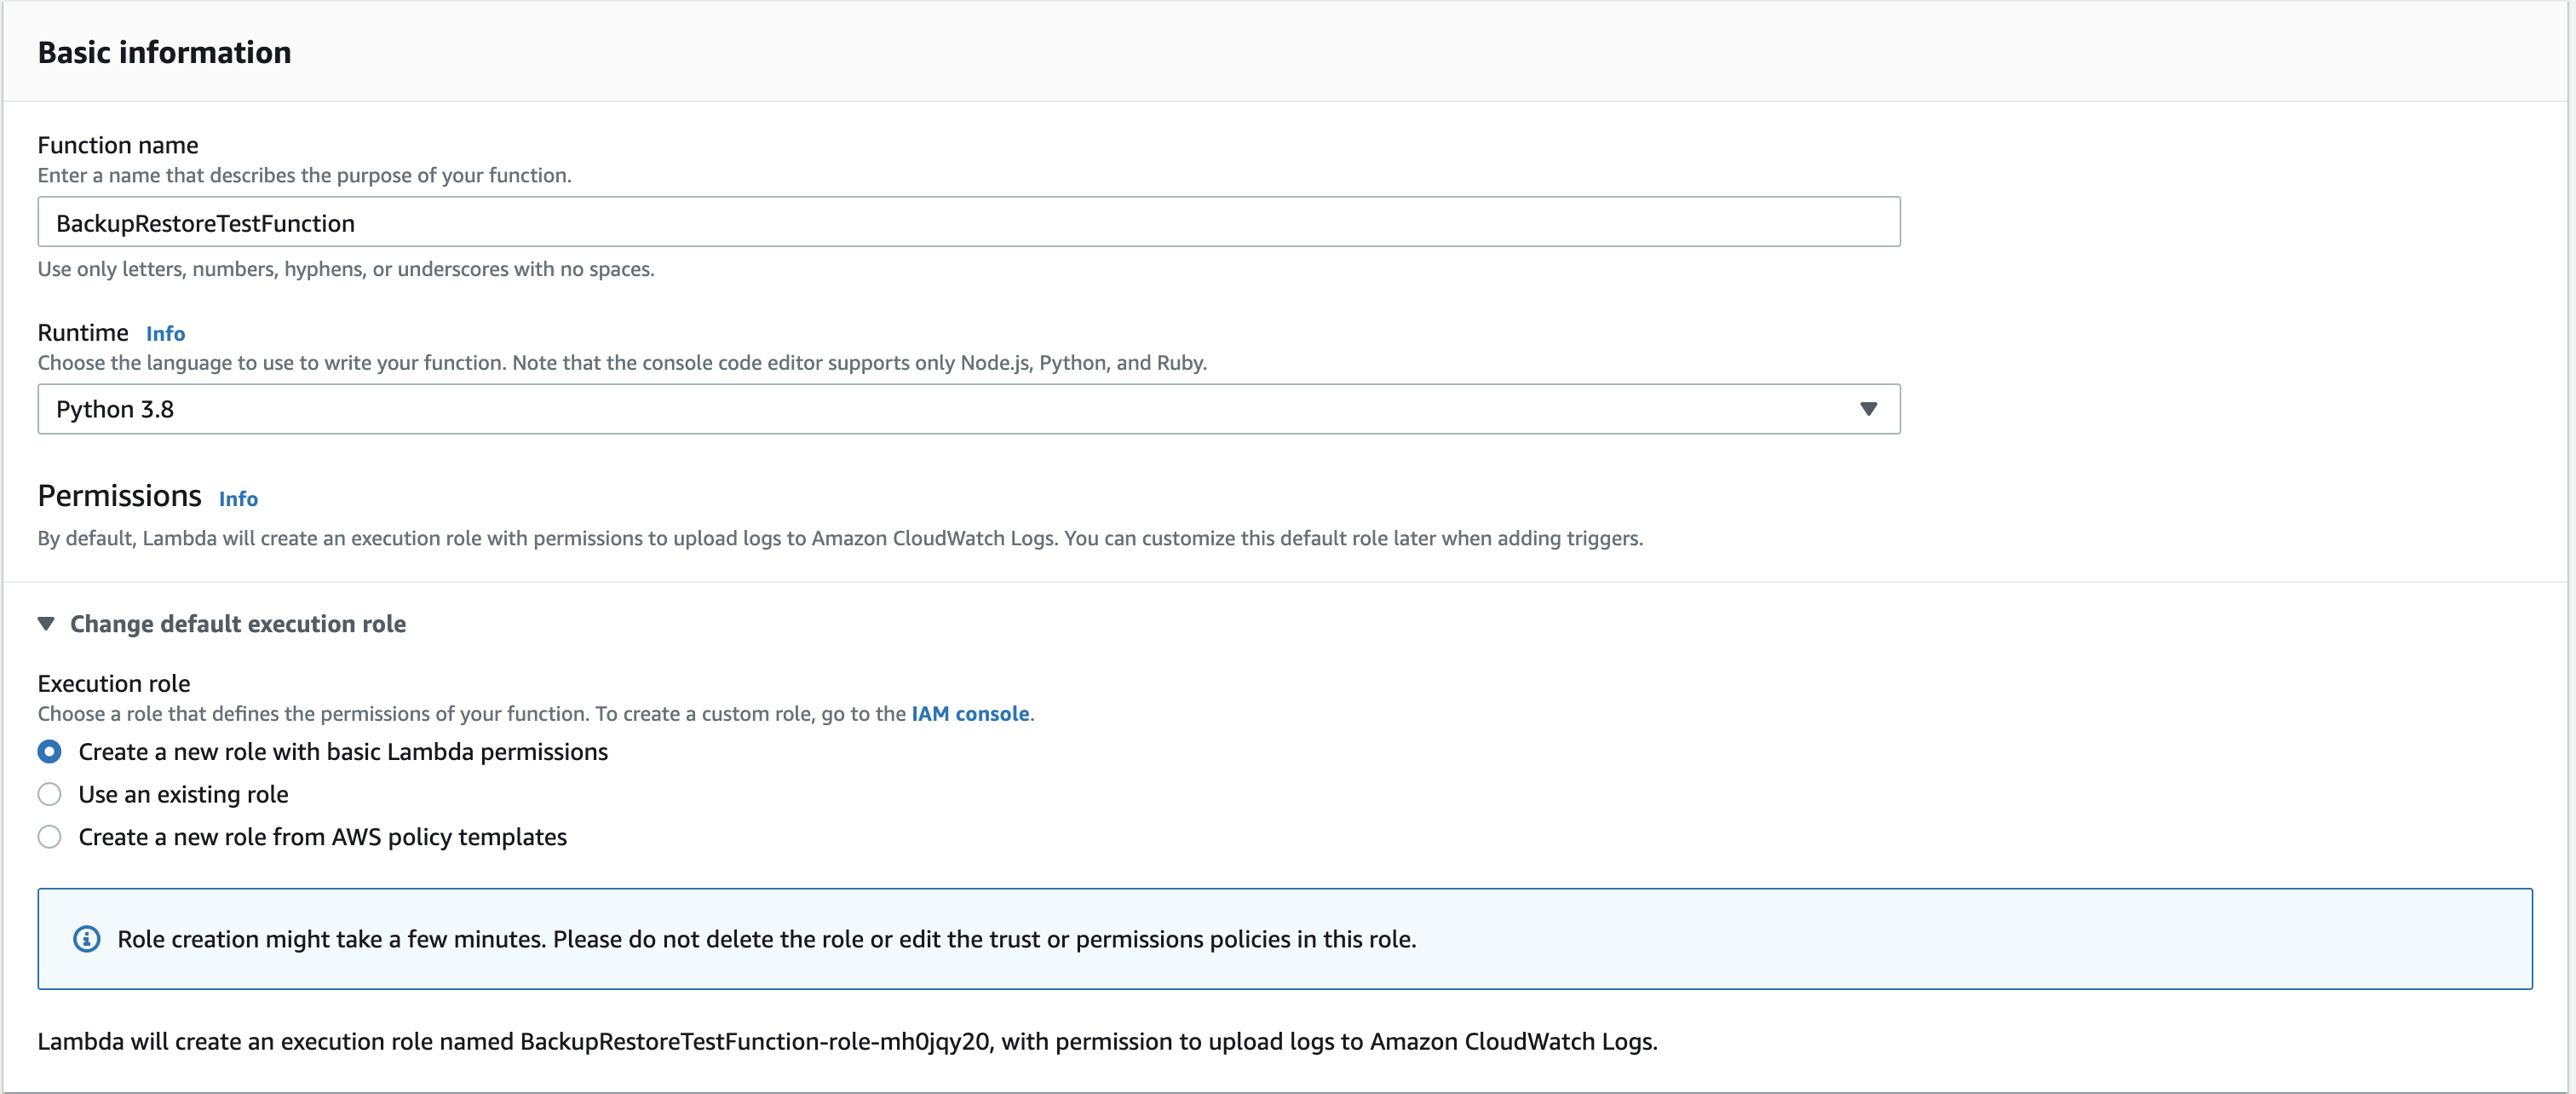
This is the important part of this article. Here you need to create the lambda function inside the specific subnet in this scenario I’m using the restore test subnet which was created by the CloudFormation template. The reason because this Lambda function should be able to access the restored instance to check whether the SSH port is listening or not.
Navigate to the AWS Lambda console and create a new function. In the basic information section, I’m giving the details as mentioned in the below screenshot. Note that here creating a new IAM role automatically for the lambda function.
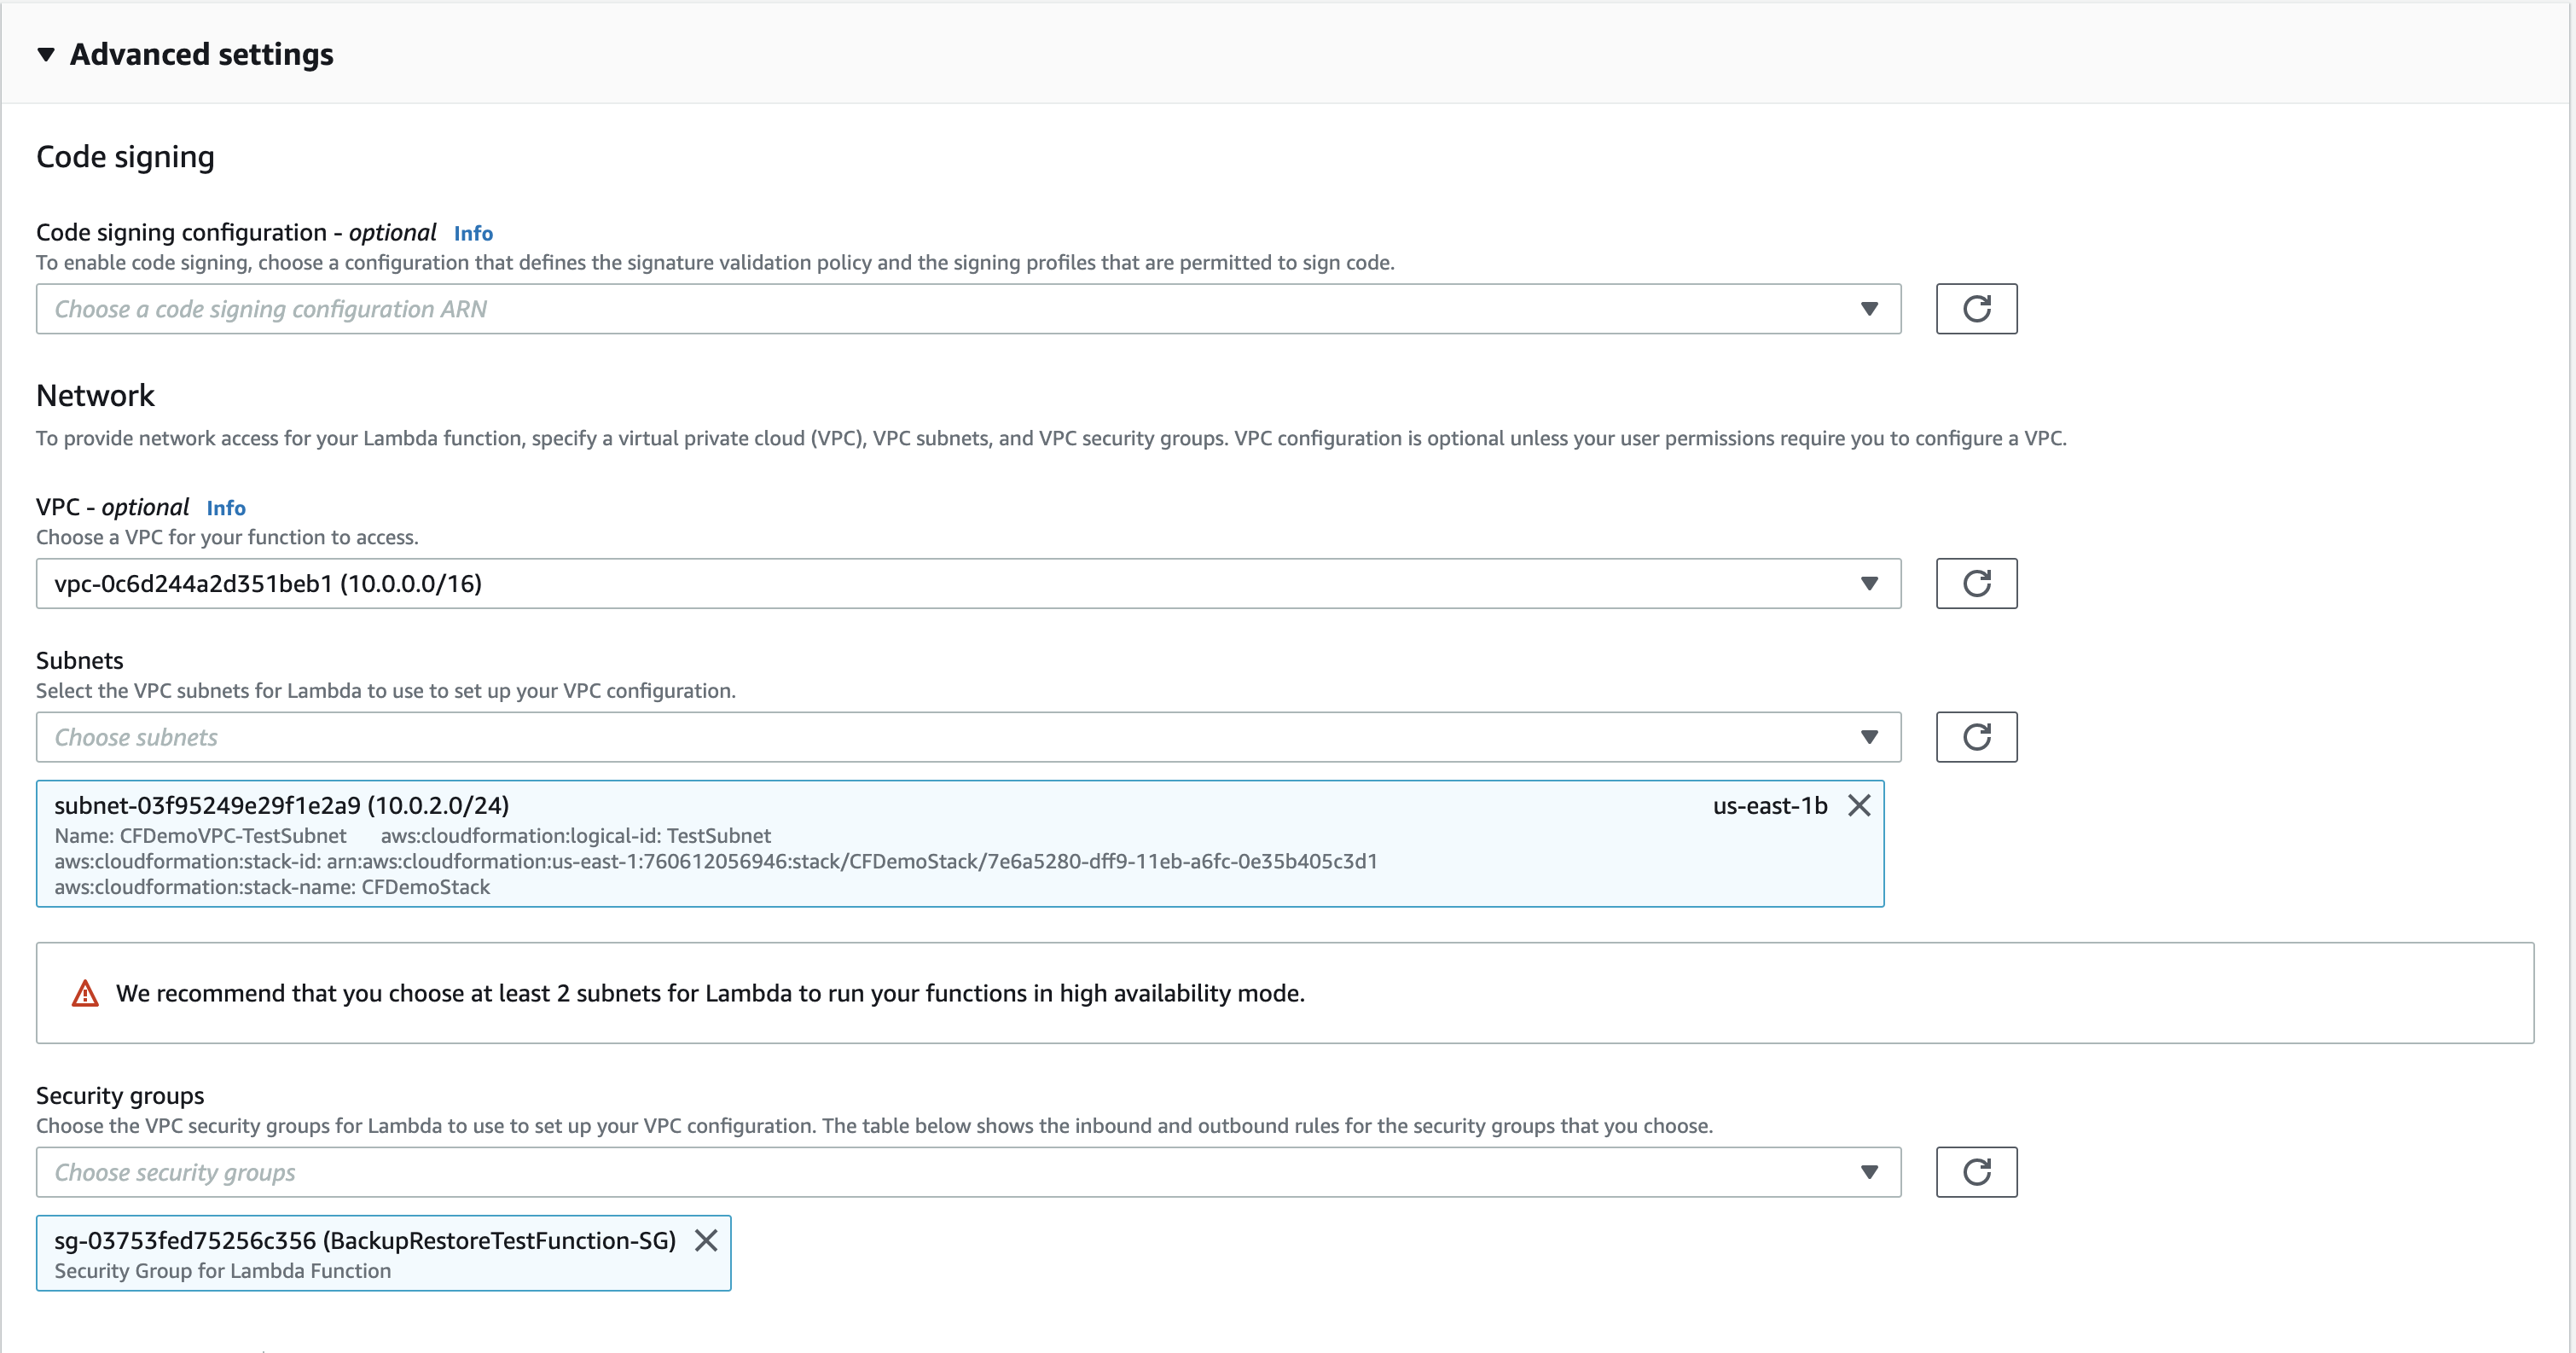
Configure the network settings on the Advanced settings section as follows and click the Create function.
Once you create the function, go inside it and make the following changes under the Configuration tab.
Change the function timeout to 1.30 mins under General configuration.
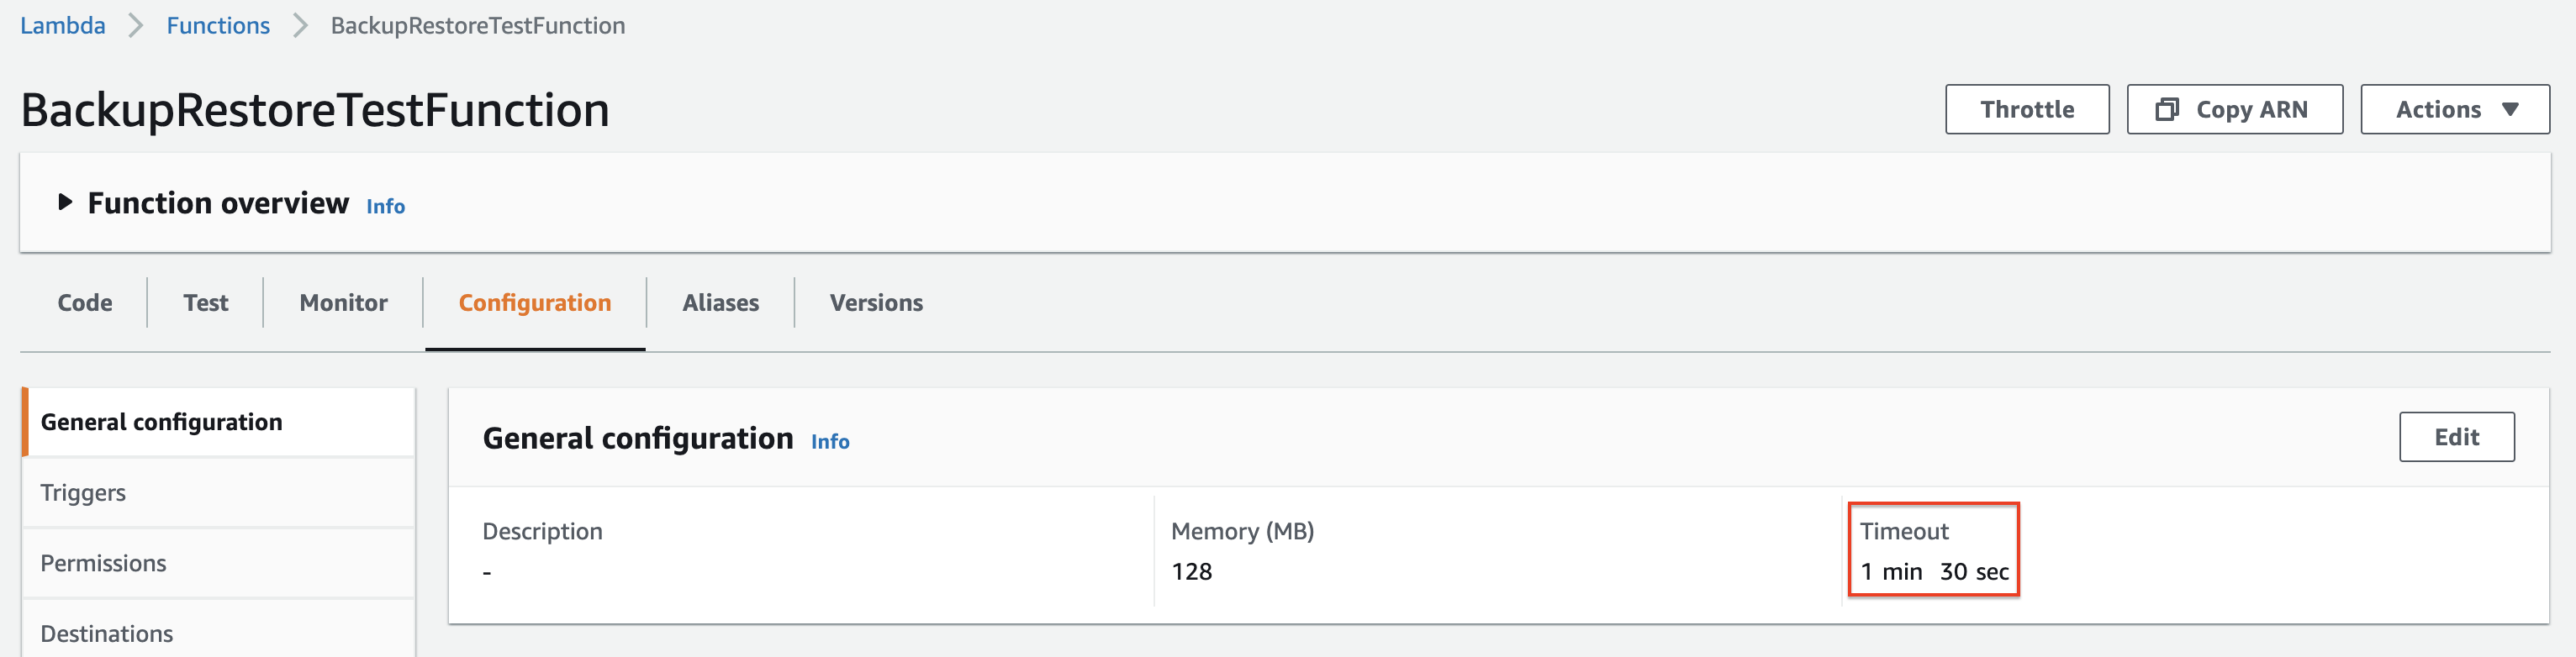
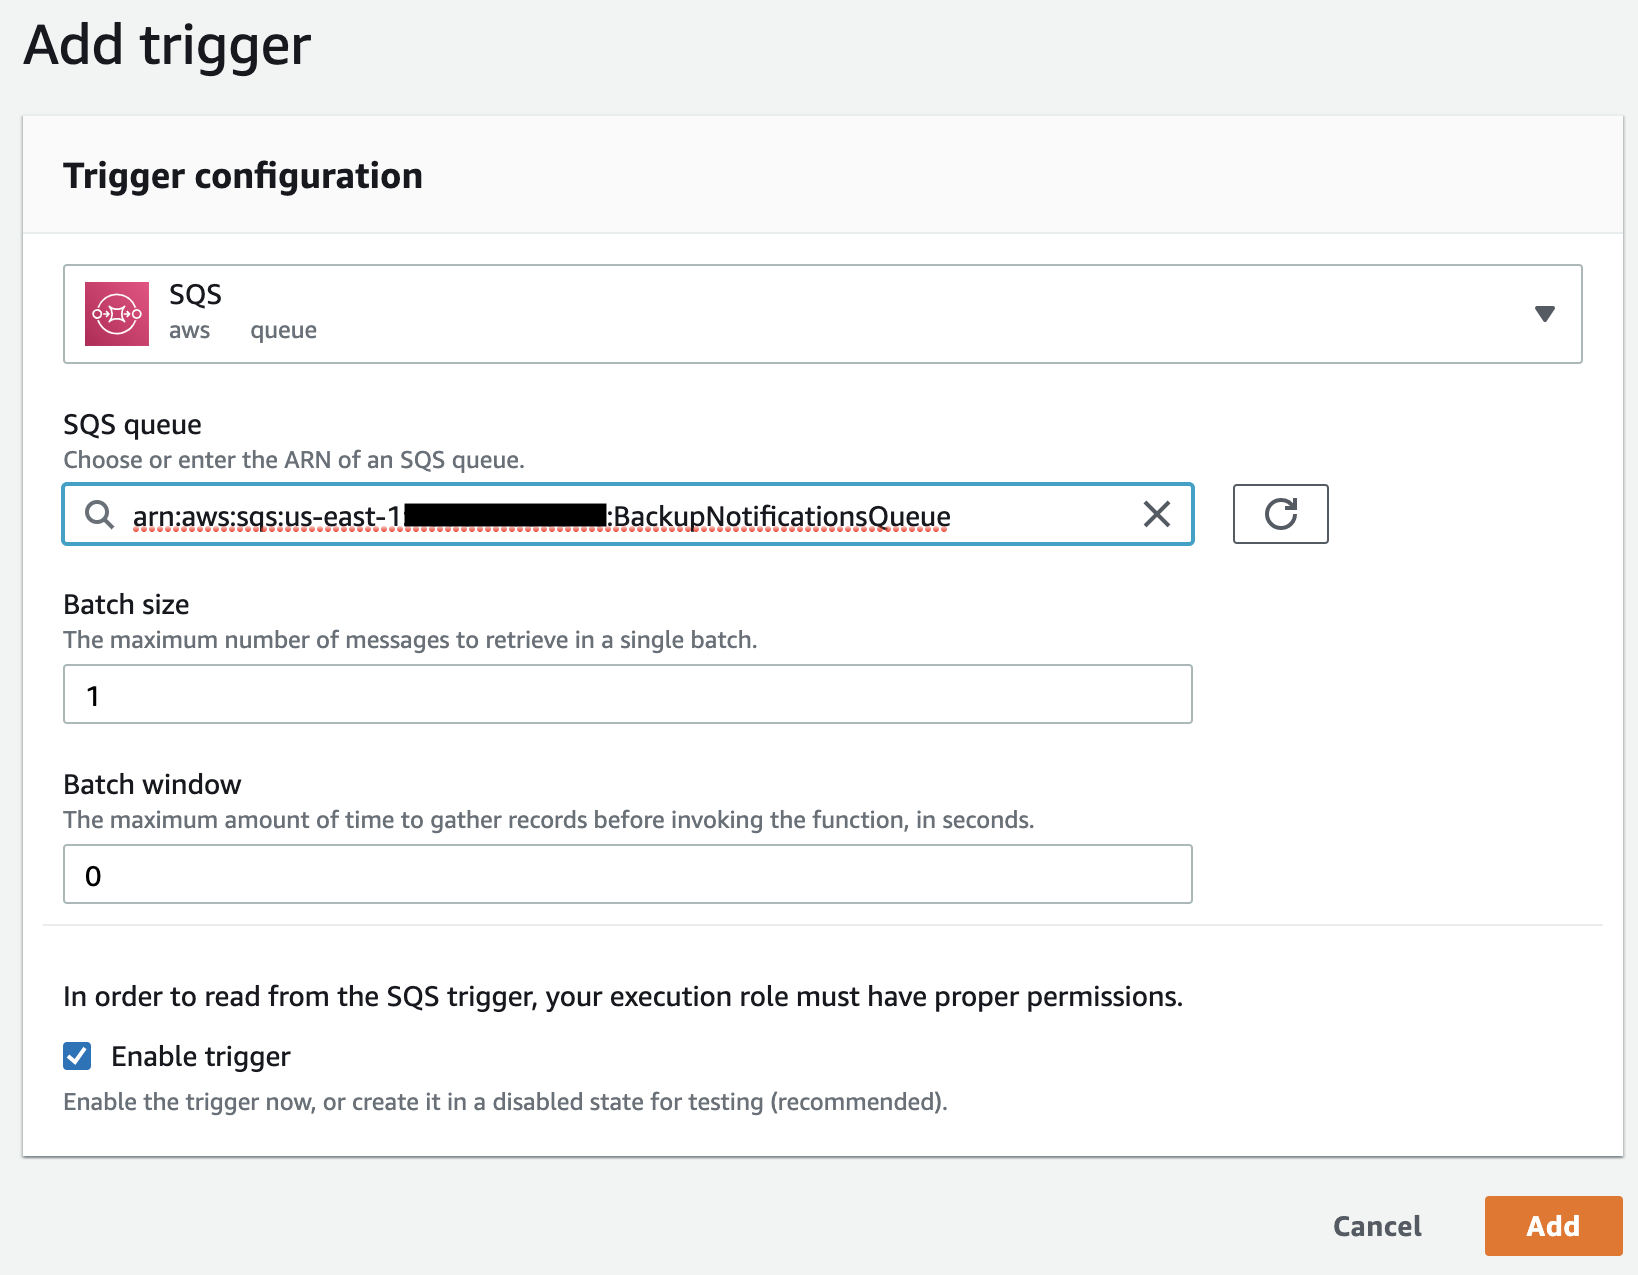
Under the Triggers section, add the previously created SQS with the Batch size set to 1.
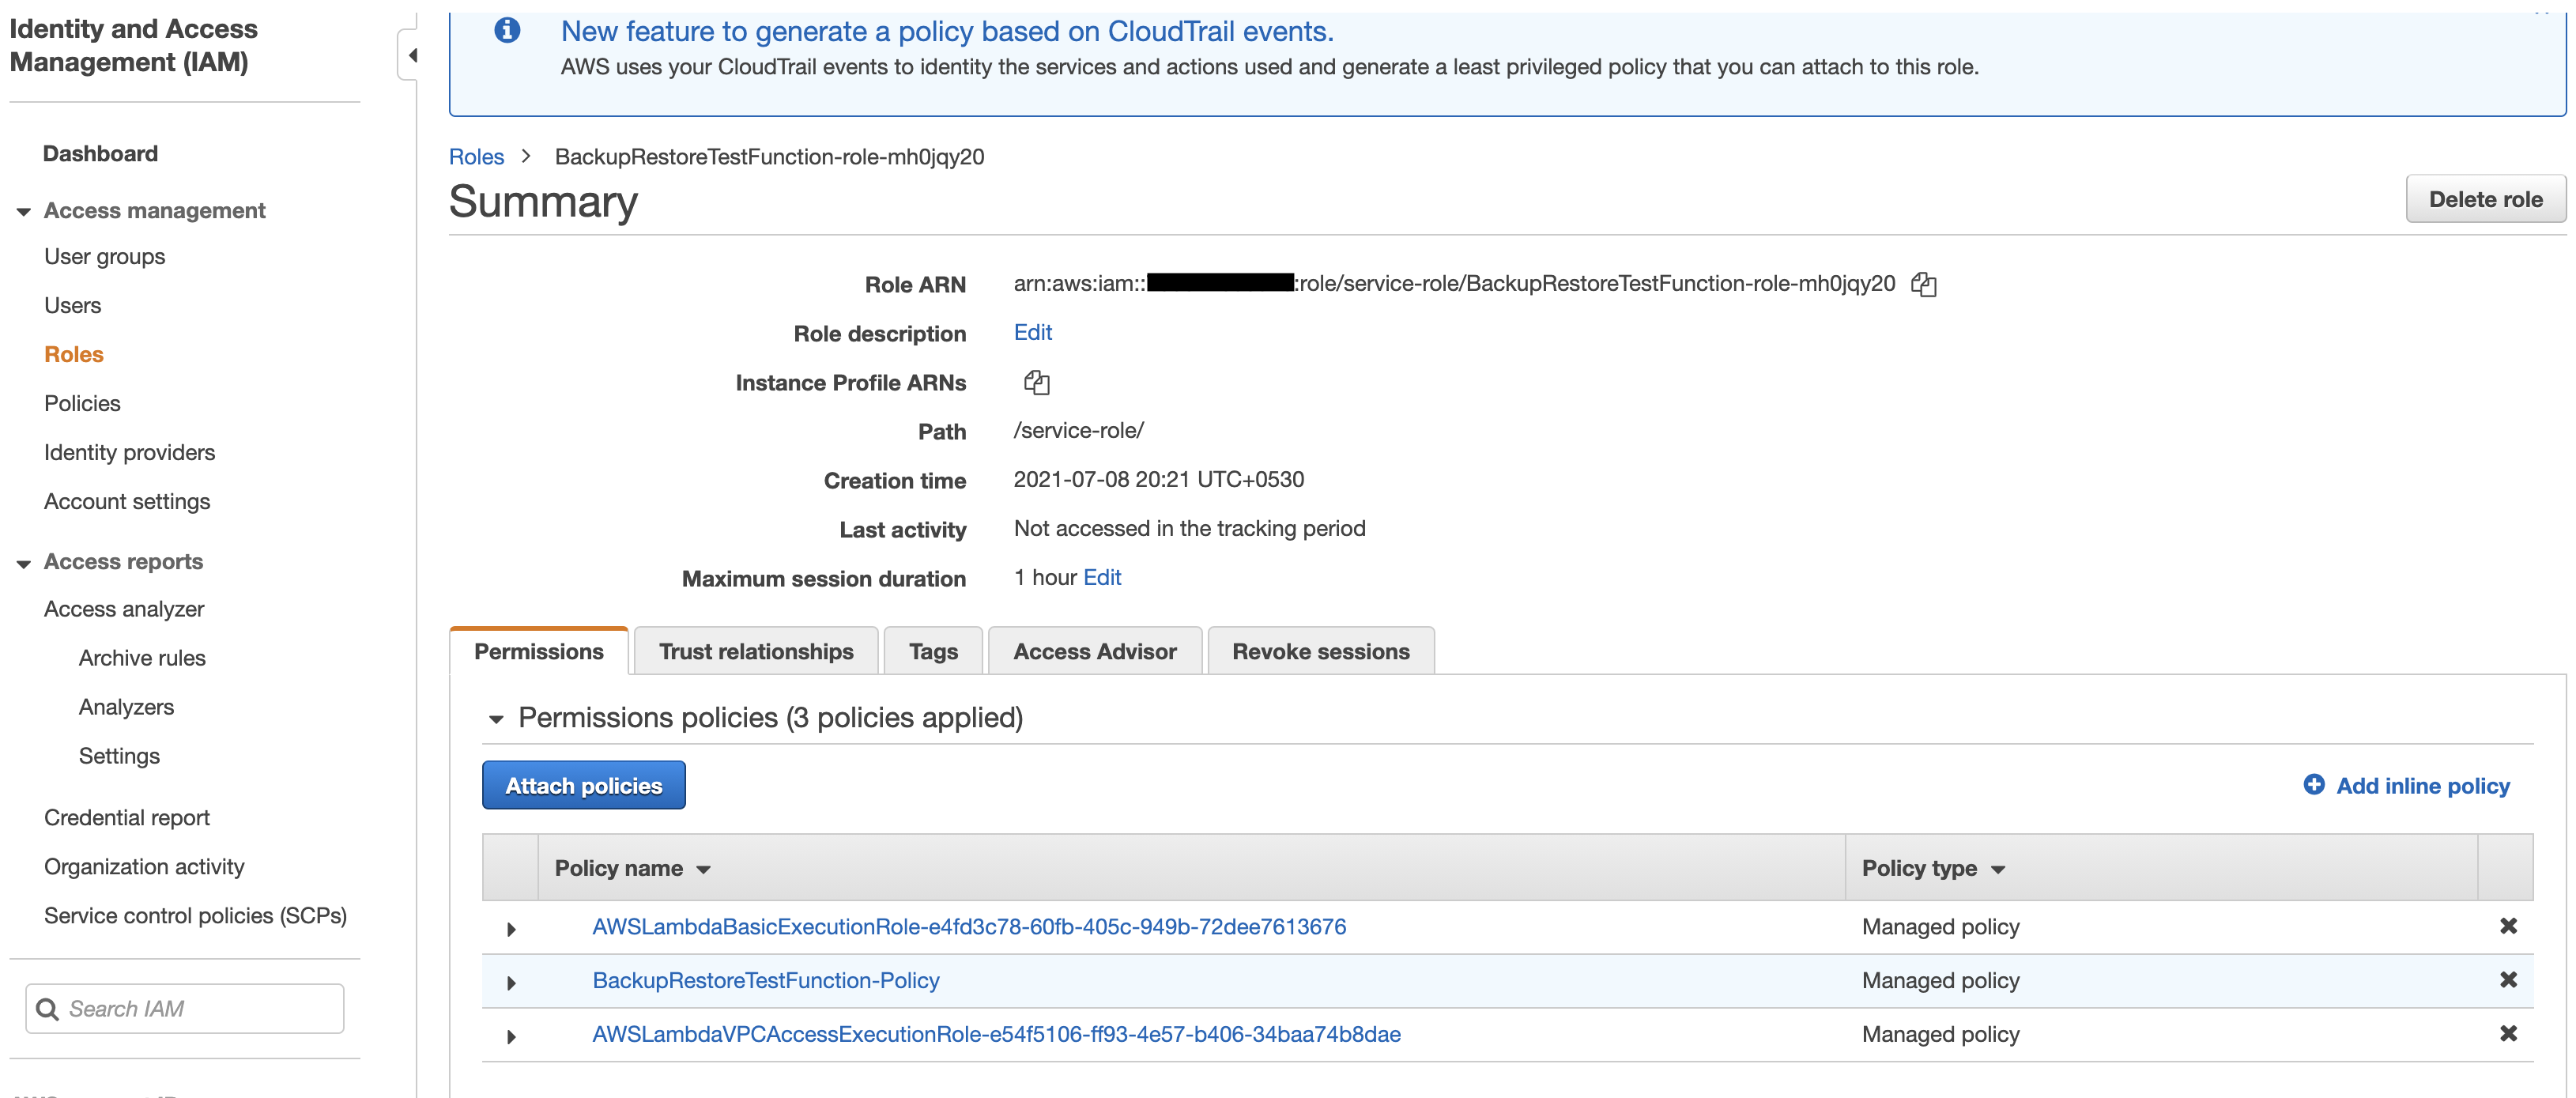
Configure the Lambda function permissions. Click the automatically created lambda role and then attach the previously created policy to it.

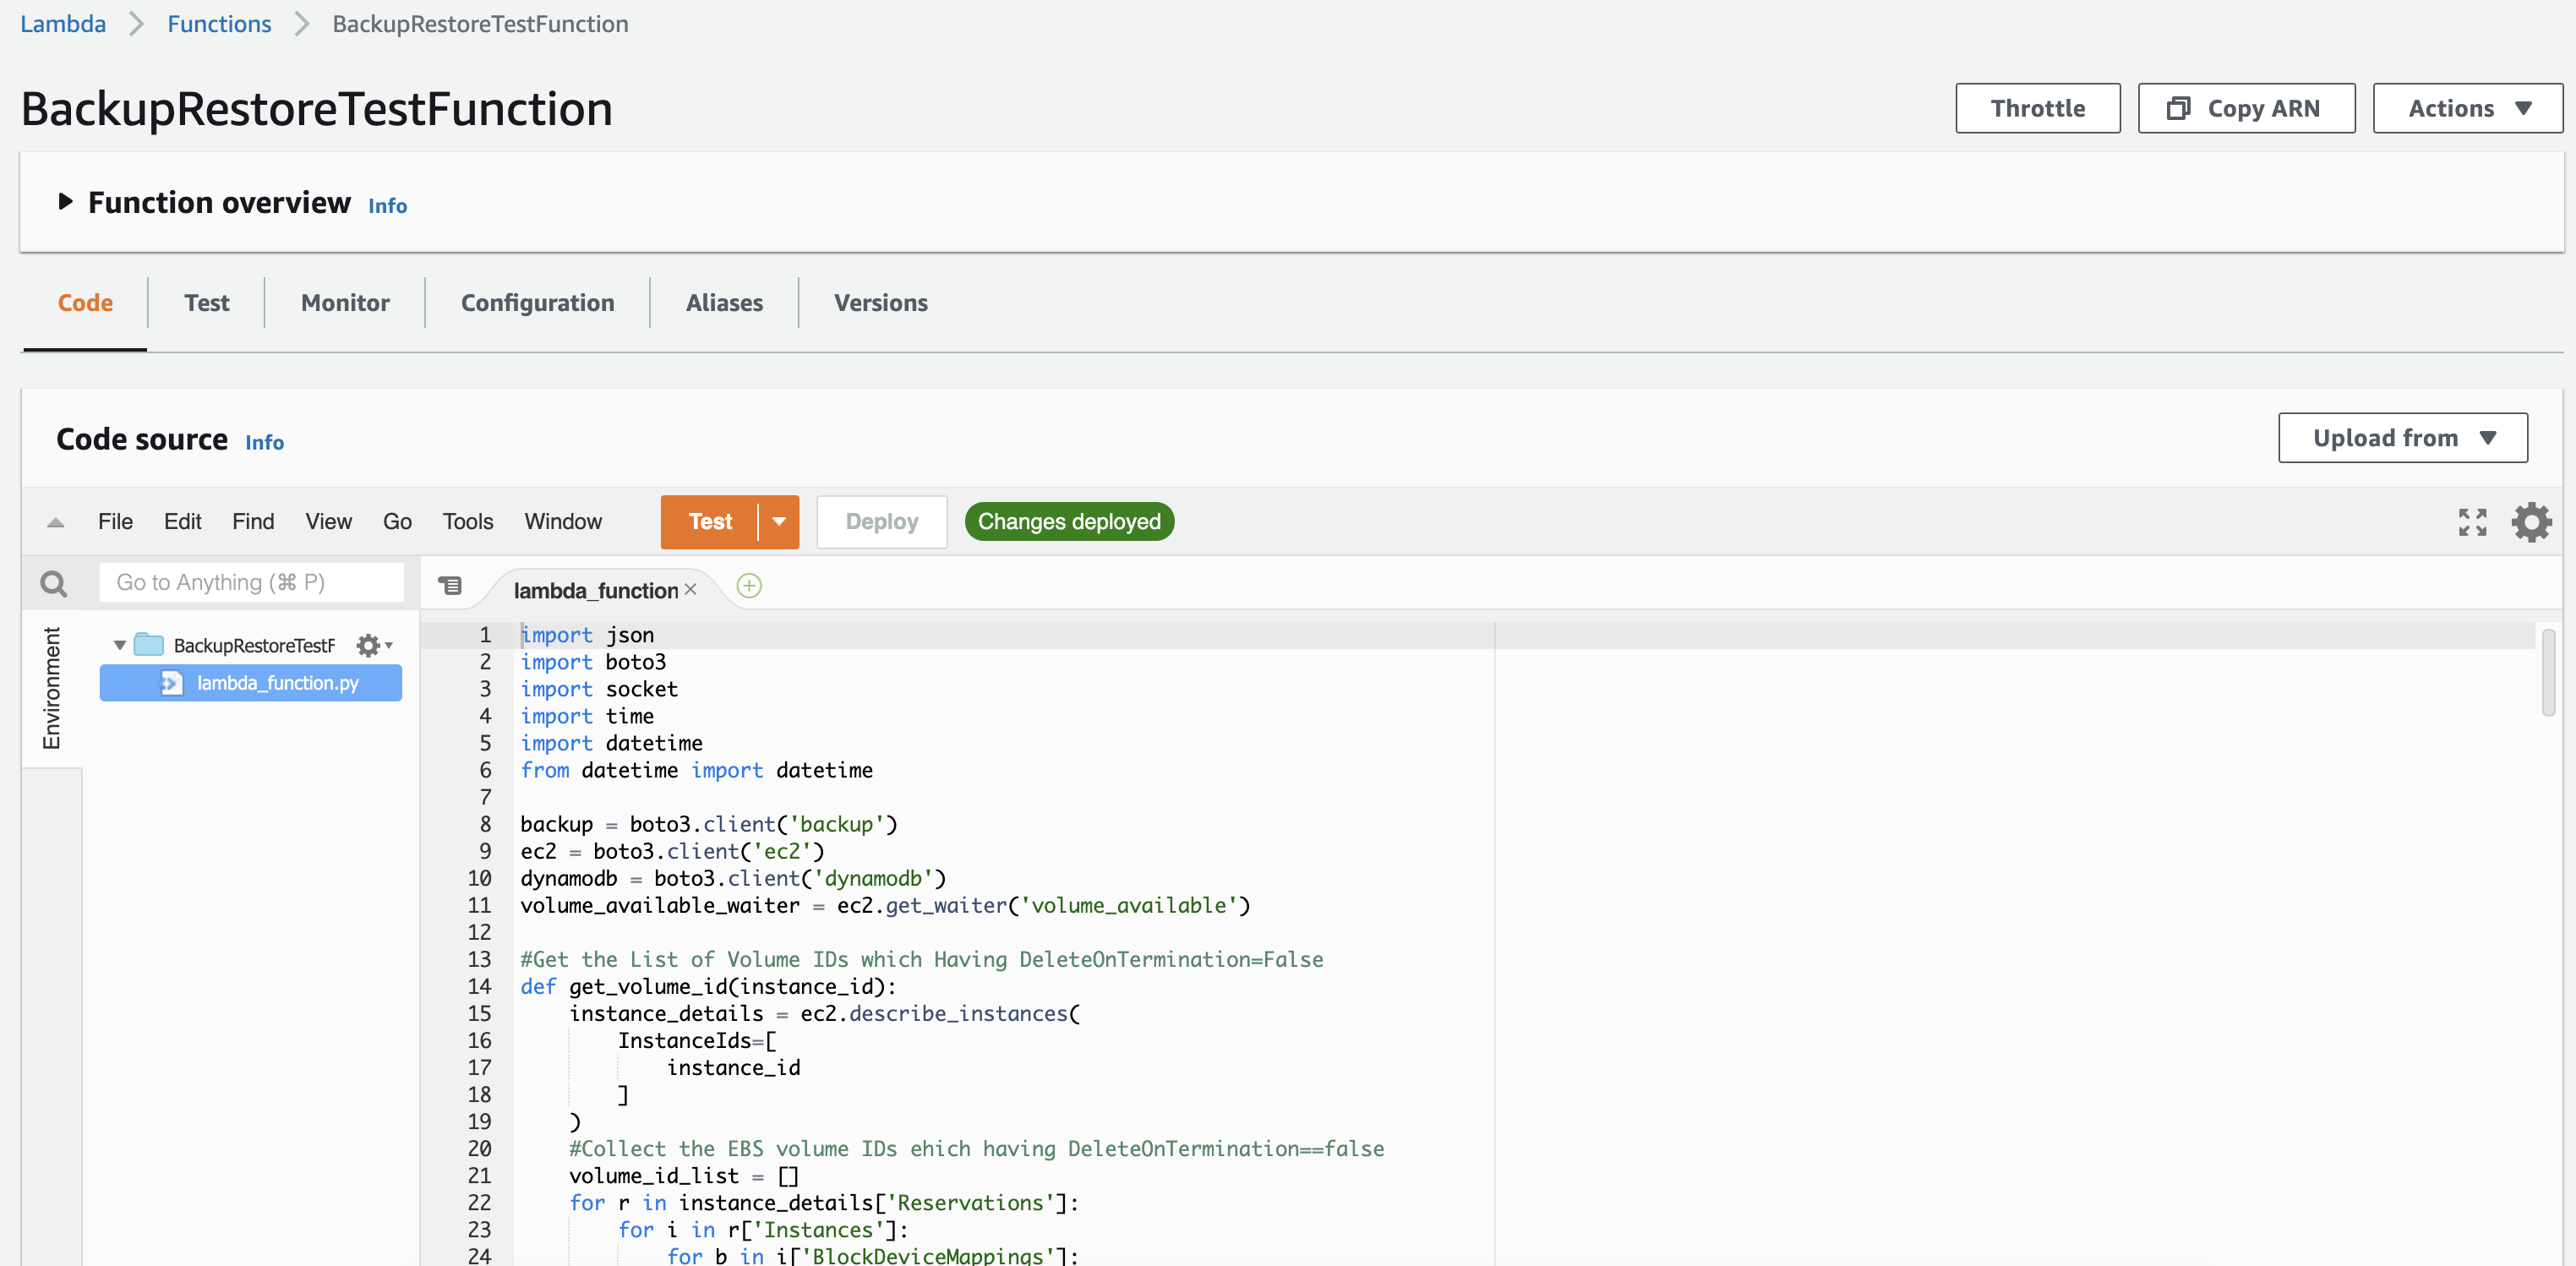
Finally, add the following Python code to the lambda function and Deploy the function.
Get the Python code from GitHub
Testing the Solution
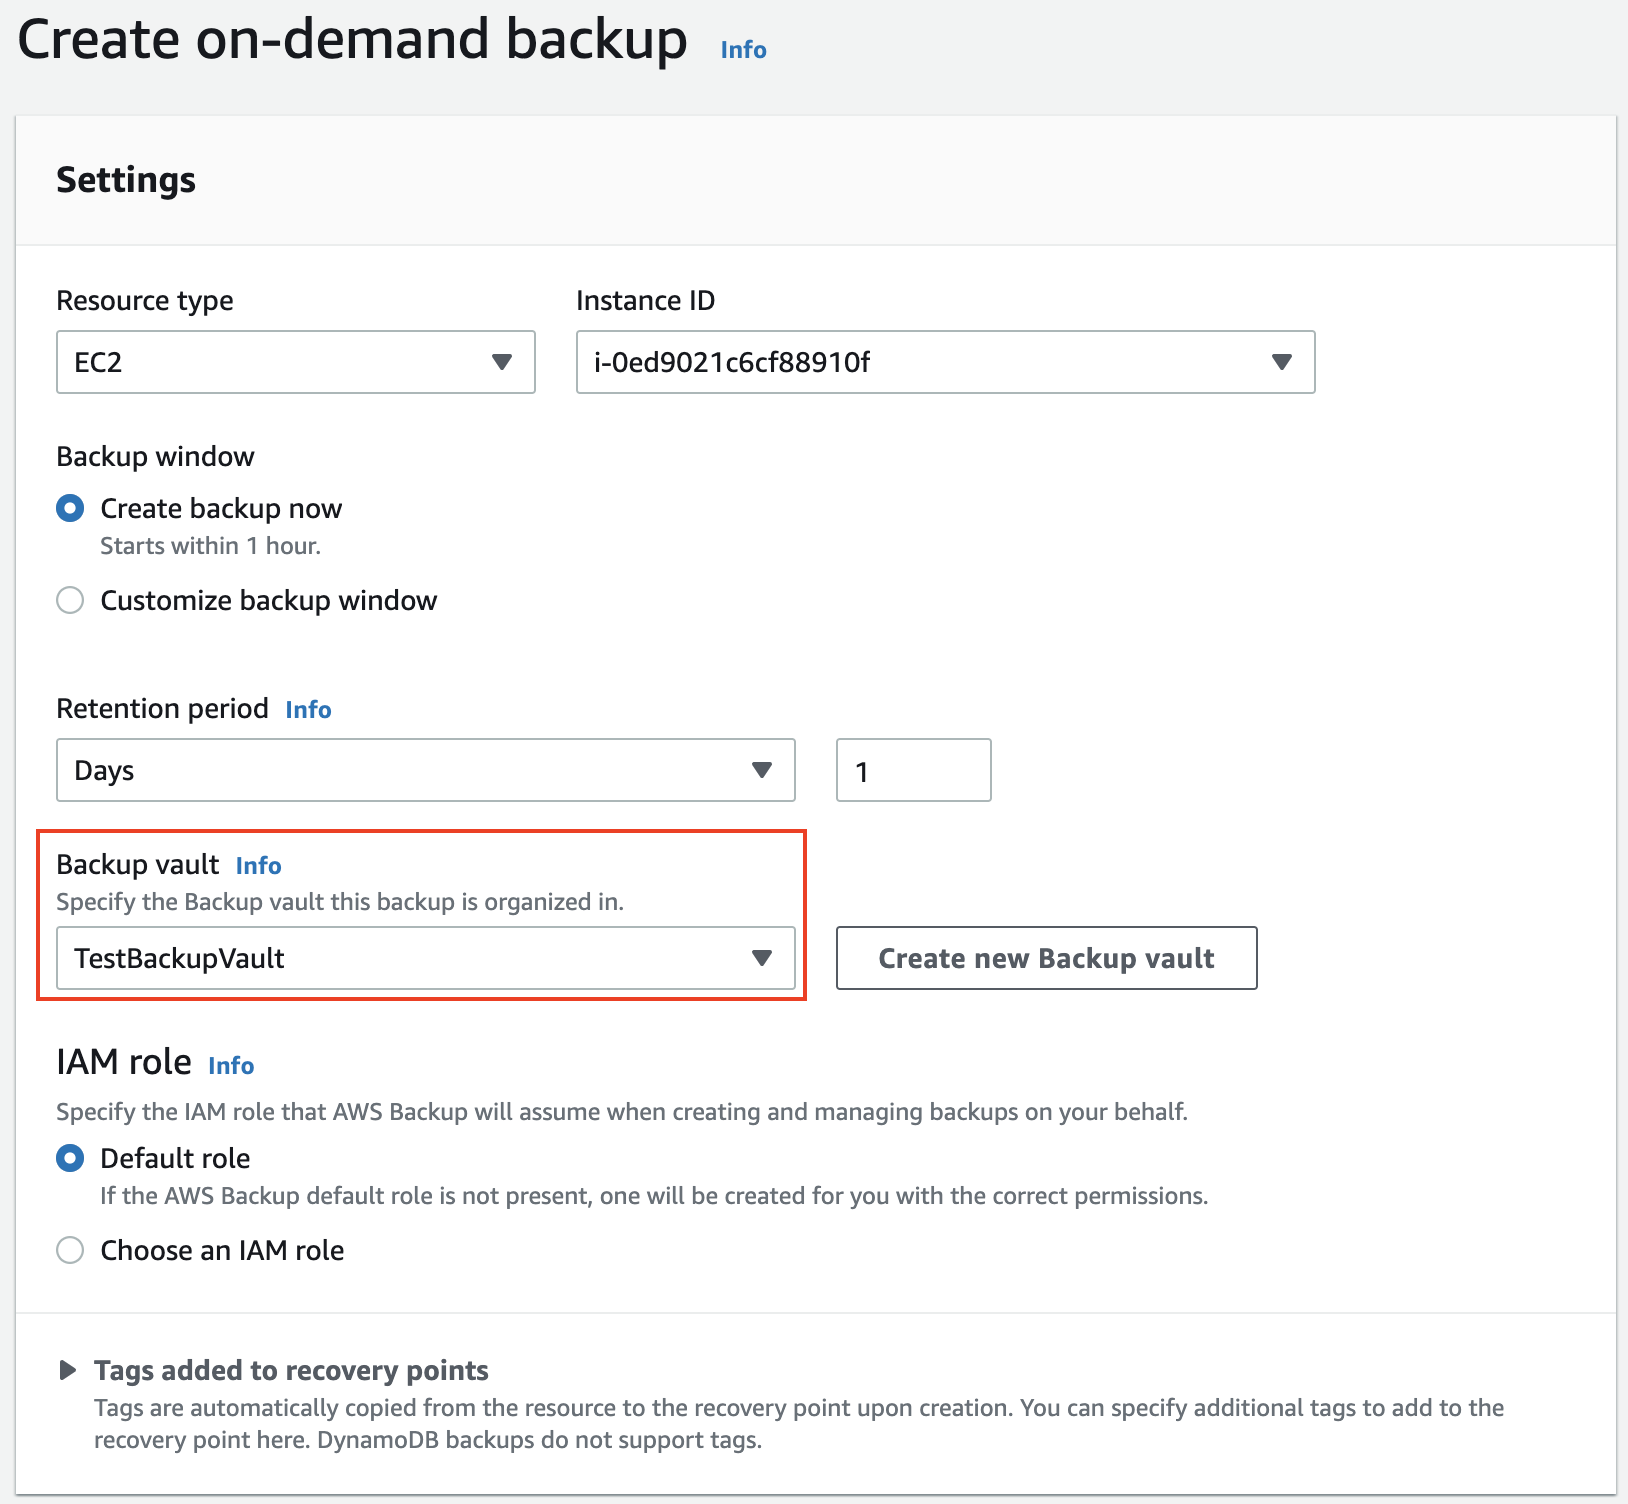
The EC2 instance that was created as a part of the CloudFormation stack is going to be used for the backup and restore process. I will simulate the action performed by AWS backup by creating an on-demand backup to see if the backup is successful.
Navigate to the AWS Backup console and create an on-demand backup for an EC2 instance. Make sure to select the correct backup vault in which you enabled the notifications.
Once the backup is successfully completed, you will get a notification saying that the backup job has been completed and the lambda function will get invoked. From inside the lambda function, it initiates the restore job. Then again the restore process has been completed, and you will get another notification confirming this.
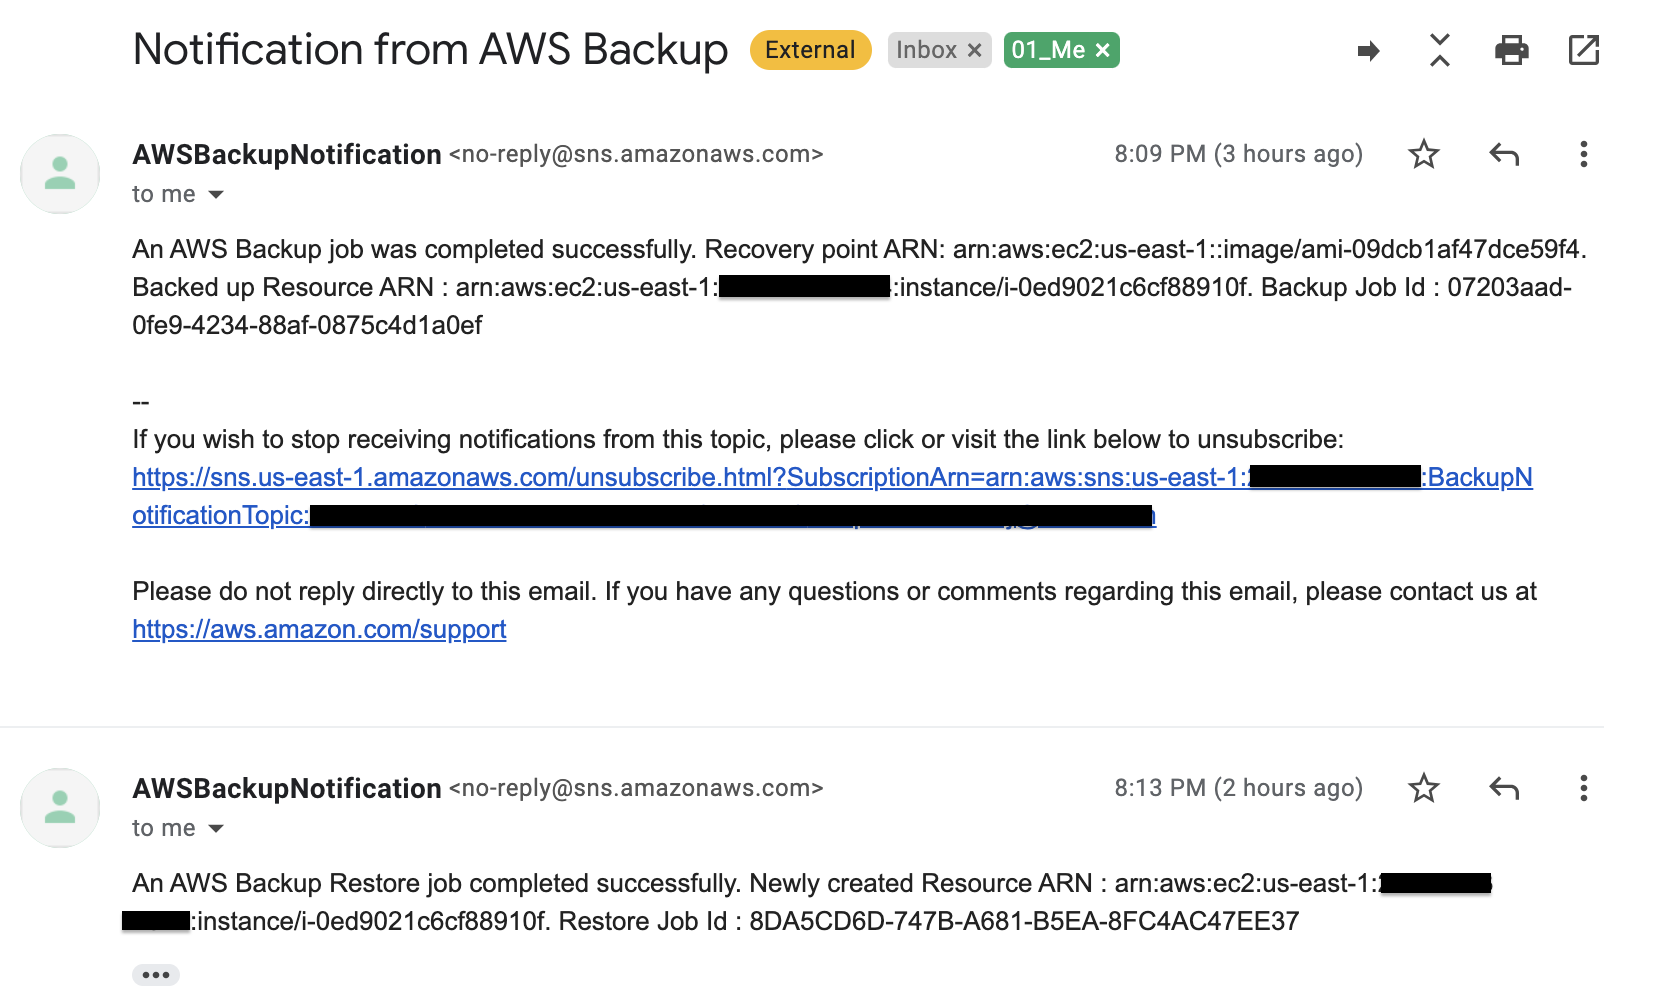
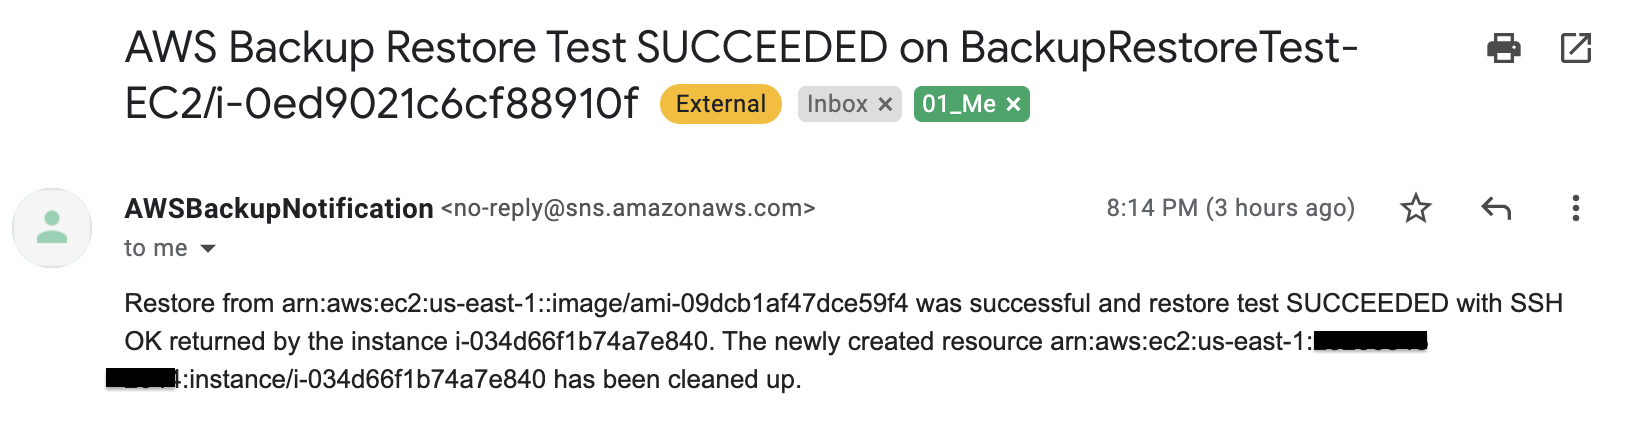
After the restore notification lambda function will get invoked again to test the restored instance and clean up allocated resources for the restore test. Finally, send the status of the restore test.
1 comment
I have tried using this tutorial to set up the validation of my backups, but the Lambda function fails to work. I never see a clean invocation of the function.
I’m getting these errors:
2022-09-21T14:49:28.116-04:00 START RequestId: a6dad2d1-0631-5598-91a5-897458ec9b0a Version: $LATEST
2022-09-21T14:49:28.118-04:00 Something has failed. Please review the job in the AWS Backup console.
2022-09-21T14:49:28.120-04:00 END RequestId: a6dad2d1-0631-5598-91a5-897458ec9b0a
2022-09-21T14:49:28.120-04:00 REPORT RequestId: a6dad2d1-0631-5598-91a5-897458ec9b0a Duration: 3.55 ms Billed Duration: 4 ms Memory Size: 128 MB Max Memory Used: 79 MB Init Duration: 438.47 ms
2022-09-21T14:49:31.911-04:00 START RequestId: 975b5817-907c-5d7a-a723-03b2cea47275 Version: $LATEST
2022-09-21T14:49:31.937-04:00 Something has failed. Please review the job in the AWS Backup console.
2022-09-21T14:49:31.938-04:00 END RequestId: 975b5817-907c-5d7a-a723-03b2cea47275
2022-09-21T14:49:31.938-04:00 REPORT RequestId: 975b5817-907c-5d7a-a723-03b2cea47275 Duration: 1.50 ms Billed Duration: 2 ms Memory Size: 128 MB Max Memory Used: 79 MB
2022-09-21T14:49:32.121-04:00 START RequestId: ac799920-bbb7-596e-b6fb-c285e5622406 Version: $LATEST
2022-09-21T14:49:32.123-04:00 Something has failed. Please review the job in the AWS Backup console.
2022-09-21T14:49:32.124-04:00 END RequestId: ac799920-bbb7-596e-b6fb-c285e5622406
2022-09-21T14:49:32.124-04:00 REPORT RequestId: ac799920-bbb7-596e-b6fb-c285e5622406 Duration: 1.88 ms Billed Duration: 2 ms Memory Size: 128 MB Max Memory Used: 79 MB
2022-09-21T14:49:32.183-04:00 START RequestId: 023f980a-cb07-5cec-b7e6-c3af95edbbdd Version: $LATEST