
Sometimes you might observe some web applications are not properly handle errors when the request to the origin is failed or any unknown requests coming to the origin servers, returns default response pages with basic formatting and generic messaging that can be confusing for users. One of the reasons for that is there is no feature to publish a custom page built-in with web servers or in applications. Don’t worry if you are still struggling with such cases which do not support any custom error pages, you can achieve it by using Cloudflare.
As you know Cloudflare is a global tool that makes everything you connect to the Internet secure and fast. With tons of features in Cloudflare, they also provided to handle a wide range of error codes by using Cloudflare Custom Pages. These custom pages help you to provide an improved user experience to the end users.
So, if you are using Cloudflare plan with Pro or above, you can use the Custom Pages feature straightforwardly. But unfortunately, as per their documentation, that can be published only for the Account Level (apply to every domain associated with your account) and Domain Level (apply to only one domain associated with your account).
So, in this article, I will show you how to publish custom error pages for a specific subdomain using Cloudflare Workers and Cloudflare Pages.
Prepare Custom Pages
As an initial step, you need to prepare a custom page to publish based on the HTTP status response. You can host the custom page in any location, but here I’m going to host it inside the Cloudflare pages.
In the Cloudflare Pages, there are 3 ways to host your page.
- Integrate the Git repository to Cloudflare Pages and do the deployment.
- Direct Upload prebuilt static HTML files to Cloudflare Pages.
- Using Wrangler from the command line.
Since I already have the HTML files of my custom page, I will choose the 2nd option. So you can follow the below steps to host it on Cloudflare Pages.
Go to the Cloudflare Dashboard -> Pages -> Create Project
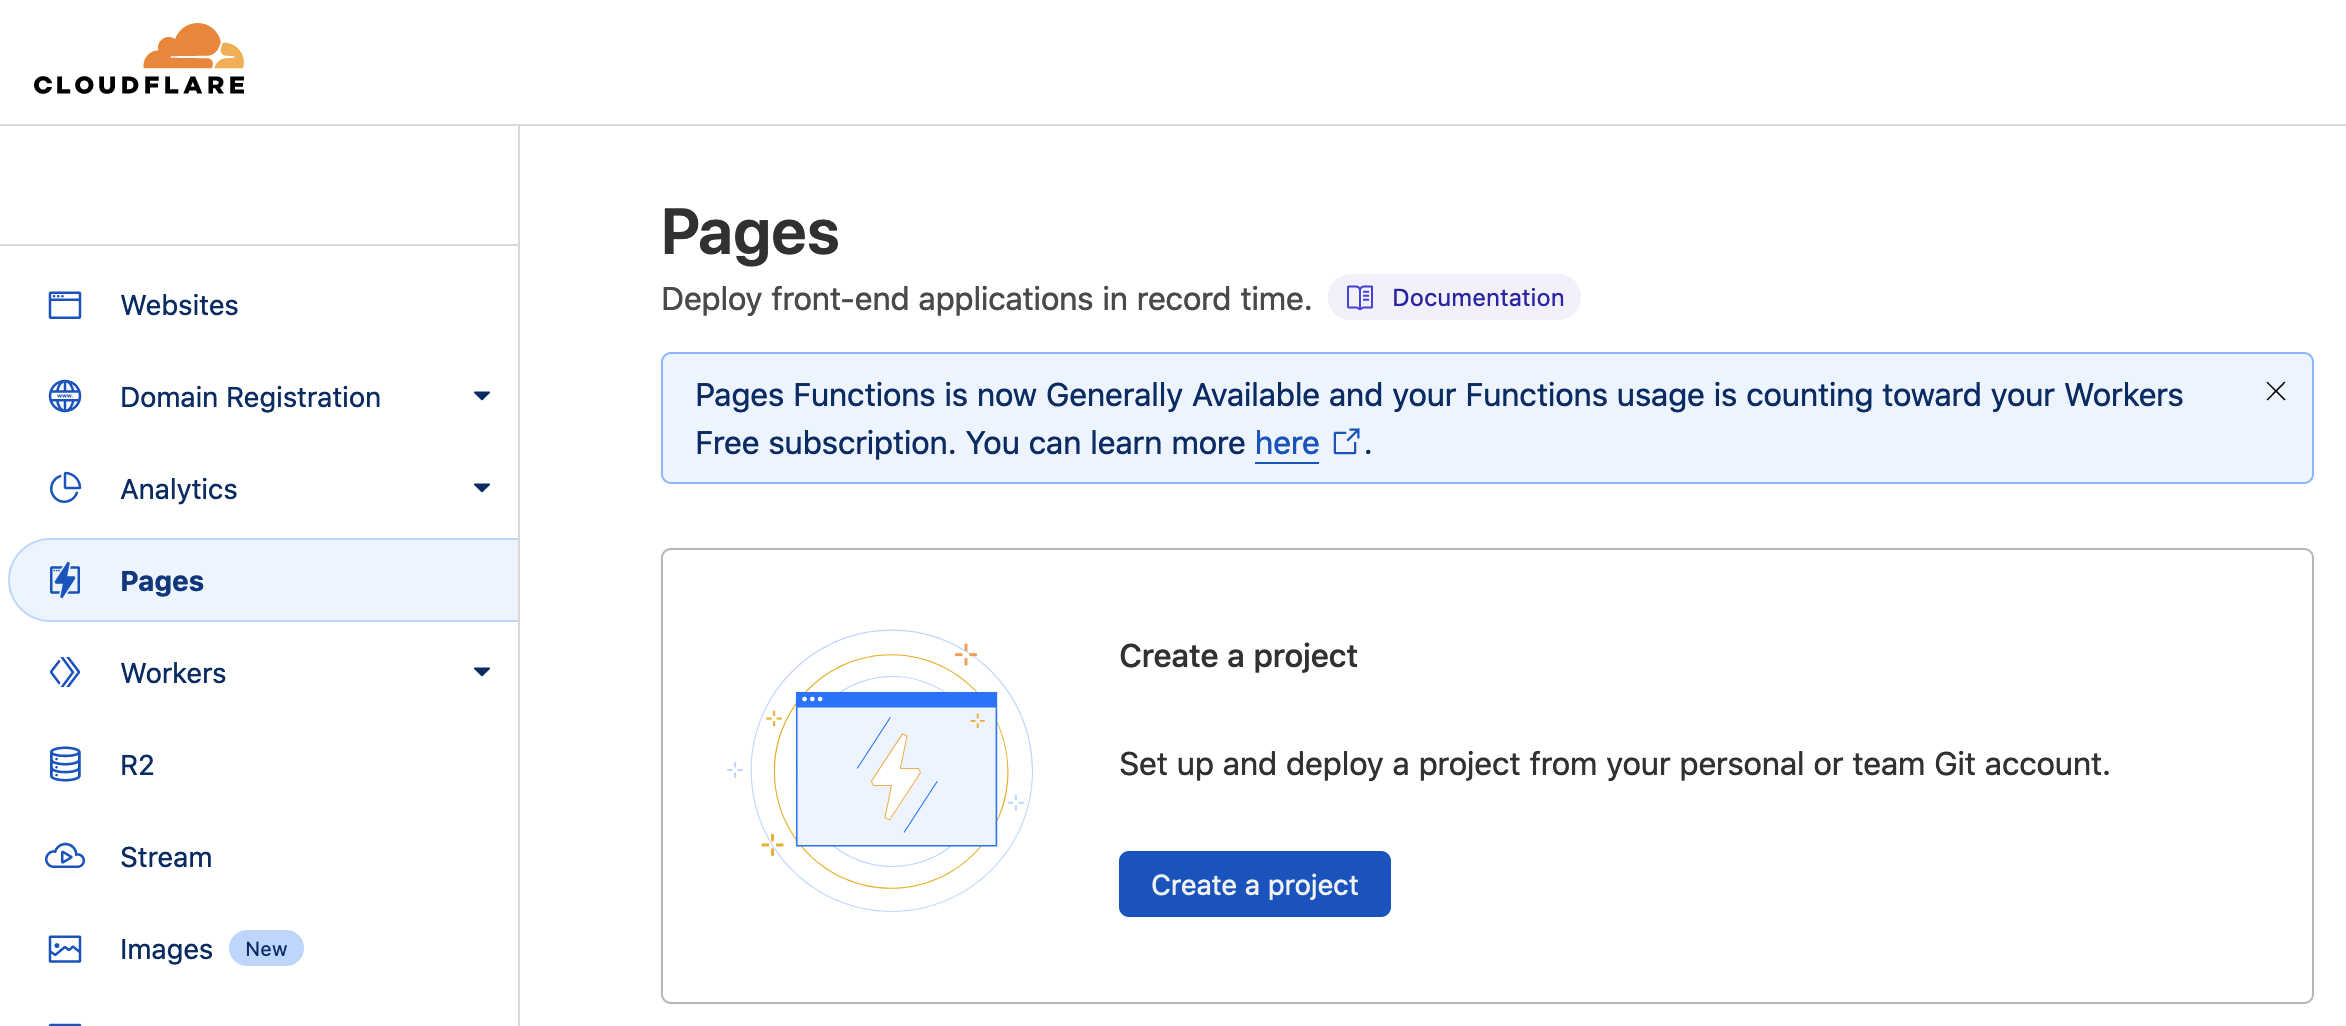
Then select the Direct upload option to upload your custom page.

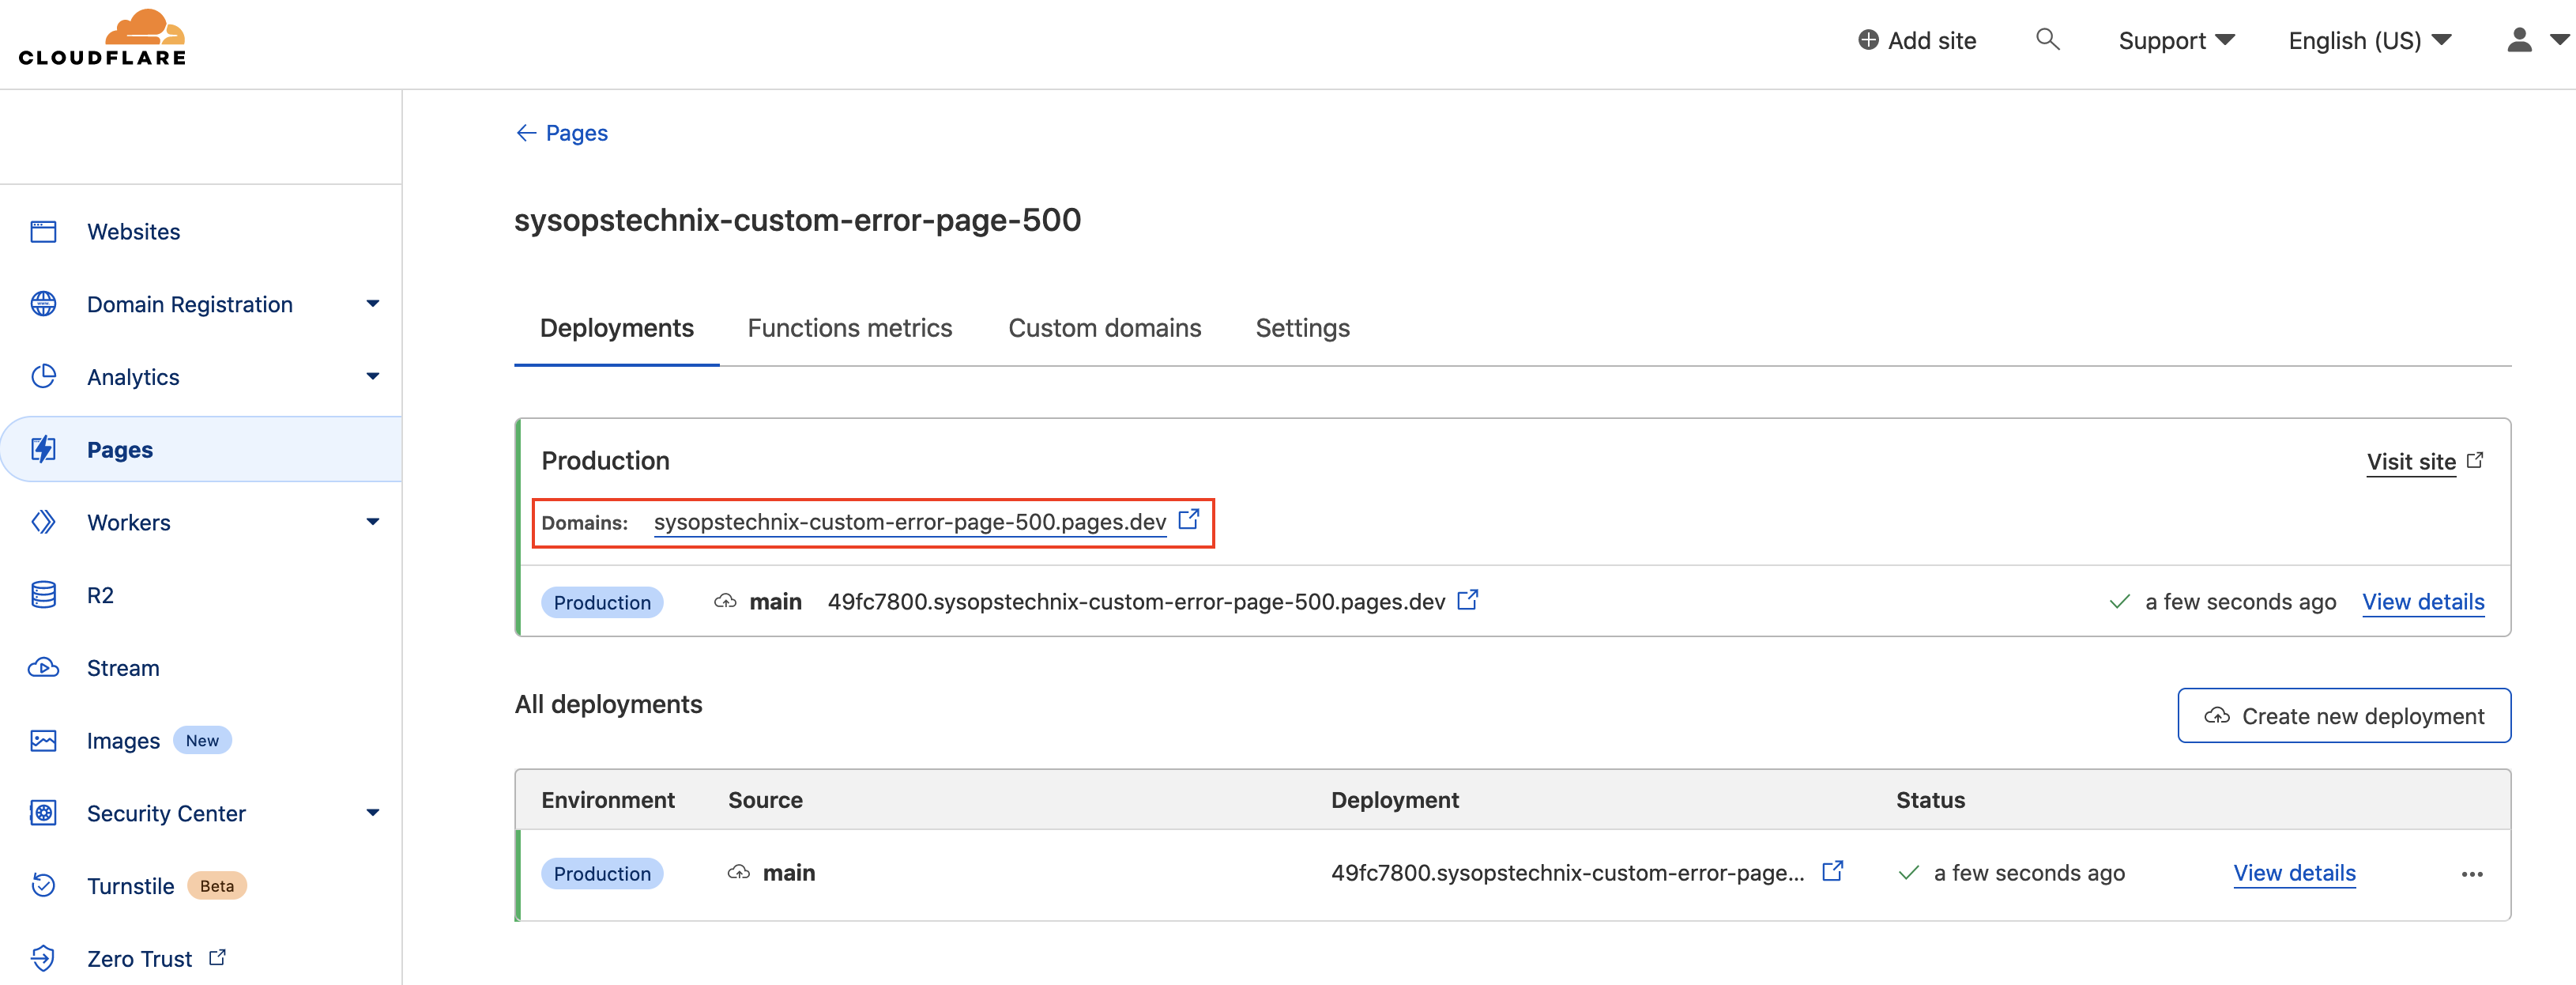
Give a project name and upload your assets and deploy the site.
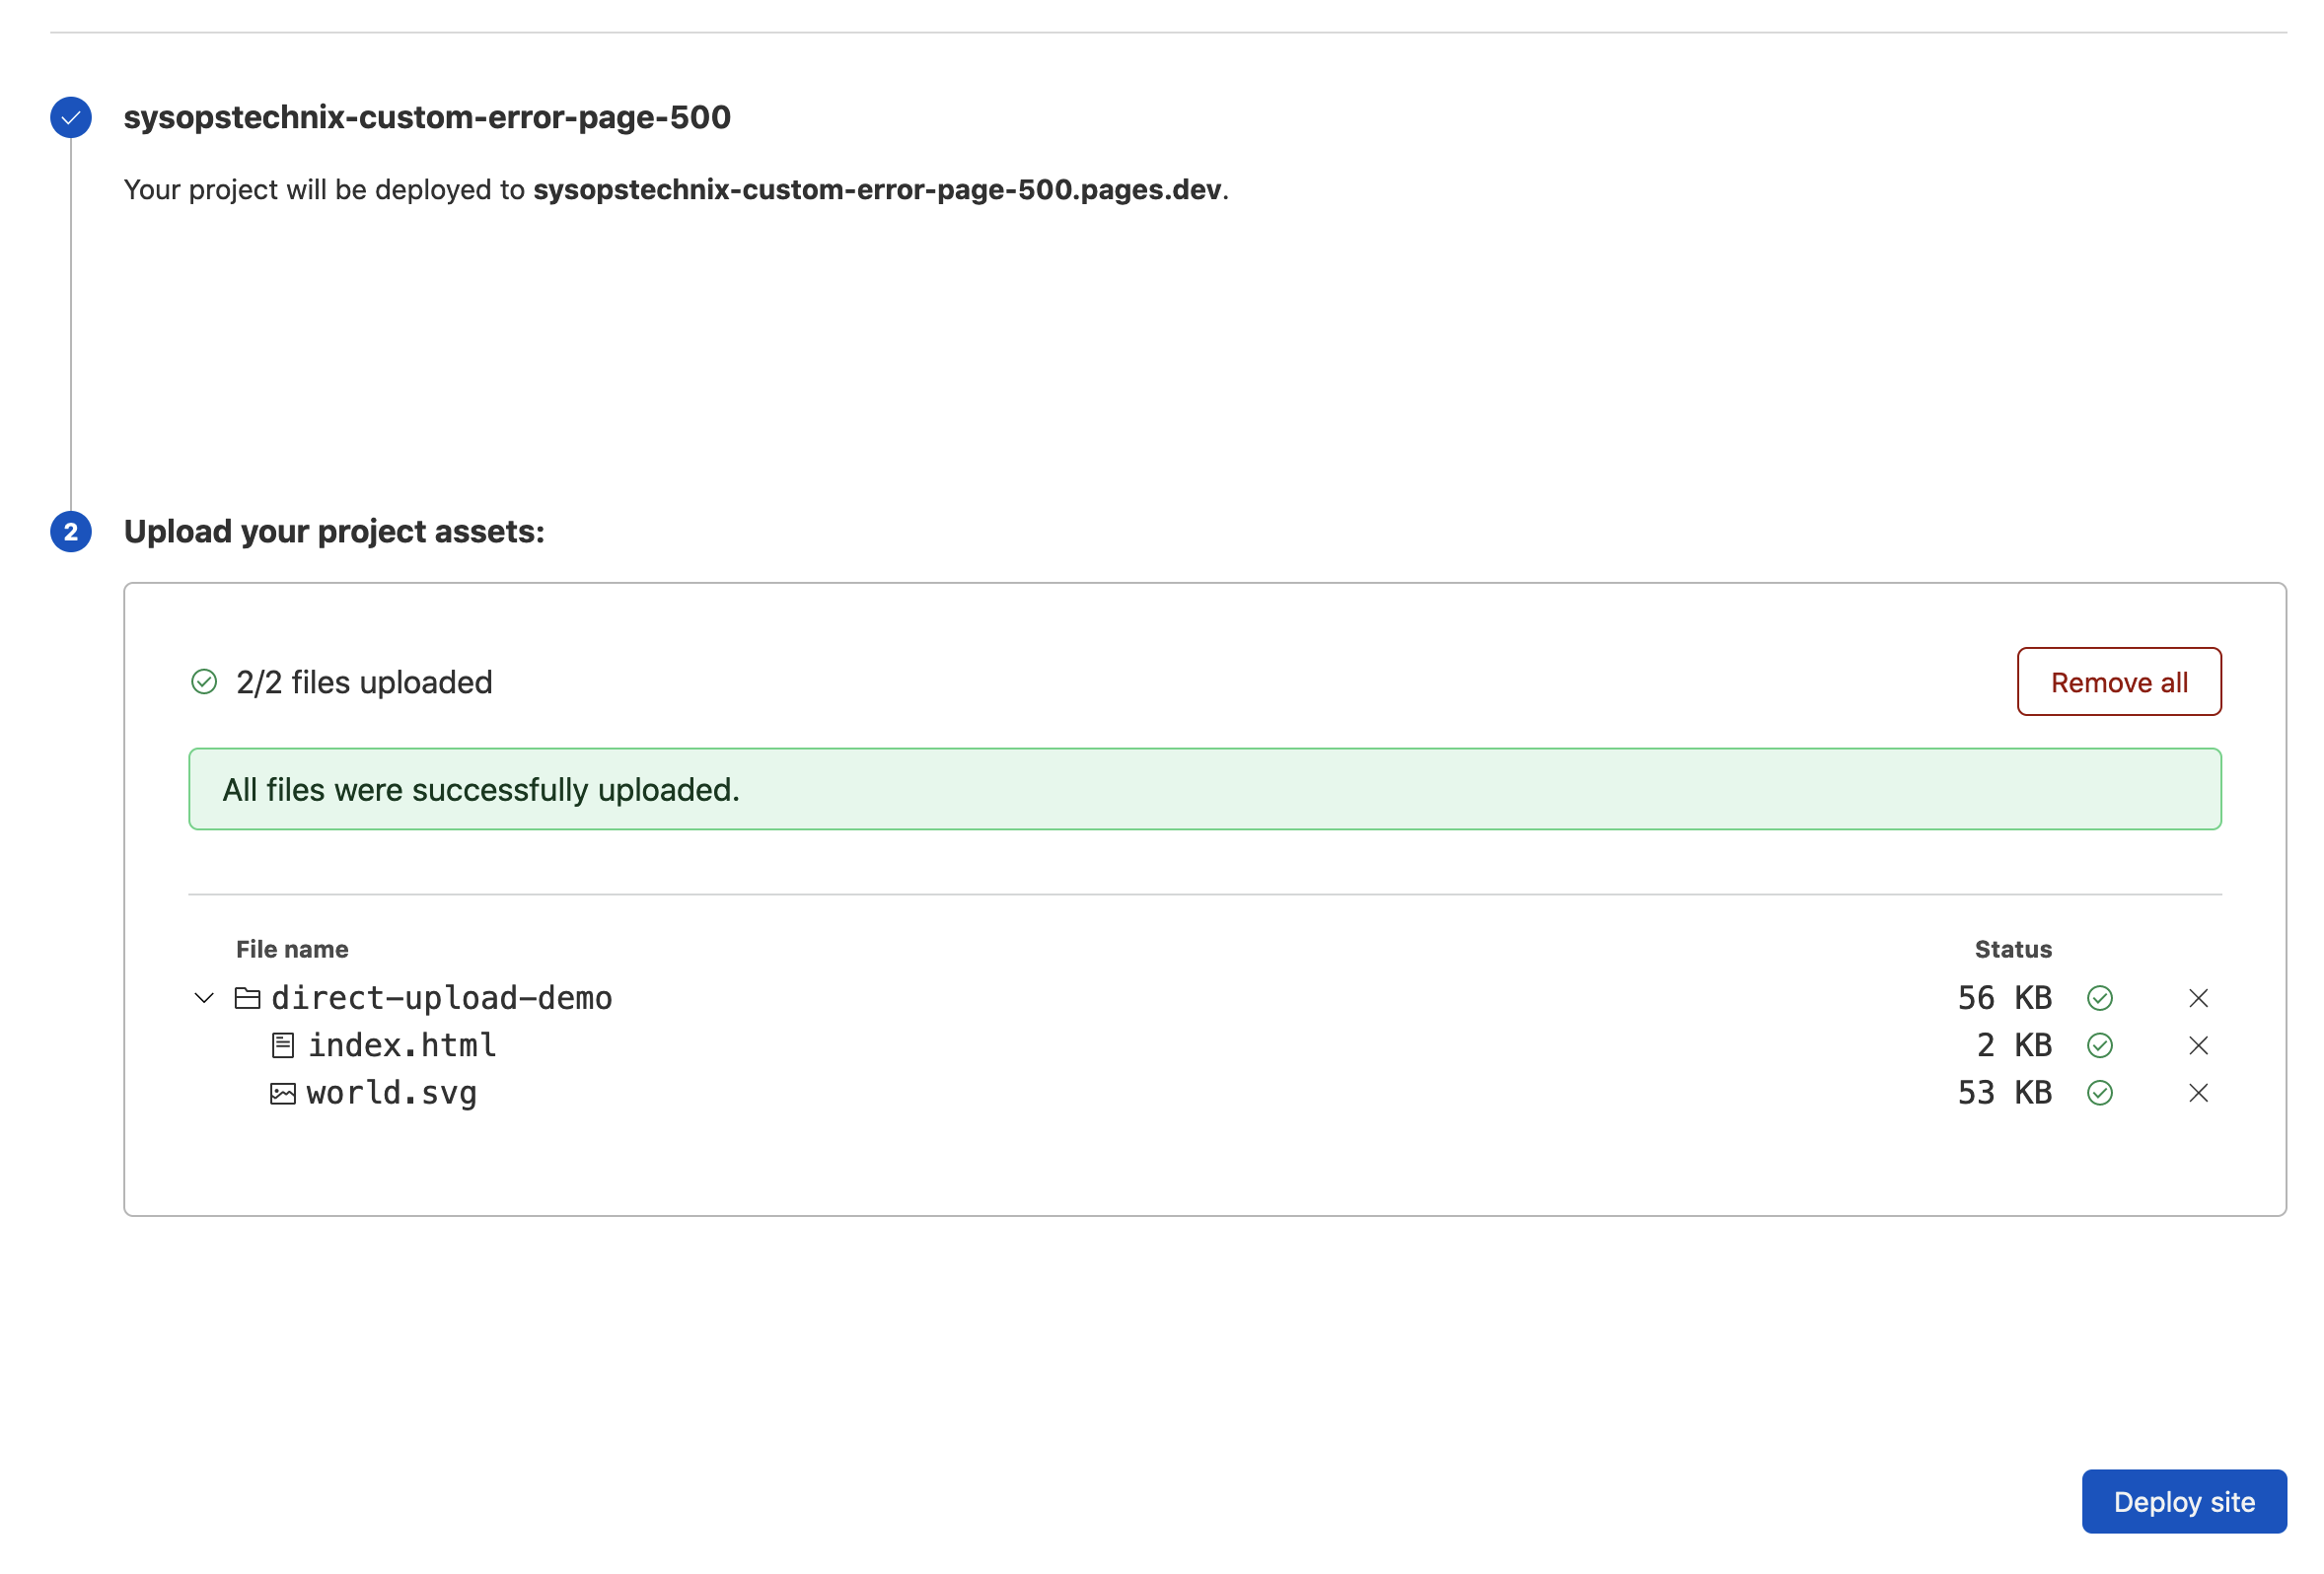
Once you have successfully deployed the site you can use the following mentioned URL to test if your site is accessible.
Let’s Start to Write Cloudflare Worker
As a prerequisite, you should have Cloudflare already set up in front of your web application.
Brief About Cloudflare Workers
In a nutshell, Cloudflare workers allow you to deploy and run custom codes on Cloudflare’s edge to apply processing to requests and responses to your website or web application. If you need to know more about Cloudflare Workers then you can read the Cloudflare product page.
Whenever a request is made to a worker domain (Cloudflare managed domain), Cloudflare passes the request to to the worker’s handler (depending on how routes are configured). From there, the worker can extract the HTTP request and do some tweaks and finally compute a response as per the Cloudflare worker script.
Generating a Cloudflare Workers Project
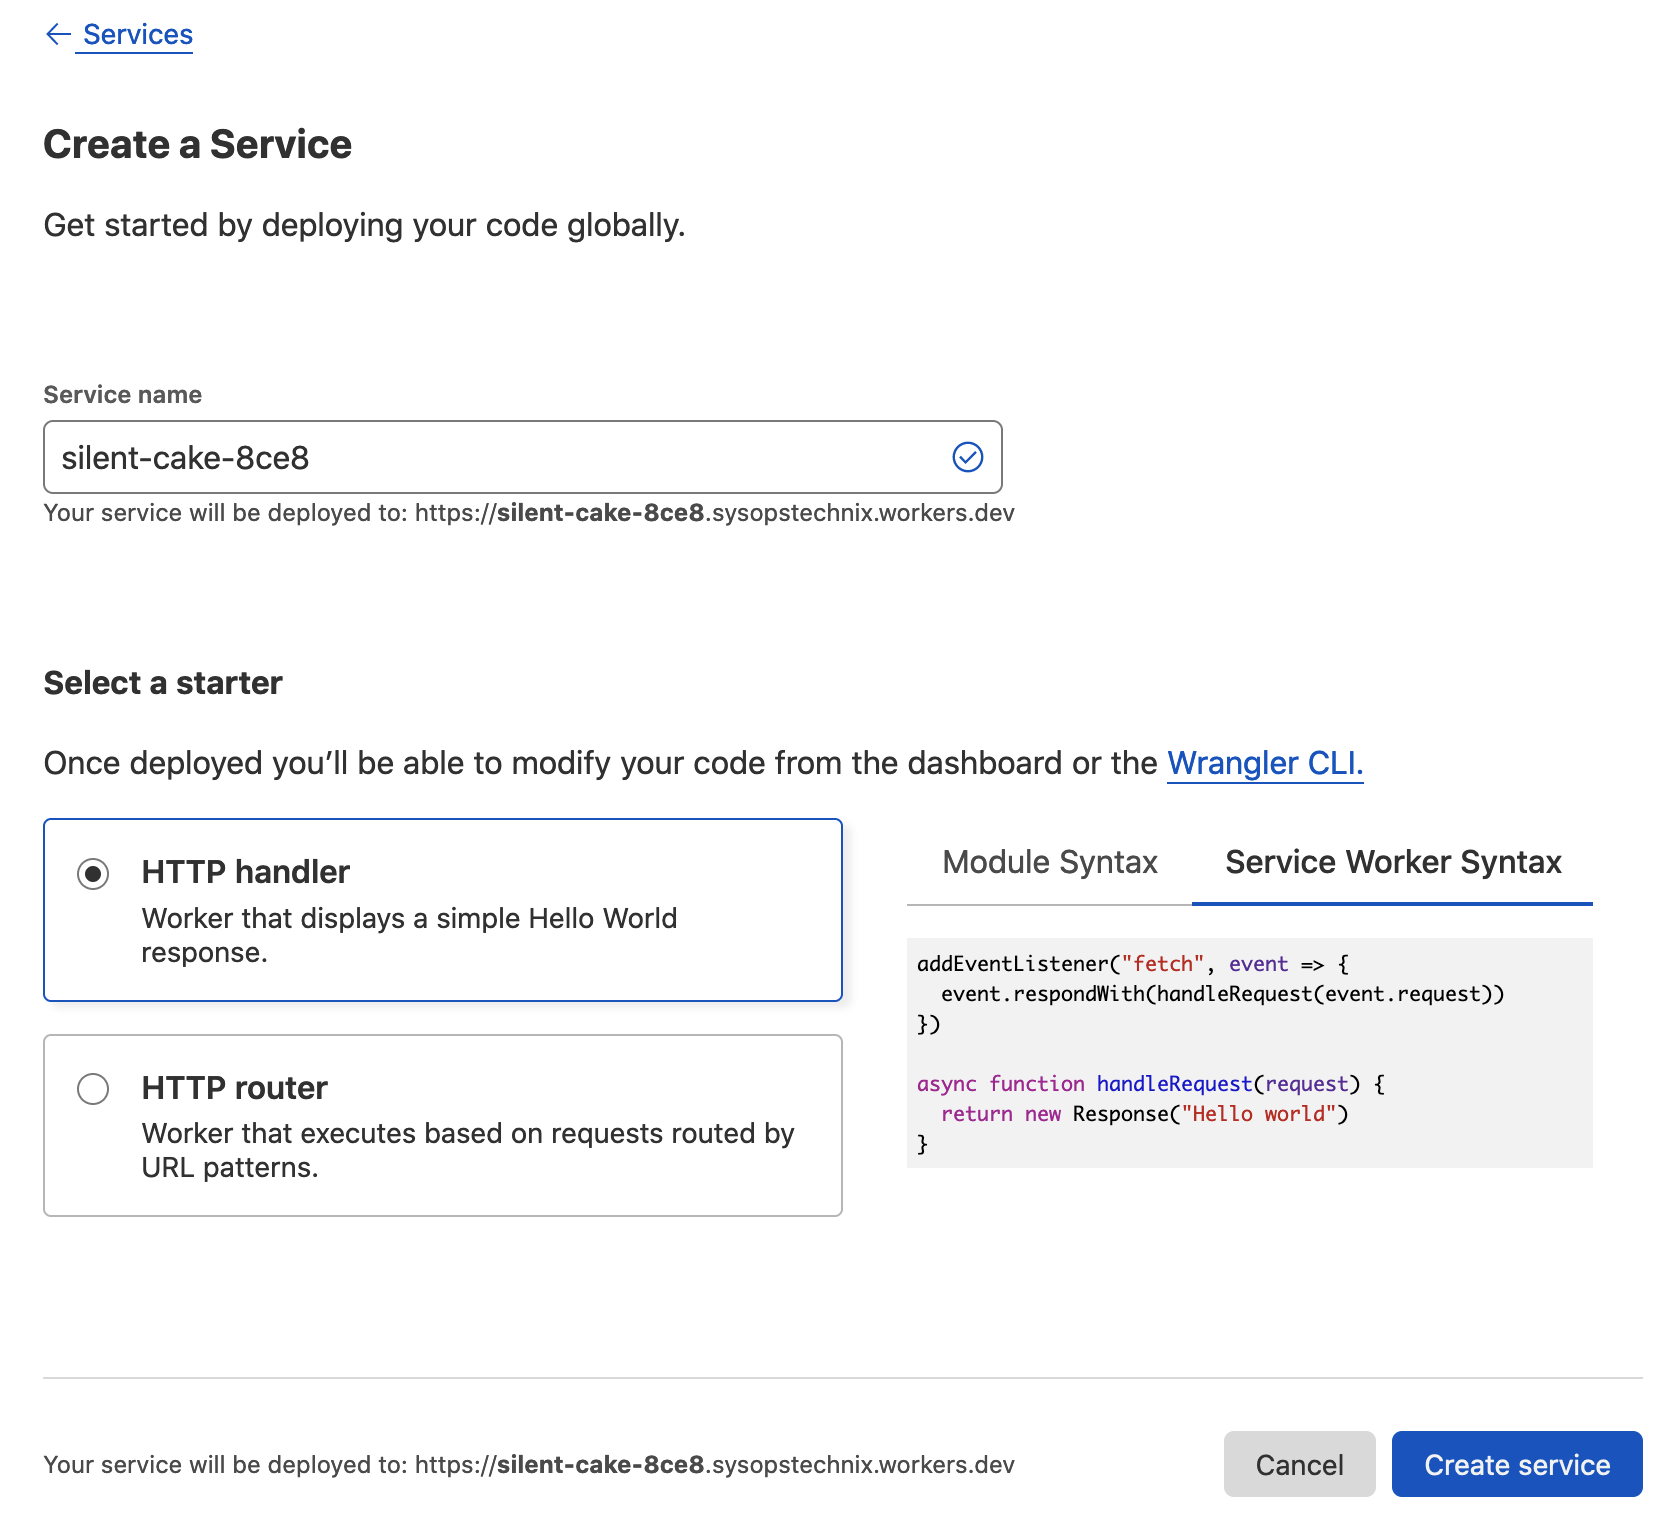
Assume you already have a Cloudflare setup on your web application. First, open the Cloudflare Dashboard -> Workers -> Create a Service.
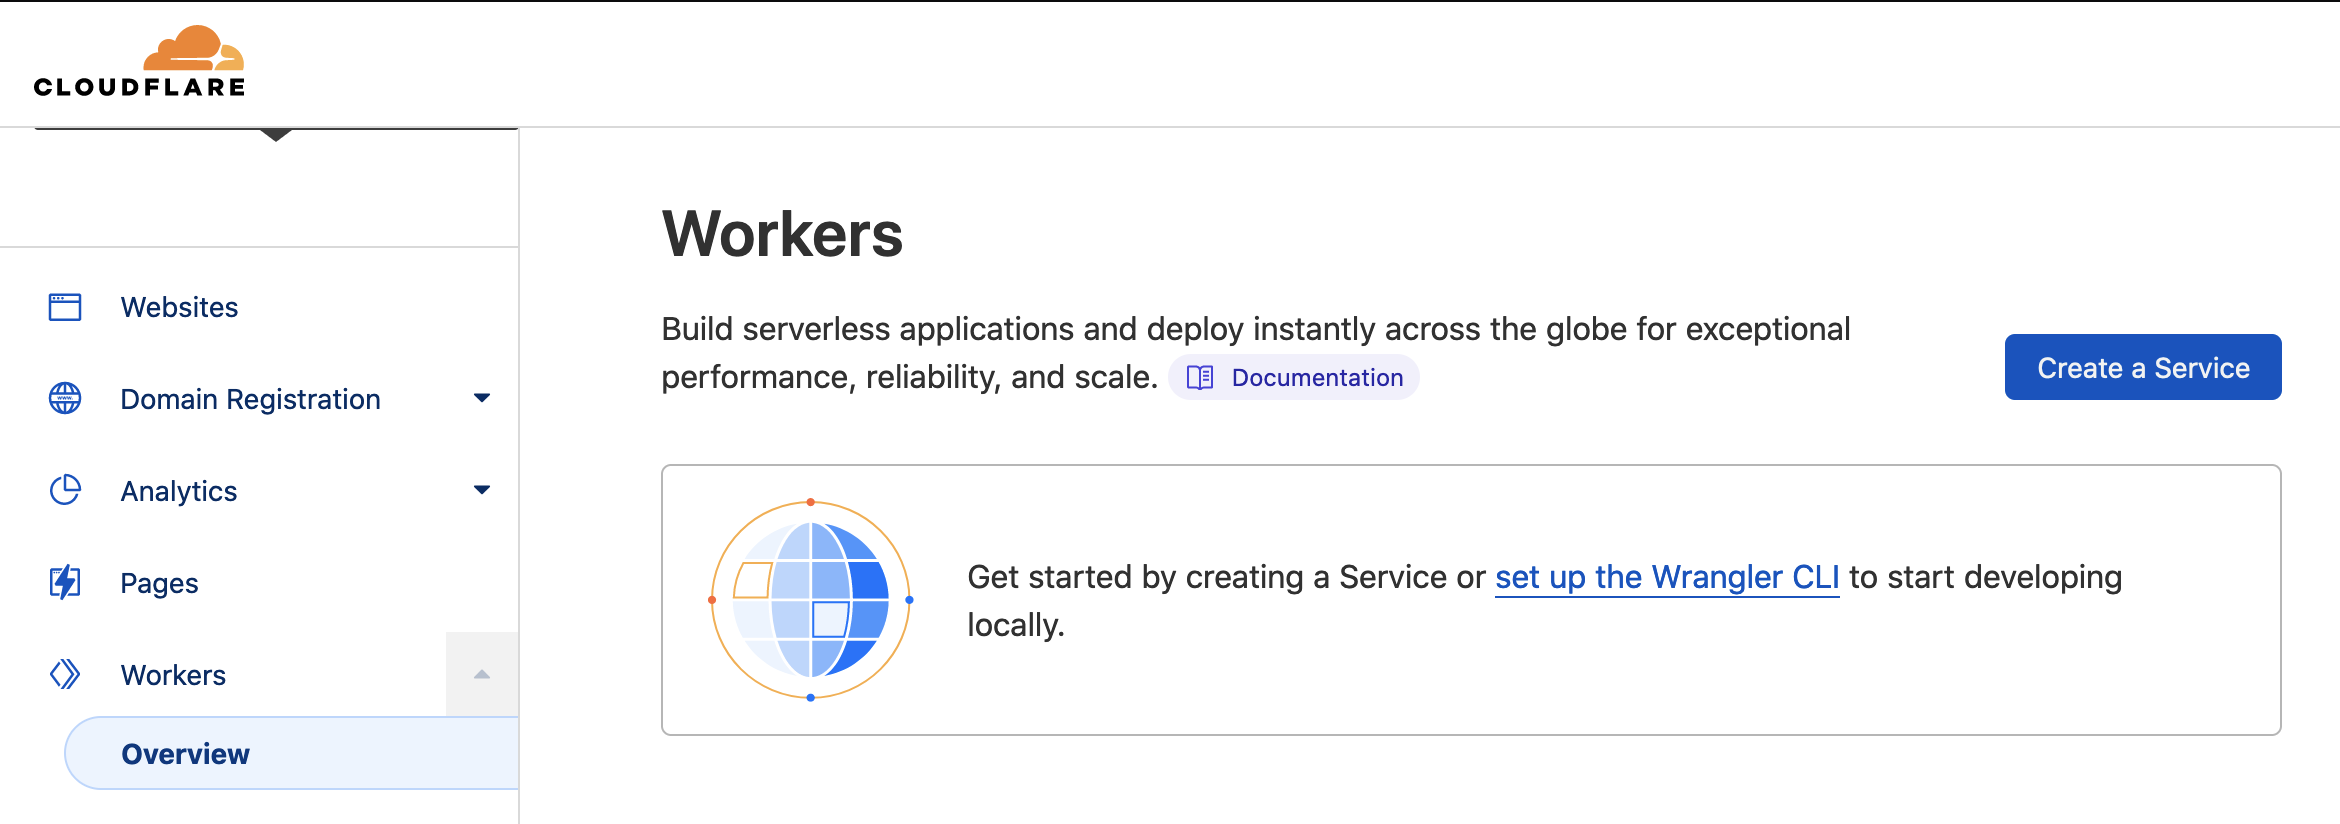
Give the service name and Select the Service Worker Syntax.
Then go inside the created service and click the Quick Edit button and then you can see the following coding environment where you have to write the logic function.
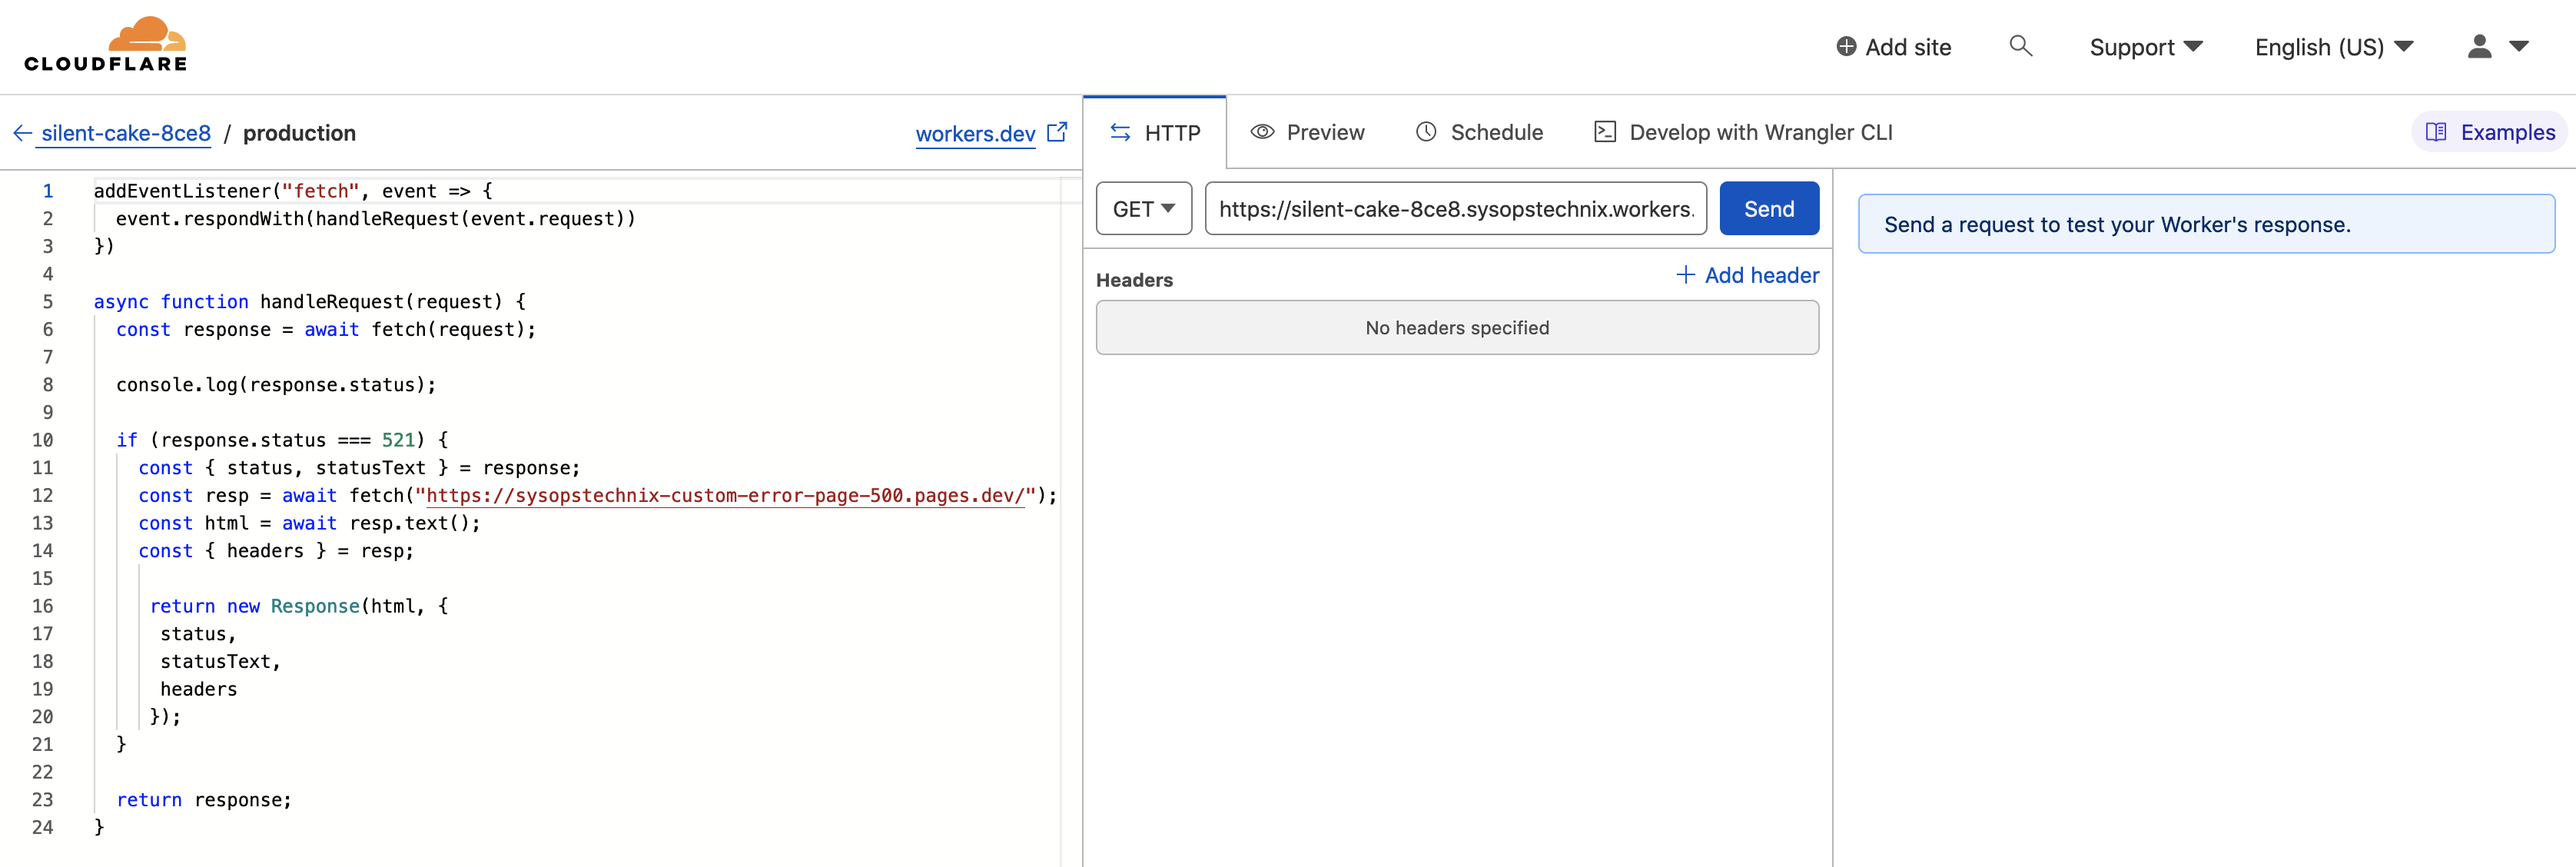
Add the following code snippet and make sure to change line number 10 with your custom error page which was hosted in Cloudflare pages in the previous step. Then click Save and Deploy.
addEventListener("fetch", event => {
  event.respondWith(handleRequest(event.request))
})

async function handleRequest(request) {
  const response = await fetch(request);

  if (response.status === 521) {
    const { status, statusText } = response;
    const resp = await fetch("https://sysopstechnix-custom-error-page-500.pages.dev/");
    const html = await resp.text();
    const { headers } = resp;

     return new Response(html, {
      status,
      statusText,
      headers
     });
  }

  return response;
}
Let’s dive into the above code piece by piece.
As I mentioned before, upon request, an event is passed to our worker’s handler. The worker.js file is where you handle this event. By default, the handler looks like this:
addEventListener("fetch", event => {
  event.respondWith(handleRequest(event.request))
})
Here is the event handling function. This is something similar to JavaScript event handling. In the example, I’m going to capture the HTTP response code (521) from the origin server and based on the response status, publish the custom error page.
- Fetch the response from your origin and store it in response constant.
- Check whether that HTTP response code value is 521 (Web server is down).
- If so collect the original response contents. This is because when we return the response as it is, it will return the 521 error page with a 200 OK status code. Hence we need to alter the response before returning it to the client.
- Then fetch the custom page.
- Finally, build a new response with a custom page and return it to the client.
async function handleRequest(request) {
  const response = await fetch(request);

  if (response.status === 521) {
    // Extract the status and statusText from the original response
    const { status, statusText } = response;

    // Fetch the custom page
    const resp = await fetch("https://sysopstechnix-custom-error-page-500.pages.dev/");

    // Read the response content
    const html = await resp.text();

    // Extract the response's headers to forward them to the client
    const { headers } = resp;
    // Build a new response with custom page
     return new Response(html, {
      status,
      statusText,
      headers
     });
  }
// Finally return our modified response with custom page
  return response;
}
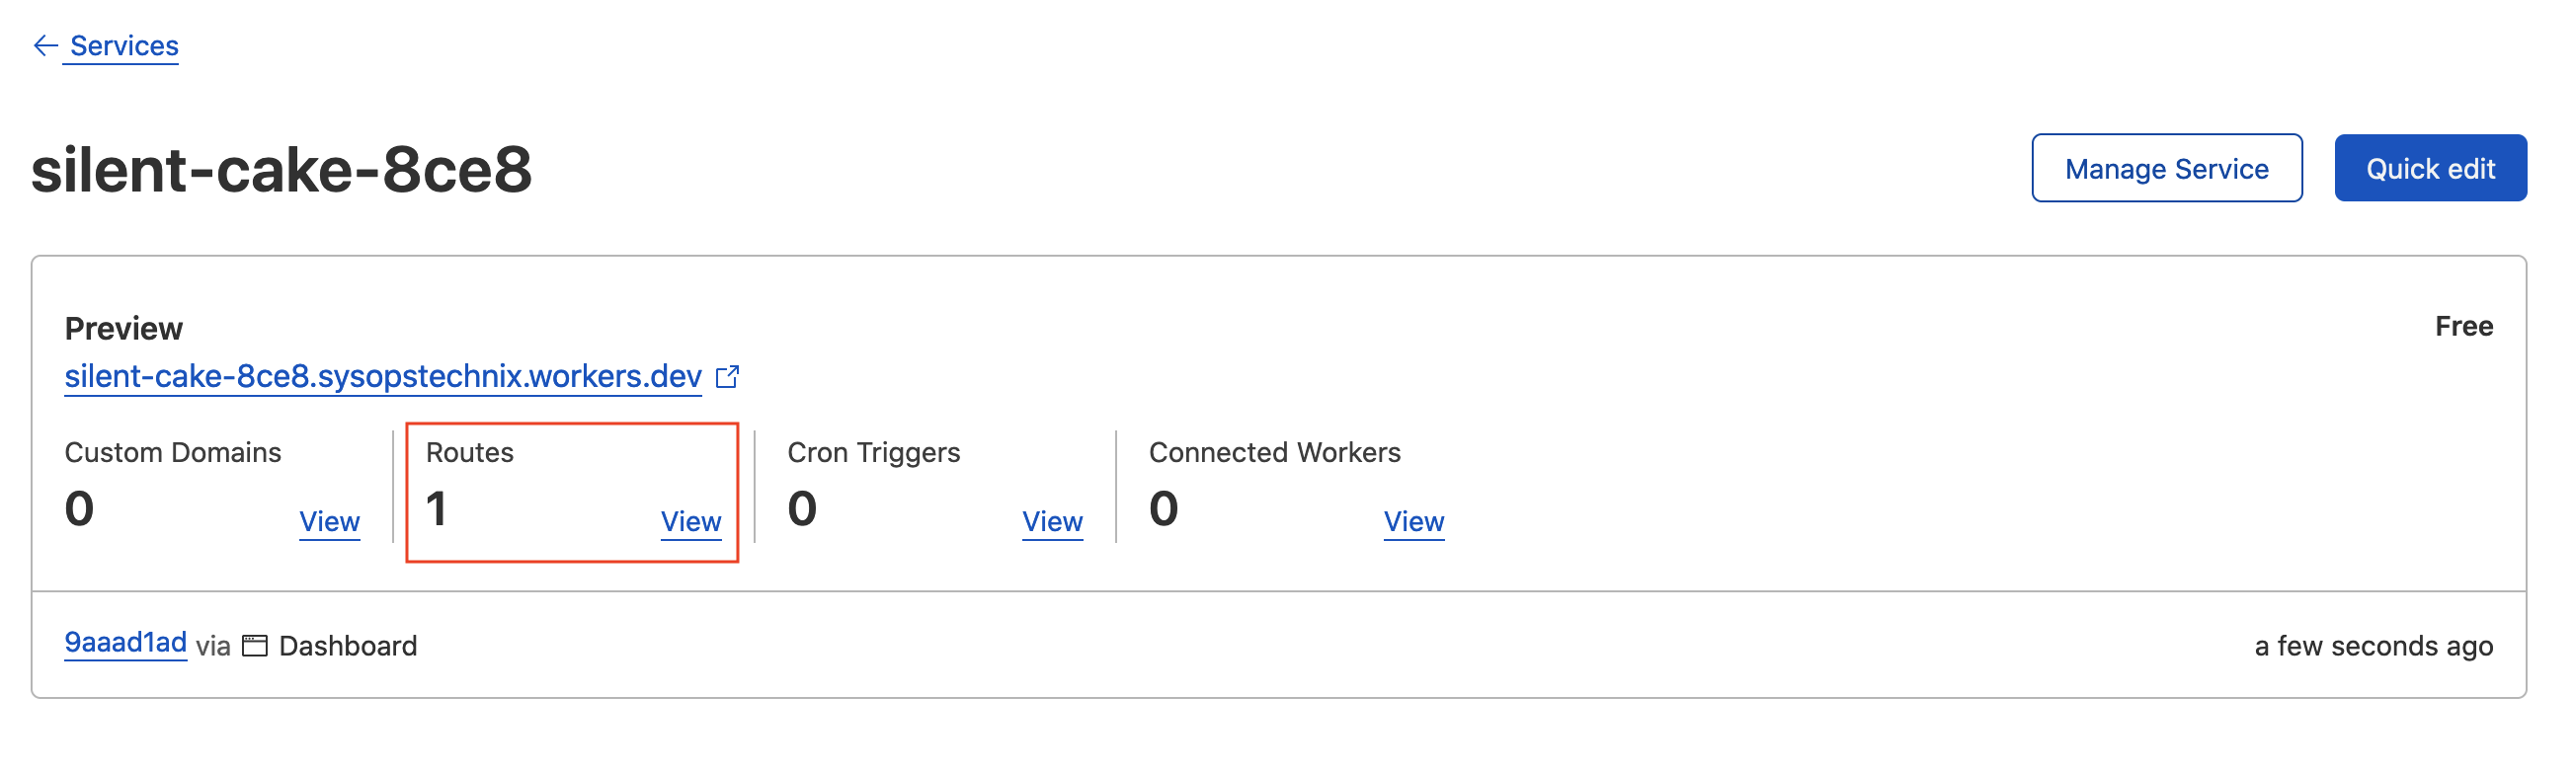
Create Routes
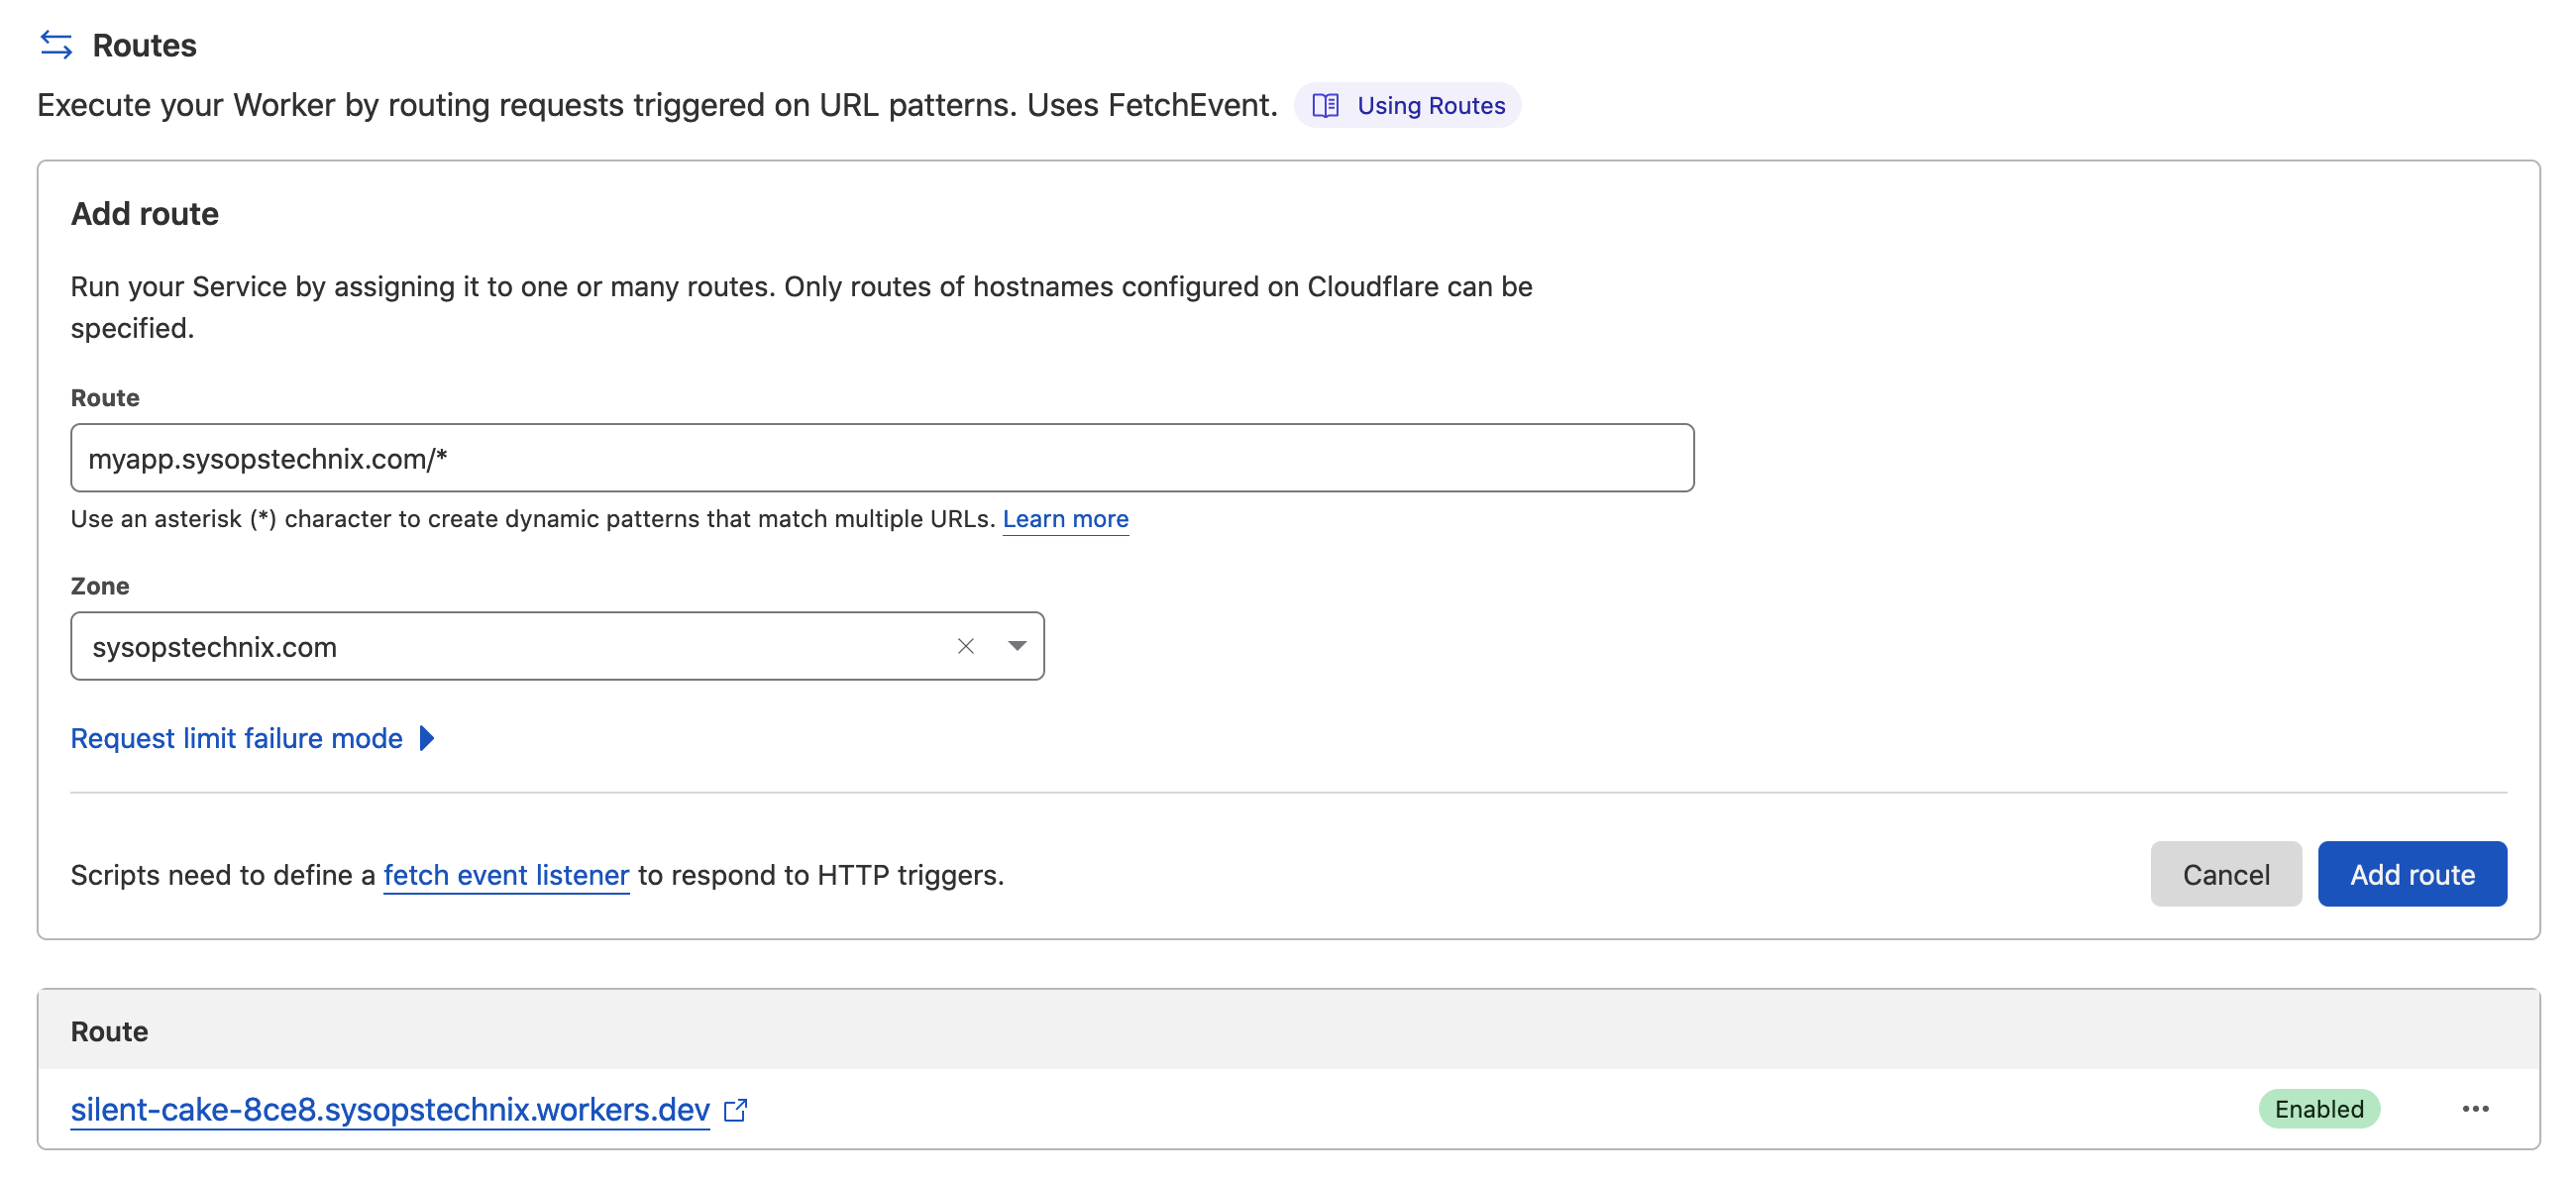
Now all you need to do is enable the worker on your web application by creating a route to tell the worker when to run. This route is telling the worker to execute any request made to my web app. If you have multiple domains you serve off, let’s say myapp.sysopstechnix.com and research.sysopstechnix.com then you can set wildcard routes to cover both of those. (Ex: *.sysopstechnix.com/*)
Click ‘View‘ in the ‘Routes‘ section.
Add a new route as follows (change the route according to your domain name). Once you save the route that is it! The worker should be active on your site instantly.
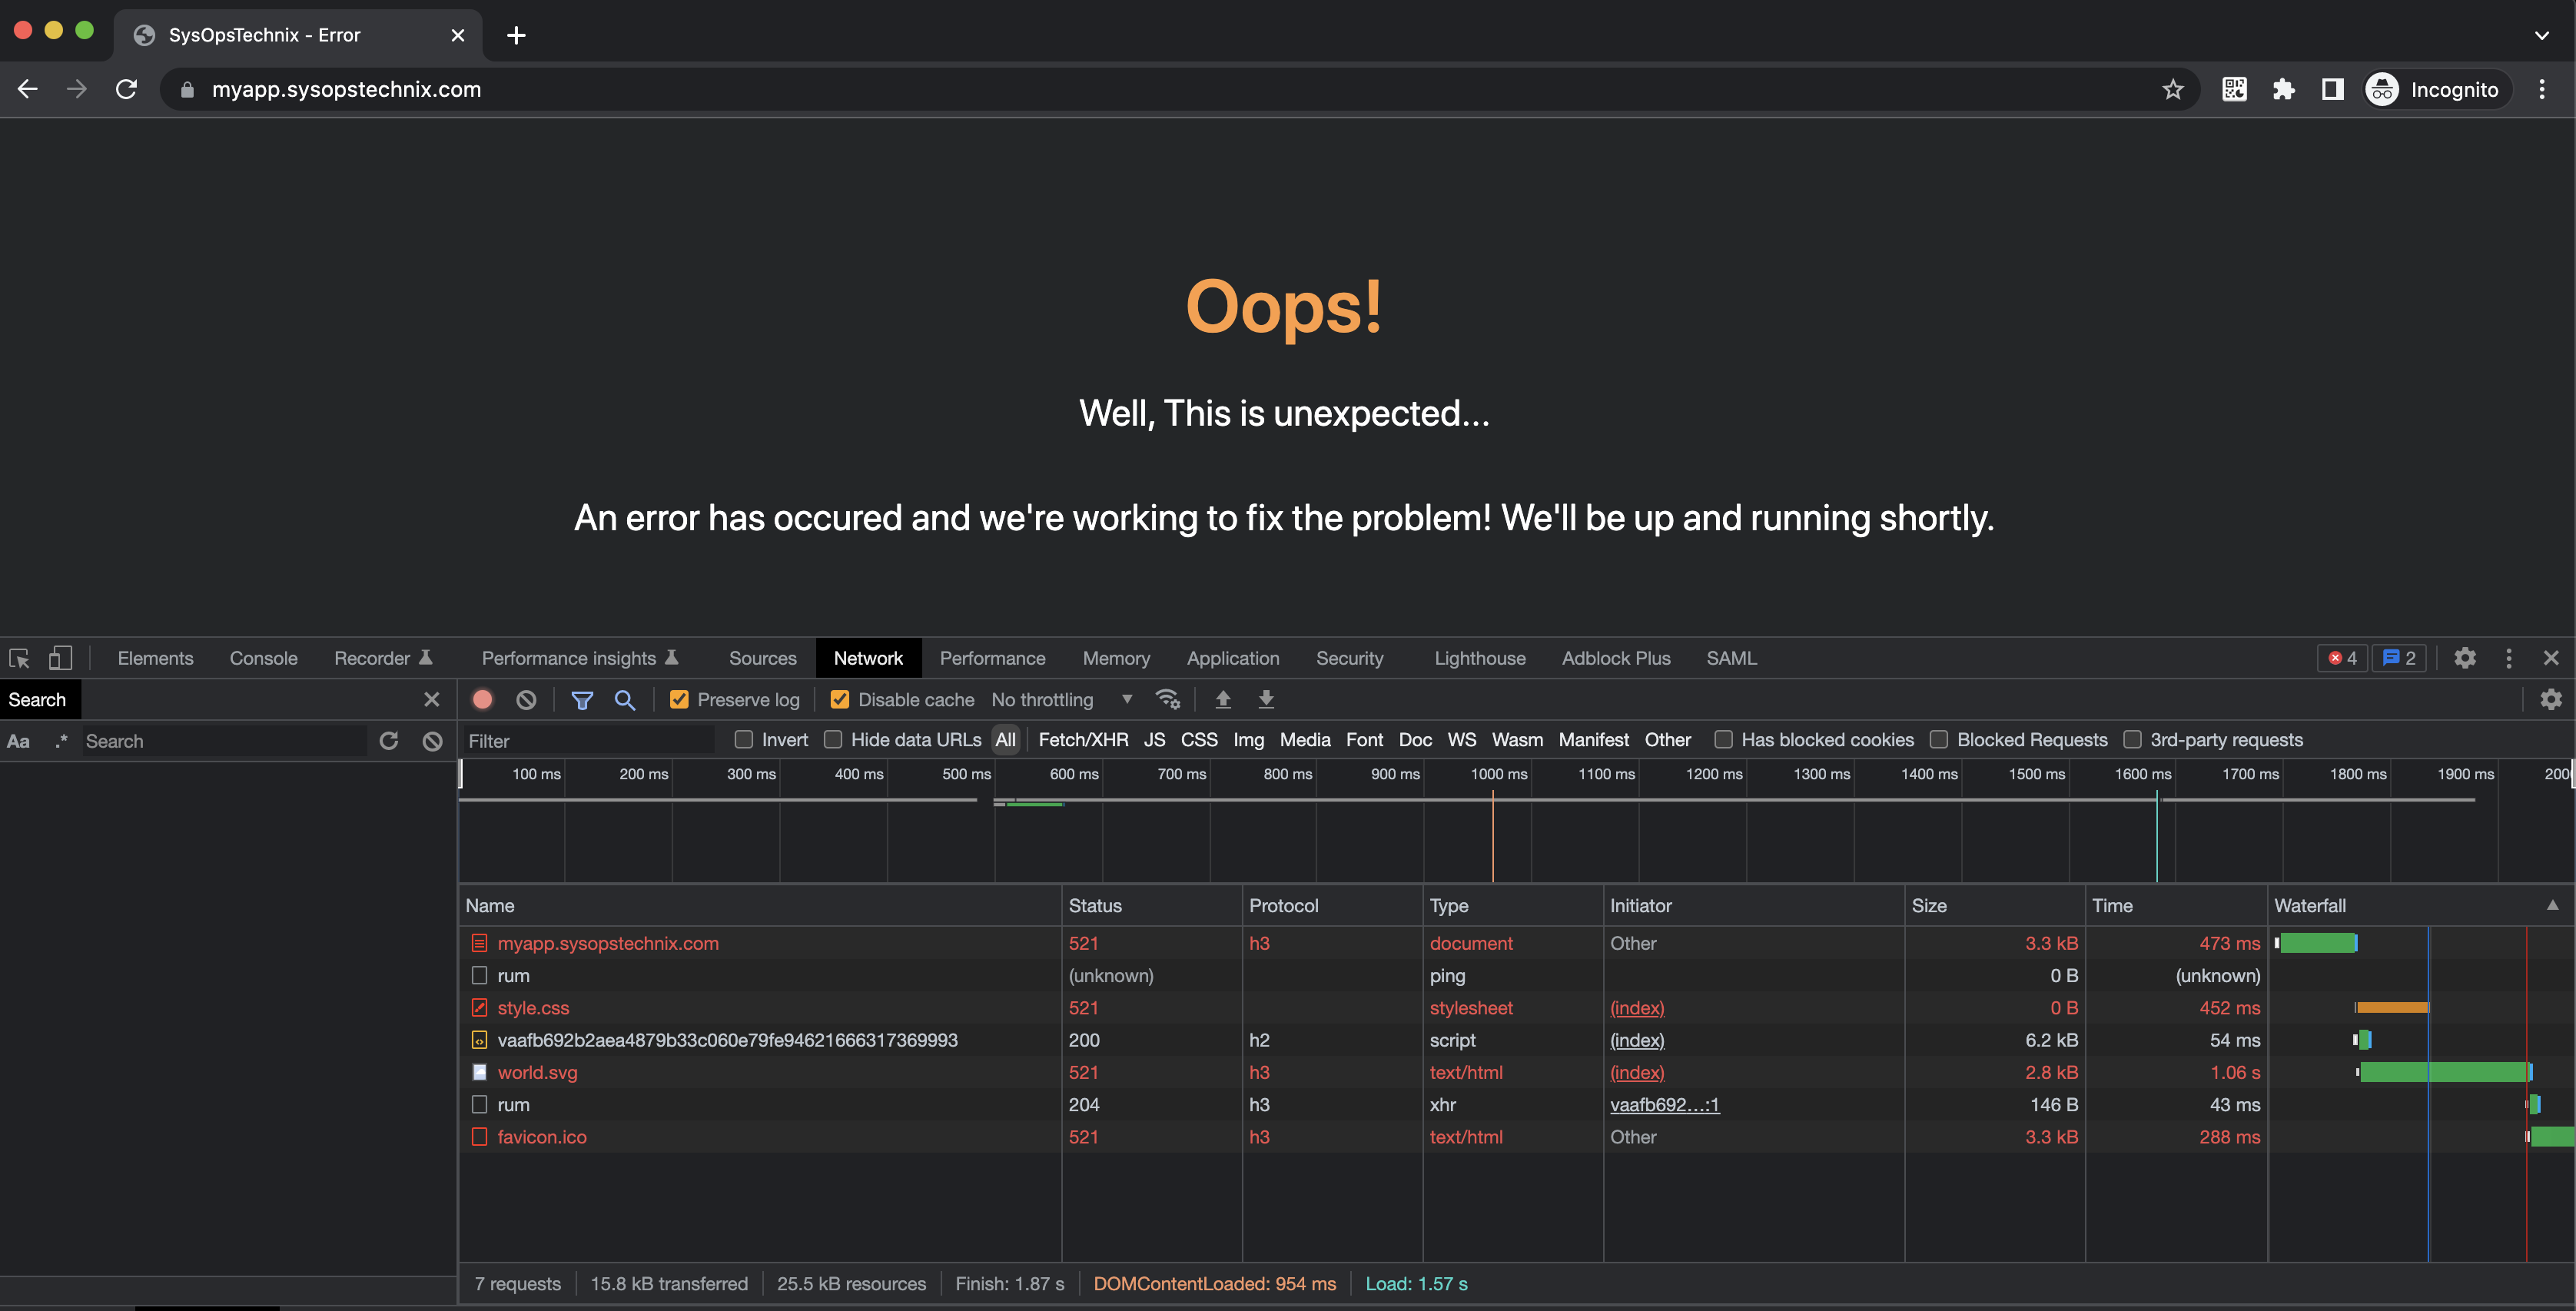
Test the Custom Page
Now you can head on over to your web application and down the web server and see the custom page output. In my case, I’m checking with the response status code 521 (Web server is down), and here is the output. 🙂
Conclusion
This is a very simple example, however, I think this might be very helpful to you when your web application does not support enabling custom pages and give a better experience to your website visitors. Also inspecting the HTTP request and response at the edge of the network opens up interesting possibilities for customization accordingly.