
What if you manage cloud environments across the globe at scale manually, by provisioning and configuring your infrastructure resources one by one in a web browser or at the command line?
In the cloud-native environment, setting up and provisioning cloud resources was an onerous, manual, and error-prone process. With the evolvement of the Infrastructure As Code (aka IaC) strategy, it is possible to define a configuration file to configure and provision cloud resources automatically, consistently, and predictably in cloud environments. That can be very useful for DevOps processes, workload, and time management in various scenarios. Most of the cloud providers have a proprietary version of IaC they offer; for AWS, it is CloudFormation.
What is AWS CloudFormation?
AWS CloudFormation is a framework to help model and provision a collection of AWS resources that will give you less time to manage cloud resources and more time to focus on your applications in AWS. You can manage your complete infrastructure or AWS resources predictably and repeatedly in a text file called a template. You can write it as a YAML or JSON script where you can specify details for each of your resources and their dependencies together as one stack. Also, you can manage the CloudFormation template in version control, just like you do your application code. With CloudFormation, you can automate your cloud infrastructure deployments and scale your infrastructure across the globe.
How does AWS CloudFormation work?
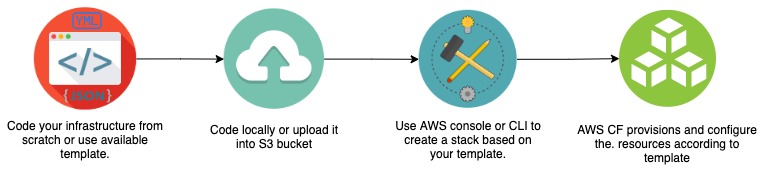
- You can write infrastructure code using a YAML or JSON text-based file which is called a template.
- Create your code locally in the AWS CloudFormation tool or upload a YAML or JSON file into the S3 bucket.
- Use either the AWS CF Console or the Command Line Interface to create a stack based on your template code.
- Finally, CloudFormation will provision and configure the resources based on the template that you specified.
The benefits of using AWS CloudFormation
- Easy management and tracking of changes on your infrastructure.
- Since templates are using YAML or JSON files, can save them in a version control system and maintain a production version of your templates.
- Reusability and quick infrastructure provisioning.
- You can quickly provision your infrastructure without affecting other resources by using your previously created template. The same template can be modified and used for as many stacks as you need.
- Automated deployment and orchestration.
- The cloud formation templates allow you to declare what you want your resources to look like. This eliminates the requirement of relying on other scripting tools to create the resources.
- Ability to customization through parameters.
- You may pass parameters for customizing templates during the run time. As an example, you could pass availability zone, instance type, volume sizes, etc. when creating the stack.
- Interactive UI to visualize and edit.
- AWS Cloudformatio offers a designer view that you can drag and drop resources and build connectivity relationships with each other to compete with the templates. Also, you can modify the templates with the help of a designer view or JSON view.
AWS CloudFormation Terminologies
Template
A template is a YAML or JSON text file that defines all required resources contained in a stack to run a specific application. A template includes several major sections.
- Description: Describes the template.
- Metadata: Objects providing additional information about the template,
- Parameters: Input parameters to pass to your template during the runtime.
- Mappings: Key/value pairs used for lookup at runtime.
- Conditions: Conditions that control whether certain resources are created or whether properties are assigned values.
- Resources: Defines cloud resources and their properties. This is a required section.
- Outputs: Values that are returned whenever you view information about the resources created from this template.
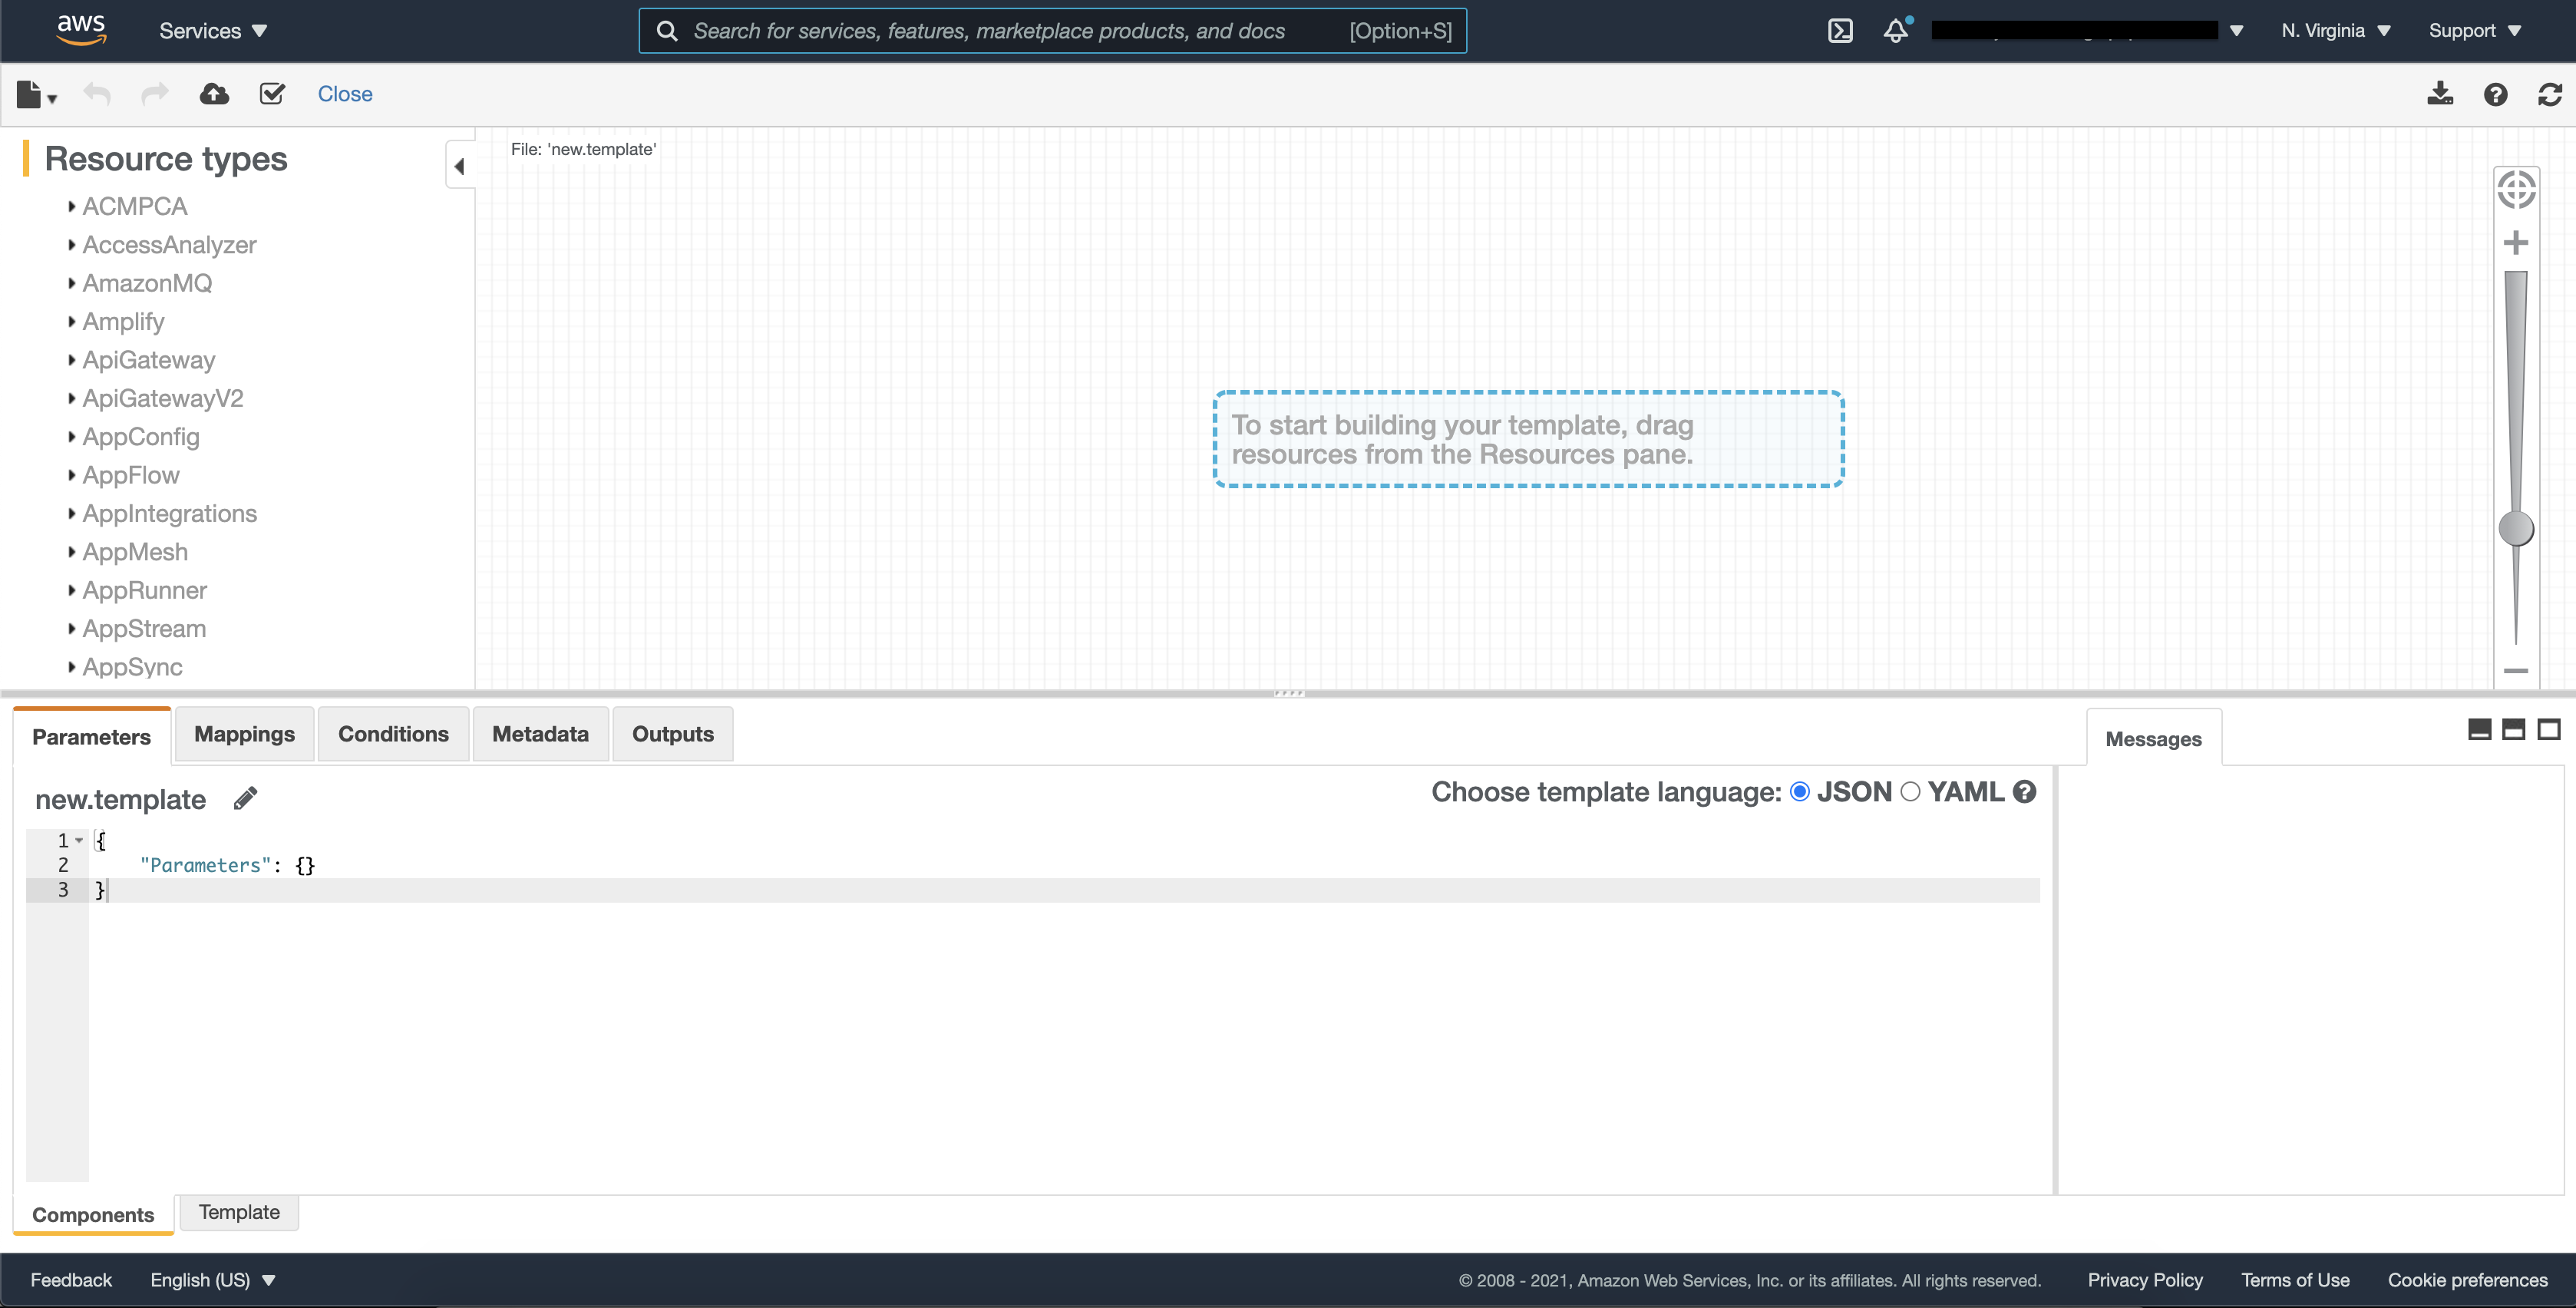
You can create a template using two methods such as from AWS CloudFormation Designer or else using a YAML/JSON file.
#Sample AWS CloudFormation JSON Template
{
"AWSTemplateFormatVersion": "2010-09-09",
    "Description": "",
    "Metadata": {

    },
    "Parameters": {

    },
    "Mappings": {

    },
    "Conditions": {

    },
    "Resources": {
        #Required Section
    },
    "Outputs": {

    }
}
Stack
Simply a Stack is a collection of AWS resources that you can control and manage as a single entity. You can do the modification like create update or delete at any time. All resources inside a stack are populated by a CloudFormation Template. As an example, you can create a stack that includes all resources required to run a complete web application deployment.
Change Set
When a Stack needs to be modified, you can re-upload the template with changes and run it on the stack. Then AWS will take care of doing the modifications to the necessary resources. The Change Set will give you a summary of your proposed changes before they actually applied. That gives you an idea of which changes might impact your running resources, especially critical resources, before implementing them.
Let’s get started with Writing the CloudFormation Template
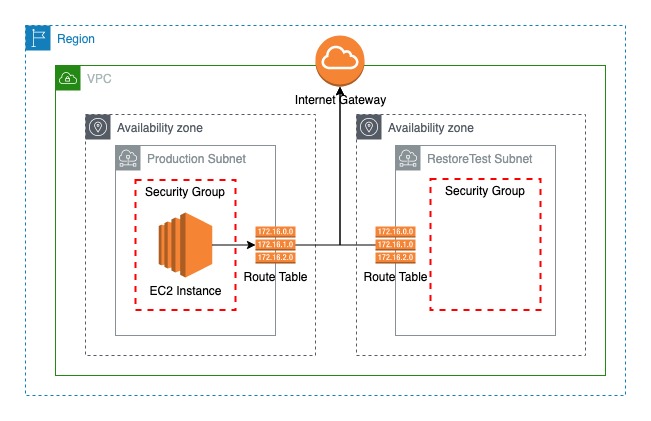
In this example, I’m going to create a simple CloudFormation template that includes two subnets in two different availability zones in a single VPC, one subnet for production servers and another for backup restore testings. Also as an EC2 instance configuration, I have included some commands you want to execute on launch in the resource’s Properties’ UserData section, and that will install and start the httpd server on the EC2 instance.
Once you create CloudFormation Stack using this template, you will get the final infrastructure as looks like the image below.
Prerequisites
- First, you have to decide the AWS region where you want the resources to be created.
- IAM User with admin privileges.
- Required pre-created EC2 Keypair.
- I have selected Amazon Linux (ami-0d5eff06f840b45e9) as the AMI Image.
Let’s start writing the template using JSON.
{
"AWSTemplateFormatVersion": "2010-09-09",
"Description": "",
"Metadata": {
"AWS::CloudFormation::Interface" : {
"ParameterGroups" : [
{
"Label" : { "default" : "Network Configurations" },
"Parameters" : [ "VPCCIDRBlock", "AZForProdSubnet", "ProdSubnetCIDRBlock", "AZForTestSubnet", "TestSubnetCIDRBlock" ]
},
{
"Label" : { "default":"Amazon EC2 Configurations" },
"Parameters" : [ "EC2InstanceType", "EC2KeyPair", "ProdInstanceAMI" ]
}
],
"ParameterLabels" : {
"VPCCIDRBlock" : { "default" : "Which VPC should this be deployed to?" },
"AZForProdSubnet" : { "default" : "What is your ProdSubnet Availability Zone?" },
"ProdSubnetCIDRBlock" : { "default" : "Enter ProdSubnet IP Block in CIDR Notation" },
"AZForTestSubnet" : { "default" : "What is your TestSubnet Availability Zone?" },
"TestSubnetCIDRBlock" : { "default" : "Enter TestSubnet IP Block in CIDR Notation" },
"EC2InstanceType" : { "default" : "Select Instance Type for EC2 Instance" },
"EC2KeyPair" : { "default" : "Select Amazon EC2 Key Pair Name" },
"ProdInstanceAMI" : { "default" : "Which AMI you need to use to deploy EC2 Instance?" }
}
}
},
"Parameters": {
"VPCCIDRBlock": {
"Description": "Ex: 10.0.0.0/16",
"Type": "String",
"Default": "10.0.0.0/16"
},
"AZForProdSubnet": {
"Description": "Availability Zone for Production Subnet",
"Type": "AWS::EC2::AvailabilityZone::Name",
"Default": "us-east-1a"
},
"ProdSubnetCIDRBlock": {
"Description": "Ex: 10.0.1.0/24",
"Type": "String",
"Default": "10.0.1.0/24"
},
"AZForTestSubnet": {
"Description": "Availability Zone for RestoreTest Subnet",
"Type": "AWS::EC2::AvailabilityZone::Name",
"Default": "us-east-1b"
},
"TestSubnetCIDRBlock": {
"Description": "Ex: 10.0.2.0/24",
"Type": "String",
"Default": "10.0.2.0/24"
},
"EC2InstanceType": {
"Description": "Enter t2.micro, t2.nano, or t2.small. Default is t2.micro",
"Type": "String",
"Default": "t2.micro",
"AllowedValues": [
"t2.micro",
"t2.nano",
"t2.small"
]
},
"EC2KeyPair": {
"Description": "Name of an existing EC2 KeyPair to enable SSH access to the instance",
"Type": "AWS::EC2::KeyPair::KeyName"
},
"ProdInstanceAMI": {
"Description": "AMI ID for EC2 Instance",
"Type": "String"
}
},
"Mappings": {},
"Conditions": {},
"Resources": {
"CFDemoVPC": {
"Type": "AWS::EC2::VPC",
"Properties": {
"CidrBlock": {
"Ref": "VPCCIDRBlock"
},
"Tags": [
{
"Key": "Name",
"Value": "CFDemoVPC"
}
]
}
},
"ProdSubnet": {
"Type": "AWS::EC2::Subnet",
"Properties": {
"MapPublicIpOnLaunch": true,
"AvailabilityZone": {
"Ref": "AZForProdSubnet"
},
"VpcId": {
"Ref": "CFDemoVPC"
},
"CidrBlock": {
"Ref": "ProdSubnetCIDRBlock"
},
"Tags": [
{
"Key": "Name",
"Value": "CFDemoVPC-ProdSubnet"
}
]
}
},
"TestSubnet": {
"Type": "AWS::EC2::Subnet",
"Properties": {
"AvailabilityZone": {
"Ref": "AZForTestSubnet"
},
"VpcId": {
"Ref": "CFDemoVPC"
},
"CidrBlock": {
"Ref": "TestSubnetCIDRBlock"
},
"Tags": [
{
"Key": "Name",
"Value": "CFDemoVPC-TestSubnet"
}
]
}
},
"CFDemoIGW": {
"Type": "AWS::EC2::InternetGateway",
"Properties": {
"Tags": [
{
"Key": "Name",
"Value": "CFDemoIGW"
}
]
}
},
"AttachGateway": {
"Type": "AWS::EC2::VPCGatewayAttachment",
"Properties": {
"VpcId": {
"Ref": "CFDemoVPC"
},
"InternetGatewayId": {
"Ref": "CFDemoIGW"
}
}
},
"ProdSubnetRT": {
"Type": "AWS::EC2::RouteTable",
"Properties": {
"VpcId": {
"Ref": "CFDemoVPC"
},
"Tags": [
{
"Key": "Name",
"Value": "ProdSubnetRT"
}
]
}
},
"InternetRoutesForProdSubnetRT": {
"Type": "AWS::EC2::Route",
"Properties": {
"RouteTableId": {
"Ref": "ProdSubnetRT"
},
"DestinationCidrBlock": "0.0.0.0/0",
"GatewayId": {
"Ref": "CFDemoIGW"
}
}
},
"ProdSubnetRTA": {
"Type" : "AWS::EC2::SubnetRouteTableAssociation",
"Properties" : {
"RouteTableId" : {"Ref" : "ProdSubnetRT"},
"SubnetId" : {"Ref" : "ProdSubnet"}
}
},
"TestSubnetRT": {
"Type": "AWS::EC2::RouteTable",
"Properties": {
"VpcId": {
"Ref": "CFDemoVPC"
},
"Tags": [
{
"Key": "Name",
"Value": "TestSubnetRT"
}
]
}
},
"InternetRoutesForTestSubnetRT": {
"Type": "AWS::EC2::Route",
"Properties": {
"RouteTableId": {
"Ref": "TestSubnetRT"
},
"DestinationCidrBlock": "0.0.0.0/0",
"GatewayId": {
"Ref": "CFDemoIGW"
}
}
},
"TestSubnetRTA": {
"Type" : "AWS::EC2::SubnetRouteTableAssociation",
"Properties" : {
"RouteTableId" : {"Ref" : "TestSubnetRT"},
"SubnetId" : {"Ref" : "TestSubnet"}
}
},
"ProdInstanceSecurityGroup": {
"Type": "AWS::EC2::SecurityGroup",
"Properties": {
"GroupName": "ProdInstanceSecurityGroup",
"GroupDescription": "Security Group for Prod EC2 Instance",
"SecurityGroupIngress": [
{
"IpProtocol": "tcp",
"FromPort": 80,
"ToPort": 80,
"CidrIp": "0.0.0.0/0"
},
{
"IpProtocol": "tcp",
"FromPort": 22,
"ToPort": 22,
"CidrIp": "0.0.0.0/0"
}
],
"VpcId": {
"Ref": "CFDemoVPC"
},
"Tags": [
{
"Key": "Name",
"Value": "ProdInstanceSecurityGroup"
}
]
}
},
"RestoreTestSecurityGroup": {
"Type": "AWS::EC2::SecurityGroup",
"Properties": {
"GroupName": "RestoreTestSecurityGroup",
"GroupDescription": "Security Group for Restored EC2 Instance",
"SecurityGroupIngress": [
{
"IpProtocol": "tcp",
"FromPort": 22,
"ToPort": 22,
"CidrIp": "0.0.0.0/0"
}
],
"VpcId": {
"Ref": "CFDemoVPC"
},
"Tags": [
{
"Key": "Name",
"Value": "RestoreTestSecurityGroup"
}
]
}
},
"ProdInstance01": {
"Type": "AWS::EC2::Instance",
"Properties": {
"KeyName": {
"Ref": "EC2KeyPair"
},
"ImageId": {
"Ref": "ProdInstanceAMI"
},
"InstanceType": {
"Ref": "EC2InstanceType"
},
"Monitoring": "false",
"SecurityGroupIds": [
{
"Ref": "ProdInstanceSecurityGroup"
}
],
"Tags": [
{
"Key": "Name",
"Value": "ProdInstance01"
}
],
"UserData": {
"Fn::Base64": {
"Fn::Join": [
"",
[
"#!/bin/bash -xe \n",
"yum install httpd -y \n",
"chkconfig httpd on \n",
"echo '<h1>SysOps Technix CloudFormation Demo</h1>' > /var/www/html/index.html \n",
"service httpd start"
]
]
}
},
"SubnetId": {
"Ref": "ProdSubnet"
}
}
}
},
"Outputs": {
"InstanceId": {
"Description": "InstanceId of the Prod Instance",
"Value": {
"Ref": "ProdInstance01"
}
},
"PublicDNS": {
"Description": "Public DNSName of the Prod Instance",
"Value": {
"Fn::GetAtt": ["ProdInstance01", "PublicDnsName"]
}
},
"PublicIP": {
"Description": "Public IP address of the Prod Instance",
"Value": {
"Fn::GetAtt": ["ProdInstance01", "PublicIp"]
}
}
}
}
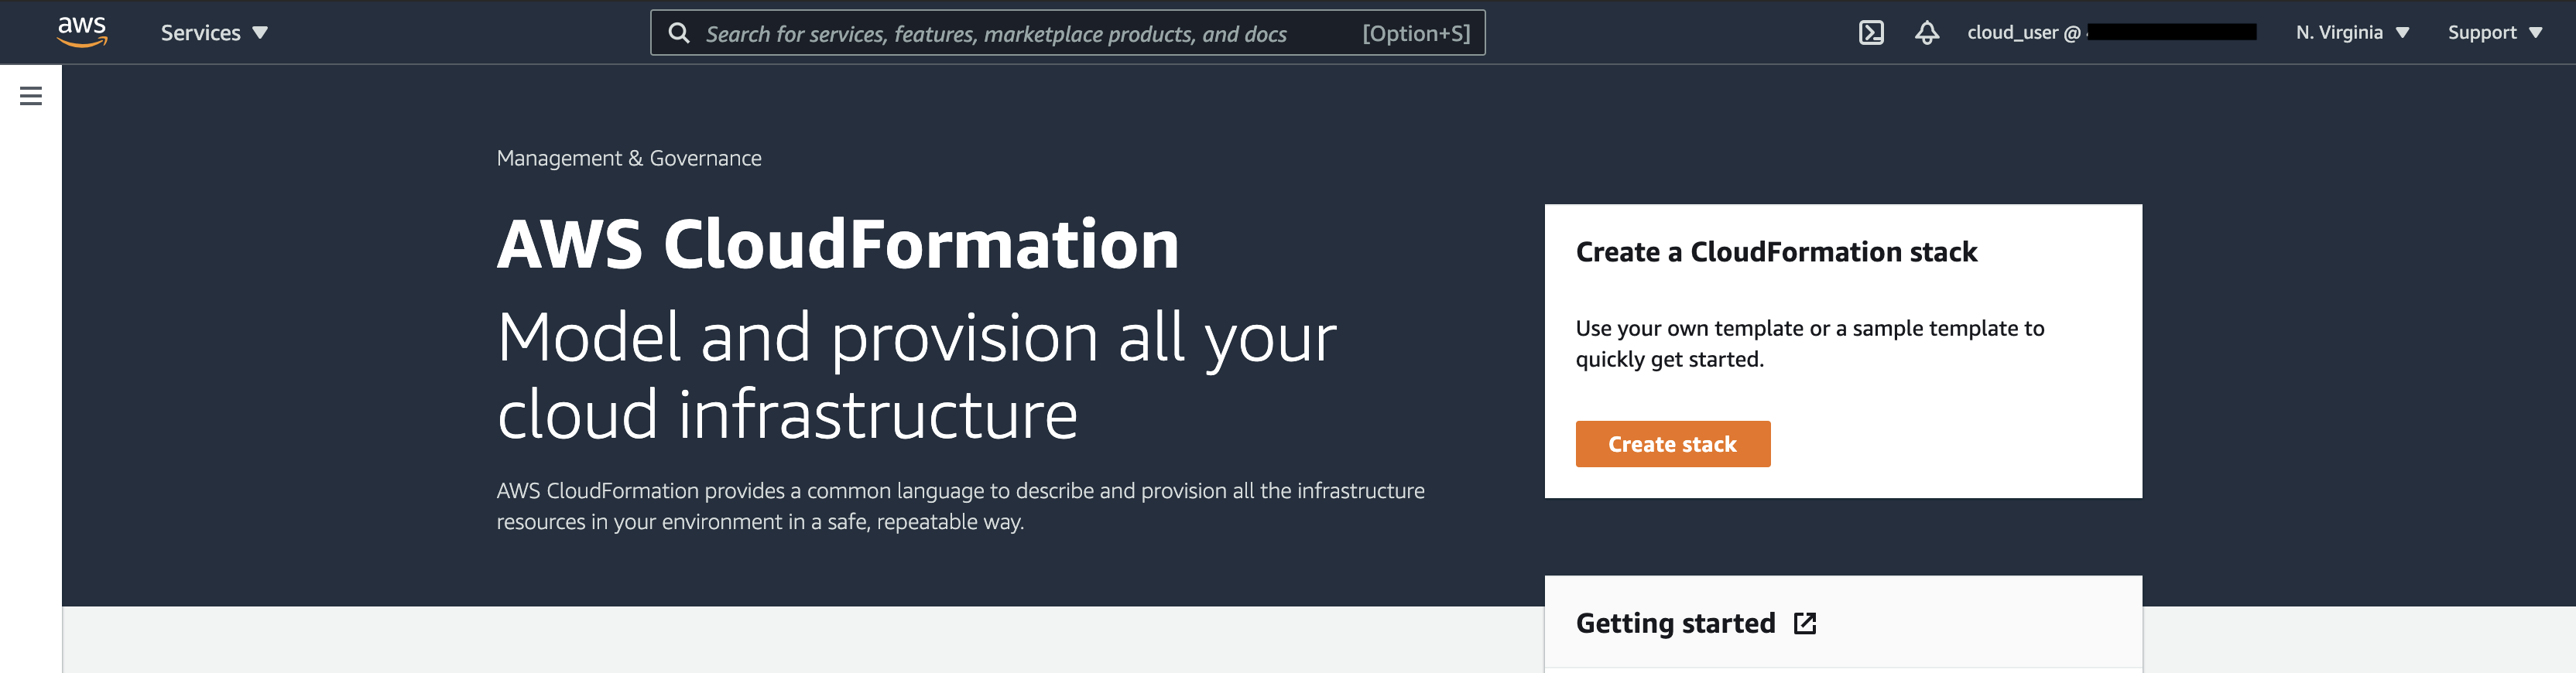
Create CloudFormation Stack using AWS Console
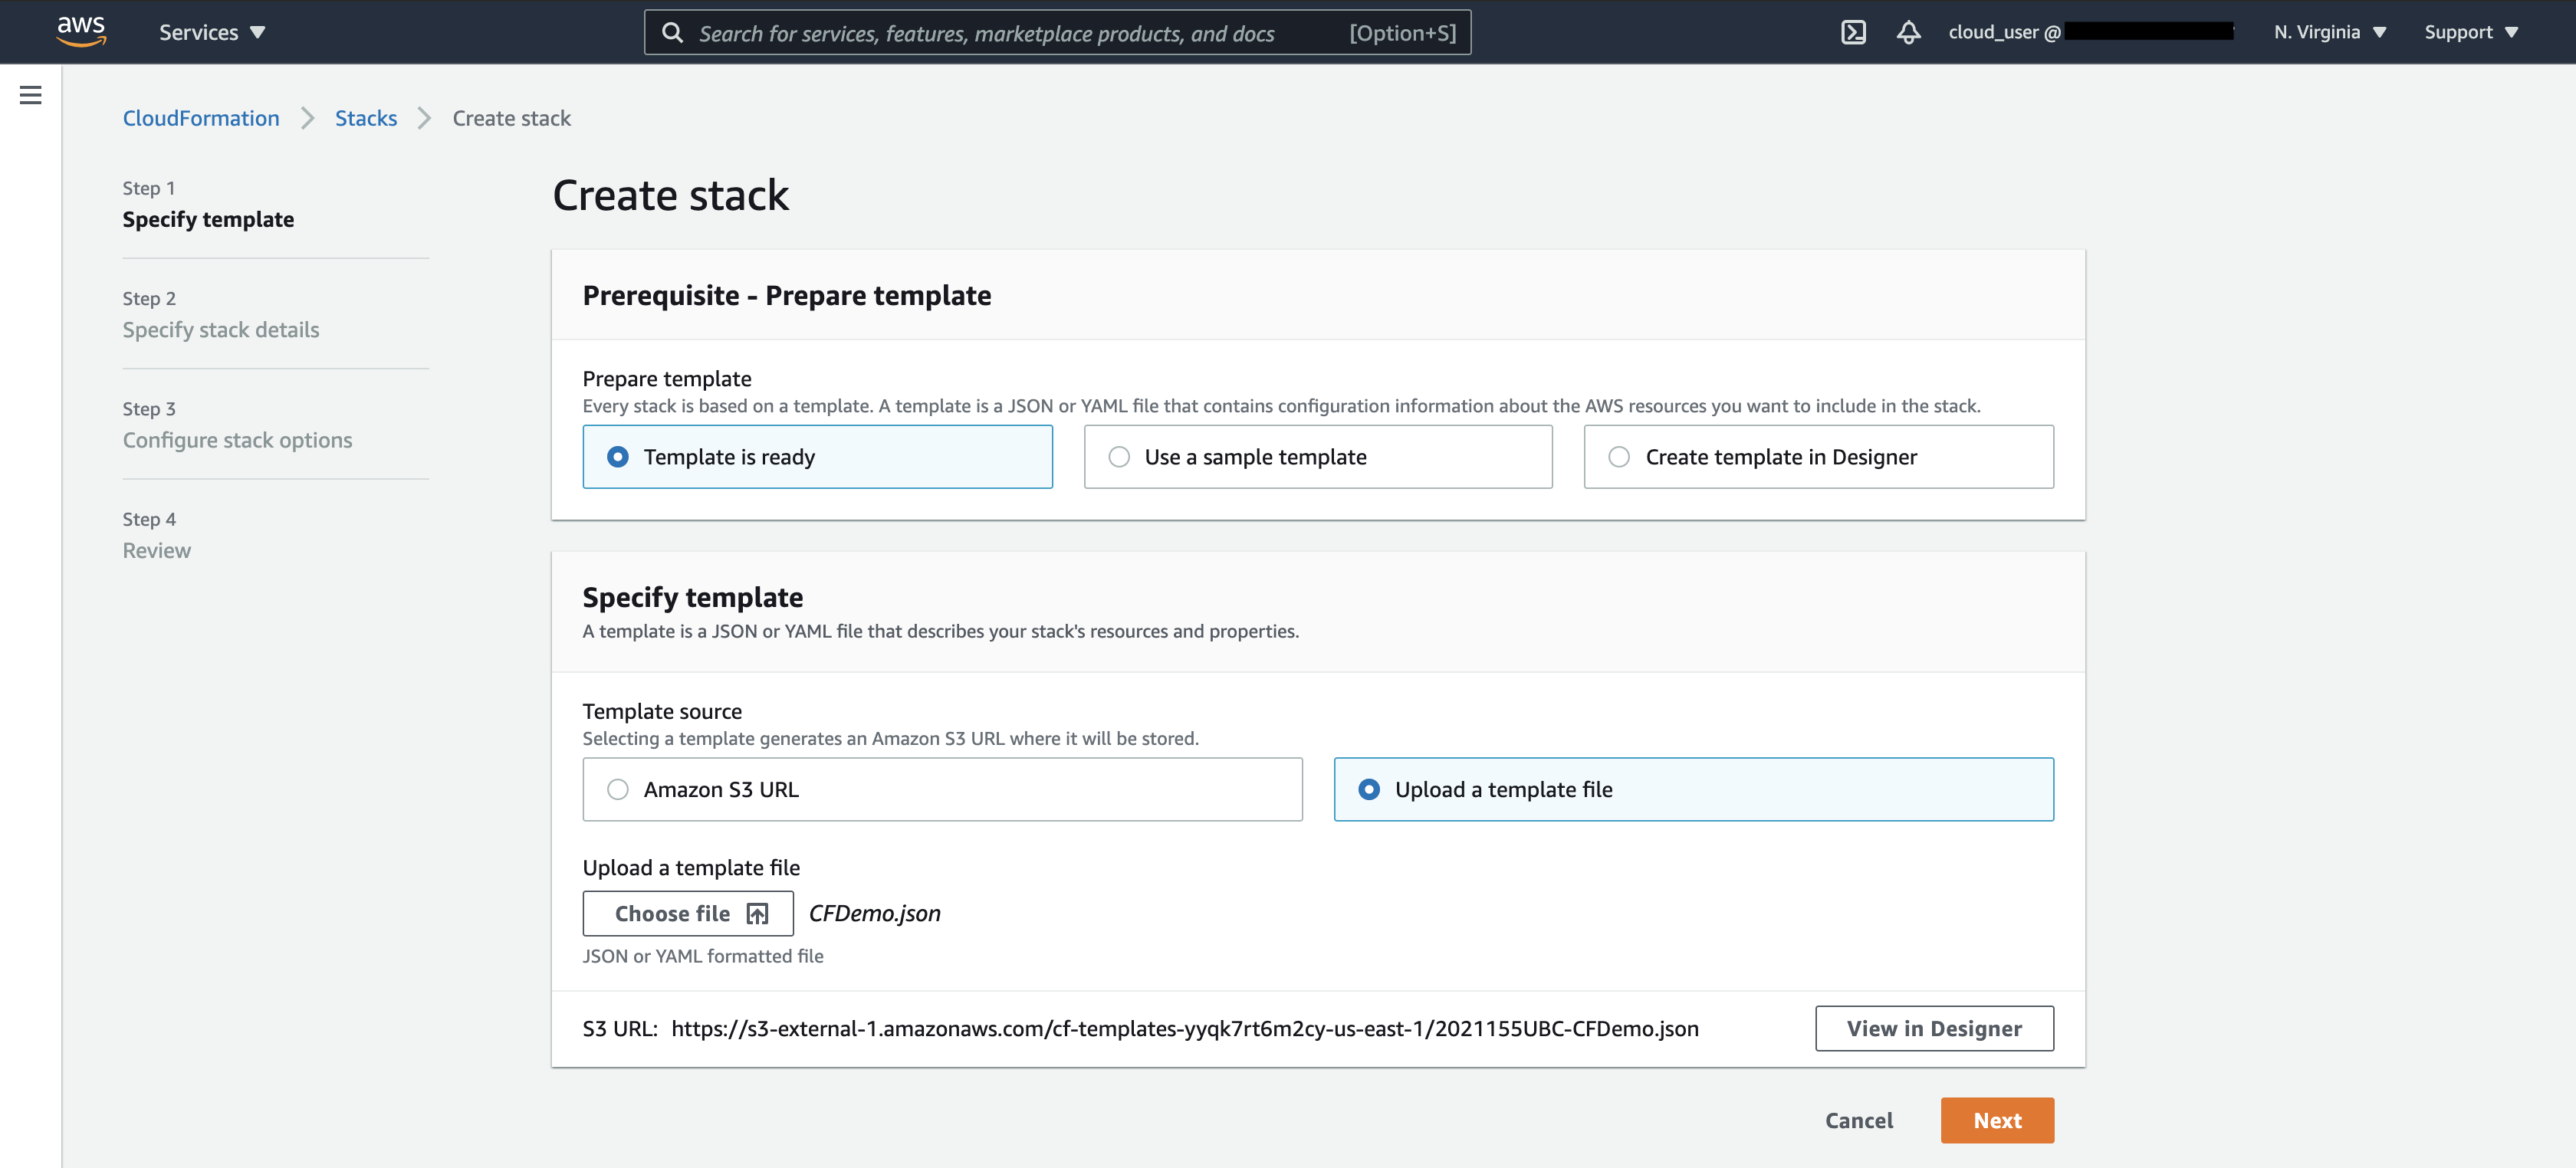
Go to the CloudFormation Console and click on Create Stack.
Since my CloudFormation template is ready on the local machine, I’m selecting the “Template is ready” option and “Upload a template file” and browse the template file and click Next.
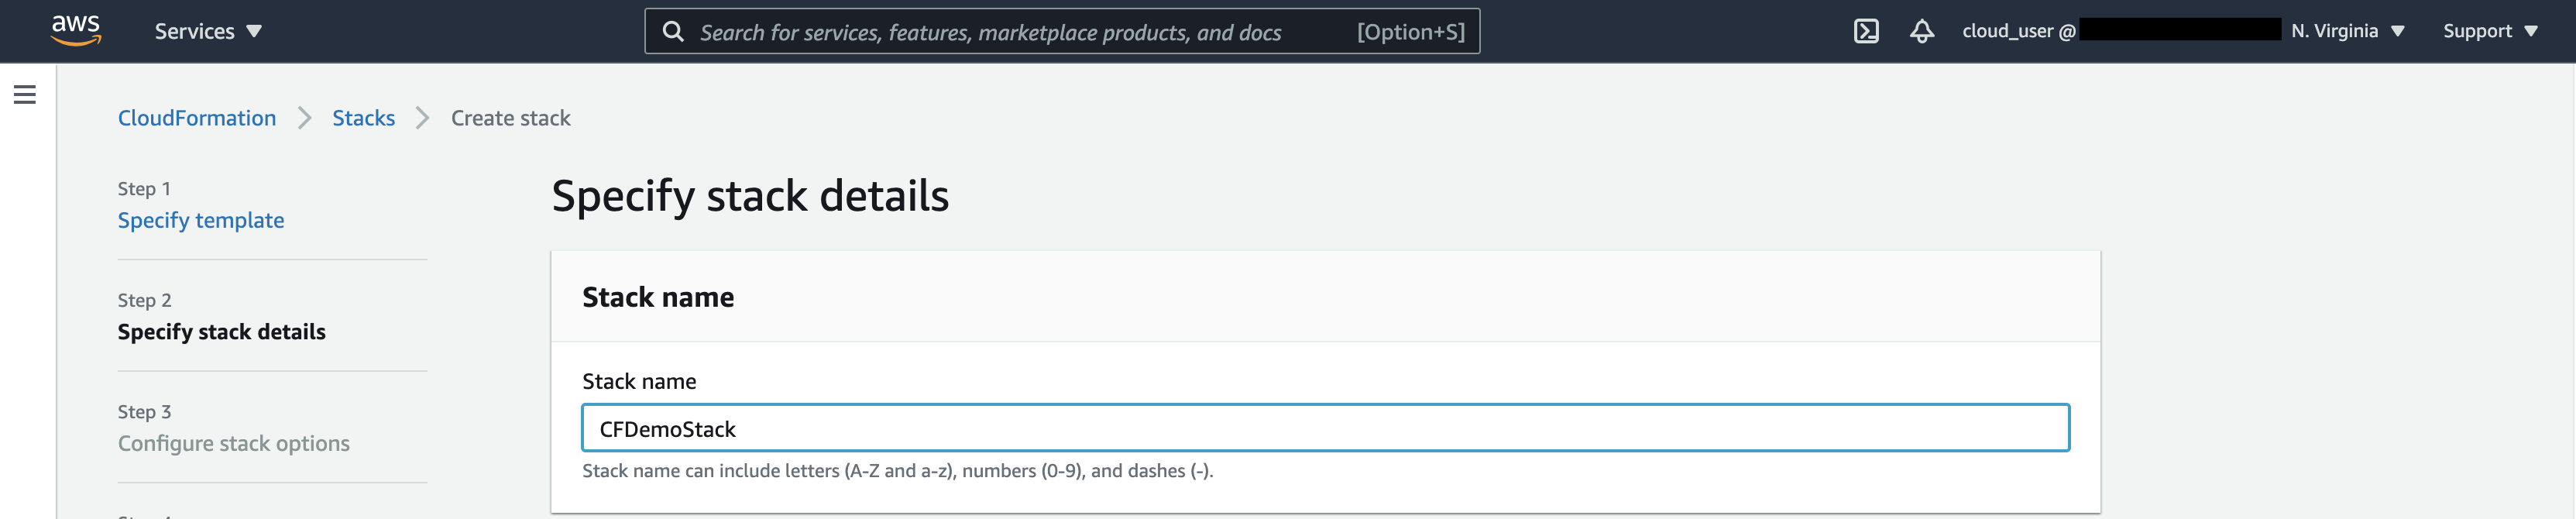
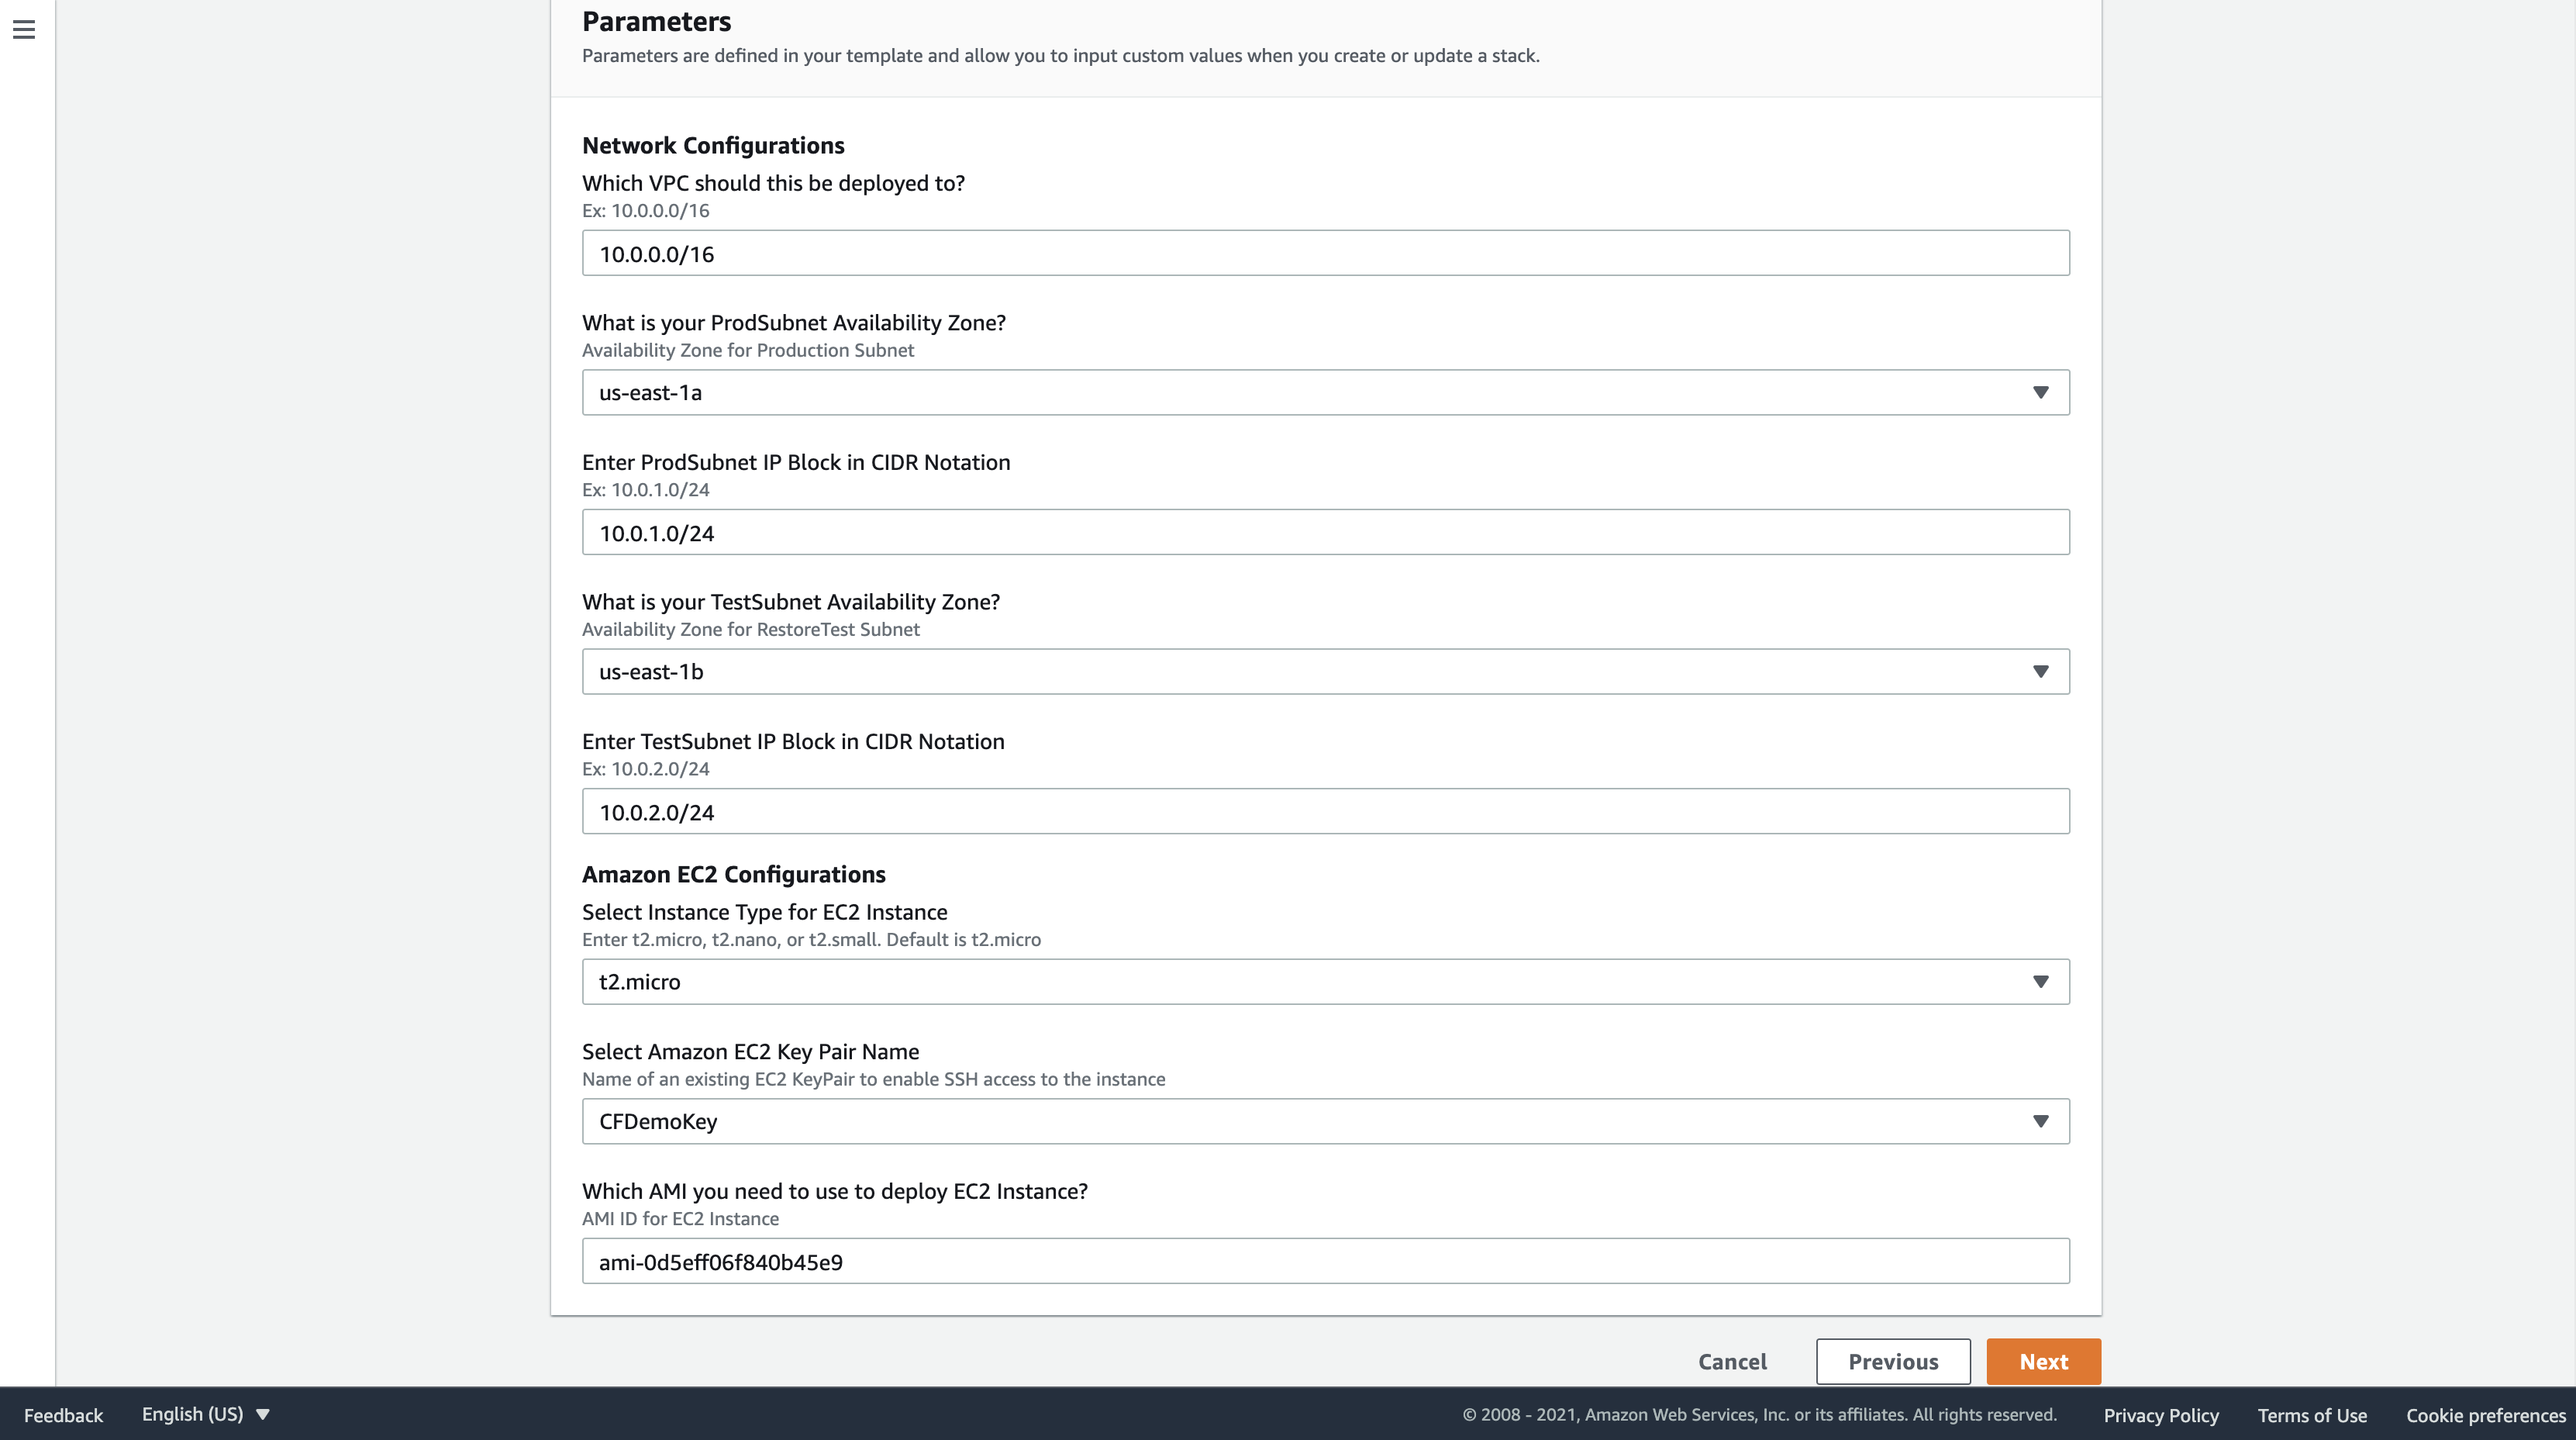
Give a Stack name and then modify the parameters according to your requirement and click Next.
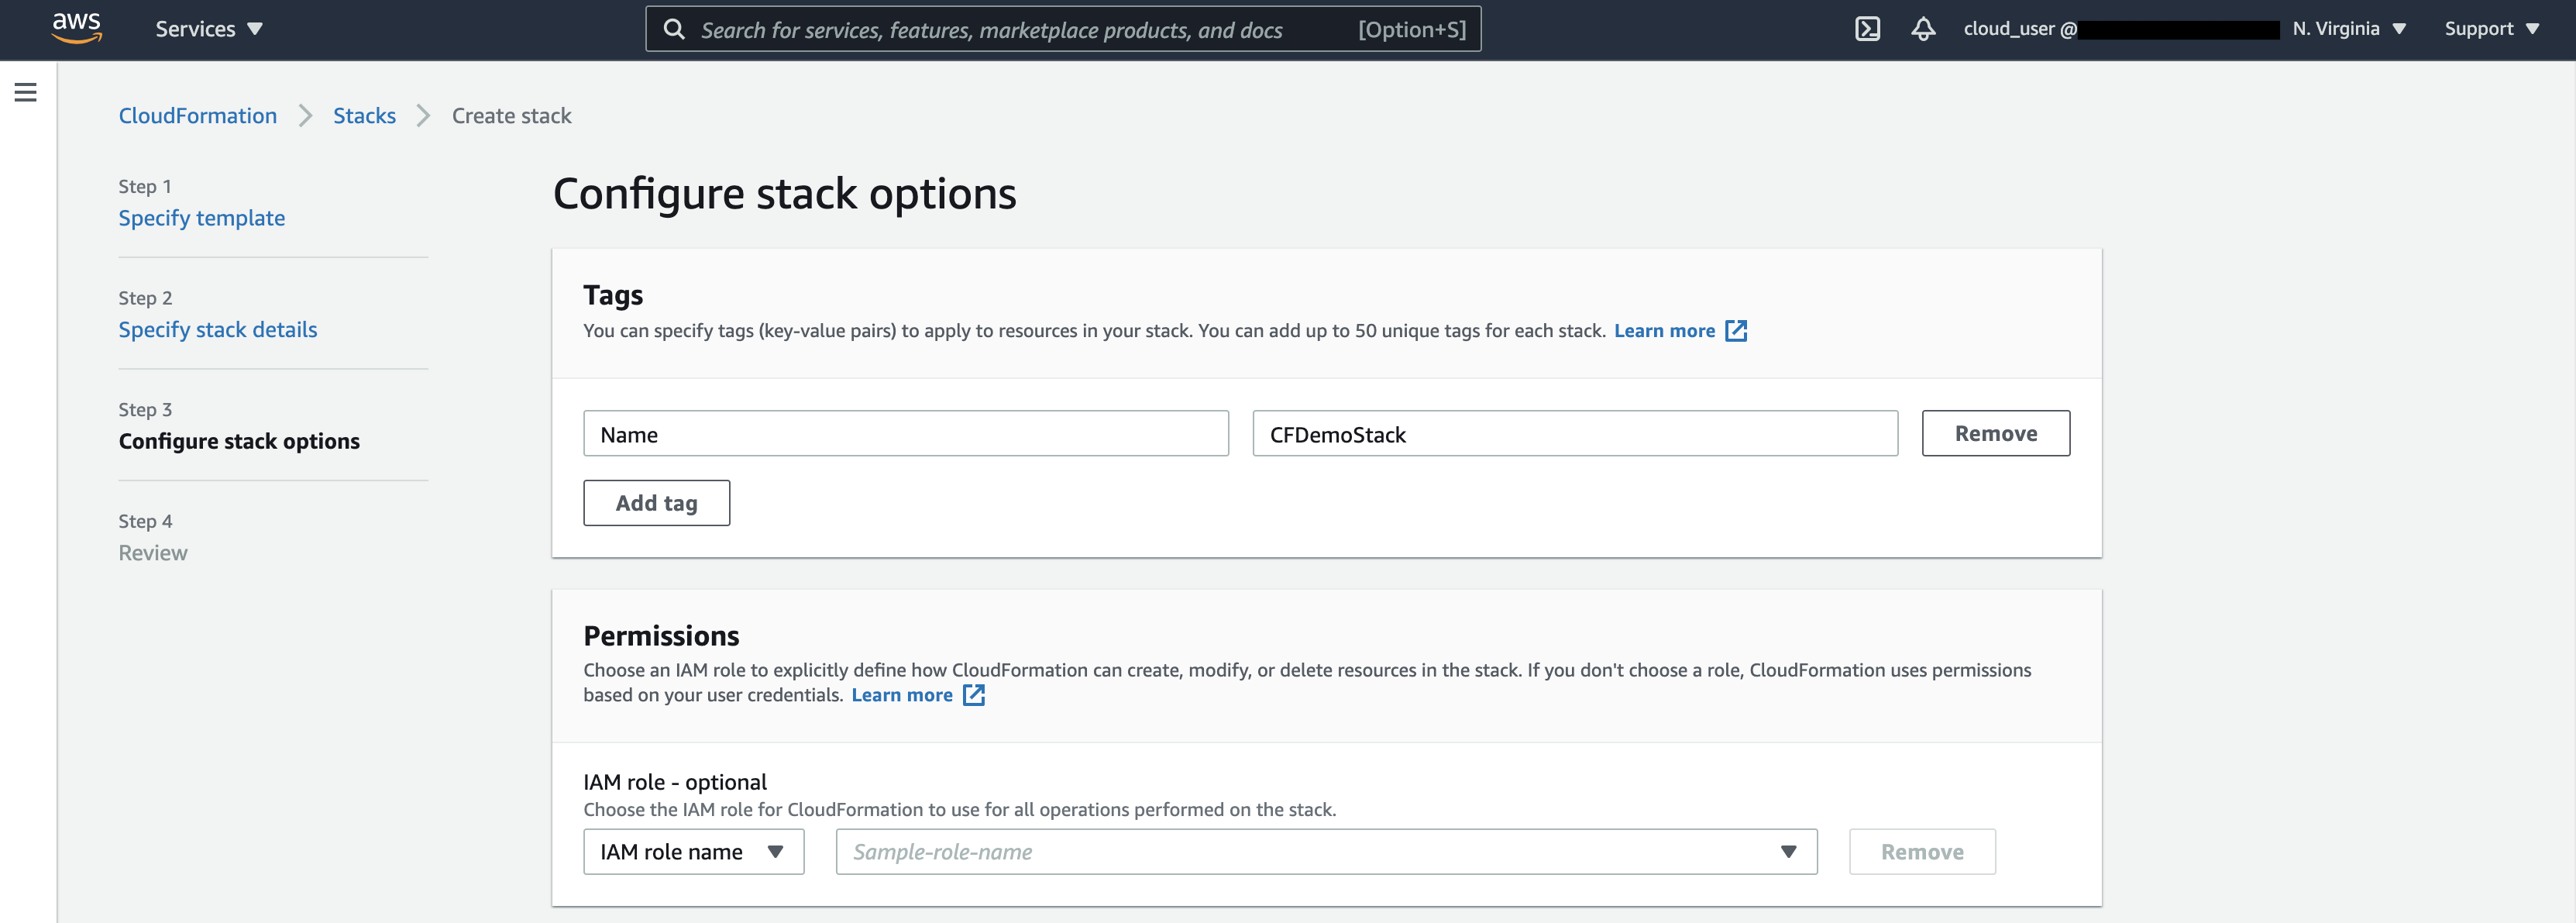
If required, you can add Tags in this section and I’m keeping all other options as default configurations there and click Next.
Review all configurations you modified before clicking Create stack. If everything looks good then you can proceed with the Create stack button.
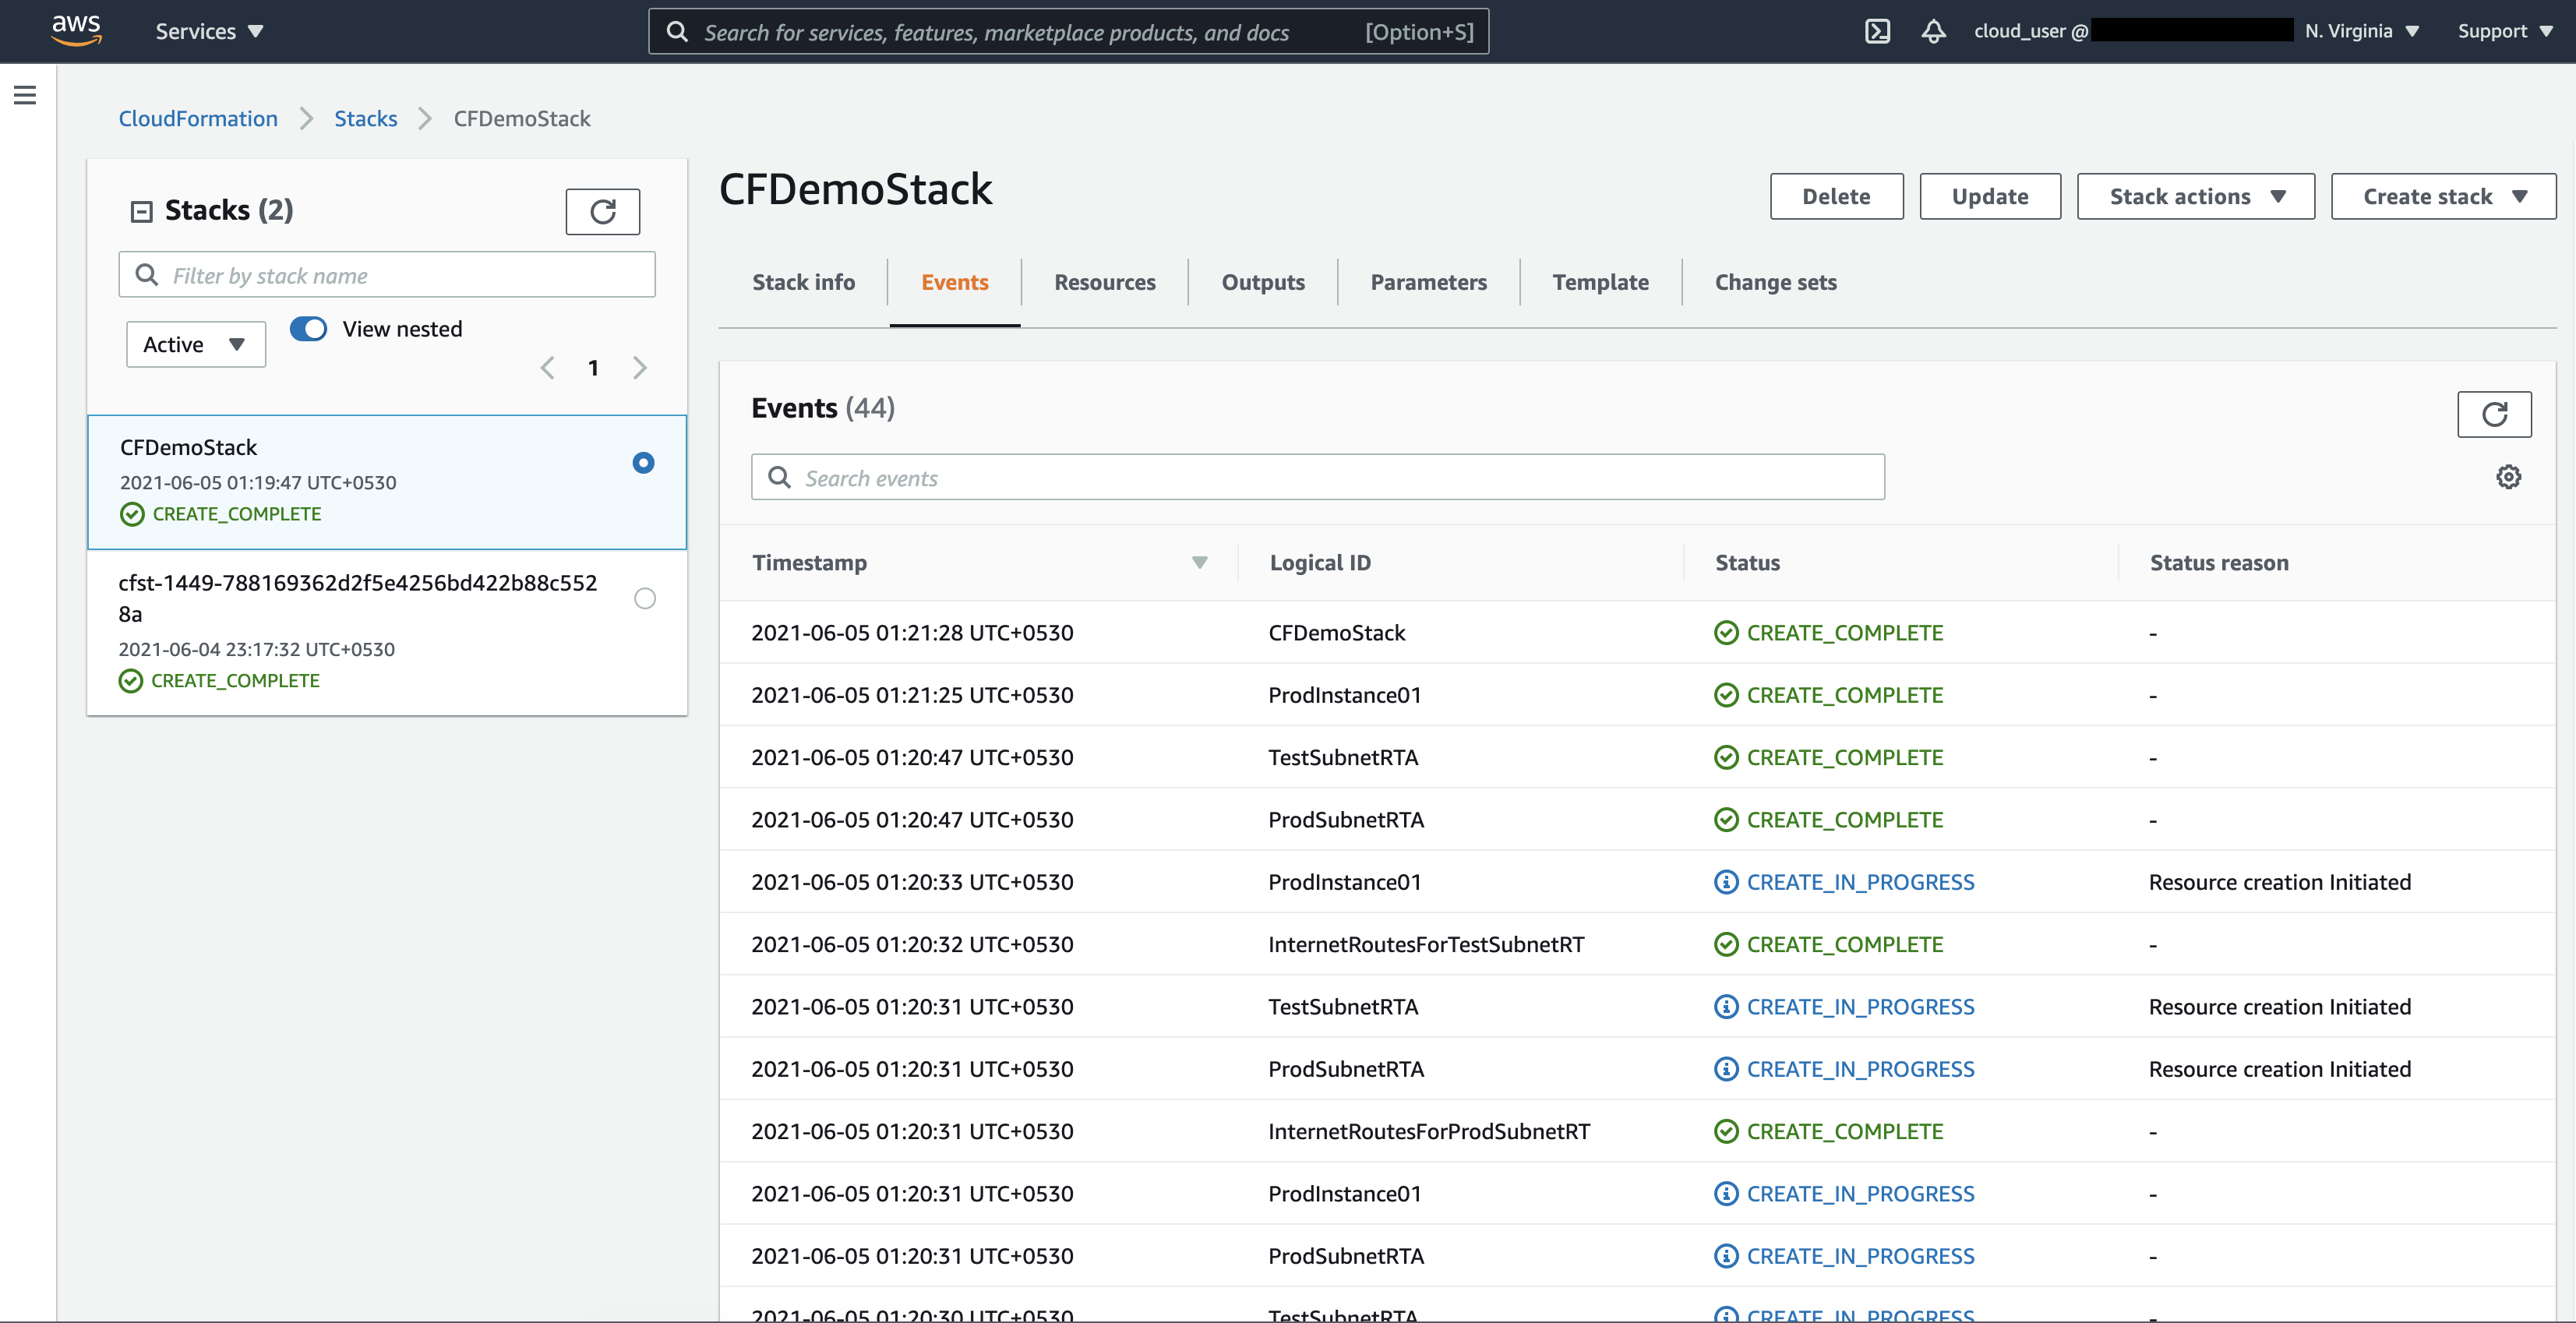
The execution of the template will start and you can see the progress in the “Events” tab.
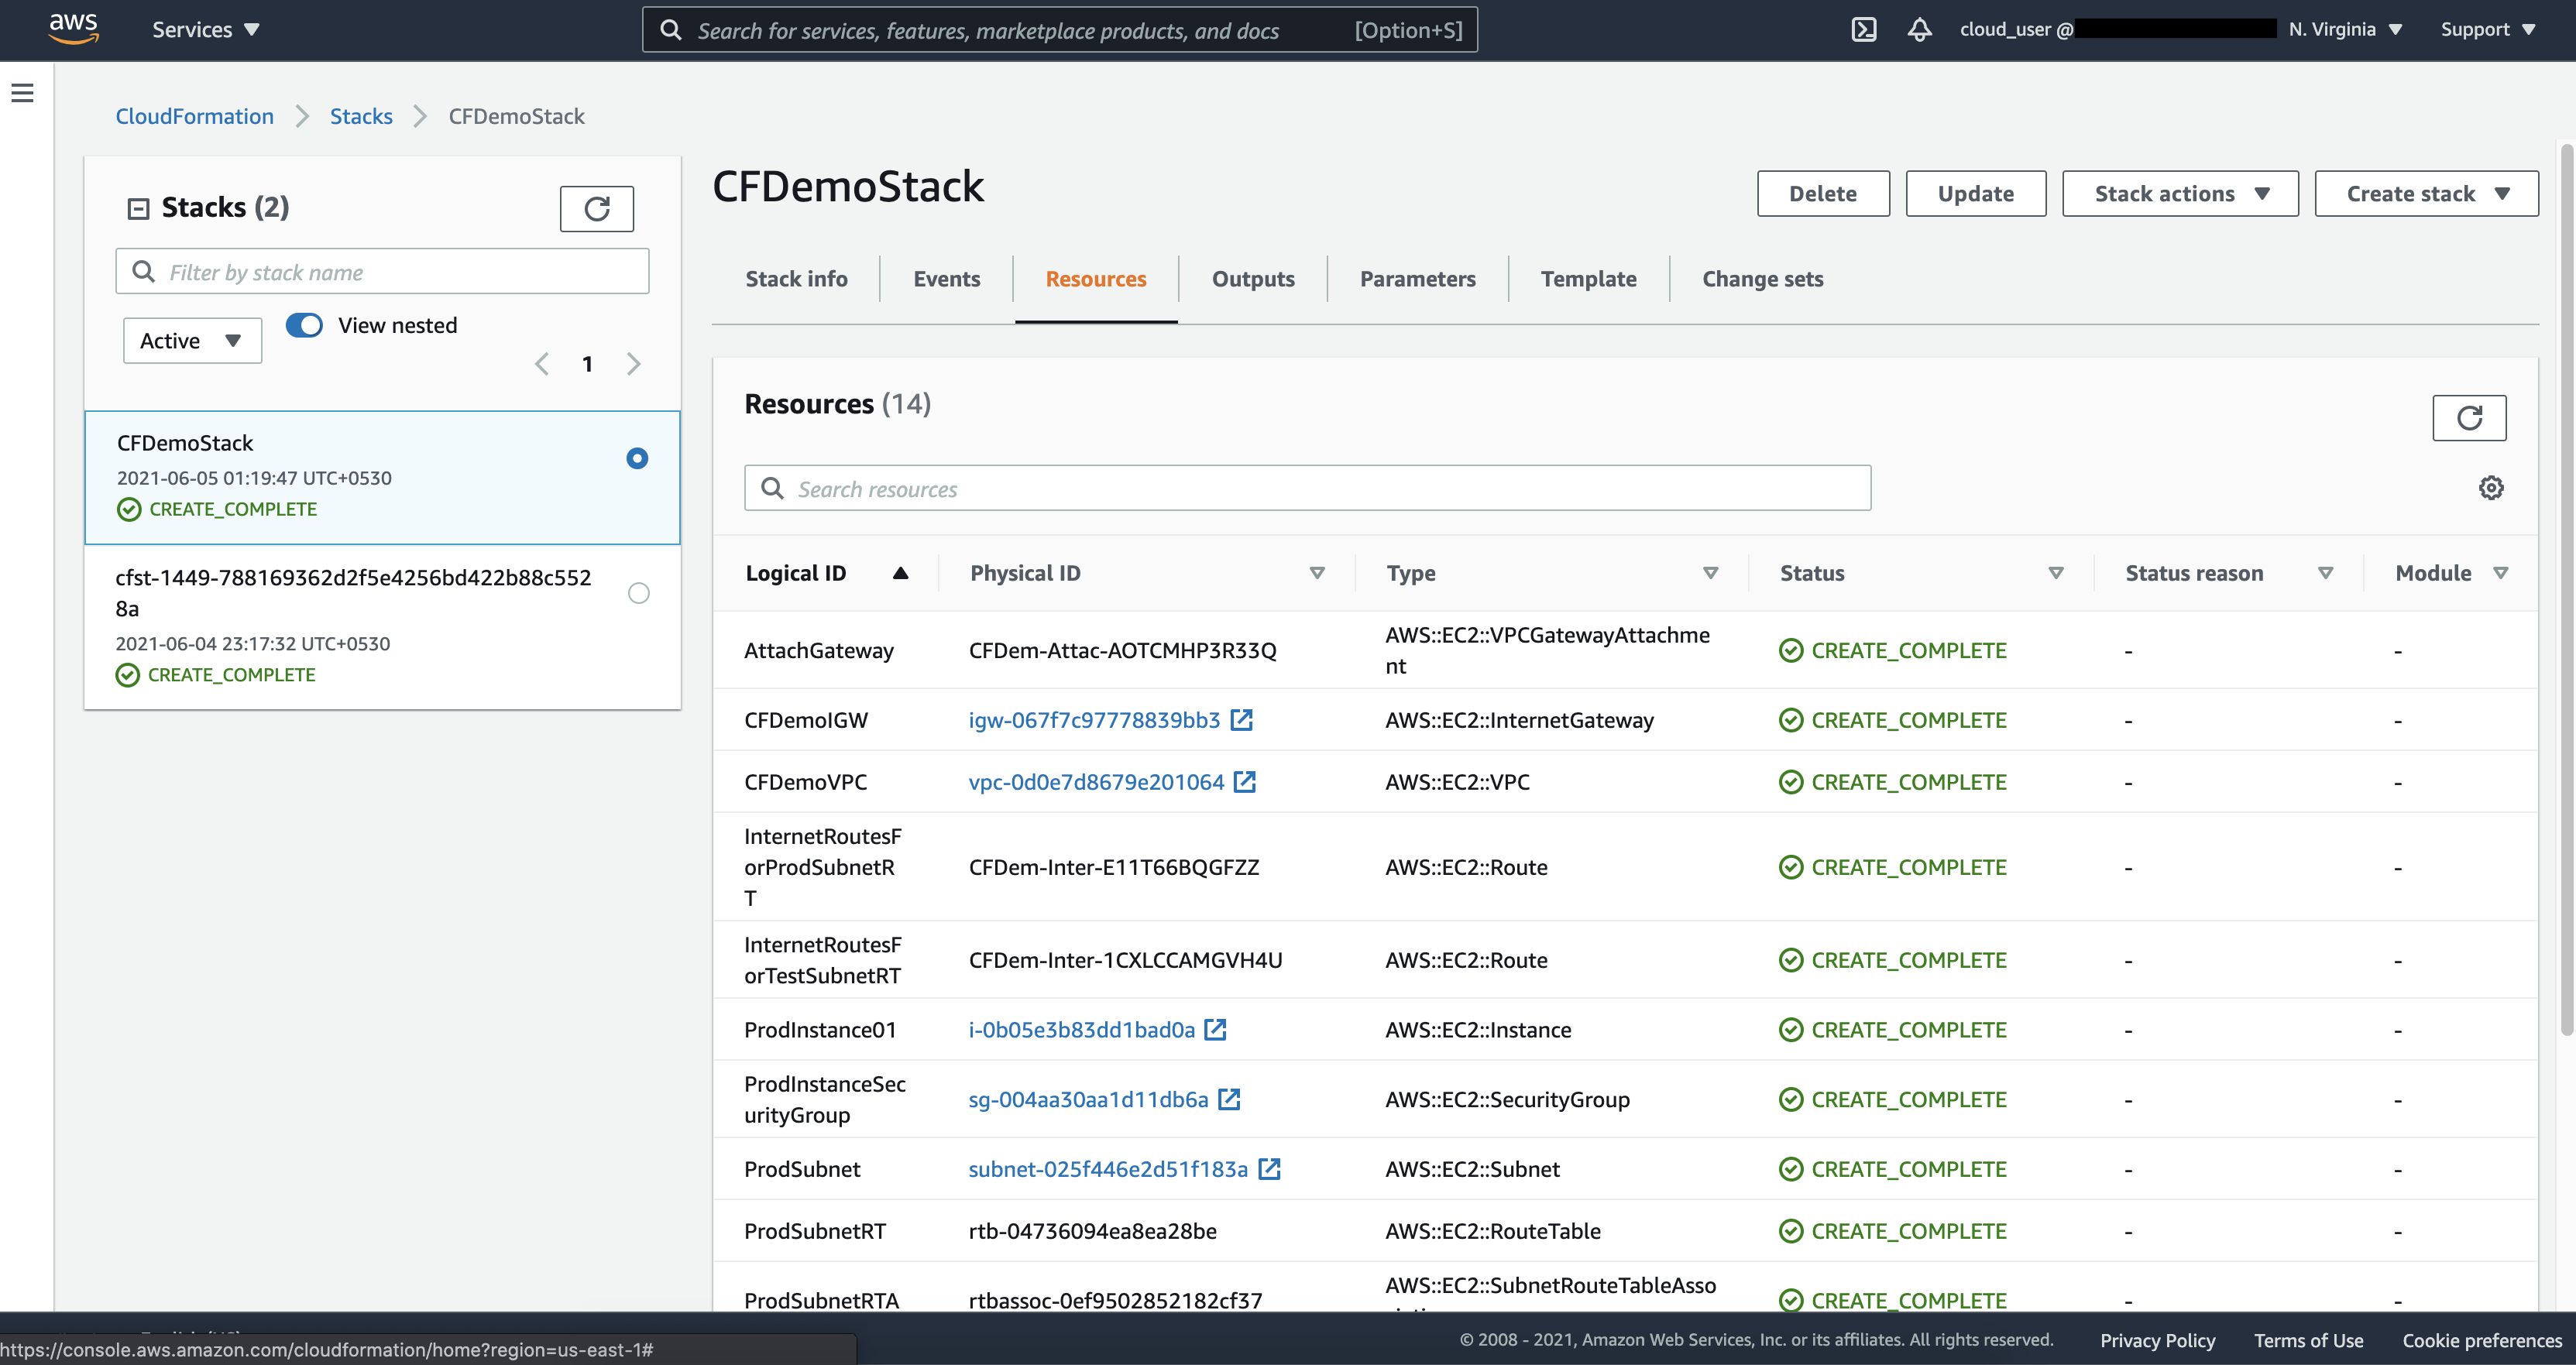
Click on the “Resources” tab to see the list of newly created resources.
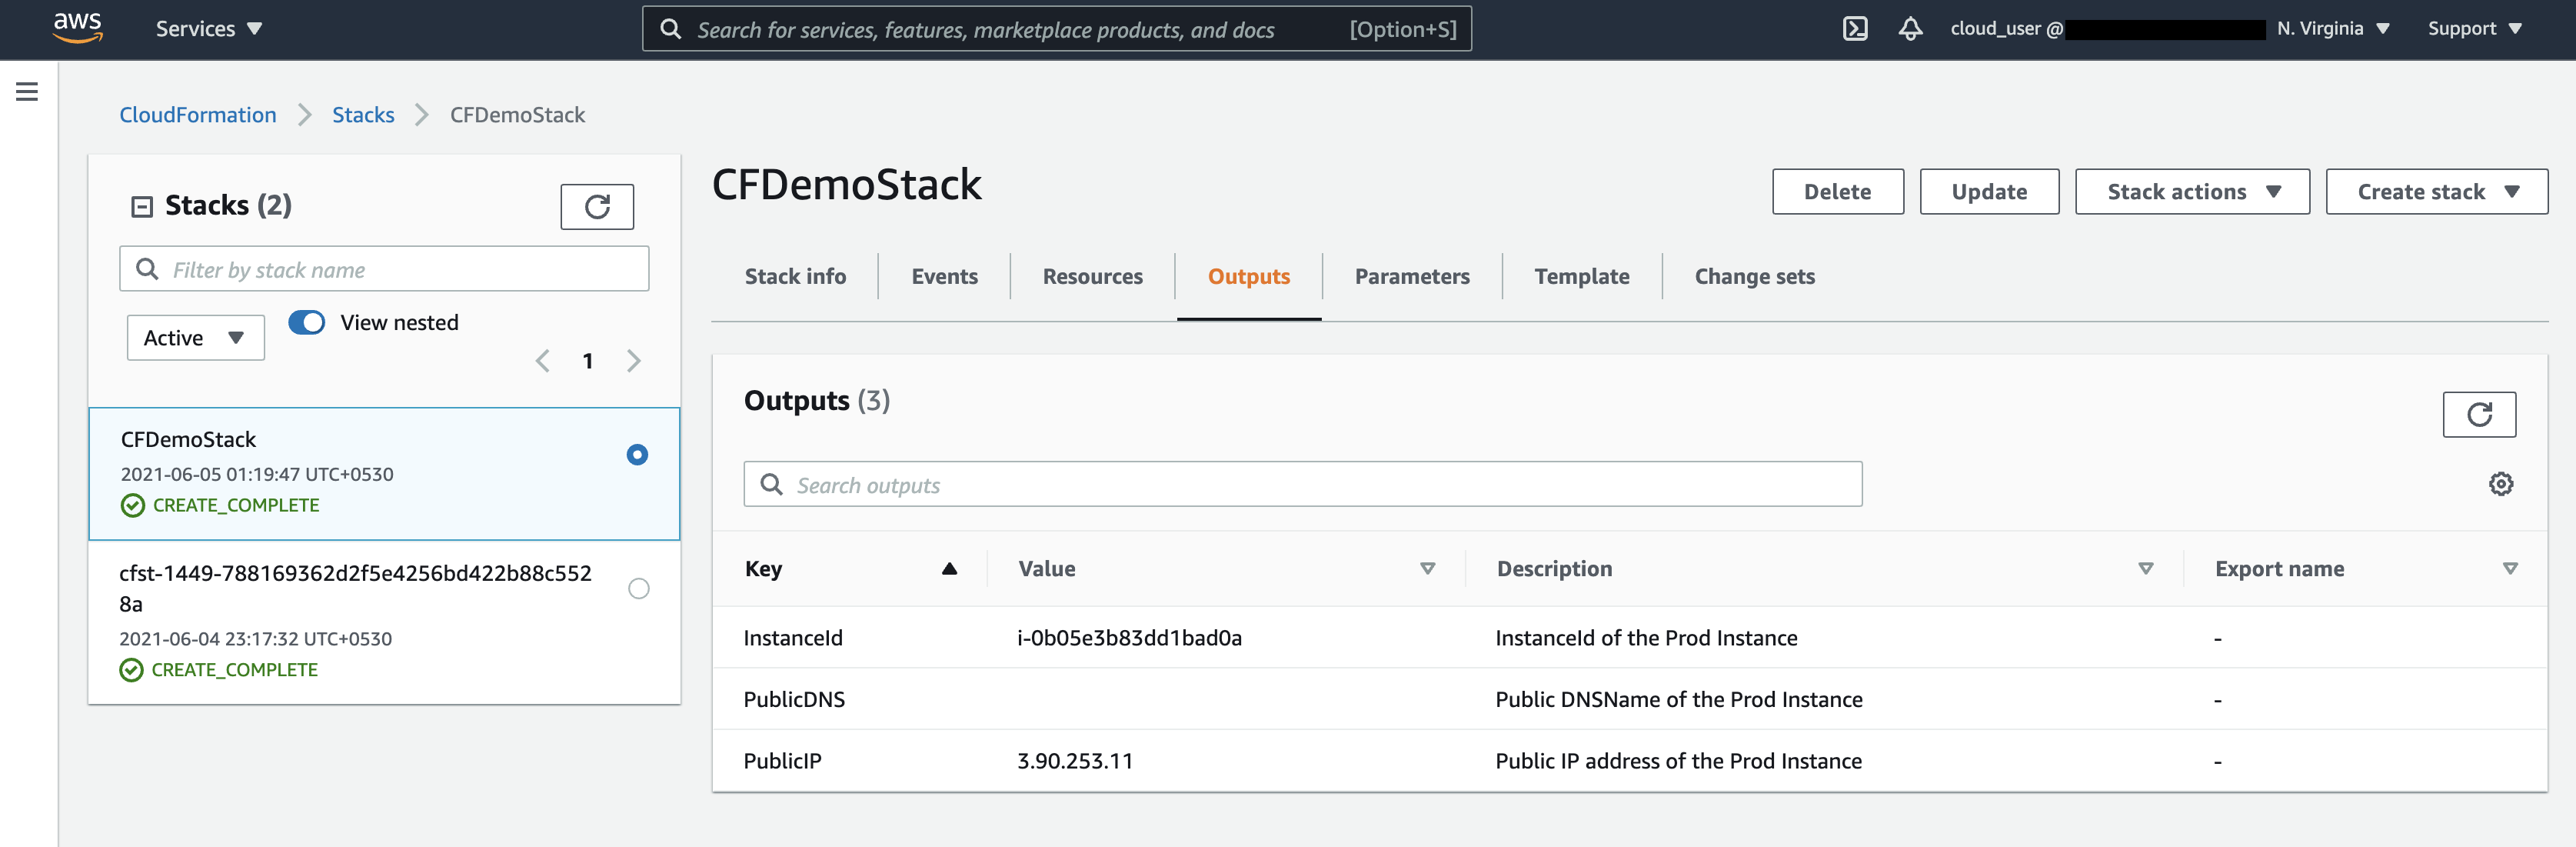
Once you see CREATE_COMPLETE, that means your stack is successfully deployed and EC2 Instance is up and running. In the Outputs section, you can get the public IP of the created instance.
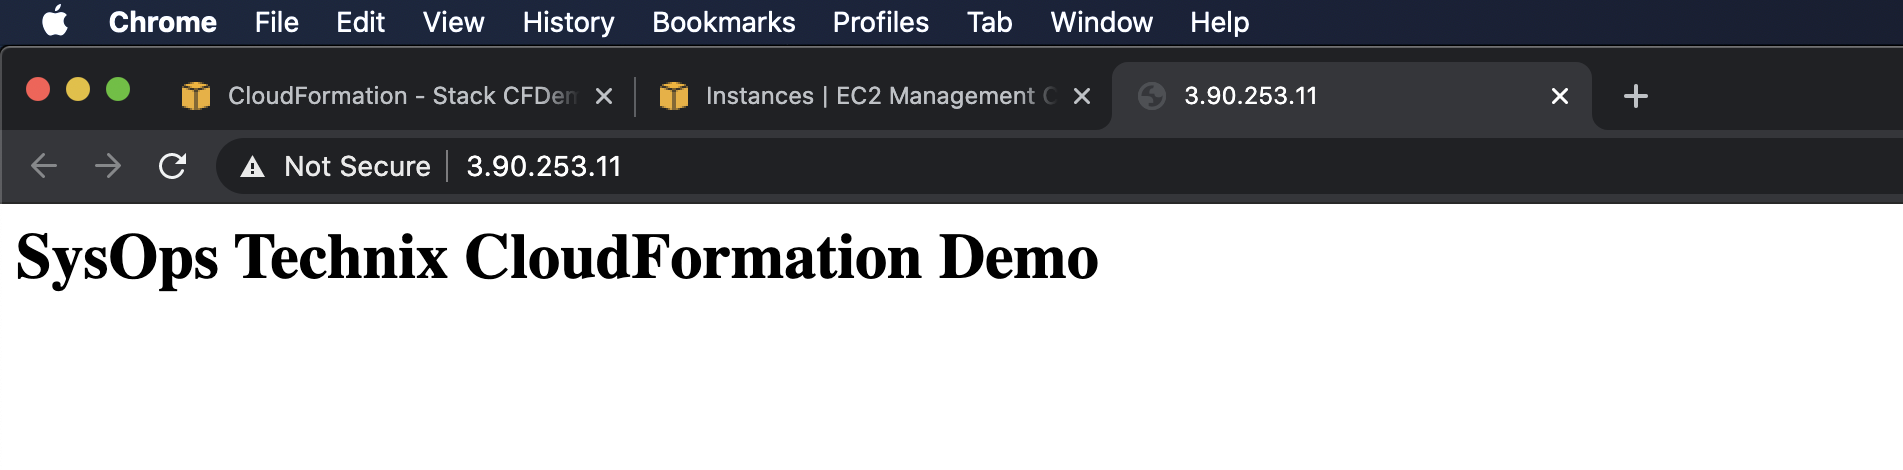
Finally, you can check the deployed environment and EC2 instance is working by pasting the public IP in your web browser.
Conclusion
In this article, you have learned about the basics of AWS Cloud Formation services, how to create templates and upload them in a stack, and how to set up a new EC2 Instance along with User Data Script.