
In this era, sending SMS appears to be outdated technology, but in some cases, it is a very simple, robust, and indispensable technology in mobile communication. There may be various third-party solutions you may know for SMS gateways, but those solutions are very costly if you are administering a small organization.
Are you looking for the cheapest and easiest way to send SMS alerts from your alerting systems?
I have really interested in the field of the Internet of Things (IoT), therefore I thought it would be cool to integrate a Raspberry Pi as an SMS gateway solution with the help of an old 3G USB dongle.
In this article, I’m going to show you how to set up the hardware and how you can send and receive SMS using SMS Server Tools 3 (SMS Gateway). In addition, playSMS can be integrated as a complete SMS server management with API functionalities which allows complete flexibility when processing incoming and outgoing SMS messages as well as integrating into other systems.
Hardware and software requirements
- Raspberry PI 3 Model B+
- Power supply for Raspberry PI (5V, 2A)
- Keyboard + HDMI Cable
- 3G USB Dongle
- Memory Card
- Activated SIM Card
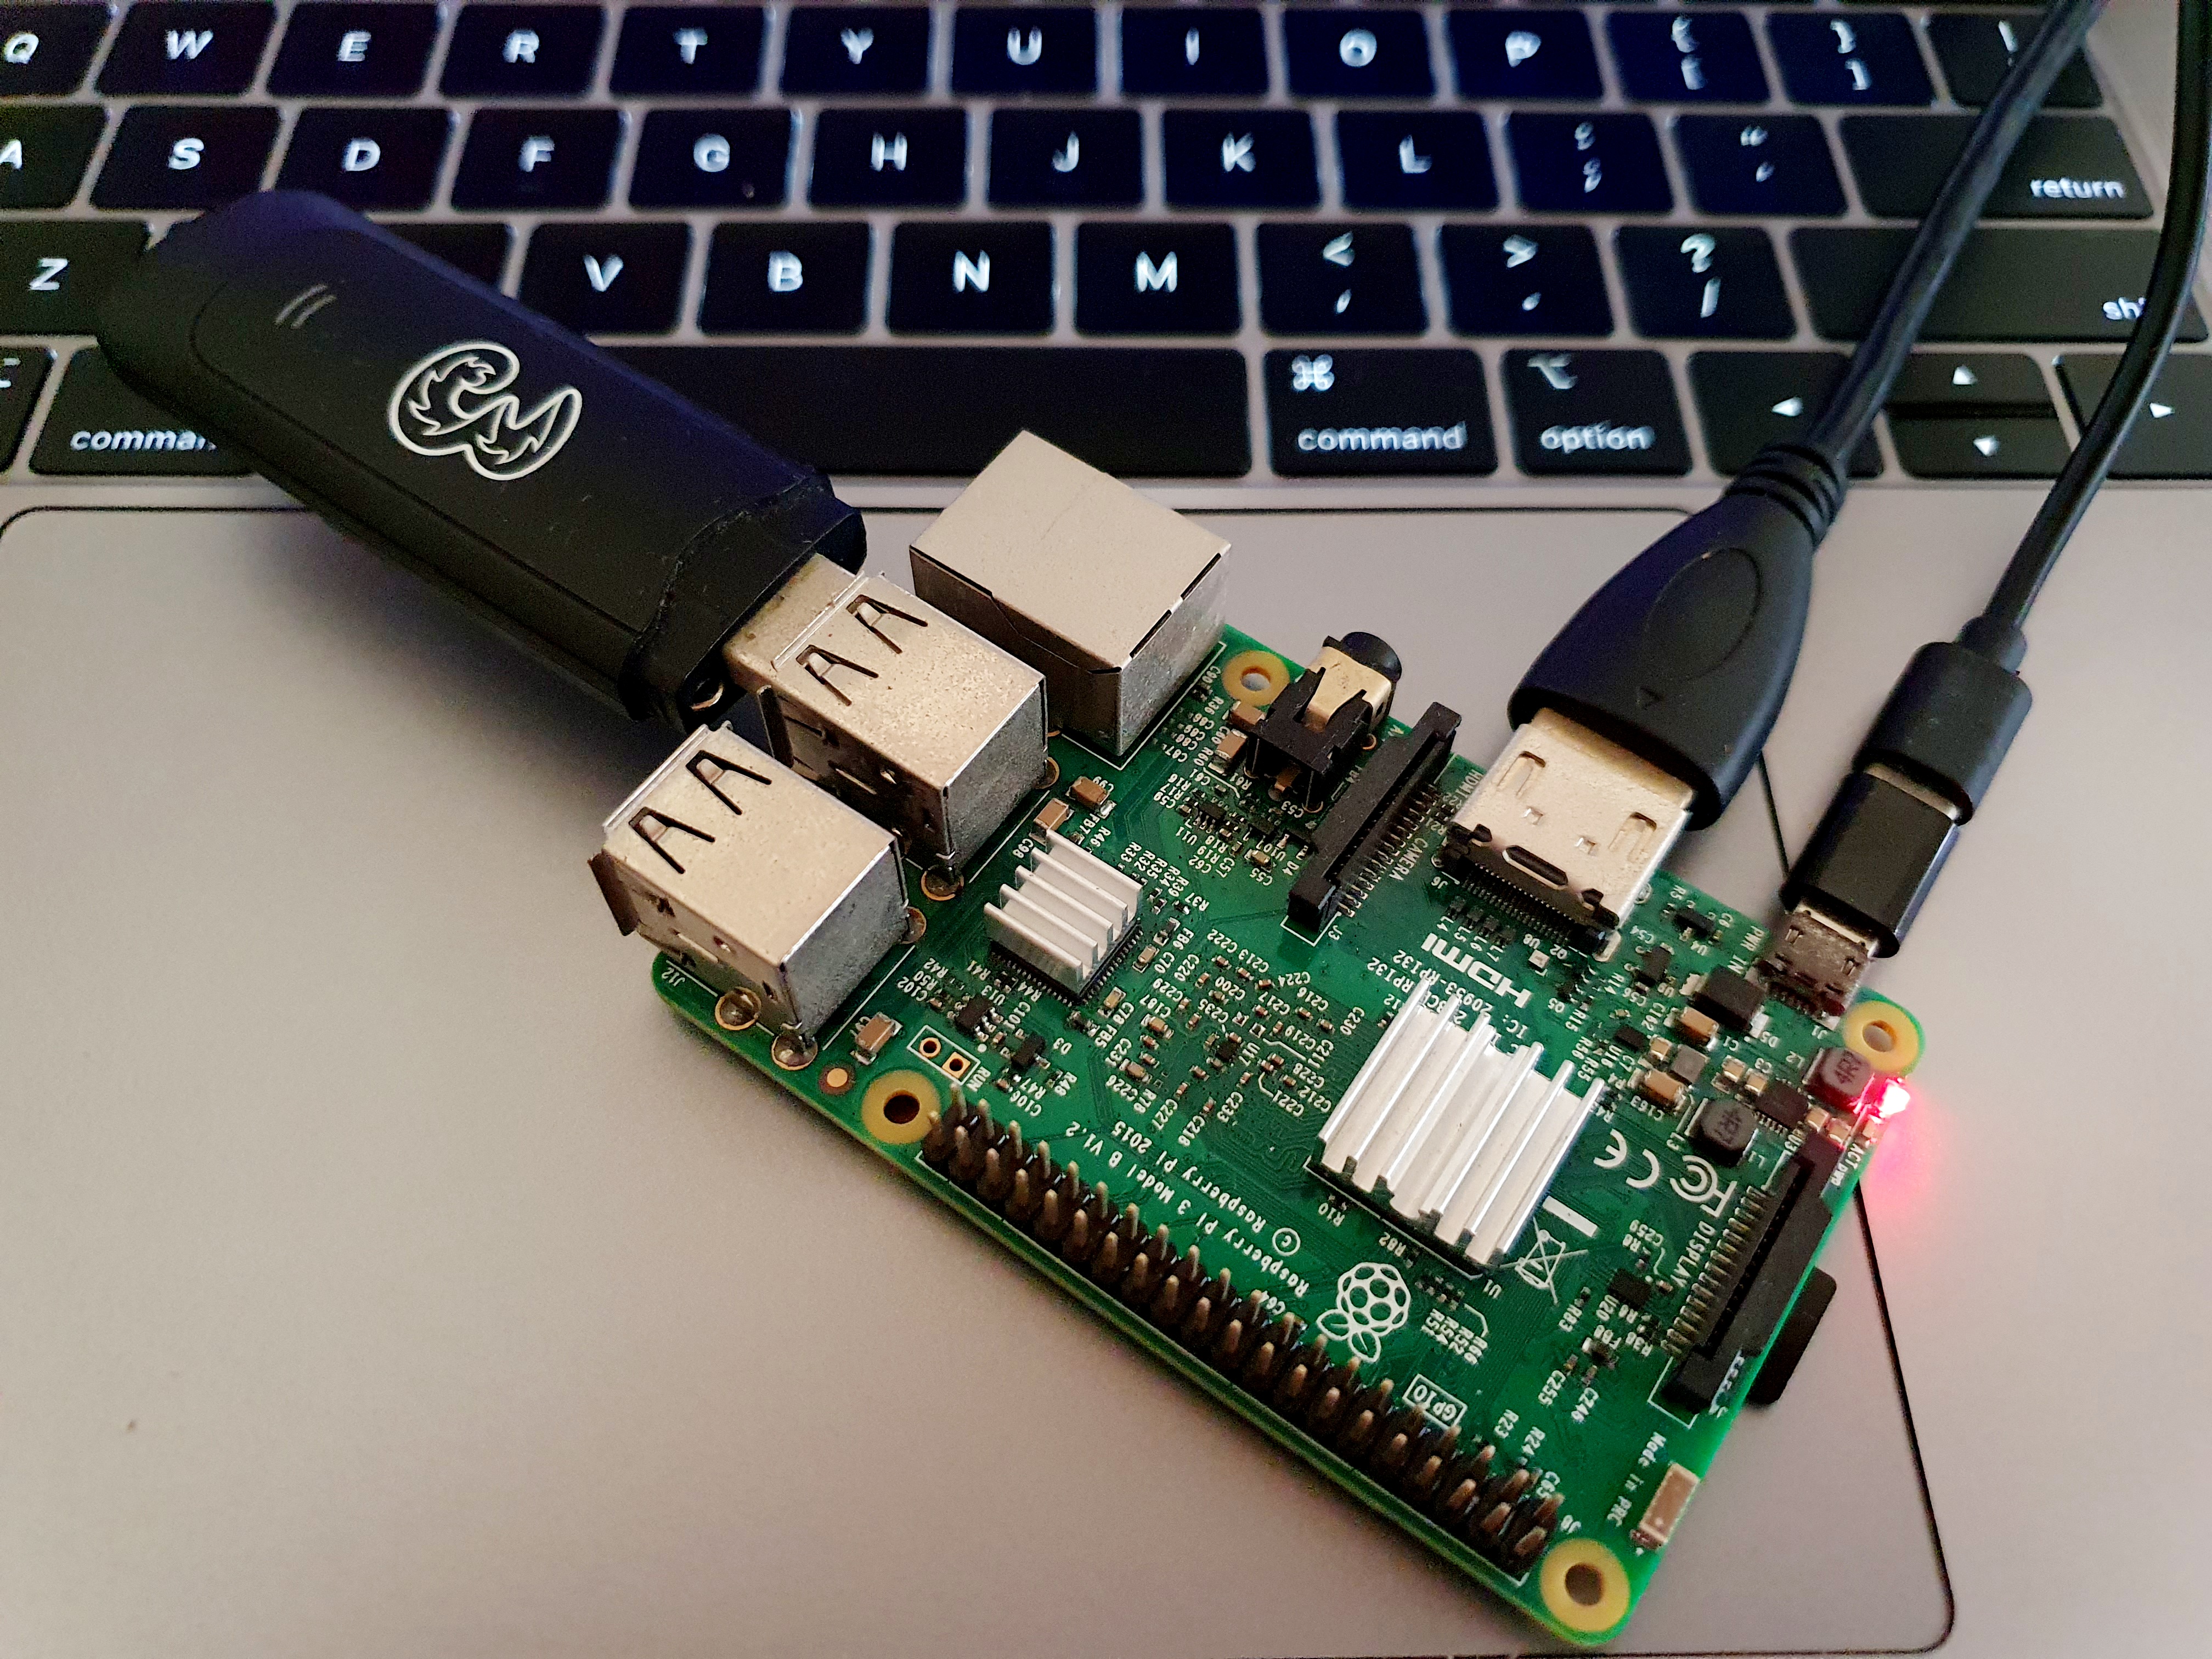
Assembling the Hardware Together
According to the below image, connect the cables with Raspberry Pi 3 and plug the USB 3G Dongle through the USB port. Make sure the USB 3G Dongle is inserted with a registered SIM card and is in an active state.
Initial Setup of Raspberry PI
Before you proceed with this article, initially you have to install Raspbian OS on your Raspberry Pi device. So that the following video will clearly show how to install Raspbian OS using Raspberry Pi Imager. Please go through the video and prepare your Raspberry Pi ready to use.
More Reference: https://www.raspberrypi.com/documentation/computers/getting-started.html
Once you install the Raspbian OS, insert the memory card into the Raspberry Pi and power up the device. Once the OS is loaded you can connect the Raspberry PI device to the WIFI or Wired Ethernet network.
Let’s Start to Configure Raspberry Pi as an SMS Gateway
Check the USB 3G Dongle Connectivity
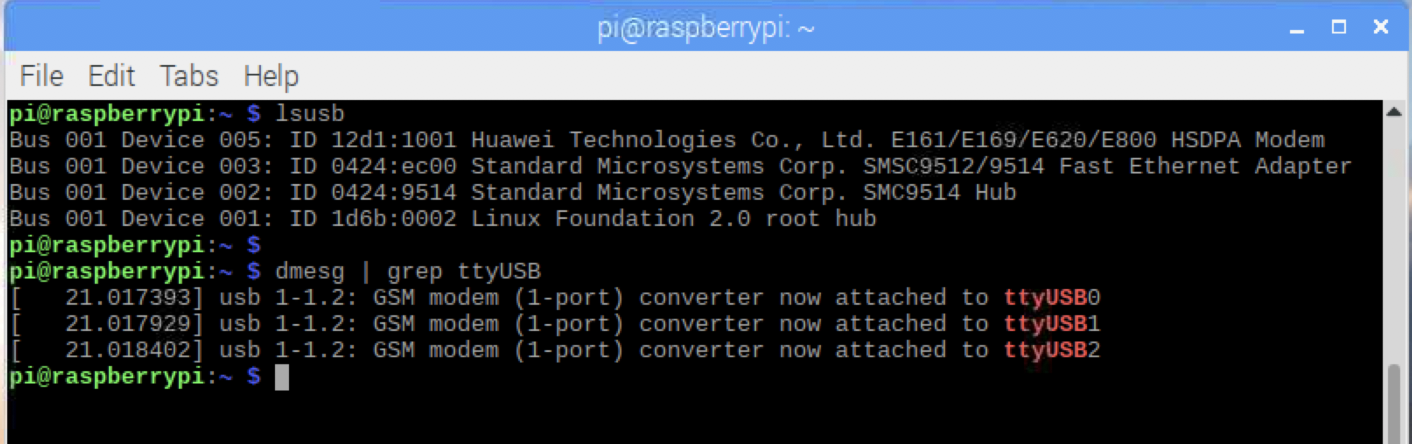
SSH into the Raspberry Pi or open the terminal inside it (if you’re using a keyboard and monitor) from the local machine. Then enter the following command to list all of the USB devices connected to your Raspberry Pi.
lsusb
Now you need to know the location, where on your Raspberry Pi the USB Dongle is mounted in the file system:
dmesg | grep ttyUSB
If you are not connected to any other USB serial devices other than the USB Dongle, you will almost certainly be using the name ttyUSB0 in the command output.
Let’s connect to the 3G Dongle via the terminal, you need to install the following tool.
apt install picocom
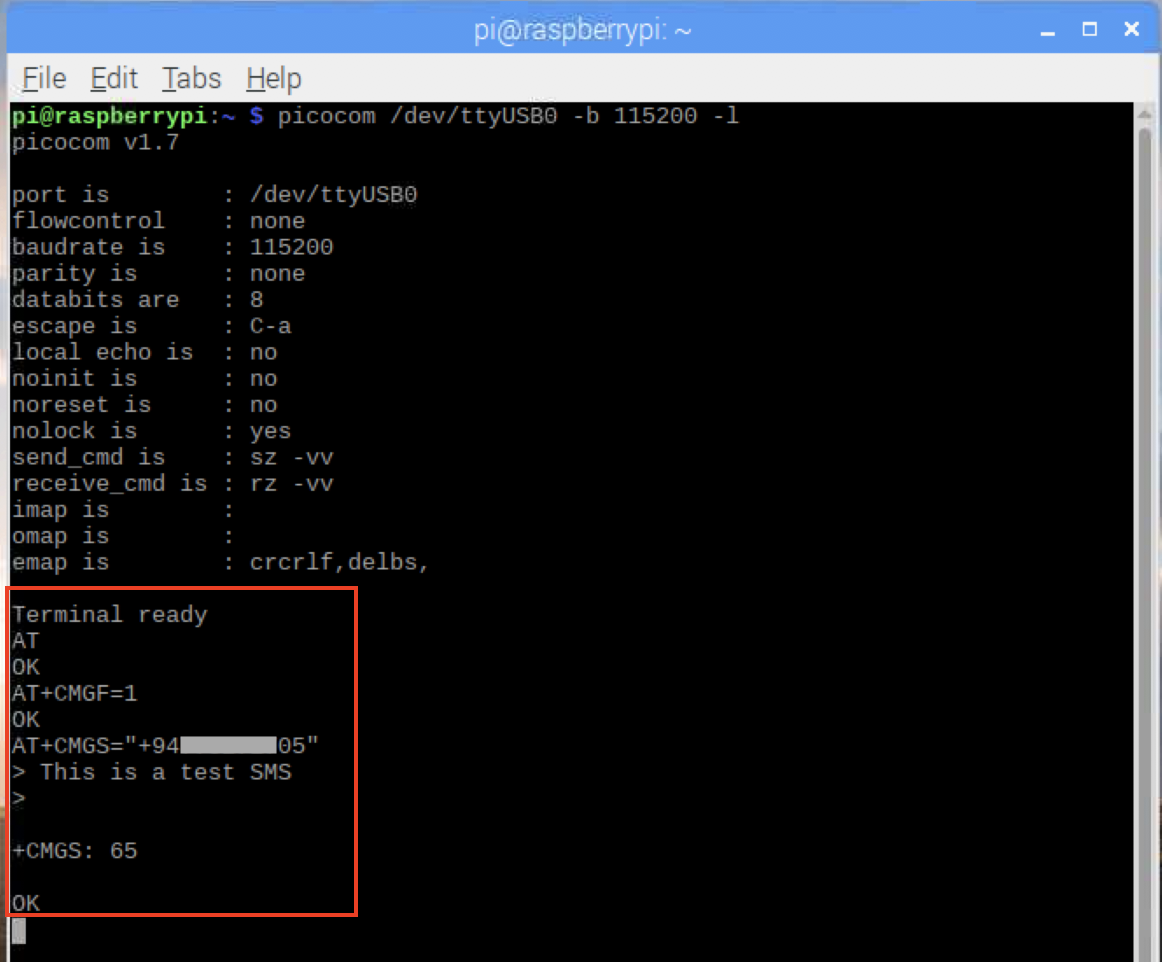
Once the tool is installed, enter the following command to get access to the USB Dongle. That will open the serial communication to the USB Dongle.
picocom /dev/ttyUSB0 -b 115200 -l
To communicate with any GSM (Global System for Mobile Communications – Communication system most widely used in mobile phones) device, you should have somewhat idea about AT commands. So issue the following commands to ensure that your GSM communication works properly.
AT <ENTER>
OK         #If the modem reponds with "OK" the GSM modem is ready.
Sample AT commands to send an SMS:
AT+CMGF=1 <ENTER>  #Set the GSM modem in SMS Text Mode
OK                 #If the modem reponds with "OK" this mode is supported.

AT+CMGS="+94771234505"              #Add a phone number
> This is the text message.         #Add a Message and press CTRL+Z
+CMGS: 65
OK
Install & Configure Gateway (SMS Server Tools 3)
SMS Server Tools 3 is Linux-based SMS Gateway software that can send and receive short messages through GSM modems and mobile phones.
Install the required packages for the build
First, we install build tools and other required packages to build the latest version. Run:
apt install build-essential libusb-1.0 libusb-1.0-0-dev vim
Download & Install SMS Server Tools 3
cd /usr/local/src
wget -c http://smstools3.kekekasvi.com/packages/smstools3-3.1.21.tar.gz
tar -zxvf smstools3-3.1.21.tar.gz
cd smstools3
make
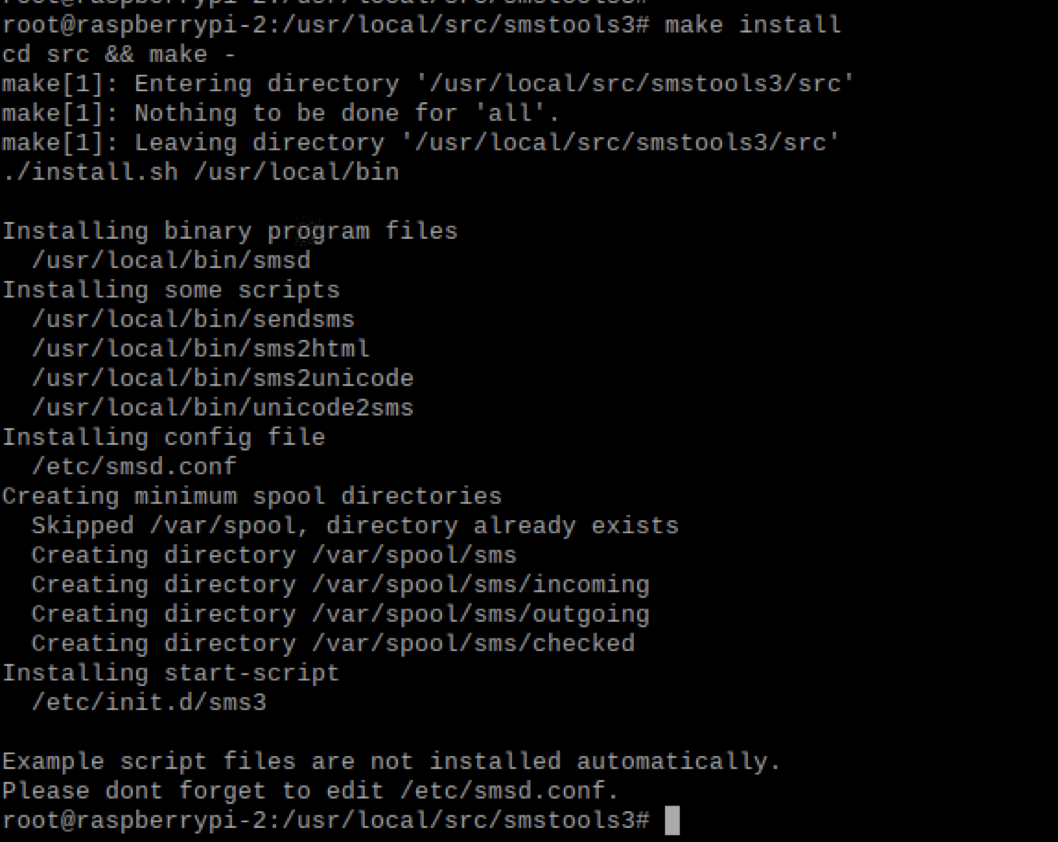
make install
Upon successful installation, you will see the output as follows.
Configure the SMS Server Tools
Create the required directory locations.
mkdir -p /var/log/sms/stats
mkdir -p /var/spool/sms/{checked,failed,incoming,outgoing,sent,modem1}
Back up the existing configurations and add the following configurations accordingly to the /etc/smsd.conf file.
mv /etc/smsd.conf /etc/smsd.conf.bak
vim /etc/smsd.conf
devices = modem1

loglevel = 5

# logfiles
stats = /var/log/sms/stats
logfile = /var/log/sms/smsd.log

# Default queue directory = /var/spool/sms
outgoing = /var/spool/sms/outgoing
checked = /var/spool/sms/checked
failed = /var/spool/sms/failed
incoming = /var/spool/sms/incoming
sent = /var/spool/sms/sent

delaytime = 2
errorsleeptime = 10
blocktime = 180
autosplit = 3

# Queue configurations
[queues]
modem1 = /var/spool/sms/modem1

# Modem configurations
# Modem name: modem1
[modem1]
device = /dev/ttyUSB0
baudrate = 115200
incoming = yes
report = yes
queues = modem1
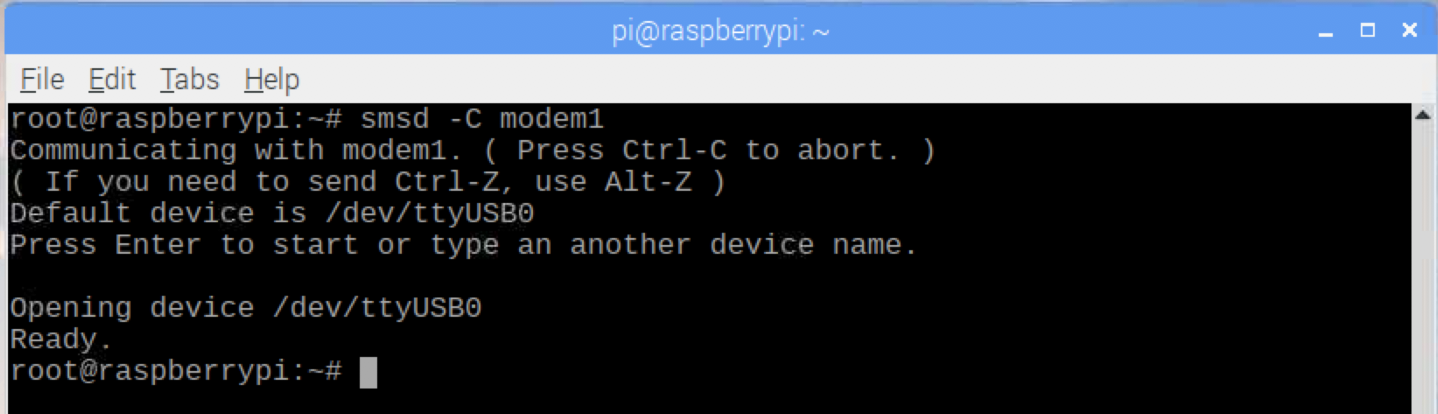
Once all the above configurations are done you can check it by the following command.
smsd -C modem1
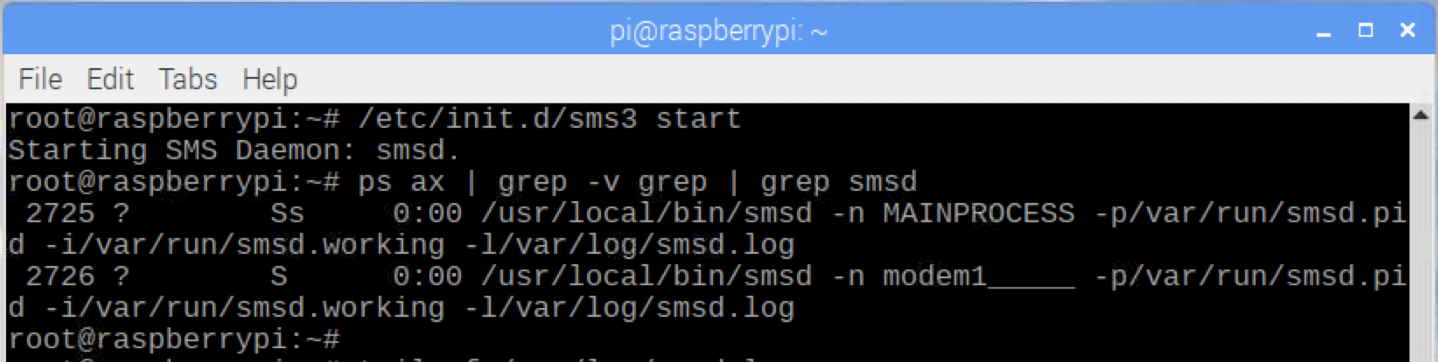
Start the SMS Gateway
/etc/init.d/sms3 start

#Check the services are running.
ps ax | grep -v grep | grep smsd
Test the SMS Gateway
There are 2 main methods of sending messages using SMS Server Tools.
- Creating an SMS file in the “
/var/spool/sms/outgoing” folder with the following content. The filename does not matter but it has to be unique.
To: 94771234505

Hello, this is the sms.
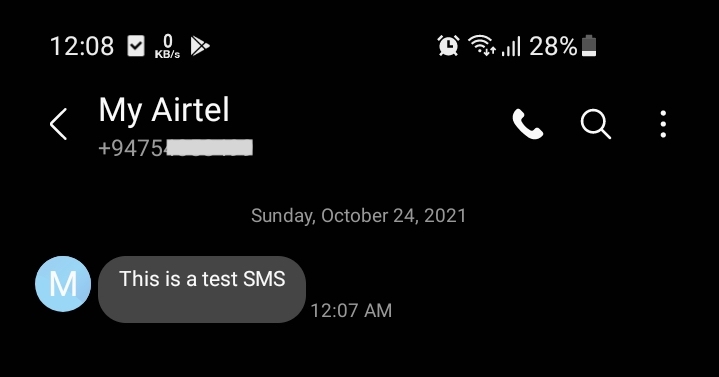
- Using the binary “sendsms” you can send SMS.
sendsms 94771234505 'This is a test SMS using the sendsms'

Note that write the phone number in international format without the leading +.
Integrate SMS Server Tools3 with PlaySMS
playSMS is a free and open-source SMS management software, a web interface for SMS gateways and bulk SMS services.
Prepare Environment to Install PlaySMS
Install the prerequisites packages for playSMS.
apt-get install apache2 mariadb-server php php-cli php-mysql php-gd php-curl php-mbstring php-xml php-zip
Add a Generic Linux User for playSMS.
adduser playsms
usermod -a -G sudo playsms
Add Apache VirtualHost configuration in /etc/apache2/sites-available/playsms.conf file.
<VirtualHost *:80>
    ServerName smsgw.sysopstechnix.com
    DocumentRoot /home/playsms/public_html
    ErrorLog /home/playsms/log/httpd-error.log
    CustomLog /home/playsms/log/httpd-accesss.log combined
    <Directory /home/playsms/public_html>
        AllowOverride FileInfo AuthConfig Limit Indexes
        Options MultiViews Indexes SymLinksIfOwnerMatch IncludesNoExec
        Require method GET POST OPTIONS
        php_admin_value engine On
    </Directory>
</VirtualHost>
Create the document root for playSMS.
mkdir -p /home/playsms/{public_html,log,bin,etc,lib,src}
chmod -R 775 /home/playsms
chown playsms:playsms -R /home/playsms

touch /home/playsms/log/audit.log /home/playsms/log/playsms.log
chmod 664 /home/playsms/log/*
chown www-data.playsms -R /home/playsms/log
Enable the Apache modules and restart the service.
a2ensite playsms.conf

#Check whether apache syntaxes are OK and restart the apache service
apachectl -t
systemctl restart apache2.service
systemctl enable apache2.service
Let’s harden the MySQL server install.
systemctl start mariadb.service
systemctl enable mariadb.service

mysql_secure_installation

Enter current password for root (enter for none): <Enter>
Set root password? [Y/n] y
Remove anonymous users? [Y/n] y
Disallow root login remotely? [Y/n] y
Remove test database and access to it? [Y/n] y
Reload privilege tables now? [Y/n] y
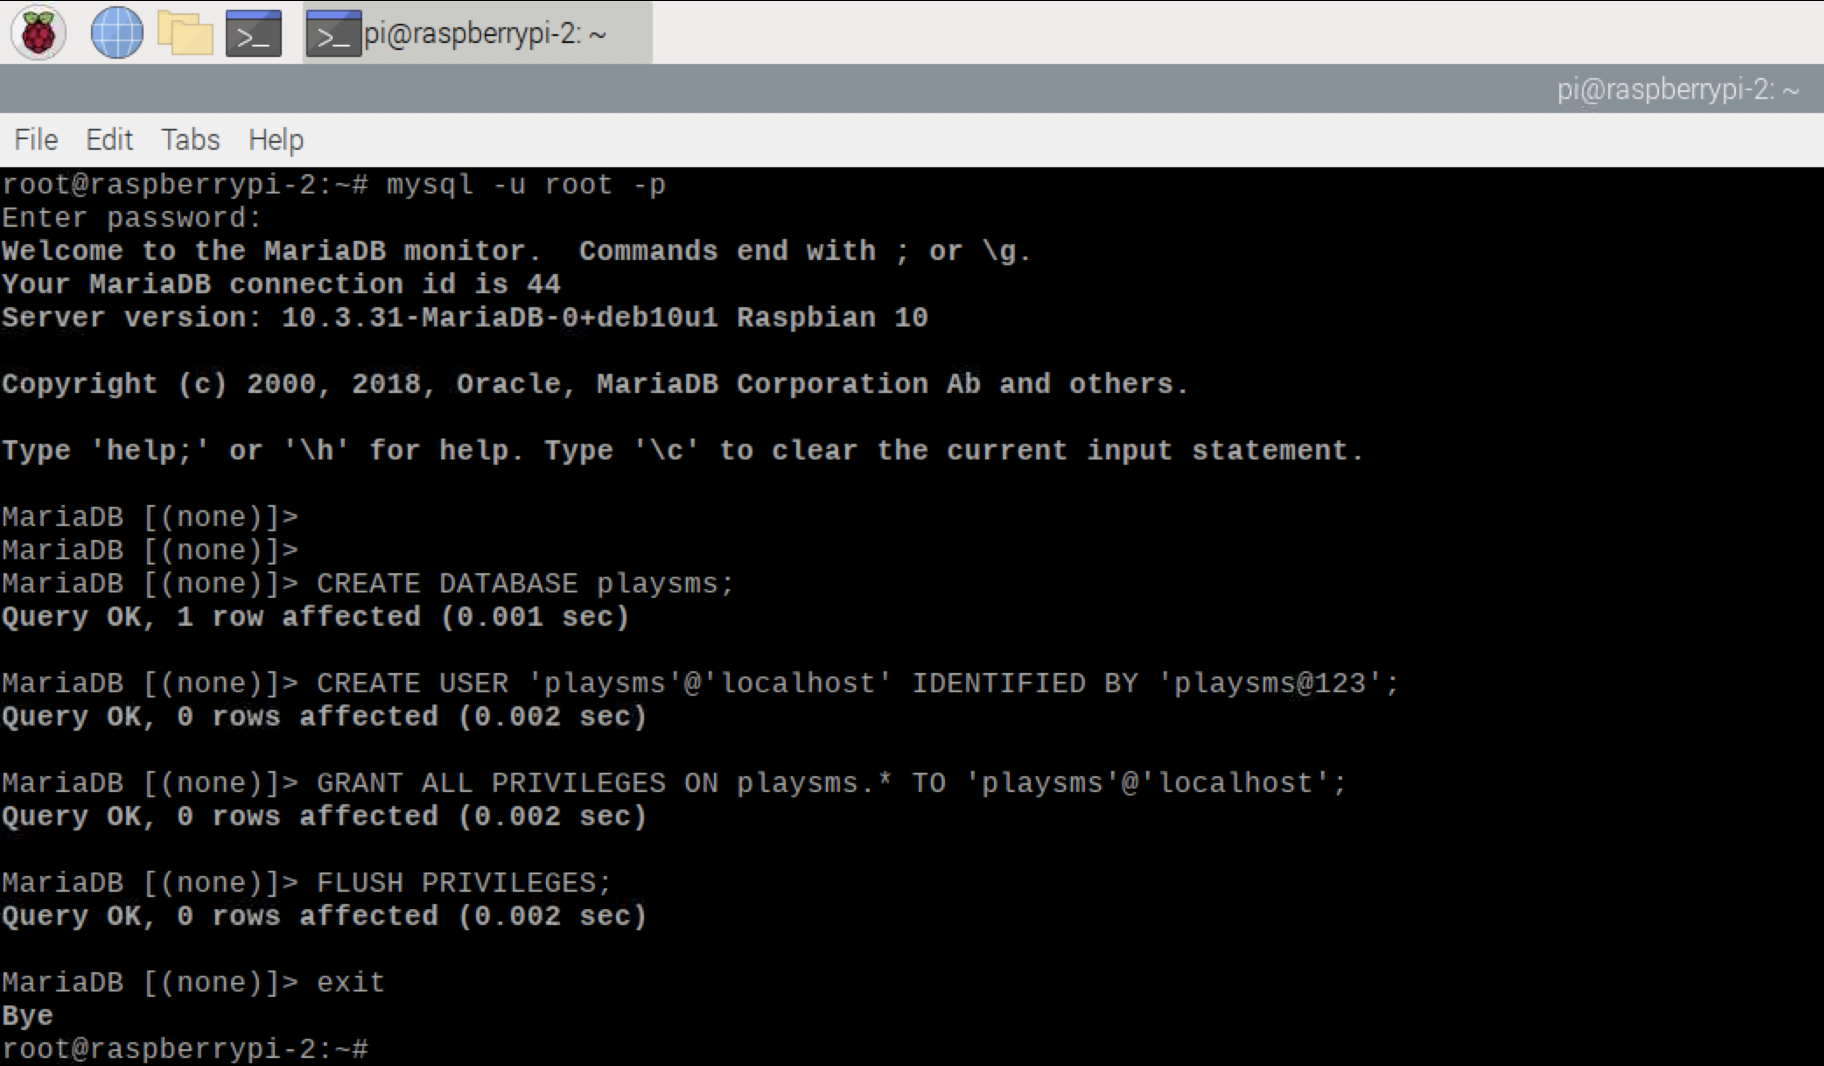
Create the database.
mysql -u root -p
CREATE DATABASE playsms;
CREATE USER 'playsms'@'localhost' IDENTIFIED BY 'playsms@123';
GRANT ALL PRIVILEGES ON playsms.* TO 'playsms'@'localhost';
FLUSH PRIVILEGES;
exit
Let’s Download & Install the playSMS
su - playsms
cd /home/playsms/src
git clone -b 1.4.3 --depth=1 https://github.com/antonraharja/playSMS
cd playSMS
Take a copy of install.conf.dist file and rename it as install.conf and then add/modify it as follows.
# INSTALL DATA
# ============
# Please change INSTALL DATA below to suit your system configurations
# Please do not change variable name, you may change only the value

# MySQL database username
DBUSER="playsms"

# MySQL database password
DBPASS="playsms@123"

# MySQL database name
DBNAME="playsms"

# MySQL database host
DBHOST="localhost"

# MySQL database port
DBPORT="3306"

# Web server's user, for example apache2 user by default is www-data
# note: please make sure your web server user
WEBSERVERUSER="www-data"

# Web server's group, for example apache2 group by default is www-data
# note: please make sure your web server group
WEBSERVERGROUP="www-data"

# Path to playSMS extracted source files
PATHSRC="/home/playsms/src/playSMS"

# Path to playSMS web files
# note: please make sure your web root path, in this example its /var/www/html
PATHWEB="/home/playsms/public_html"

# Path to playSMS additional files
PATHLIB="/home/playsms/lib"

# Path to playSMS daemon and other binary files
PATHBIN="/home/playsms/bin"

# Path to playSMS log files
PATHLOG="/home/playsms/log"

# Path to playSMS daemon configuration file
# note: this example will create playsmsd.conf in /etc
PATHCONF="/home/playsms/etc"

# END OF INSTALL DATA
# ===================
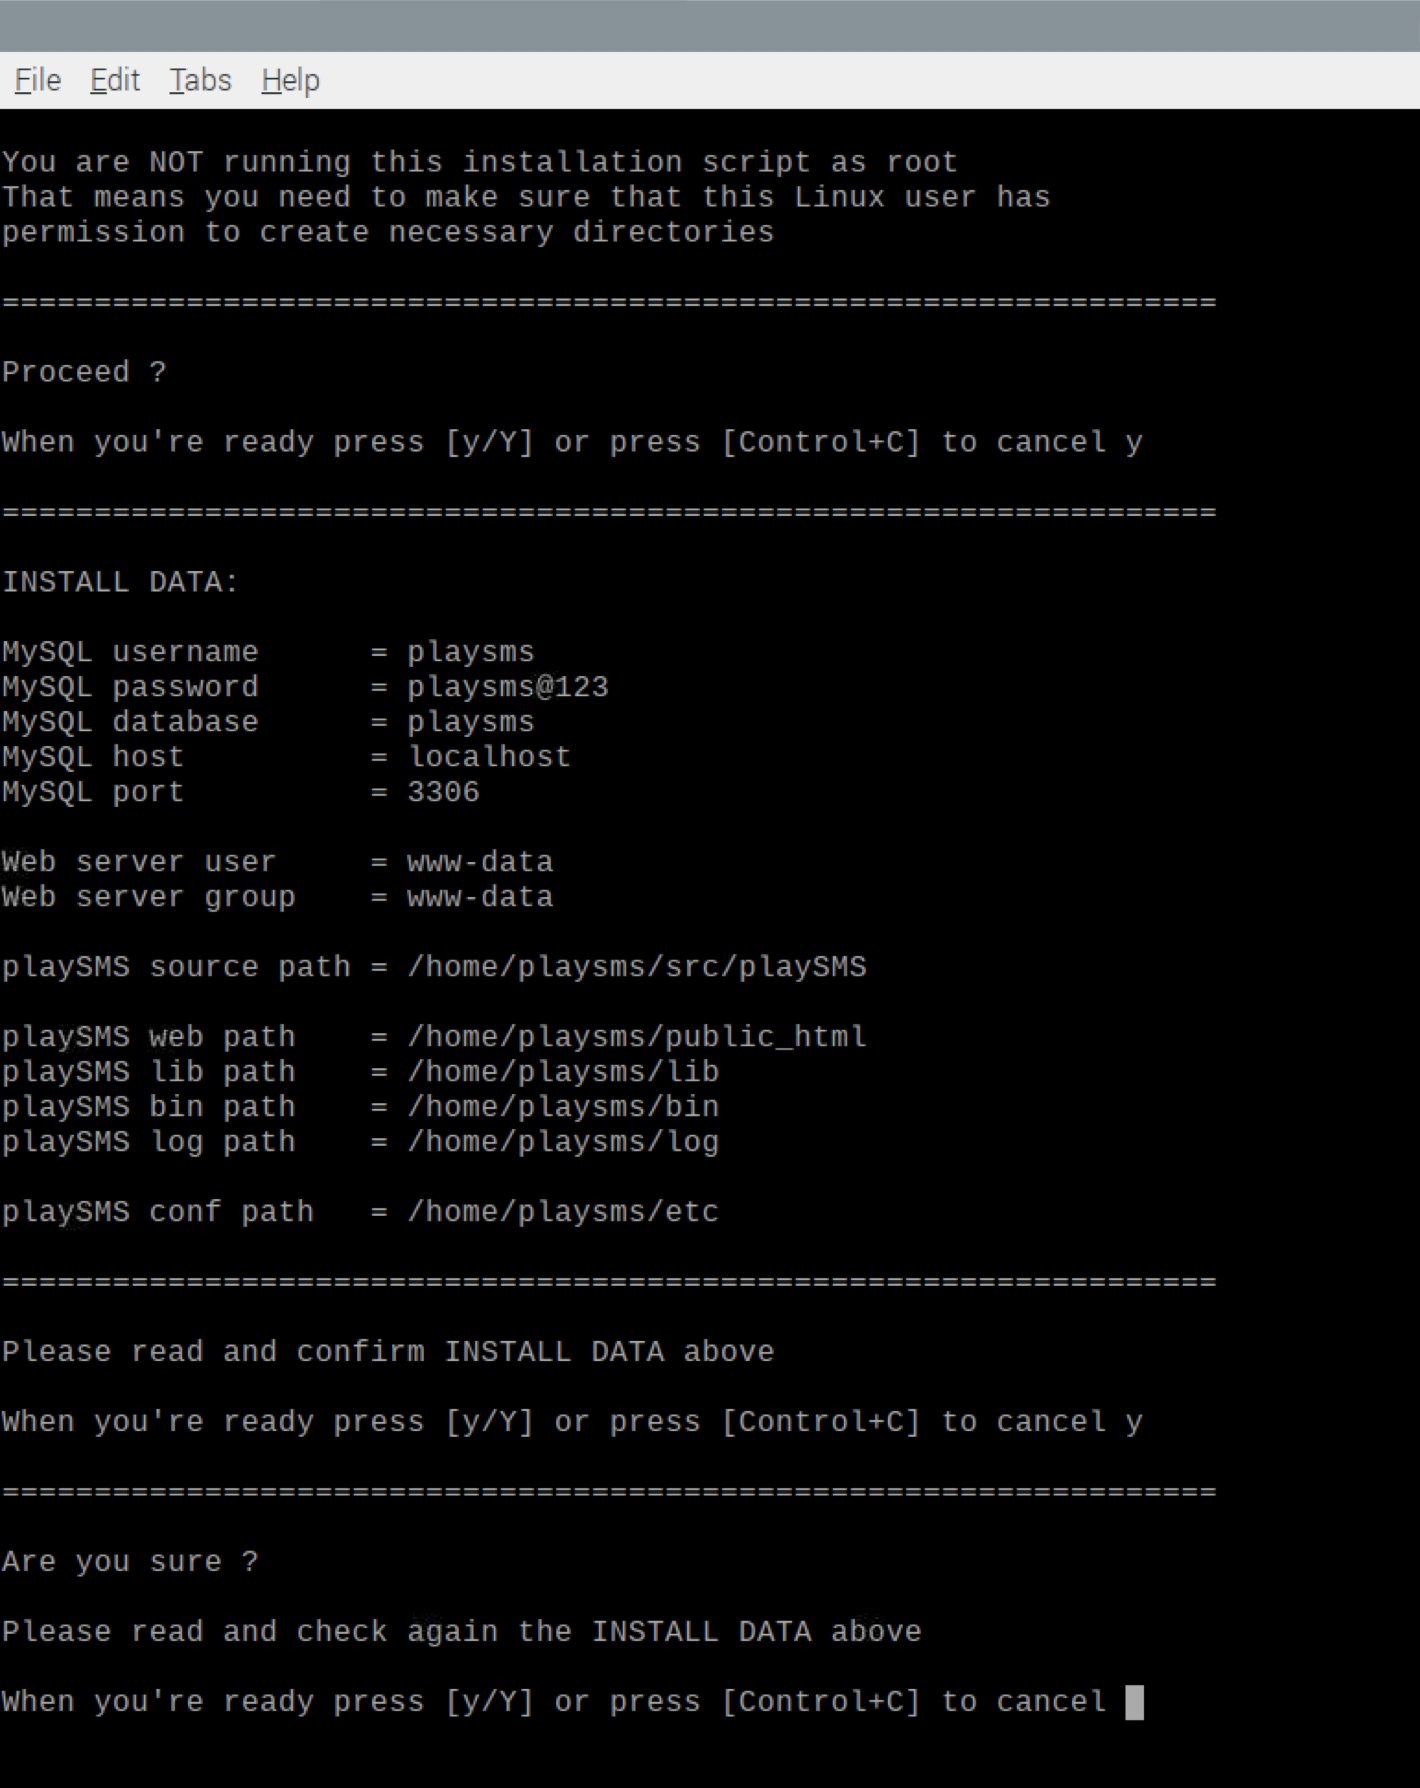
Once all the above configurations are ok, run playSMS Install Script.
./install-playsms.sh
Verify and proceed with the installation (you will be asked twice, answer Y for both)
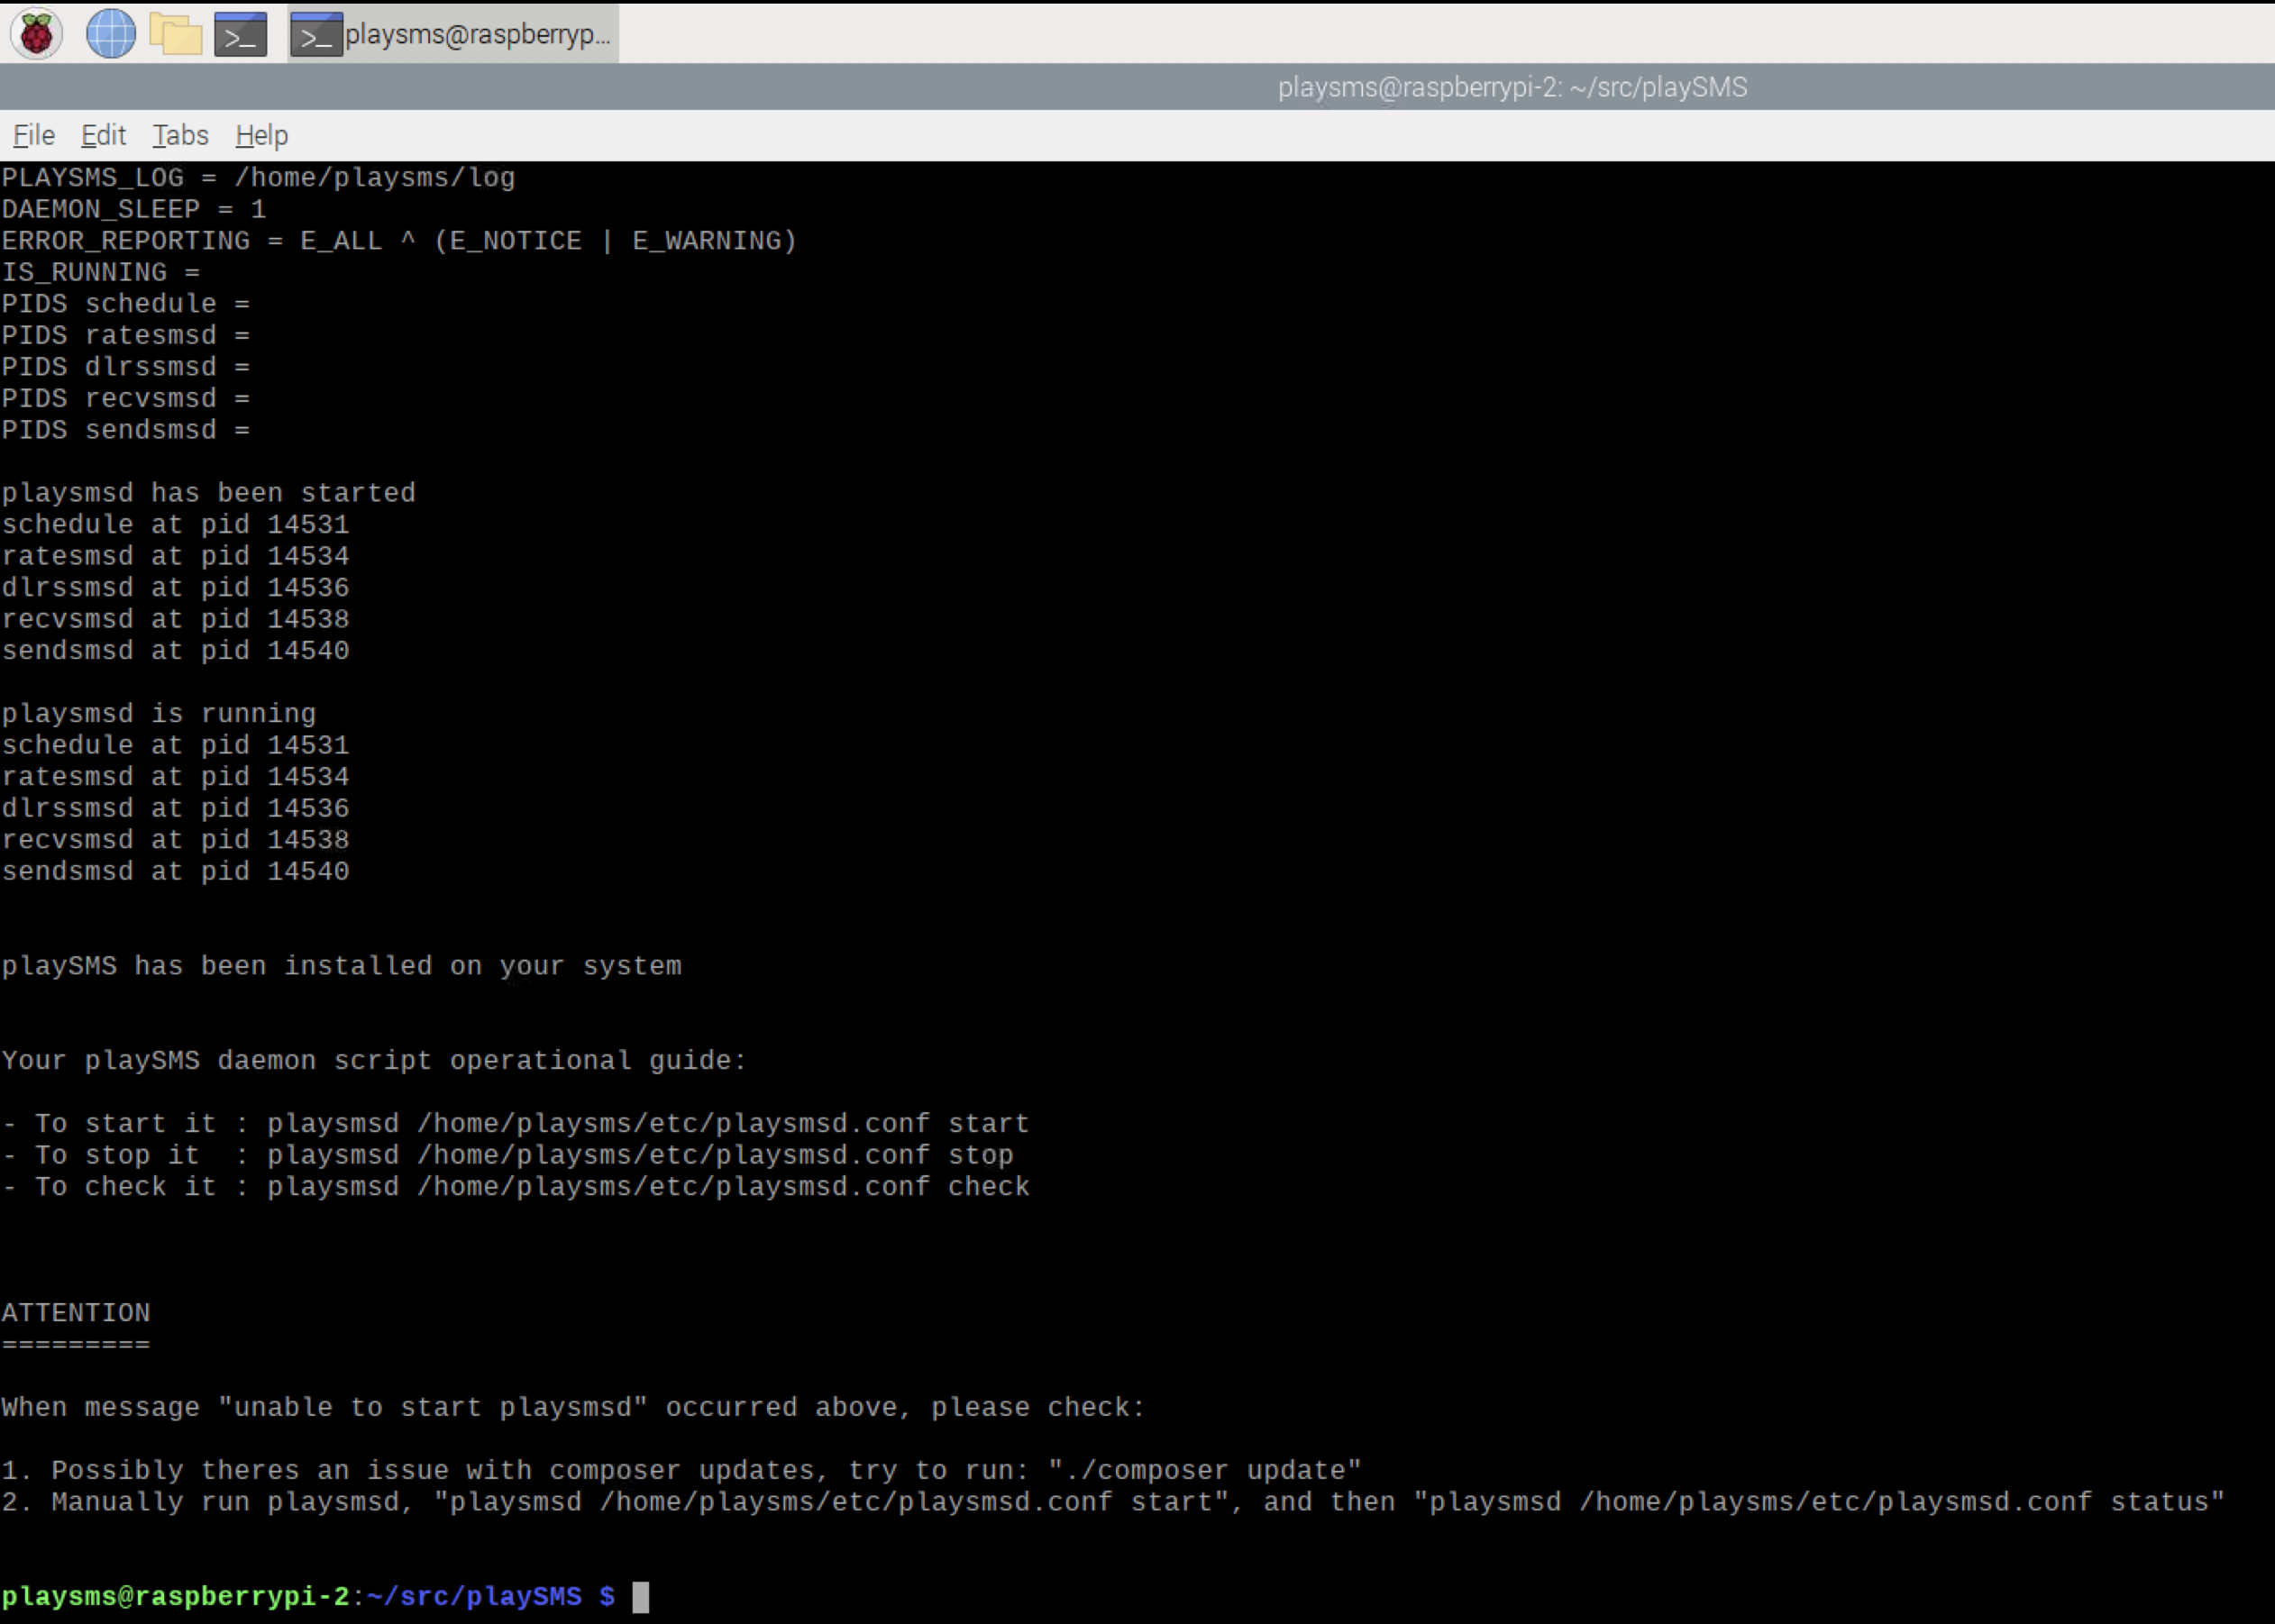
In the successful installation, you will get the following screen at the end of the installation with all playSMS daemon running:
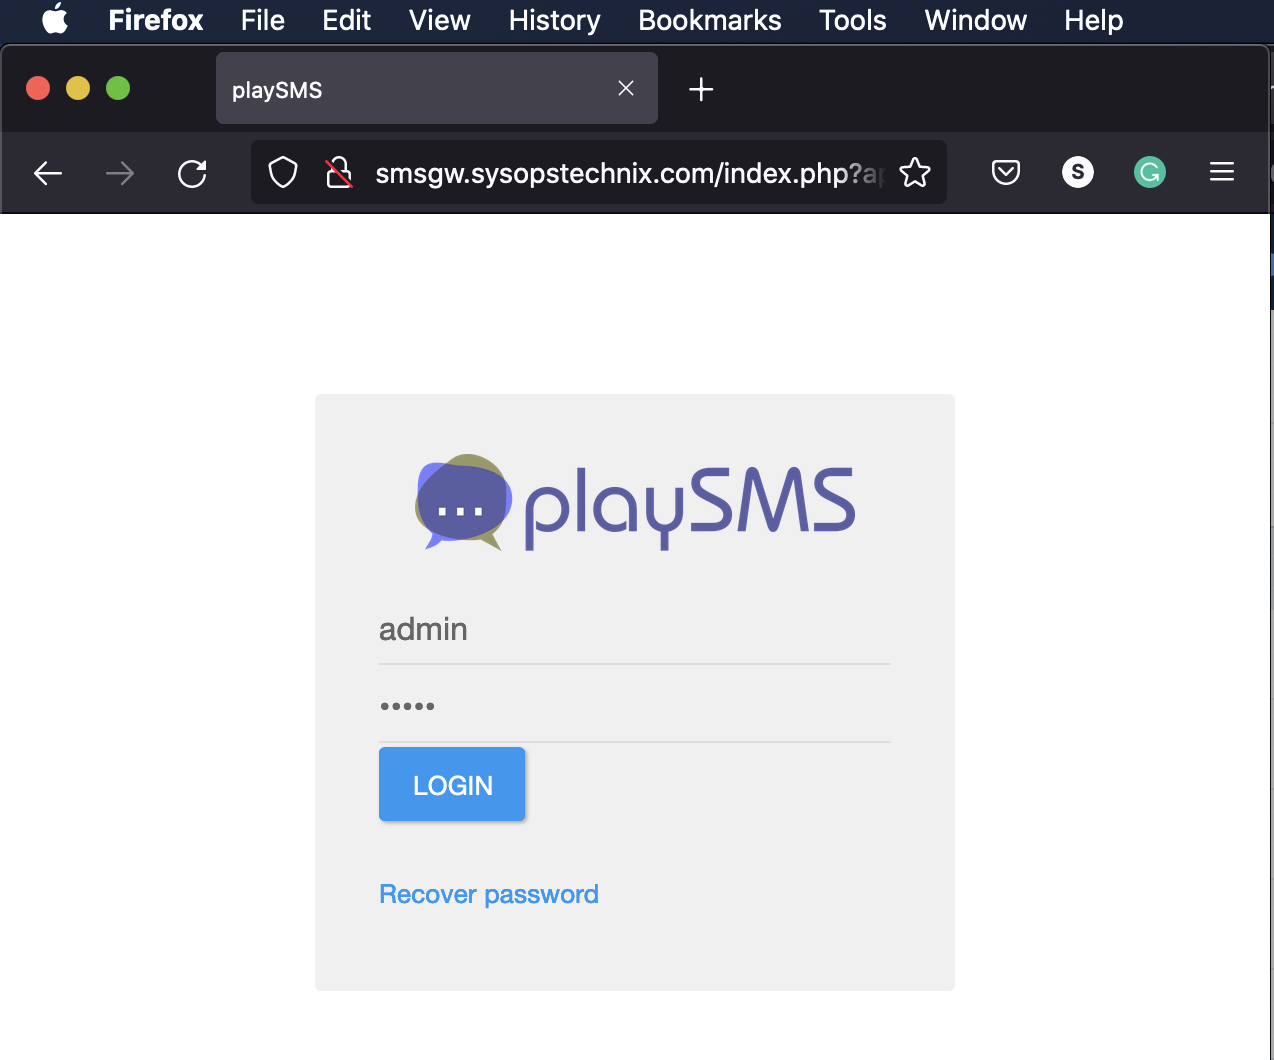
Go to your web browser, enter the configured virtual-host name (Ex: http://smsgw.sysopstechnix.com), and log in as playSMS administrator. As an initial step, make sure to change the default admin password immediately.
Default admin access:
Username: adminPassword: admin
Configure PlaySMS to Integrate with the SMS Server Tools 3
From the web UI, navigate to Settings => Manage gateway and SMSC and find the Manage gateway and SMSC and click the + sign.
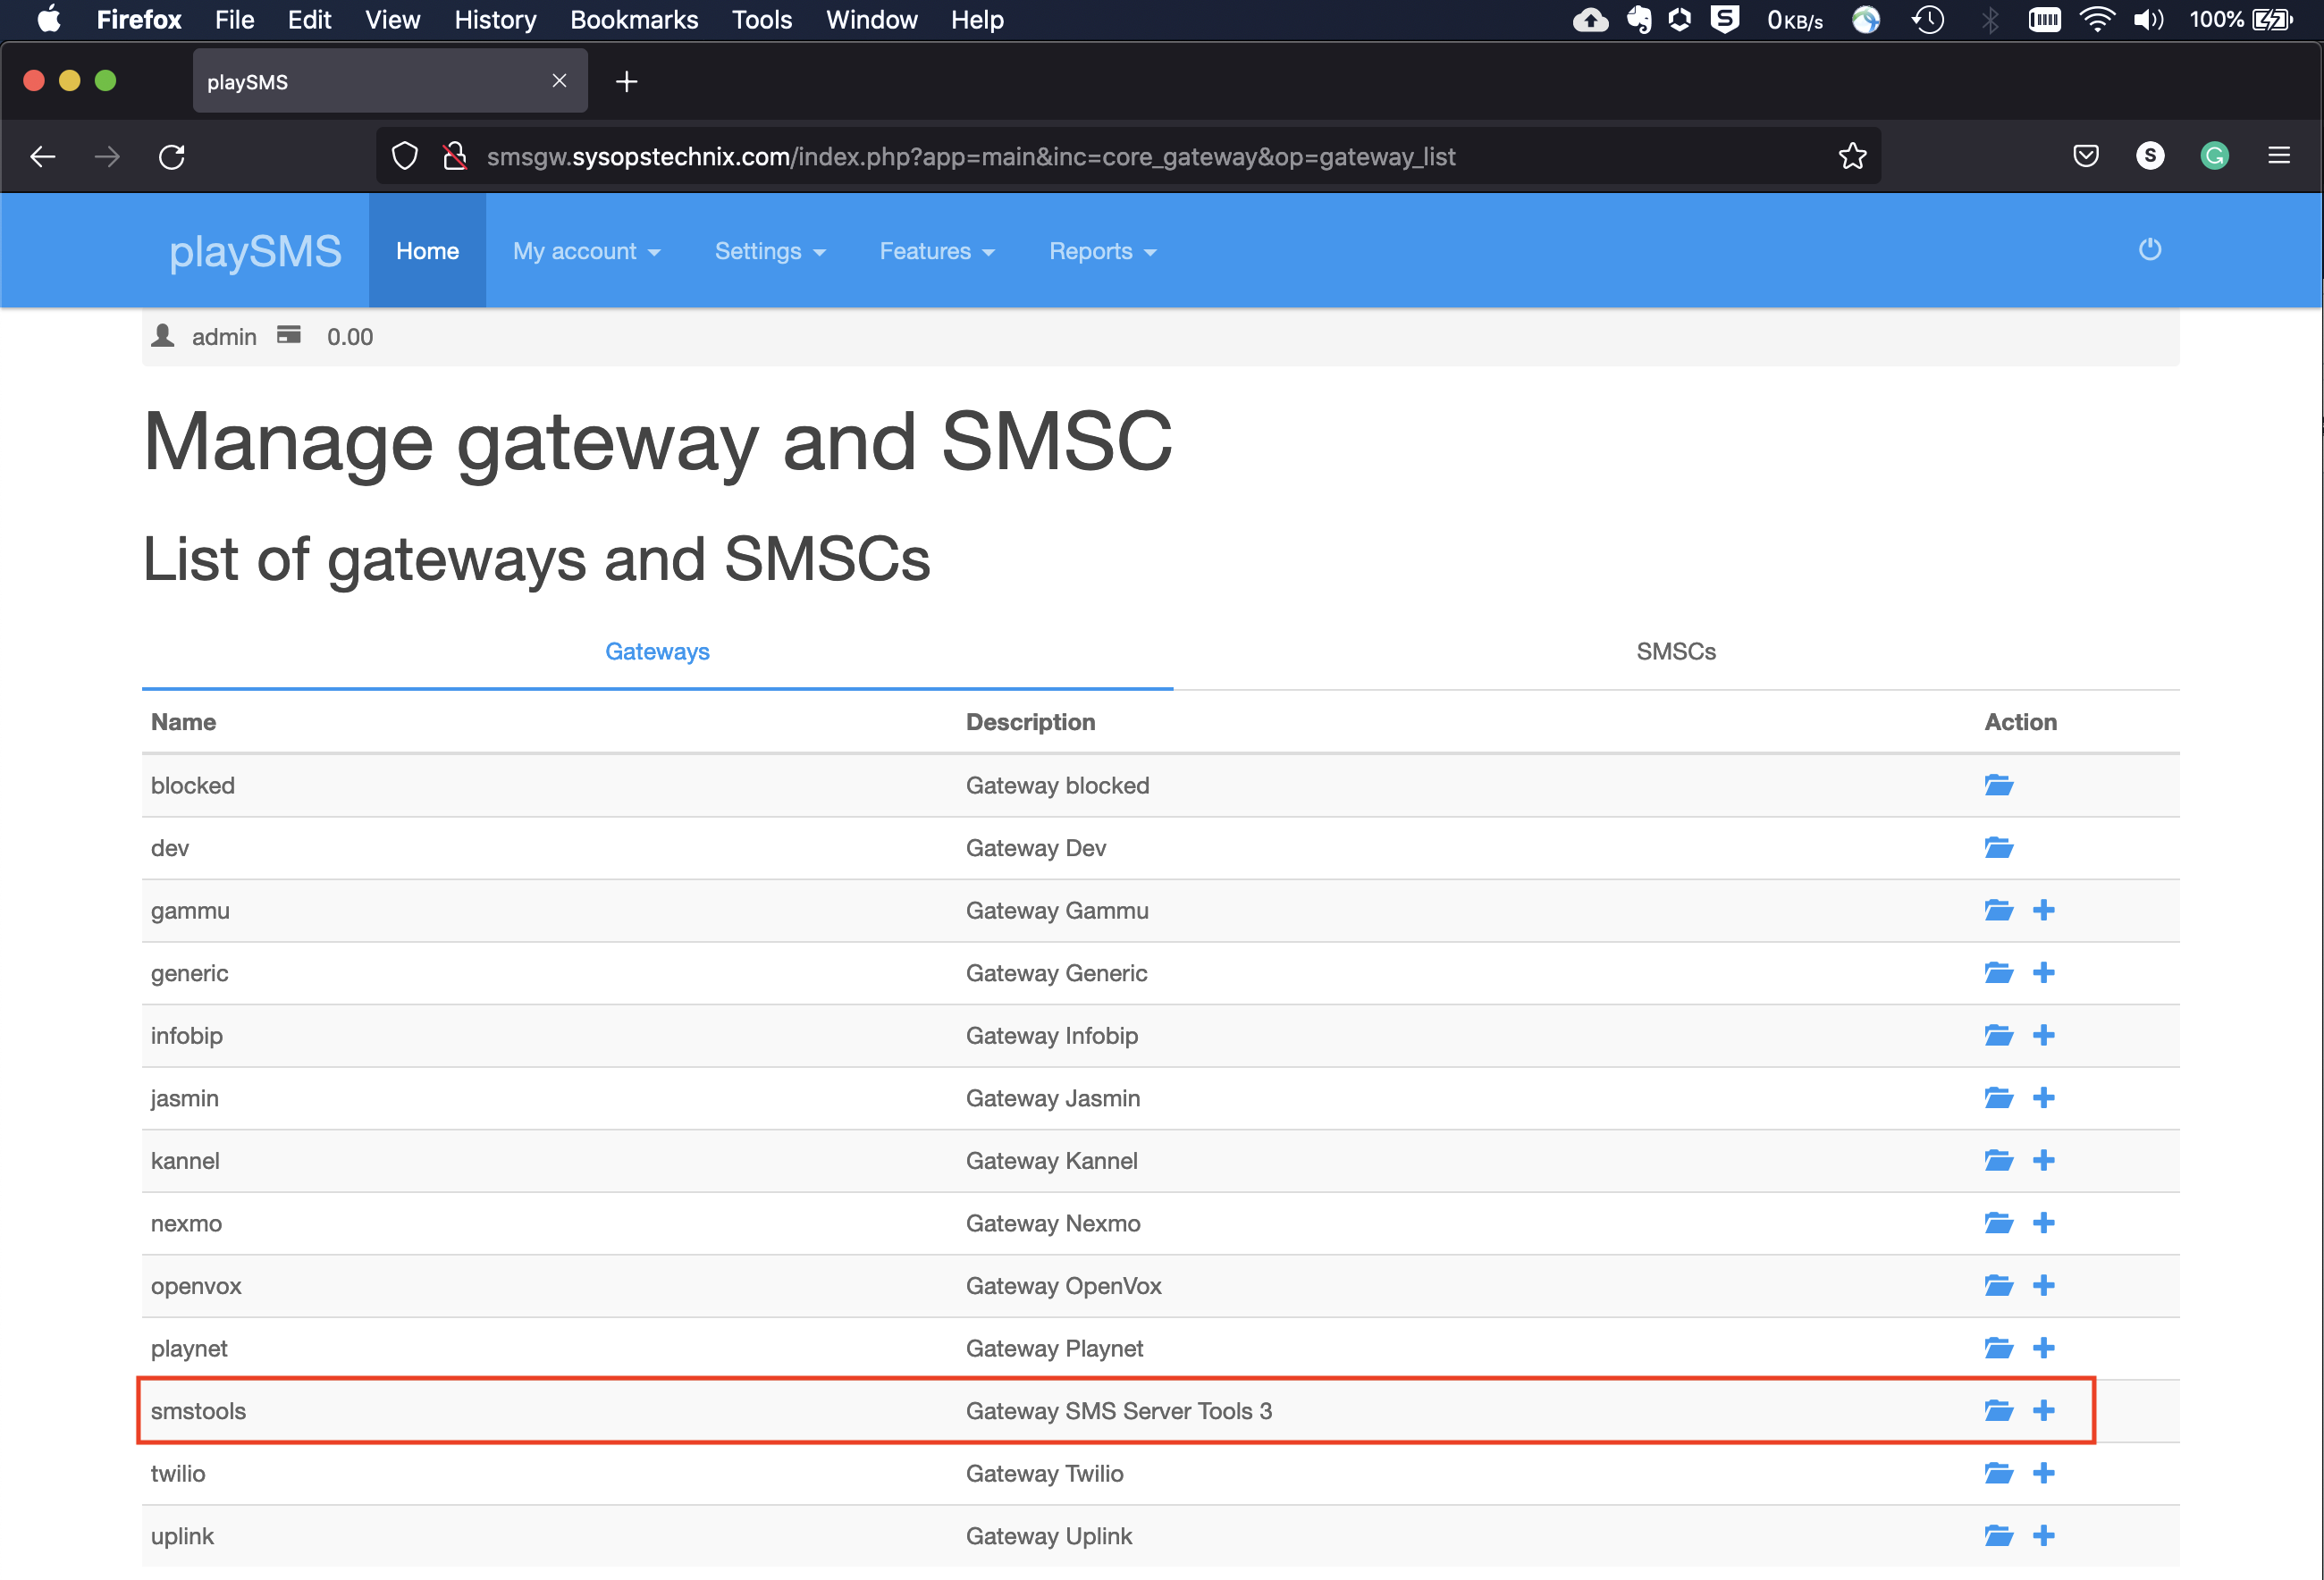
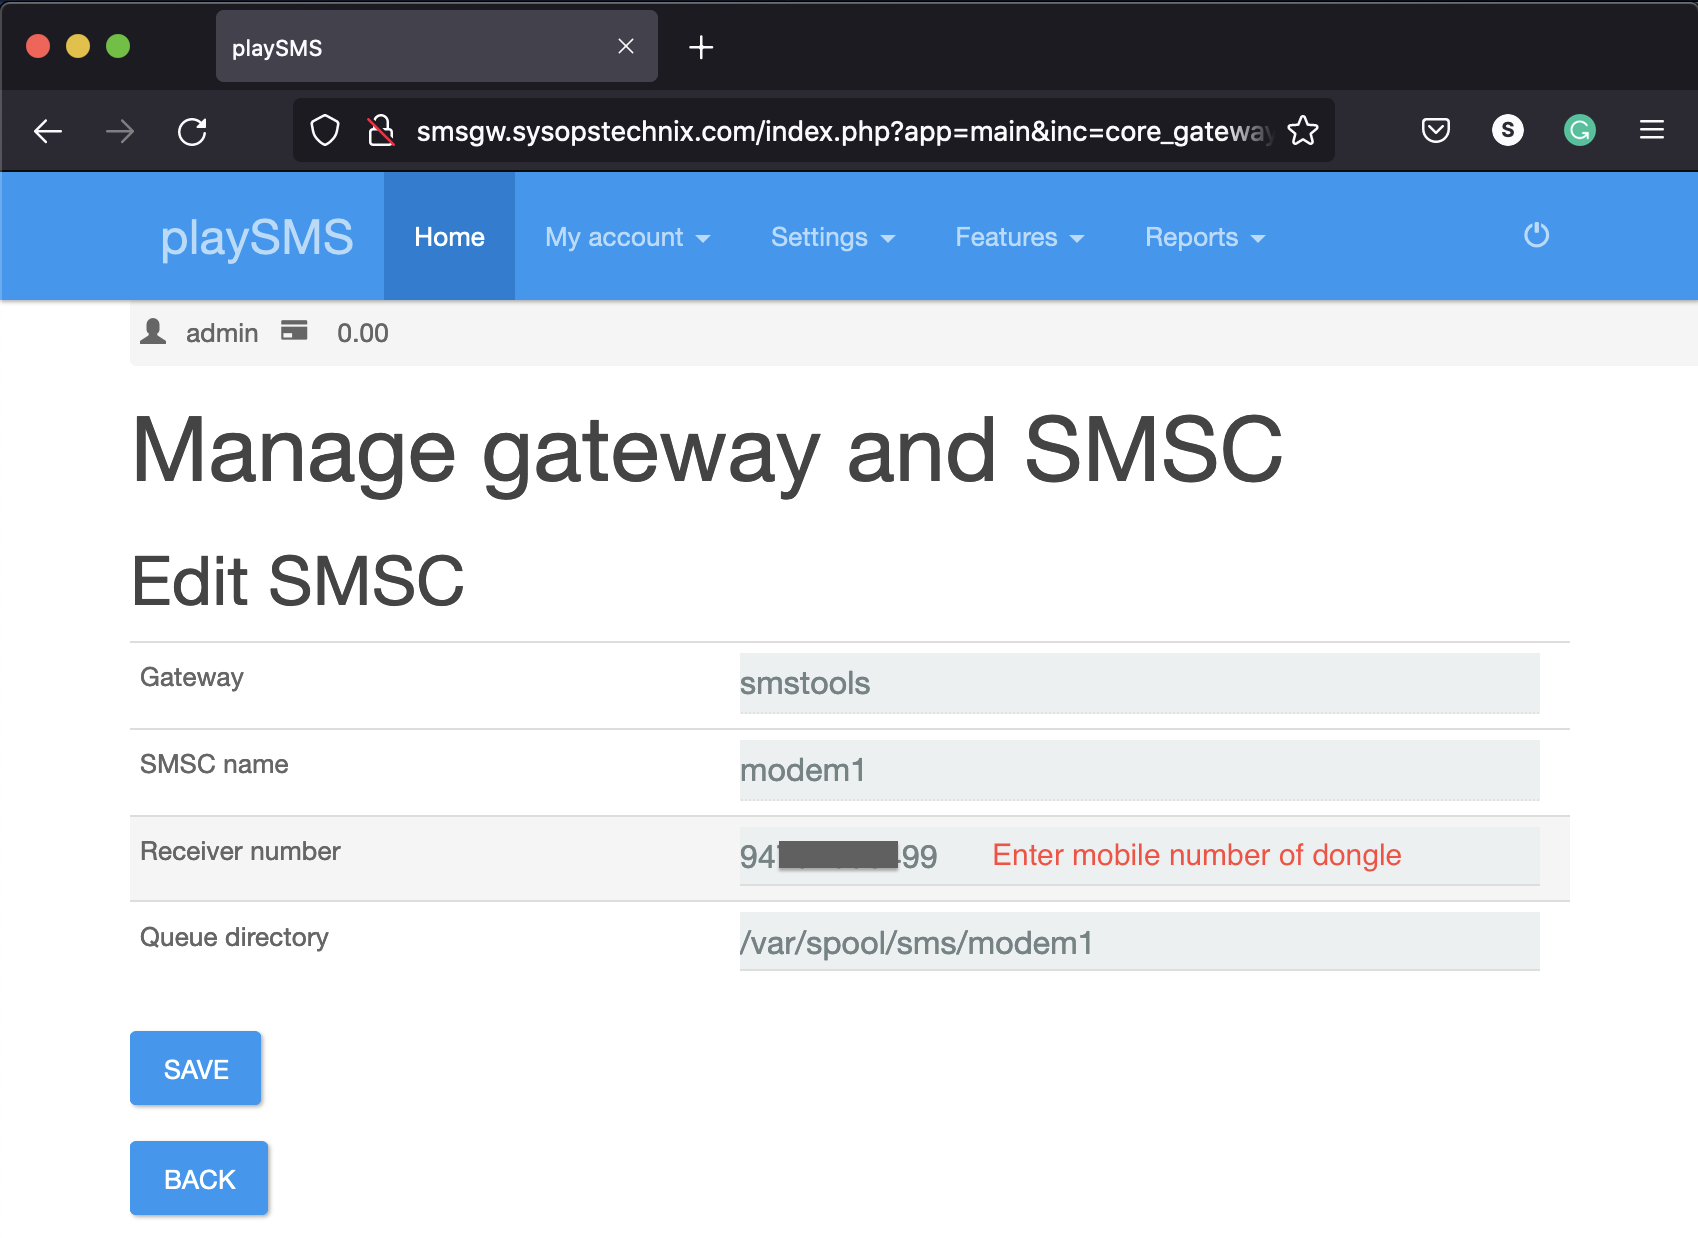
Fill up the following details accordingly and click Save.
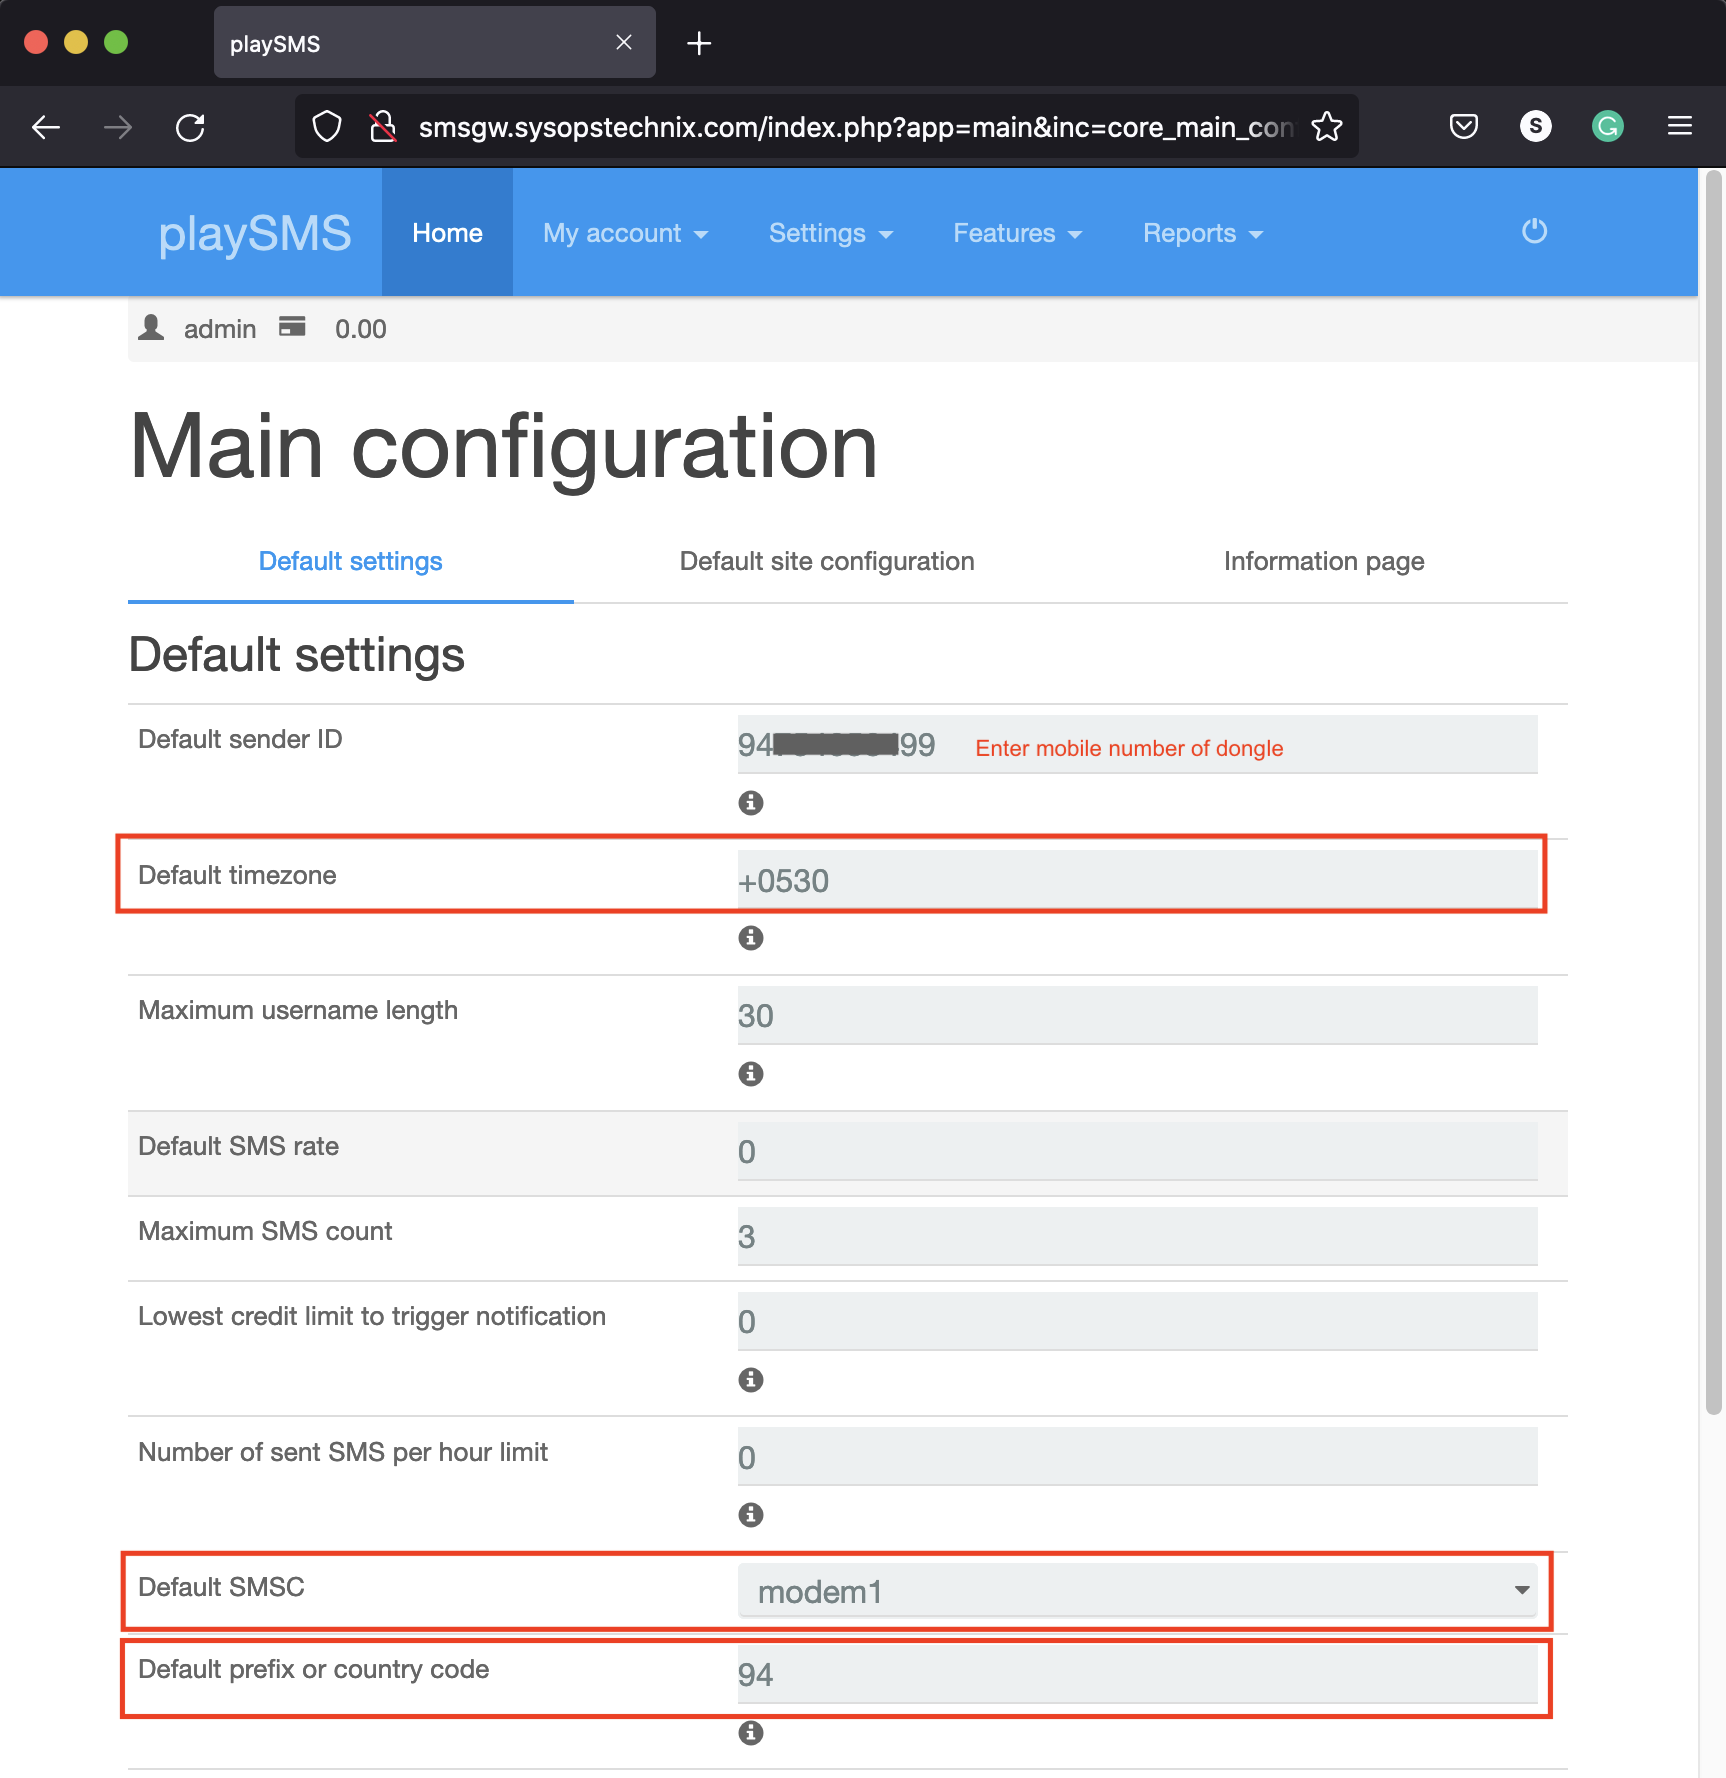
Under Settings, select Main Configuration. Then configure the highlighted areas as follows and click Save.
Once the integration is done, let’s send an SMS via playSMS. Go to My Account => Compose message. Provide the receiver’s mobile number and the message and click send.

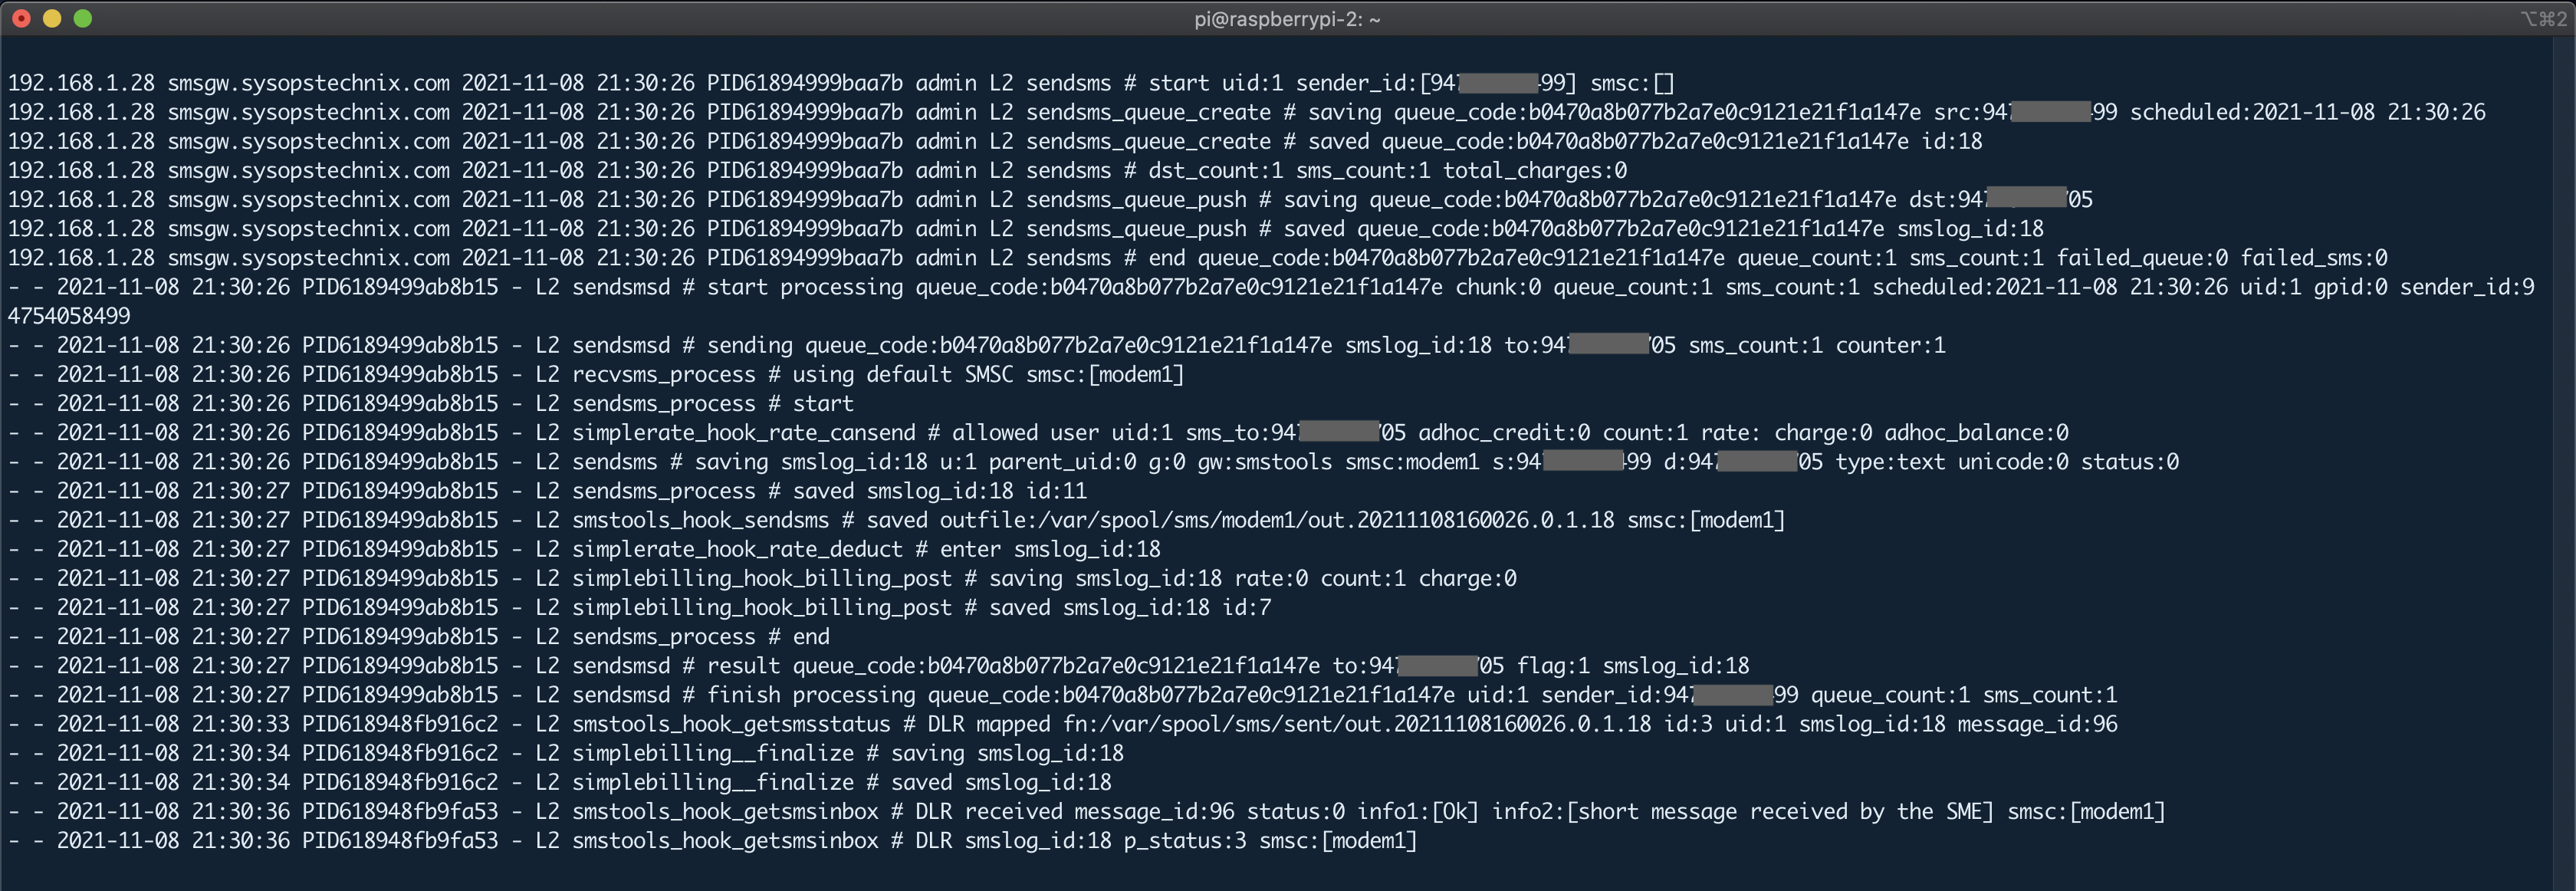
Troubleshoot with Logs
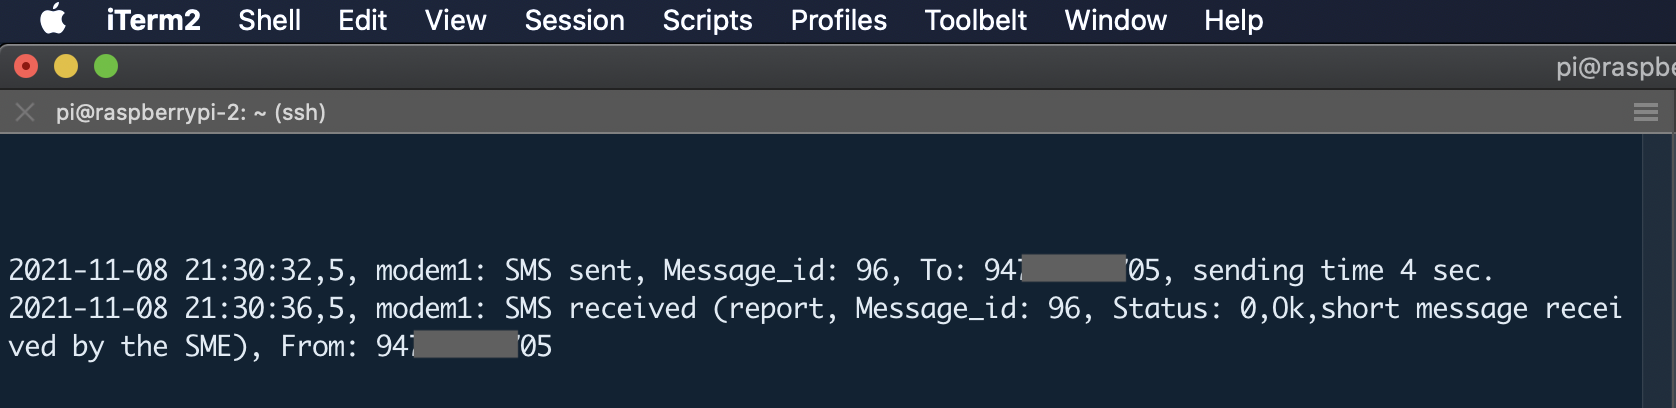
For troubleshooting to get an idea of how this flow works, you can see playSMS logs under /home/playsms/log/playsms.log and SMS Server Tools (SMS Gateway) logs under /var/log/smsd.log.
playSMS Logs
SMS Server Tools Logs
Conclusion
This article demonstrated how to simply build an OpenSource SMS Gateway using a Raspberry Pi. And this will give you the ability to integrate into other systems easily via APIs.
5 comments
Hi,
Thank you for this tutorial
What USB dongle are you using? I’ve been struggling with my 4g LTE Huawei with no success… It only shows the eth but not the ttyUSB device
Thanks again
I used the E1550 HSDPA dongle.
Hi, i’m looking for a sms gateway that sand sms when a specific email arrive. Have you got any suggestions?
I plan to set up my own SMS API
How can formatting a name sends for marketing purposes
Could I count on your expertise? how can we work with you?
Nice article… Love it.. and love the power of that SMSTOOLS and Raspberry.
Just a note…
I used this in the past with RPI, but.. it was an heavy task for the RPI. Even with the best SD cards… the system was working ok for a few weeks until the SD CARD get corrupted and system goes down.
I switched to a nano computer with SSD disk… perfcet. Running 5 years and no stress… until today..
Linux and SMStools are amazing.