
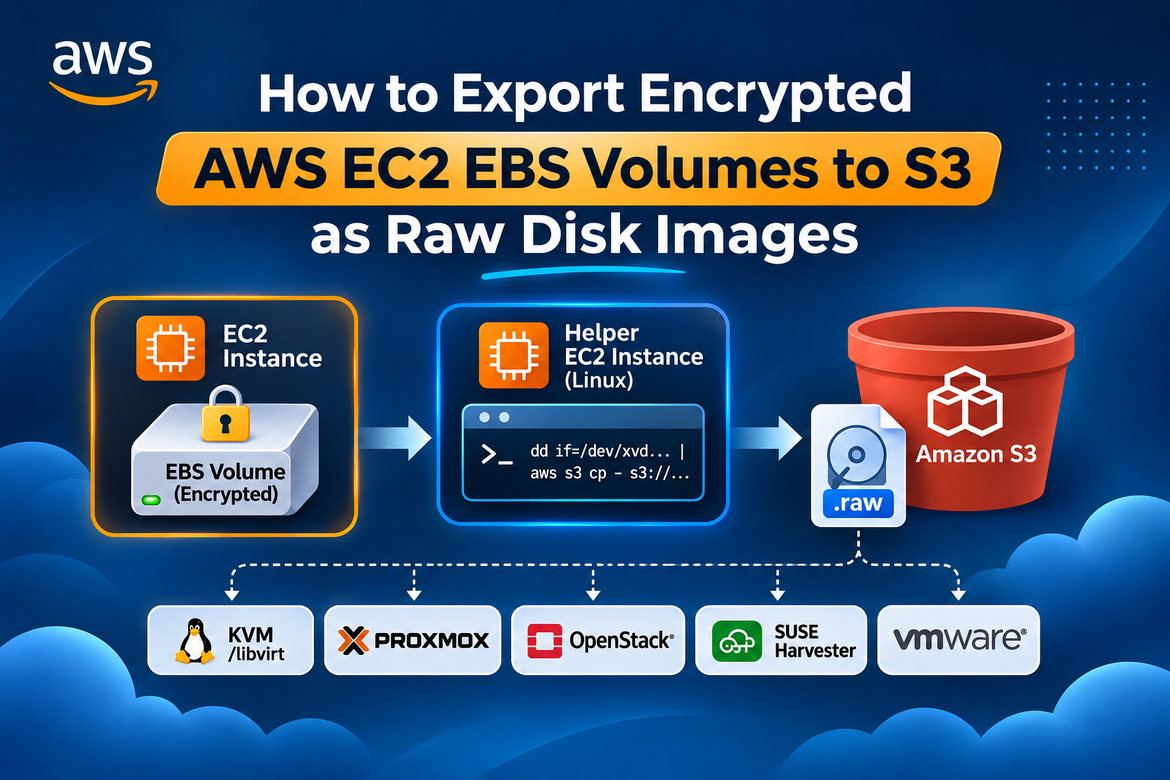
Recently I had to export encrypted EBS volume to S3 as raw disk images, so I could move a couple of EC2 servers off AWS and onto our own virtualization platform. I assumed AWS would have a button for it. It doesn’t, and it took me a few failed attempts to find a method that works.
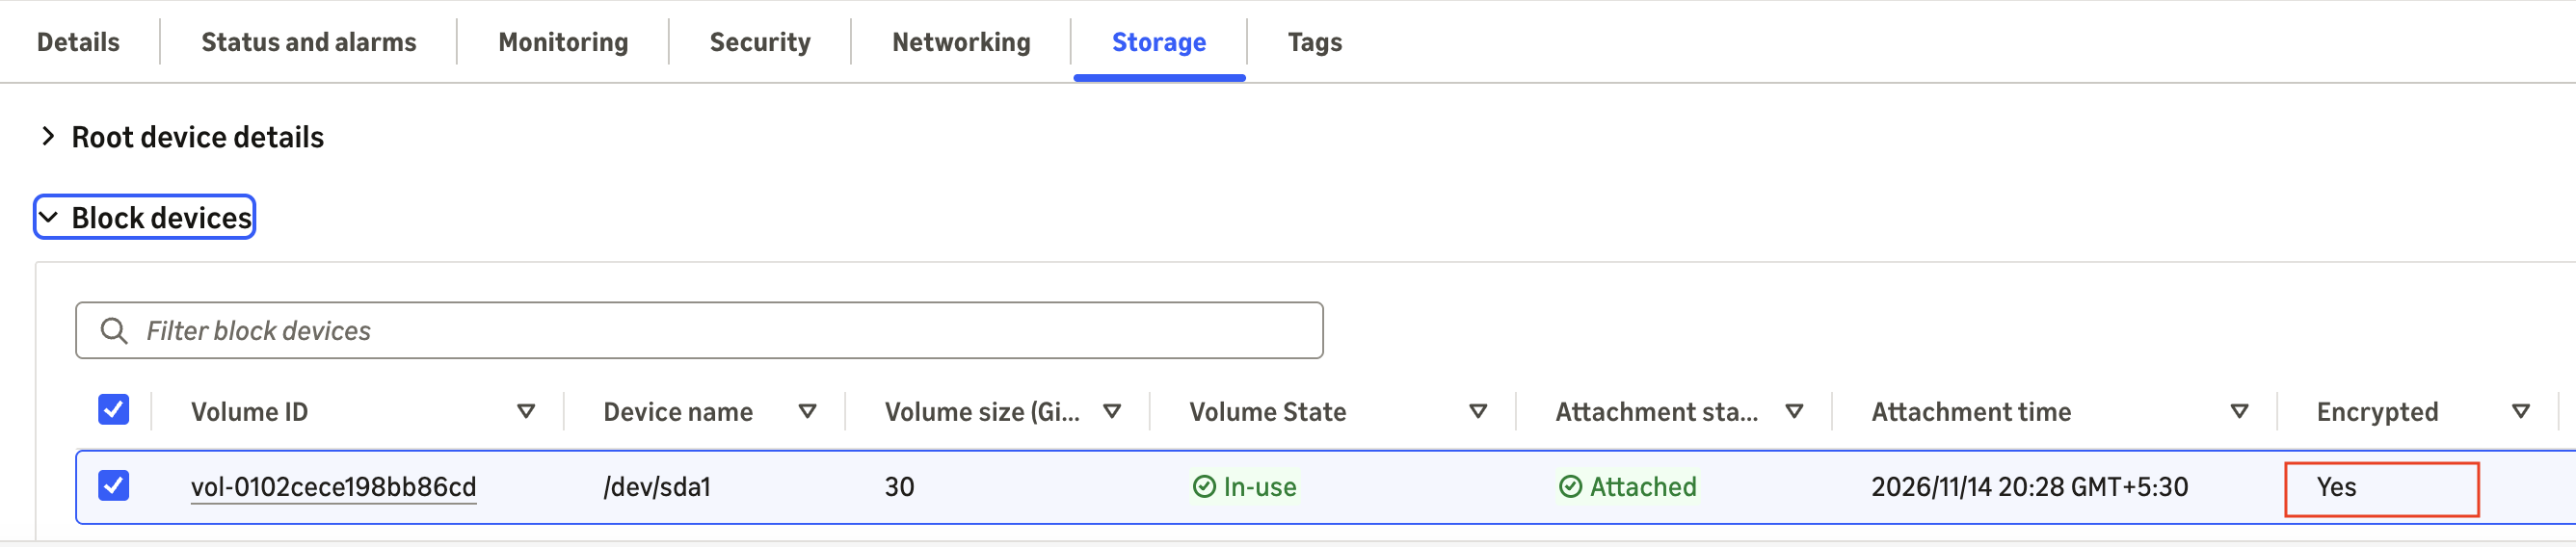
This post is the process I ended up with. It works for any destination that accepts raw disk images: KVM, Proxmox, OpenStack, SUSE Harvester, VMware (after a quick conversion), or just a backup server where you want a copy of the disk outside AWS.
Why encrypted EBS volumes are a problem
My first idea was AWS VM Export. Then I looked at copying the snapshots. Neither helped, and if you need to export encrypted EBS volume to S3 you’ll hit the same walls:
- AWS VM Export (
export-imageandcreate-instance-export-task) flatly refuses anything with encrypted EBS snapshots. - Snapshot copy lets you change the KMS key, but never lets you turn an encrypted snapshot into an unencrypted one.
- There’s no “decrypt” option. Once a volume is encrypted, it and every snapshot made from it stay encrypted.
What finally clicked for me is that EBS encryption is transparent to the instance. When you attach an encrypted volume to an EC2 instance, the hypervisor decrypts it on the fly, so reading the raw block device gives you plain data. Pipe that into S3 and you’ve got an unencrypted raw image, and the original server is never touched.
What you’ll need
Before you start, have these ready:
- A helper EC2 instance running Linux, in the same Availability Zone as the volumes you’ll create. I’d recommend a Nitro type like
m5.largeorc5.xlarge. A burstable t2/t3 can run out of CPU credits halfway through a long upload. - AWS CLI v2 on the helper, and
tmux, because you don’t want an SSH drop to kill a copy that’s been running for 20 minutes. - IAM permissions for
ec2:CreateSnapshot,ec2:CreateVolume,ec2:AttachVolume,ec2:DetachVolume,ec2:DeleteVolumeands3:PutObject. - Access to the KMS key: whoever attaches the volume needs
kms:CreateGrant,kms:Decryptandkms:DescribeKey. If you’re using the defaultaws/ebskey in the same account, this already works. - An S3 bucket that the helper can upload to and your destination can download from.
The bucket policy I used
I locked the bucket down to the helper’s public IP, so only the migration VM can read and write objects under images/. Swap in your own bucket name and IP. Your destination can still download the image later with a presigned URL.
{
    "Version": "2012-10-17",
    "Statement": [
        {
            "Sid": "AllowUploadFromMigrationHelper",
            "Effect": "Allow",
            "Principal": "*",
            "Action": [
                "s3:GetObject",
                "s3:PutObject",
                "s3:AbortMultipartUpload",
                "s3:ListMultipartUploadParts"
            ],
            "Resource": "arn:aws:s3:::ebs-exports-demo/images/*",
            "Condition": {
                "IpAddress": {
                    "aws:SourceIp": "<HELPER_PUBLIC_IP>/32"
                }
            }
        }
    ]
}
A couple of things I learned the hard way here:
- The upload still has to be signed. I first tried
--no-sign-request, since the policy allows any principal from the helper’s IP. A small test file uploaded fine, but the real disk failed straight away, because S3 never allows anonymous multipart uploads. Use proper credentials (an instance role or an IAM user). - Give the helper an Elastic IP. An auto-assigned public IP can change after a stop/start and end up with someone else. If you want to tighten things further, replace
"Principal": "*"in the policy with the helper’s IAM role ARN.
One more gotcha: if the helper talks to S3 through a VPC gateway endpoint, S3 sees its private IP and the IP condition never matches. In that case, use an aws:SourceVpce condition instead.
Prepare the server before you snapshot it
Before you take the snapshot, prepare the source server so it boots cleanly on new virtual hardware:
- Drivers: EC2 uses NVMe and ENA devices. KVM-based platforms (KVM, Proxmox, OpenStack, Harvester) use virtio, which most modern Linux distributions already include. On Windows, install the VirtIO drivers before you snapshot.
- fstab: check that
/etc/fstabuses UUIDs rather than/dev/nvme*or/dev/xvd*names. - Firmware: match BIOS or UEFI to the original instance. You can check it with
aws ec2 describe-instances --instance-ids <id> --query 'Reservations[].Instances[].BootMode'. - cloud-init: on first boot it may keep trying to reach the EC2 metadata service, which slows startup. Disable the EC2 data source if you see that.
Step-by-step: How to export encrypted EBS volume to S3
Do steps 1 to 6 once for each disk. My production server had an OS disk and a data disk, so I went through it twice; the screenshots below are from a single-disk test instance. Replace the values in angle brackets with your own IDs.
Step 1: Snapshot the encrypted volume
Working from a snapshot means the production server keeps running and you get a consistent copy. For the OS disk, I’d stop the instance first if you can afford a few minutes of downtime, so the file system is clean.
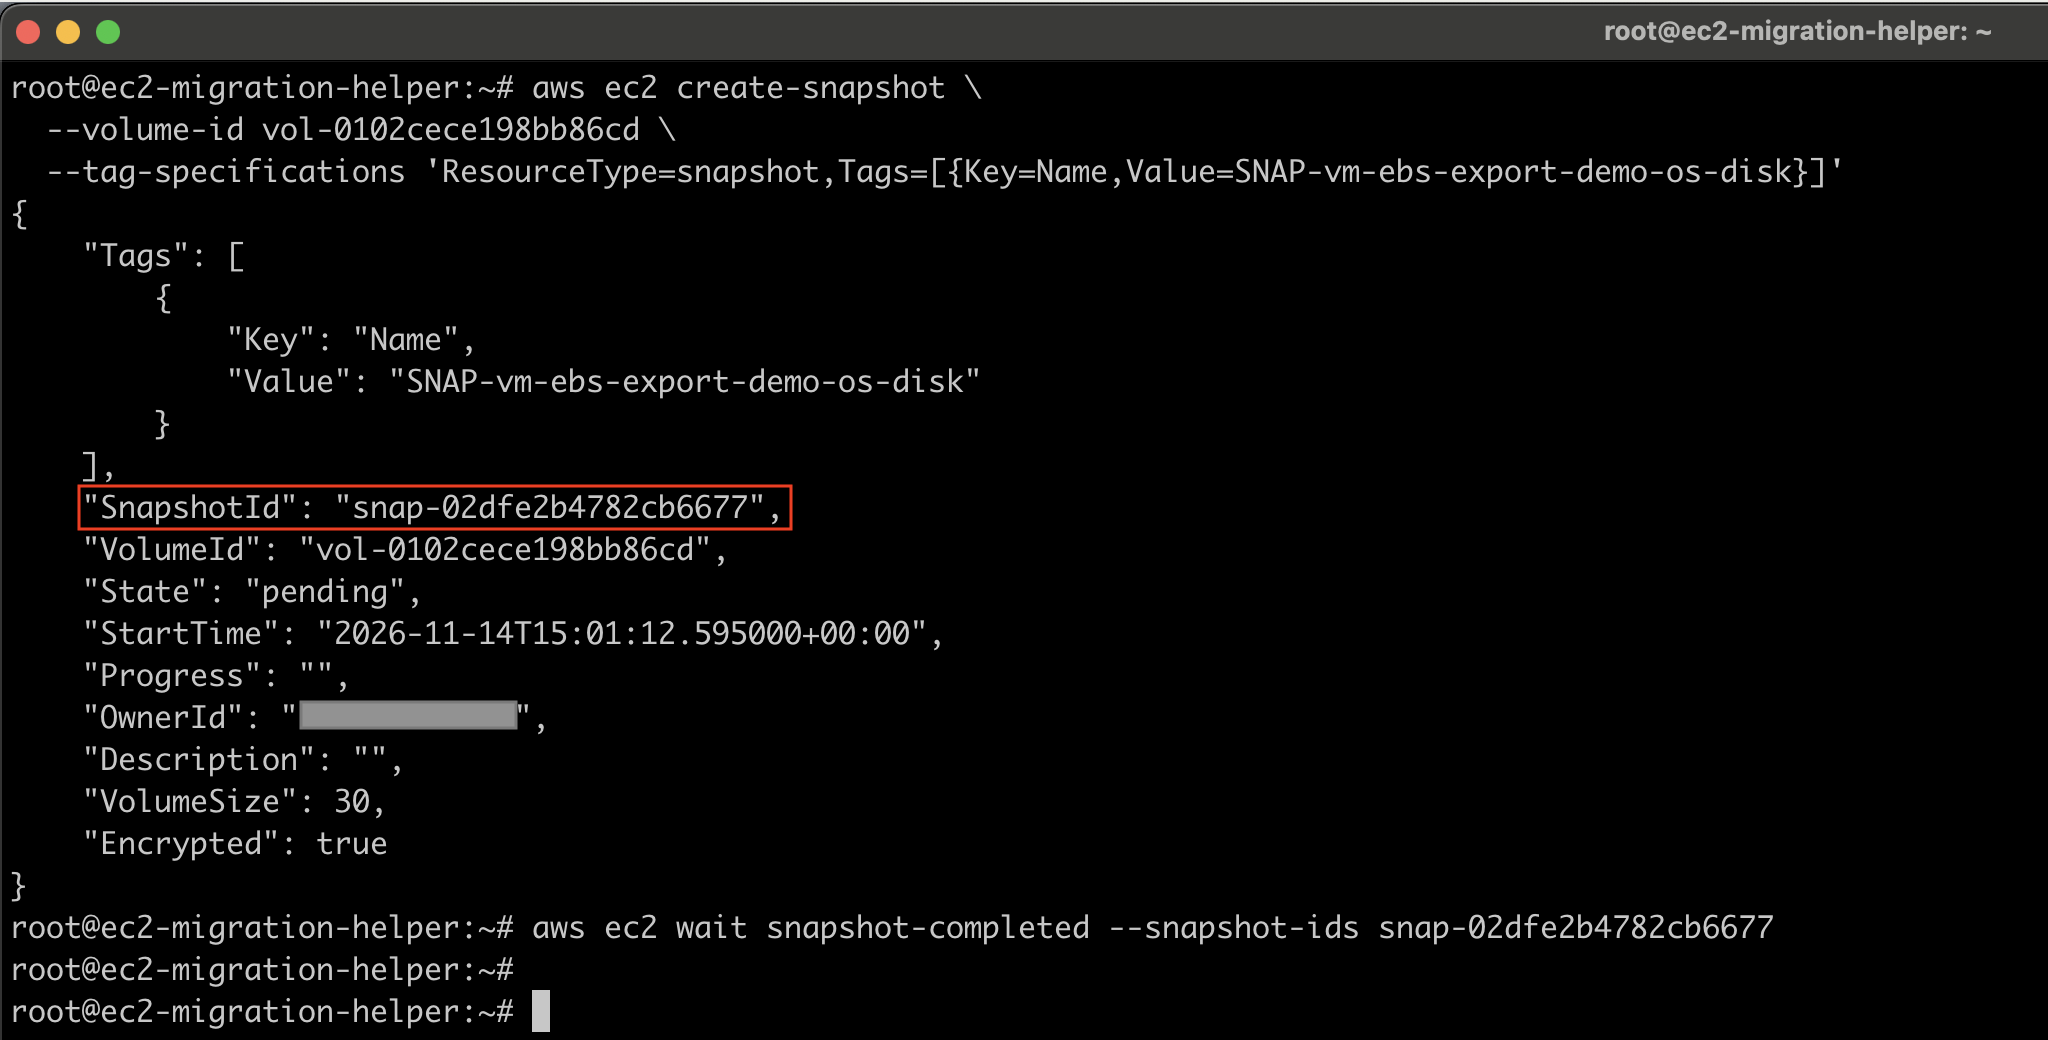
aws ec2 create-snapshot \
  --volume-id <ENCRYPTED_VOLUME_ID> \
  --tag-specifications 'ResourceType=snapshot,Tags=[{Key=Name,Value=SNAP-vm-ebs-export-demo-os-disk}]'
Then wait for it to complete:
aws ec2 wait snapshot-completed --snapshot-ids <CREATED_SNAPSHOT_ID>
If you’re already snapshotting volumes with AWS Backup, you might also like my post on how to automate and validate AWS Backup restore tests.
Step 2: Create a volume from the snapshot (with an initialization rate)
This is the step I wish I’d known about from the start. Create the volume in the helper’s Availability Zone and give it a provisioned initialization rate:
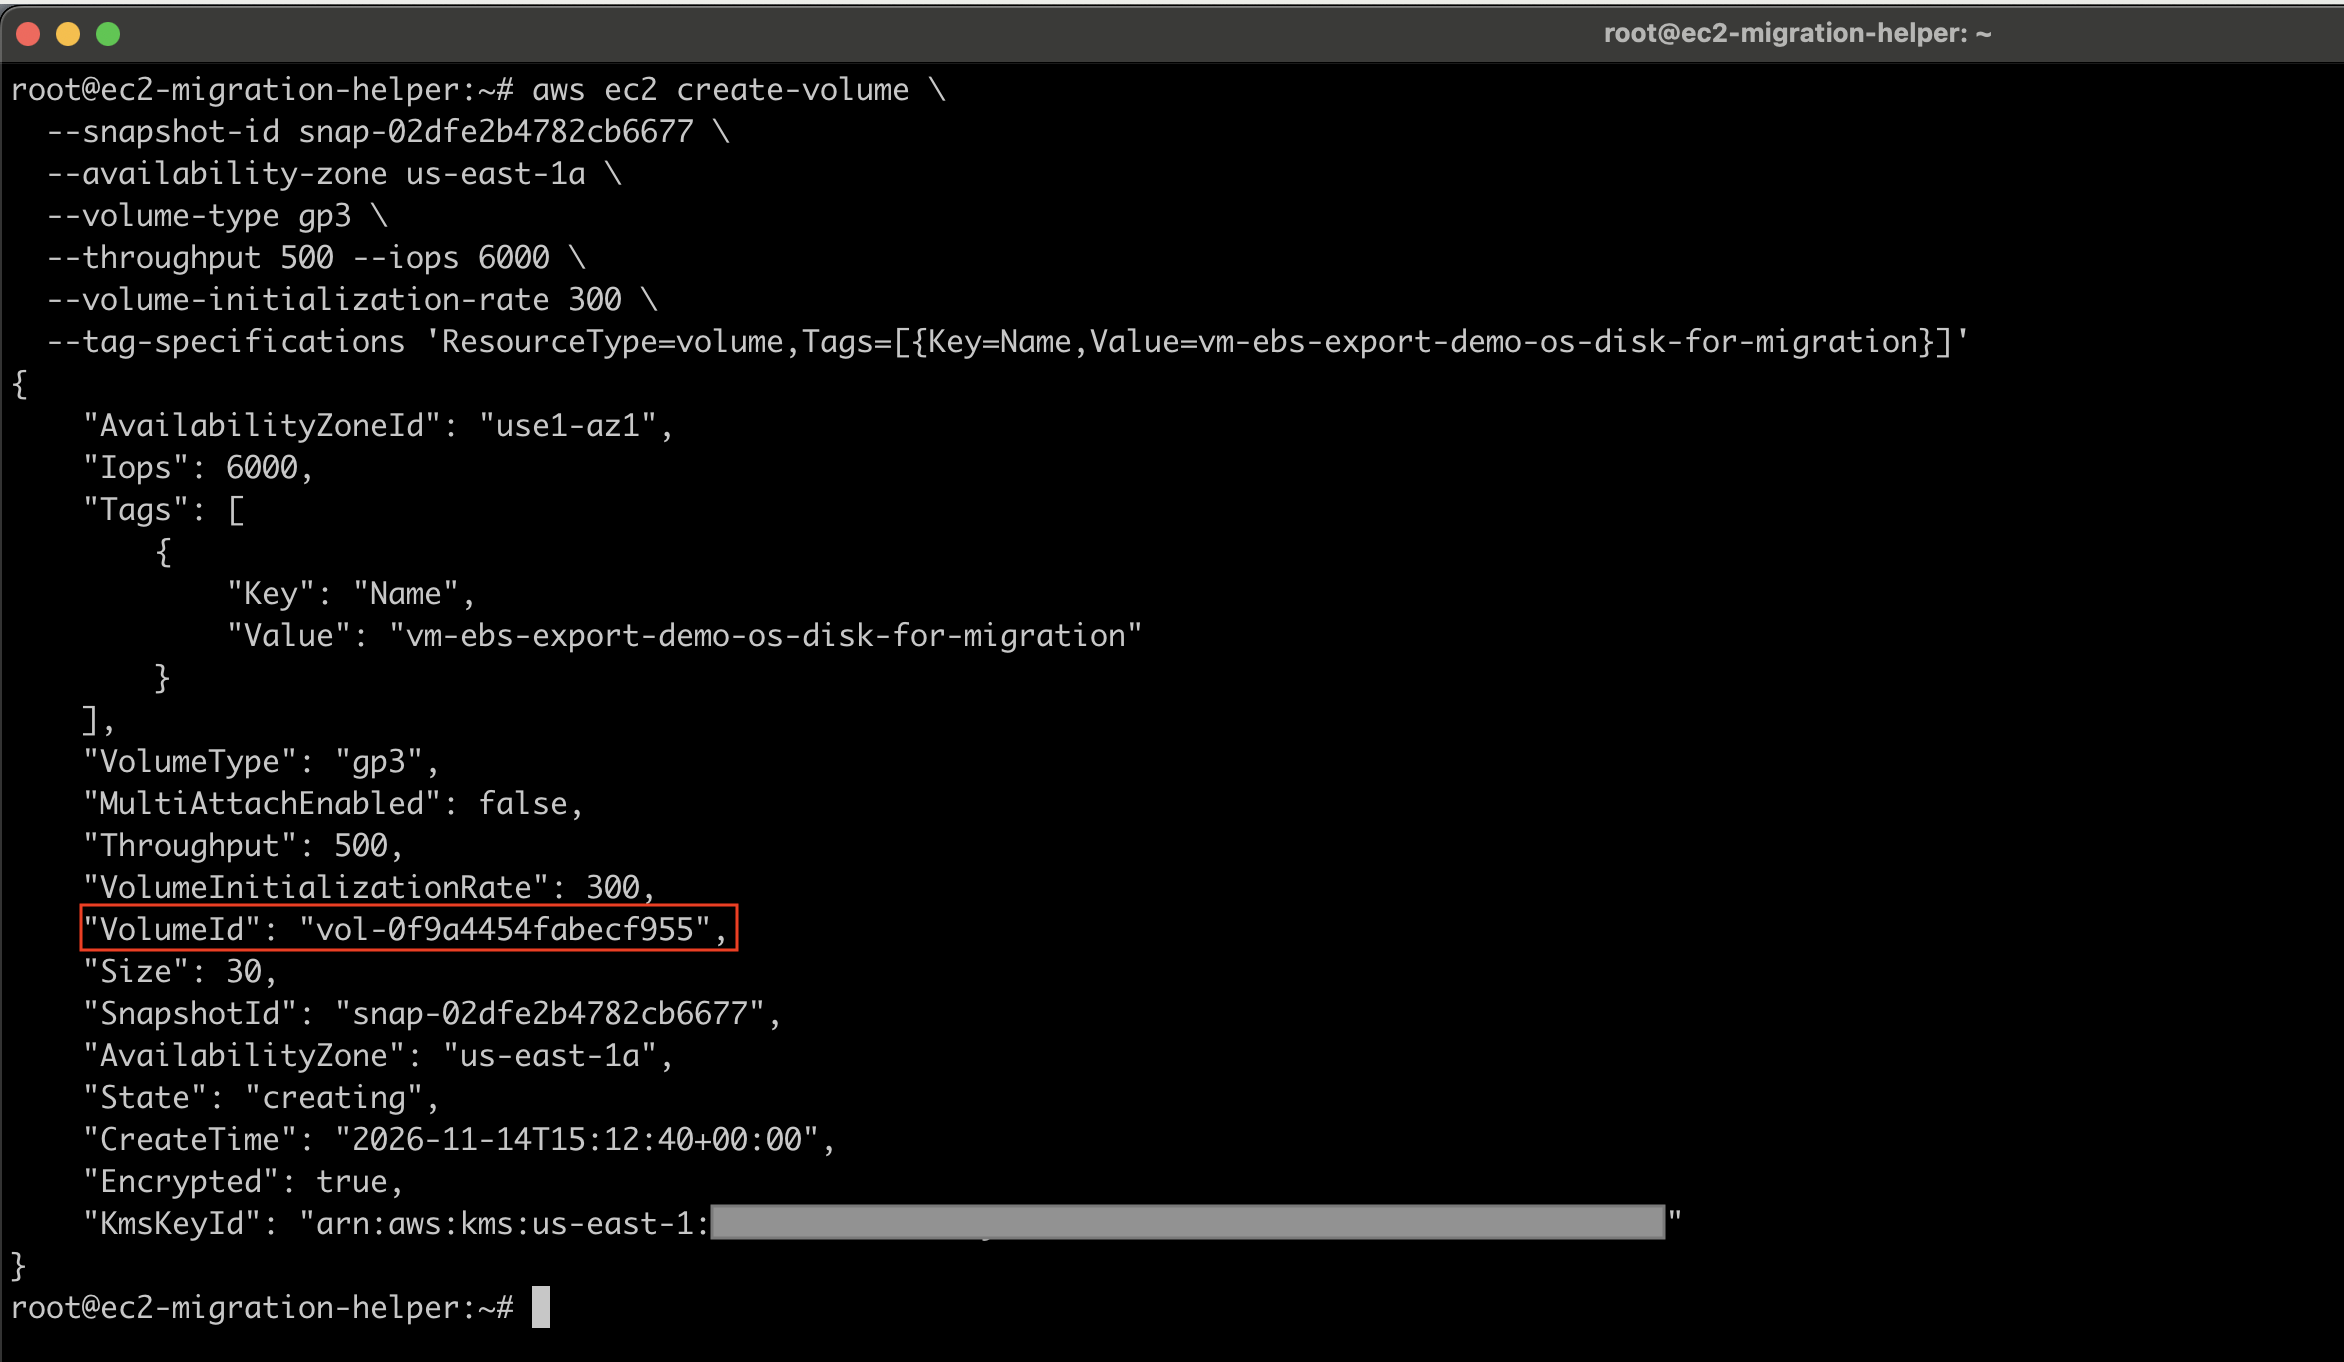
aws ec2 create-volume \
  --snapshot-id <CREATED_SNAPSHOT_ID> \
  --availability-zone <AVAILABILITY_ZONE> \
  --volume-type gp3 \
  --throughput 500 --iops 6000 \
  --volume-initialization-rate 300 \
  --tag-specifications 'ResourceType=volume,Tags=[{Key=Name,Value=vm-ebs-export-demo-os-disk-for-migration}]'
Here’s why it matters. A volume restored from a snapshot is lazy-loaded: each block is pulled from S3 the first time something reads it. dd reads every block exactly once, so my first attempt, on a plain volume, crawled along at about 4 MB/s. With --volume-initialization-rate 300, a 30 GiB volume is fully loaded in a few minutes, and my whole export took about 6 minutes instead of hours. The new volume is still encrypted, and that’s fine.
Step 3: Attach it to the helper
Attach the volume, but don’t mount it. Use the volume ID that step 2 returned.
aws ec2 attach-volume \
  --volume-id <CREATED_VOLUME_ID> \
  --instance-id <HELPER_INSTANCE_ID> \
  --device /dev/sdd
Step 4: Find the disk on the helper
lsblk
This is what it looked like on my helper:
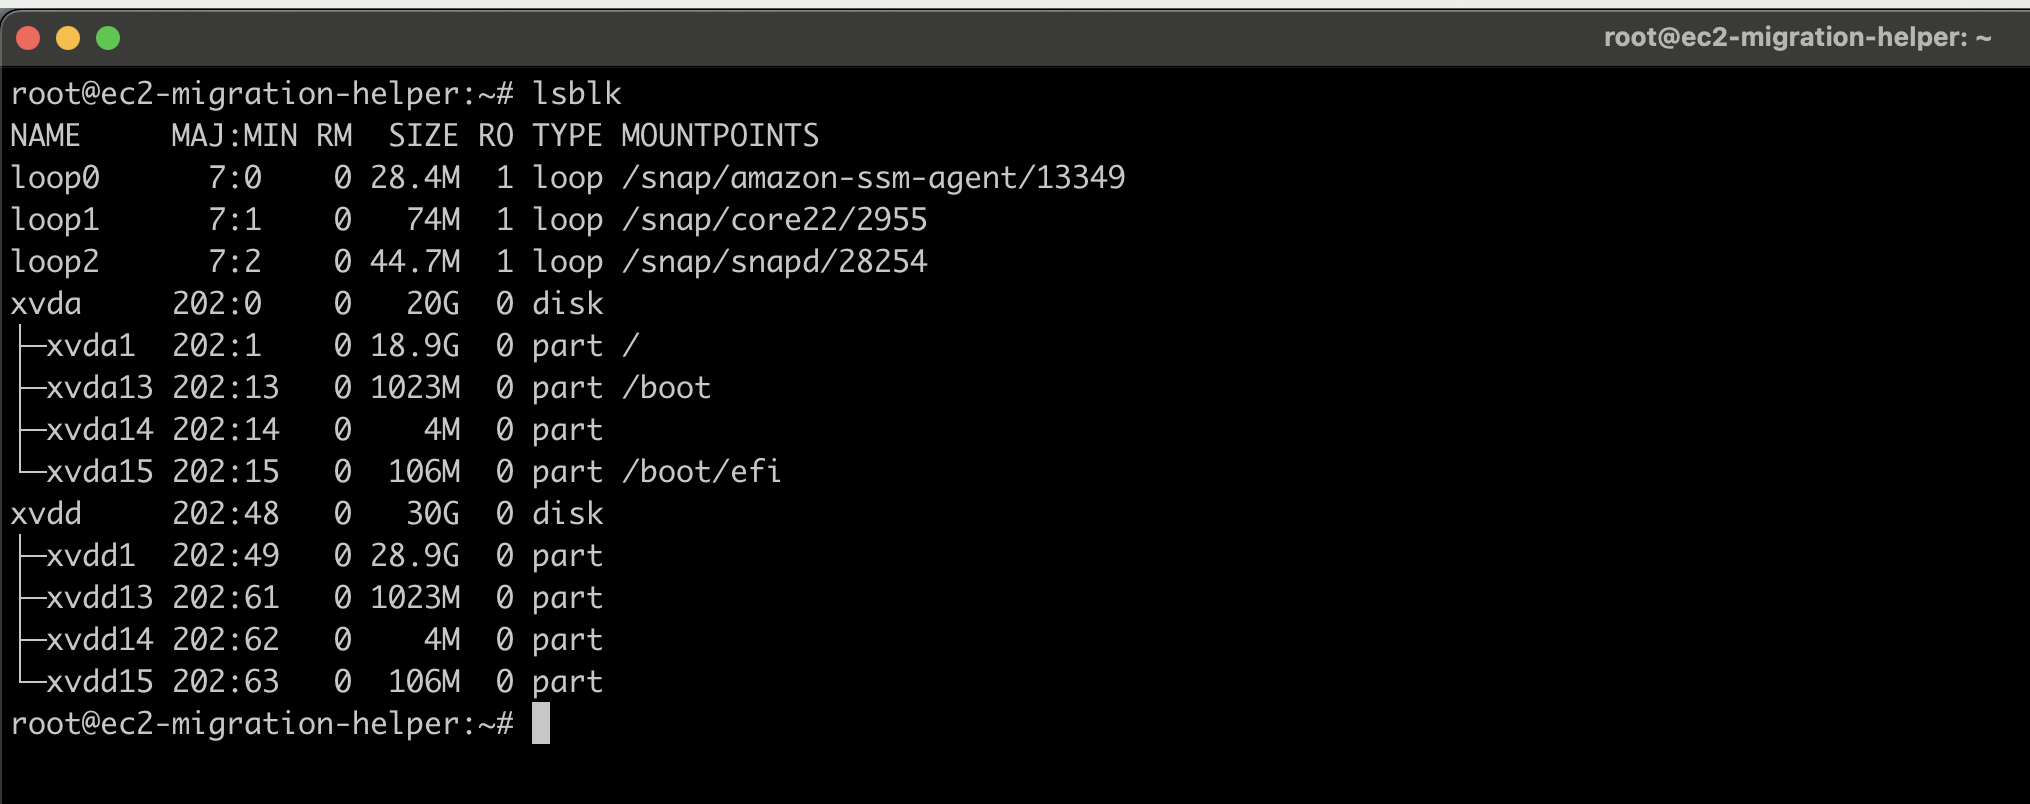
xvda is the helper’s own root disk, so leave that alone. The volume I attached as /dev/sdd shows up as xvdd. On Nitro instances you’ll see nvme1n1 and so on instead; lsblk -o NAME,SIZE,SERIAL shows the EBS volume ID next to each one, which makes matching them easy.
Export the whole disk (/dev/xvdd), not the partition (/dev/xvdd1). If you copy only the partition, you lose the partition table and bootloader, and the VM won’t boot on the other side.
Step 5: Stream the disk to S3 with dd
Start tmux first, so the copy survives if your SSH session drops:
tmux new -s export
Then stream the disk straight into S3:
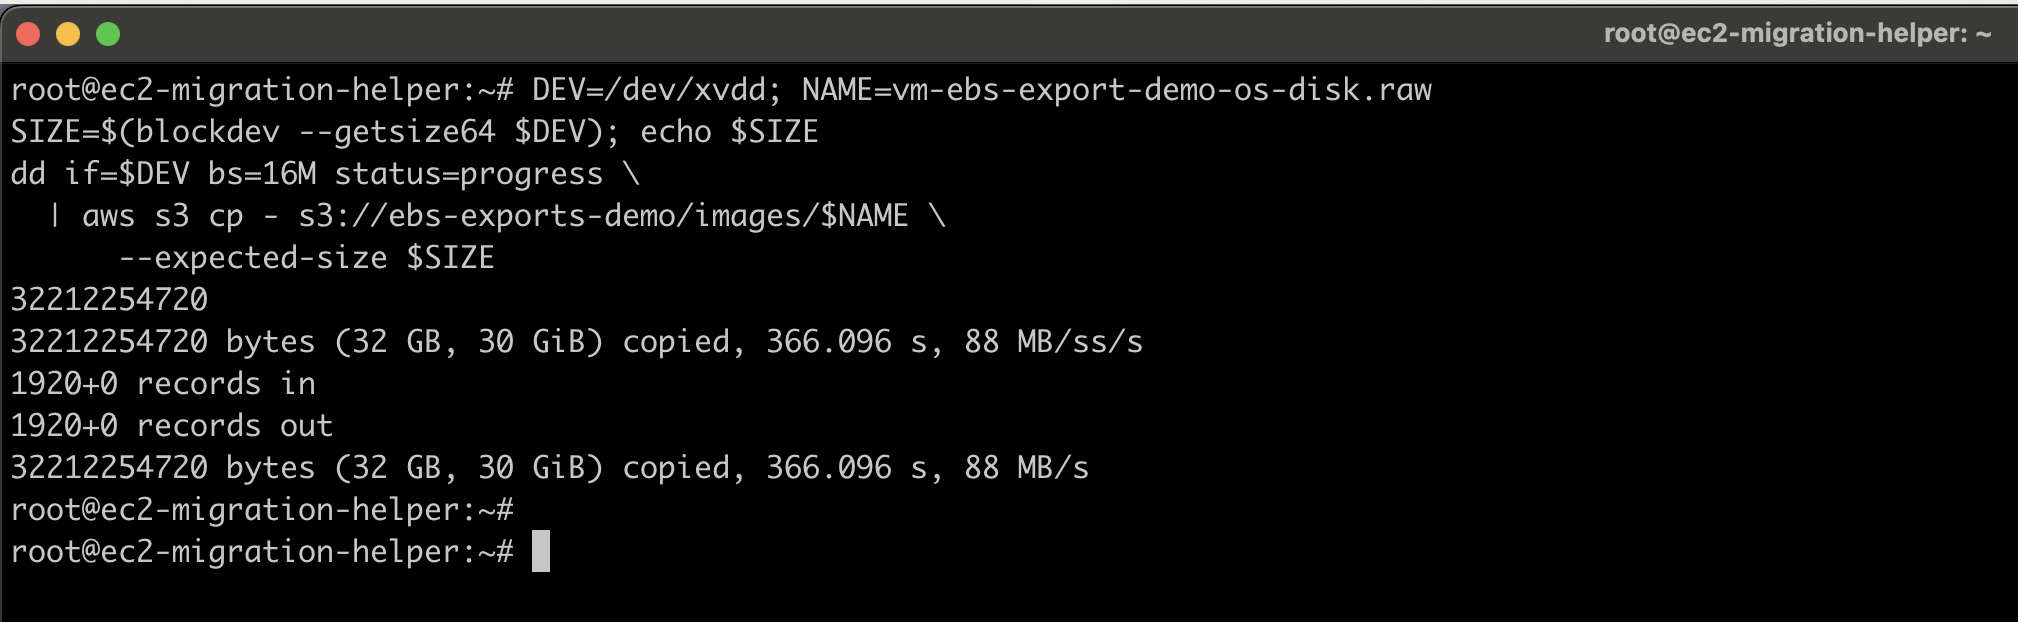
DEV=/dev/xvdd; NAME=vm-ebs-export-demo-os-disk.raw
SIZE=$(blockdev --getsize64 $DEV); echo $SIZE
dd if=$DEV bs=16M status=progress \
  | aws s3 cp - s3://ebs-exports-demo/images/$NAME \
      --expected-size $SIZE
What’s going on here:
ddreads the decrypted disk and writes it to standard output.aws s3 cp -uploads whatever comes in on standard input, so you don’t need any spare disk space on the helper.--expected-sizetells the CLI how big the stream is. Leave it out on anything over about 50 GB and the upload fails partway, once it hits S3’s 10,000-part limit.
For a second disk, open another tmux window with Ctrl-b c and run the same thing with a different DEV and NAME. Ctrl-b n switches between windows, and tmux attach -t export gets you back in after a disconnect.
When dd is done, it prints a line like 32212254720 bytes (32 GB, 30 GiB) copied. My 30 GiB OS disk took 366 seconds, at about 88 MB/s:
Step 6: Check the upload
Make sure the file in S3 is exactly the size that echo $SIZE printed:
aws s3 ls s3://ebs-exports-demo/images/

Don’t skip this. dd finishing only means the disk was read; if the CLI printed upload failed after it, the file in S3 is missing or incomplete.
Using the raw image on your new platform (optional)
The .raw file is a byte-for-byte copy of the disk, so most platforms take it as is or after a one-line conversion. Pull it down with the AWS CLI, or generate a presigned URL if the destination doesn’t have AWS credentials:
aws s3 cp s3://ebs-exports-demo/images/vm-ebs-export-demo-os-disk.raw .
aws s3 presign s3://ebs-exports-demo/images/vm-ebs-export-demo-os-disk.raw --expires-in 86400
| Destination | How to use the raw image |
|---|---|
| KVM / libvirt | Use it as is, or shrink it with qemu-img convert -f raw -O qcow2 disk.raw disk.qcow2. Then virt-install --import --disk path=disk.qcow2,bus=virtio ... |
| Proxmox VE | qm disk import <vmid> disk.raw <storage>, then attach the disk to the VM and set it as the boot disk. |
| OpenStack | openstack image create --disk-format raw --container-format bare --file disk.raw my-image |
| SUSE Harvester | Images → Create → URL, and paste the S3 object URL or a presigned URL. |
| VMware ESXi | qemu-img convert -f raw -O vmdk disk.raw disk.vmdk, upload it to a datastore, then vmkfstools -i disk.vmdk -d thin disk-thin.vmdk |
| Backup or forensics | Mount it read-only with losetup -fP --read-only disk.raw, then mount the partition you need. |
Cleaning up
Once the uploads check out, delete the temporary volumes so you’re not paying for them. Detach first:
aws ec2 detach-volume \
  --volume-id <CREATED_VOLUME_ID> \
  --instance-id <HELPER_INSTANCE_ID>
Then delete:
aws ec2 delete-volume \
  --volume-id <CREATED_VOLUME_ID>
A few other things to tidy up:
- Delete the migration snapshots once the server is running fine on its new platform.
- Remove the bucket policy, or at least the helper’s IP from it.
- Deactivate any IAM access keys you created for the migration.
- Delete the raw images from S3 when you’re done with them. They’re unencrypted copies of your disks.
Problems I ran into (and how I fixed them)
| Symptom | Cause | Fix |
|---|---|---|
Anonymous users cannot initiate multipart uploads | The upload ran with --no-sign-request. S3 rejects unsigned multipart uploads, whatever the bucket policy says. | Drop --no-sign-request and use real credentials. Check them with aws sts get-caller-identity. |
| Export runs at about 4 MB/s | The volume is lazy-loading blocks from its snapshot. | Recreate it with --volume-initialization-rate, or pre-warm it with fio --filename=/dev/xvdd --rw=read --bs=1M --iodepth=32 --ioengine=libaio --direct=1 --name=init. |
| Slow even though disk reads are fast | A burstable t2/t3 helper may have run out of CPU credits. top shows high st (steal). | Switch to a Nitro type such as m5.large, or set credit specification to Unlimited. |
AccessDenied on upload with valid credentials | The helper reaches S3 through a VPC gateway endpoint, or its public IP changed. | Check with curl -s https://checkip.amazonaws.com. Use an Elastic IP, or an aws:SourceVpce condition. |
| Upload fails partway on a large disk | --expected-size was missing, so the CLI ran out of parts. | Always pass --expected-size $(blockdev --getsize64 $DEV). |
| VM won’t boot on the destination | The partition was exported instead of the disk, or the firmware mode doesn’t match. | Export /dev/xvdd, not /dev/xvdd1. Match BIOS or UEFI to the source instance. |
FAQ
Can I decrypt an encrypted EBS volume in AWS?
No. AWS has no way to remove encryption from an EBS volume or snapshot. The only way out is to copy the data at block level, from an instance that has the encrypted volume attached, to somewhere that isn’t encrypted.
Why can’t I just use AWS VM Export?
export-image and create-instance-export-task don’t support AMIs or instances with encrypted EBS snapshots. That’s exactly the limit the dd-to-S3 method gets around.
Is the raw image in S3 encrypted?
Not at the disk level. Turn on default bucket encryption (SSE-S3 or SSE-KMS) so it’s at least encrypted at rest, keep the bucket policy tight, and delete the images once you’ve finished.
Which platforms can use the raw image?
Anything that takes raw disk images, including KVM/libvirt, Proxmox VE, OpenStack and SUSE Harvester. For VMware, Hyper-V, or just to save space, convert it with qemu-img convert to VMDK, VHDX or qcow2 first.
How long does it take?
With the initialization rate set, my 30 GiB OS disk exported in about 6 minutes at 88 MB/s. An earlier run without it took about 19 minutes at 28 MB/s, and on a volume that was still lazy-loading the copy crawled at about 4 MB/s, which would have taken over 2 hours.
What is the fastest way to export encrypted EBS volume to S3?
Create the volume from its snapshot with --volume-initialization-rate 300, run the copy from a Nitro helper such as m5.large, and stream it with dd straight into S3 so nothing is written to local disk.
Wrapping up
AWS won’t give you a button to export encrypted EBS volume to S3, but a helper instance and a single dd pipeline get you there. If I did this again, I’d create the volumes with an initialization rate from the start, run every copy inside tmux, use signed uploads, and clean up the temporary volumes and keys straight after. Questions or a different approach? Let me know in the comments.