
Most organizations are always concerned about the security of data on their mobile users’ laptops. So what happens if the laptop is lost or stolen? and how can we ensure that the data inside that laptop does not fall into the wrong person’s hands? The best solution is Encryption. Rather than installing third-party software to do encryption, Microsoft has introduced the BitLocker drive encryption feature built into the Operating System.
If you are looking at implementing BitLocker in an enterprise environment, one of the most important things is to manage BitLocker recovery keys on each and every computer in your organization. Because in some cases, BitLocker can prompt the type to recovery key if detects a specific behavior of partition changes or else users forget the decryption key.
BitLocker can use an enterprise’s existing Active Directory Domain Services (ADDS) infrastructure to remotely store recovery keys on domain-joined computers.
Let’s start how to configure it step by step
Step 1 – Verify your schema is ready
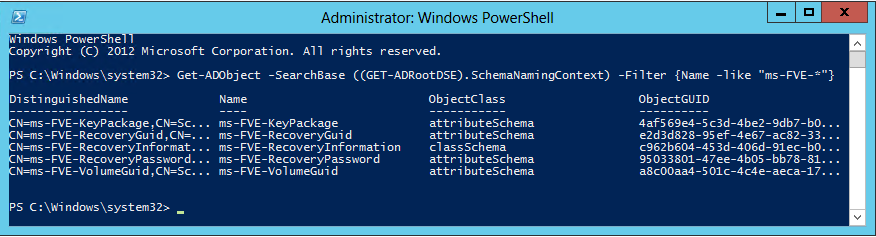
If you are on Windows server 2008 or higher and have PowerShell, you can run the following command snippet.
Get-ADObject -SearchBase ((GET-ADRootDSE).SchemaNamingContext) -Filter {Name -like “ms-FVE-*”}
After running the command you can see the following output result. If not you will need to extend your schema.
(For More Info: https://technet.microsoft.com/en-us/library/jj635854.aspx)
Step 2 – Set the required permissions to view Recovery Information
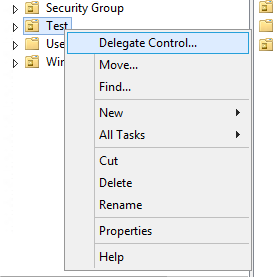
Next, we need to delegate some rights on the targeted OU to a specific group. Right-click on the targeted OU and select Delegate Control.
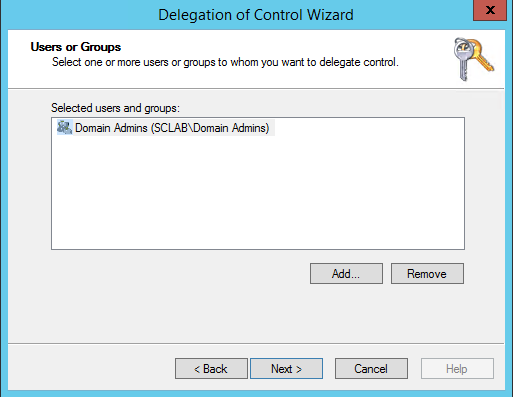
Add users/ User groups that need to view the recovery key.
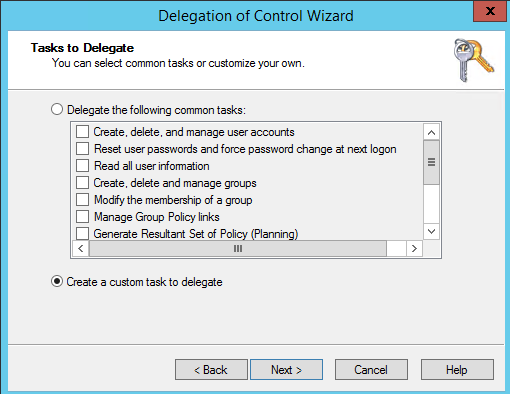
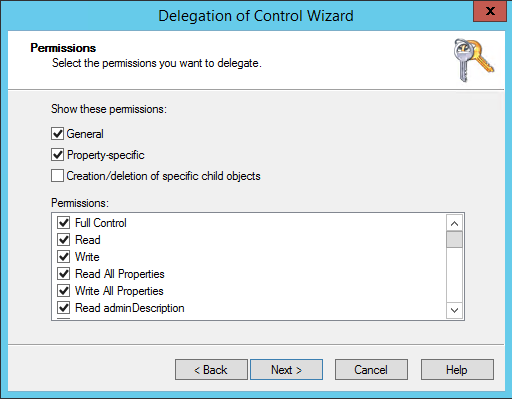
Select Create a custom task to delegate.
Choose Only the following object in the folder and check MSFVE-RecoveryInformation objects.

Give Full Control of this object. And click finish to close the wizard.
Step 3 – Configure group policy to back up BitLocker and TPM recovery information to Active Directory
Now the Active Directory is ready to store the BitLocker and TPM recovery information, so we need a policy that tells the computers to push BitLocker and TPM recovery info to Active Directory.
There are four categories of Group Policy settings available for BitLocker Drive Encryption:
- Global settings that affect all BitLocker-protected drives
- Operating system drive settings
- Fixed data drive settings
- Removable data drive settings
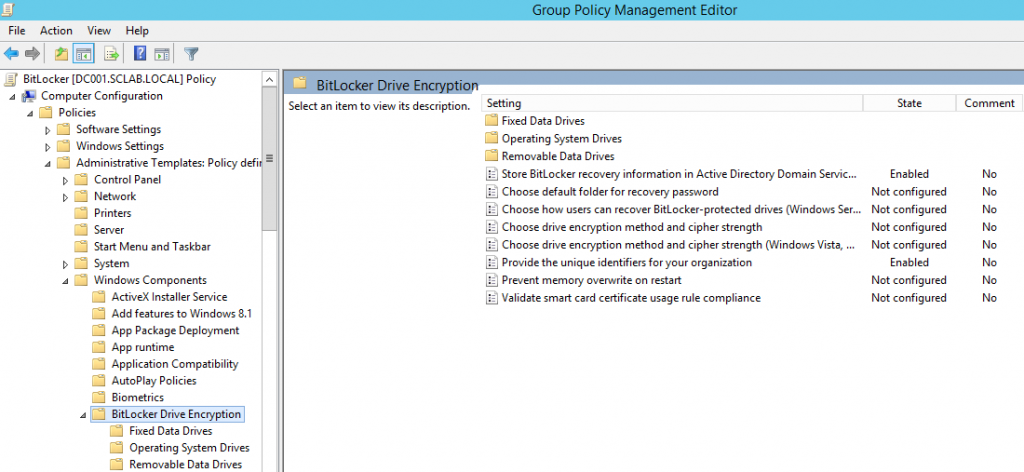
Create a new Group Policy and navigate to Computer Configuration -> Administrative Templates -> Windows Components -> BitLocker Drive Encryption.
| Category | Setting name | Recommended setting |
| Global | Store BitLocker recovery information in Active Directory Domain Services. | Set to enabled, check to Require BitLocker backup to AD DS, and ensure Recovery passwords and the key package is selected. |
| Global | Provide Unique identifiers for your organization. | Set to enabled, and either an identifier in the BitLocker identification field. (You can enter your organization name here) |
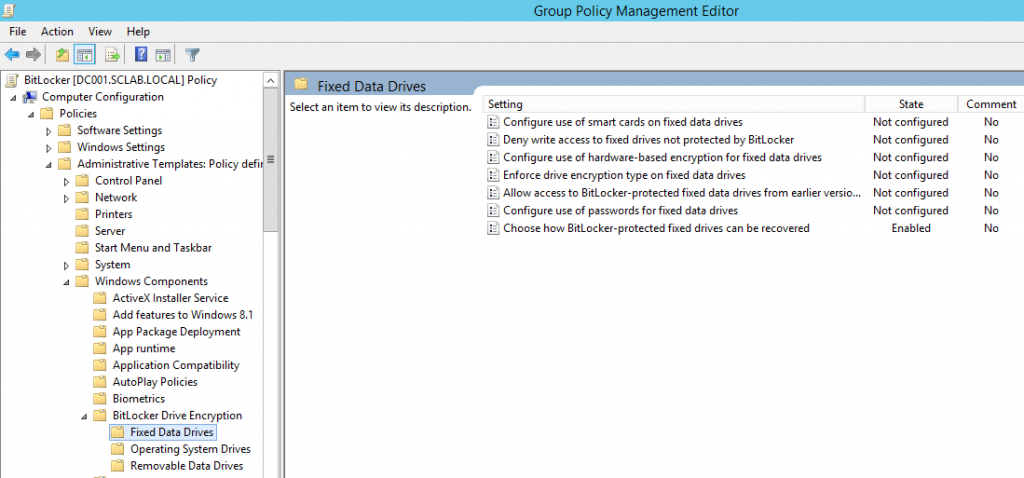
| Fixed data drives | Choose how BitLocker protected fixed drivers can be recovered. | Set to enabled, Allow 48-digit recovery password, Allow 256-bit recovery key, omit recovery options from the BitLocker setup wizard, Store recovery passwords and key packages, Do not enable BitLocker until recovery information is stored to AD DS for operating system drives. |
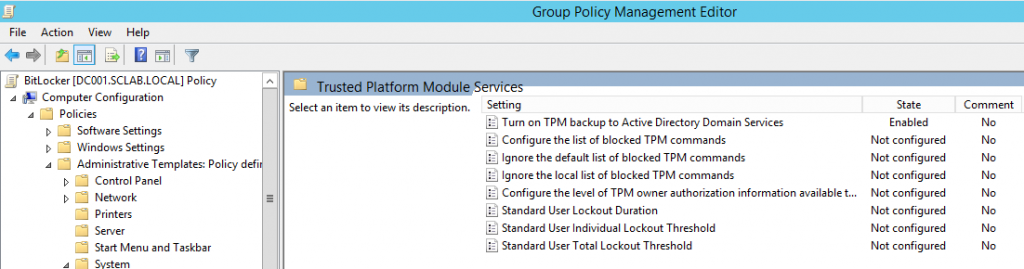
Then, navigate to Computer Configuration -> Administrative Templates -> System -> Trusted Platform Module Service.
| Category | Setting name | Recommended setting |
| Global | Turn on TPM backup to AD DS | Set to enabled. |
My final Group Policy Object looks like the following.

Step 4 – Install the BitLocker Password Recovery Viewer
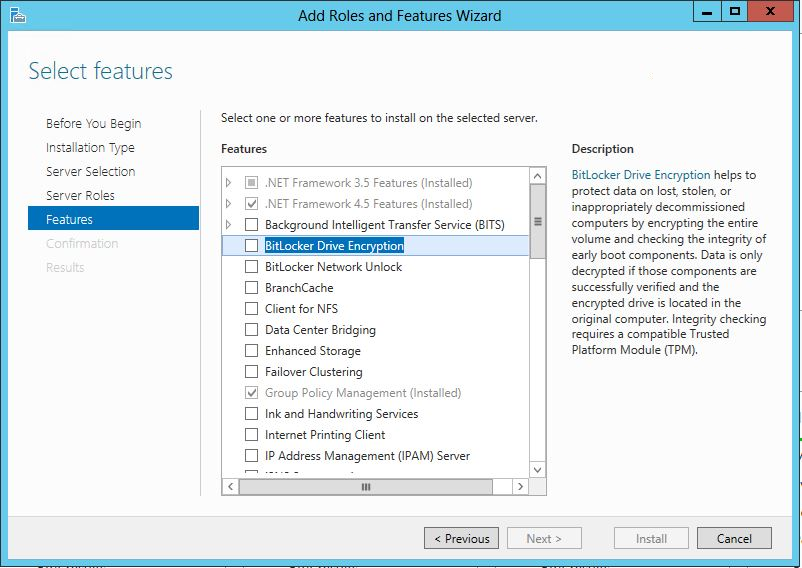
On your domain controller, open the Server Manager -> Manage -> Add Roles and Features
Then click Next until the “Select Features” window and check the “BitLocker Drive Encryption” check box.
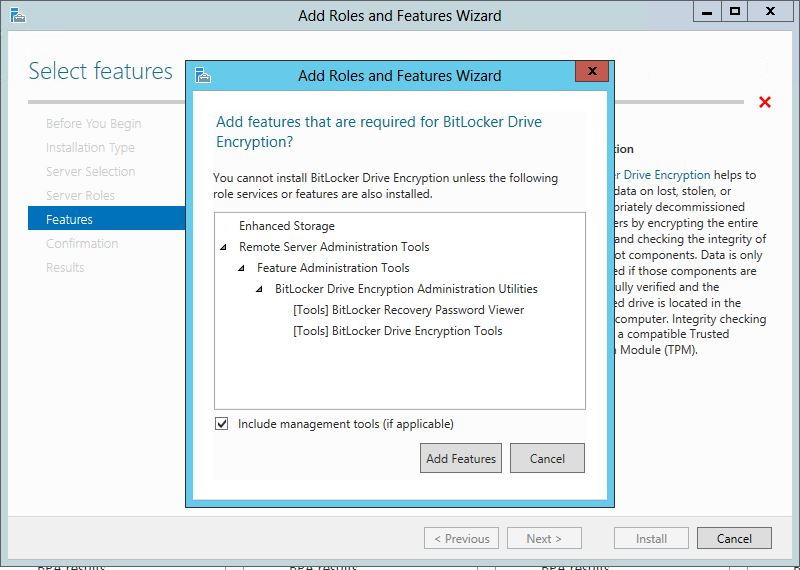
Click Add Features button to add additional features.
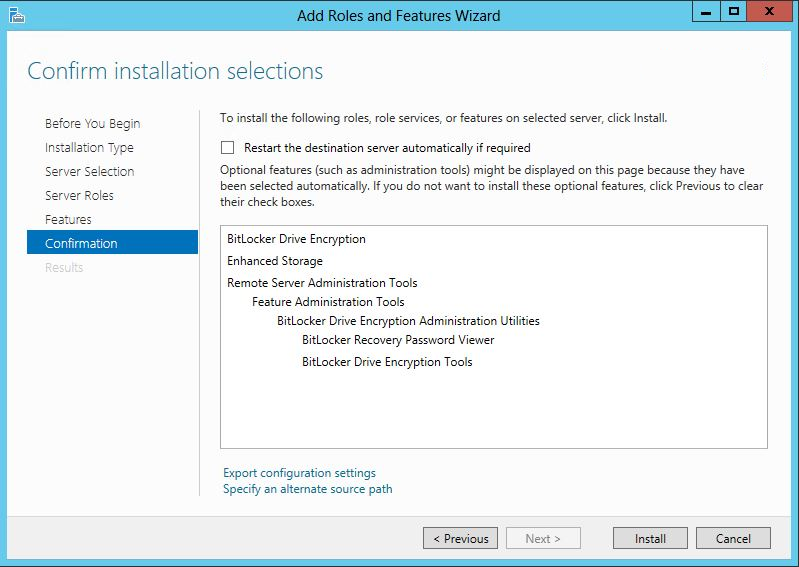
Finally, click install to install the selected features and after installation succeeded, restart the server.
Now, it is time to enable BitLocker on the domain-joined computer.
Retrieve the recovery key from Active Directory
Open the “Active Directory Users And Computers” management console. and from the window, right-click the computer object and you can see there is a new tab called “Bitlocker Recovery”
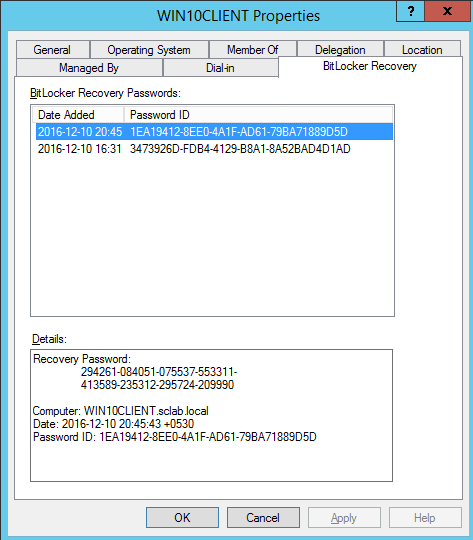
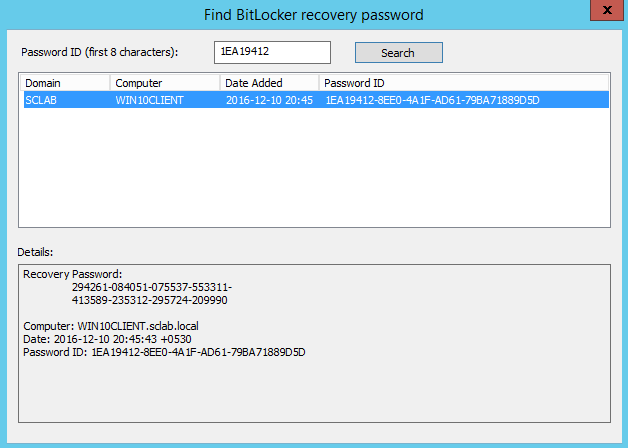
But sometimes, as an example when a user forgets the recovery password and asks to unlock the drive, the user can select the recovery option to enter the recovery key. In that window, it will show the recovery id that belongs to that drive and you can get the last 8 digits of that id to retrieve the recovery key.
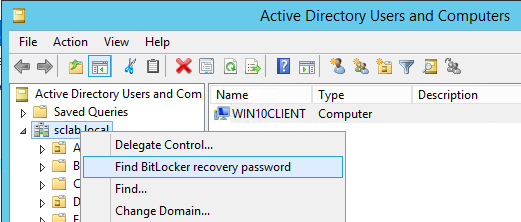
Right-click on your domain name & select “Find Bitlocker Recovery Password”.
Enter the first 8 digits and click Search. You will find the computer and the recovery key.
So Microsoft has done a great job to manage BitLocker recovery keys on large enterprise environments and to give users an easy and transparent way to protect data on their computers and other removable drives. This is totally free solution but It may require a little more work on the part of the IT team to set up the ideal environment to support it.
1 comment
Hi, excellent article.
How can I update the existing key and, if it is not possible to subscribe the existing one, how can I delete the previously created key for a certain unit?
Thanks.