
If you’ve been running larger CI/CD pipelines with GitHub-hosted runners, you already know the pain — slow builds, limited customization, shared environments that feel risky, and costs that keep climbing. Sound familiar? The good news is, there’s a better way!
By using GitHub Self-Hosted Runners with Kubernetes and Actions Runner Controller (ARC), you can take full control of your build environment. Whether you’re running a self-managed Kubernetes cluster or using a cloud service like AWS EKS, Azure AKS, or Google GKE, ARC makes it easy to deploy, scale, and manage your runners efficiently — without breaking the bank.
In this article, we’ll walk through how to deploy self-hosted GitHub runners on your on-premises Kubernetes cluster, powered by custom runner images hosted on AWS Elastic Container Registry (ECR) for complete flexibility, control, and performance optimization.
About GitHub Self-Hosted Runners
GitHub Self-Hosted Runners allow you to run GitHub Actions workflows on your own secured infrastructure. Unlike GitHub-hosted runners, which use shared cloud infrastructure, self-hosted runners give you full control over the hardware, operating system, tools, and runtime configuration.
This allows you to:
✅ Optimize performance with dedicated resources
✅ Preinstall dependencies for faster builds
✅ Enhance security by keeping your code and secrets within your own environment
✅ Reduce costs for frequent or long-running CI/CD workloads
However, manually managing these runners can be challenging — that’s where Actions Runner Controller (ARC) for Kubernetes comes in.
What Is Kubernetes ARC (Actions Runner Controller)?
Actions Runner Controller (ARC) is an open-source project by GitHub that automates the lifecycle of self-hosted runners on Kubernetes.
With ARC, you can:
- Dynamically scale runners up and down based on workflow demand
- Automatically register/deregister runners with your GitHub repository or organization
- Run runners as Kubernetes pods, leveraging your existing cluster resources
- Use custom runner container images with preinstalled dependencies
Prerequisites
Before deployment, make sure you have:
- A machine with AWS CLI command-line tools installed
- A running on-prem Kubernetes cluster (v1.33 recommended). Reference: Easy Way to Deploy a Kubernetes Cluster using Kubeadm
- kubectl and Helm installed
- GitHub access with repo and admin:org scopes
- AWS IAM credentials or image pull secret for ECR access
Setting Up the GitHub Actions Workflow Structure
In your GitHub repository, maintain the following directory structure with the relevant YAML configuration files for the runners. In this example, I’ll create a workflow with concurrent testing jobs to simulate GitHub Actions in operation.
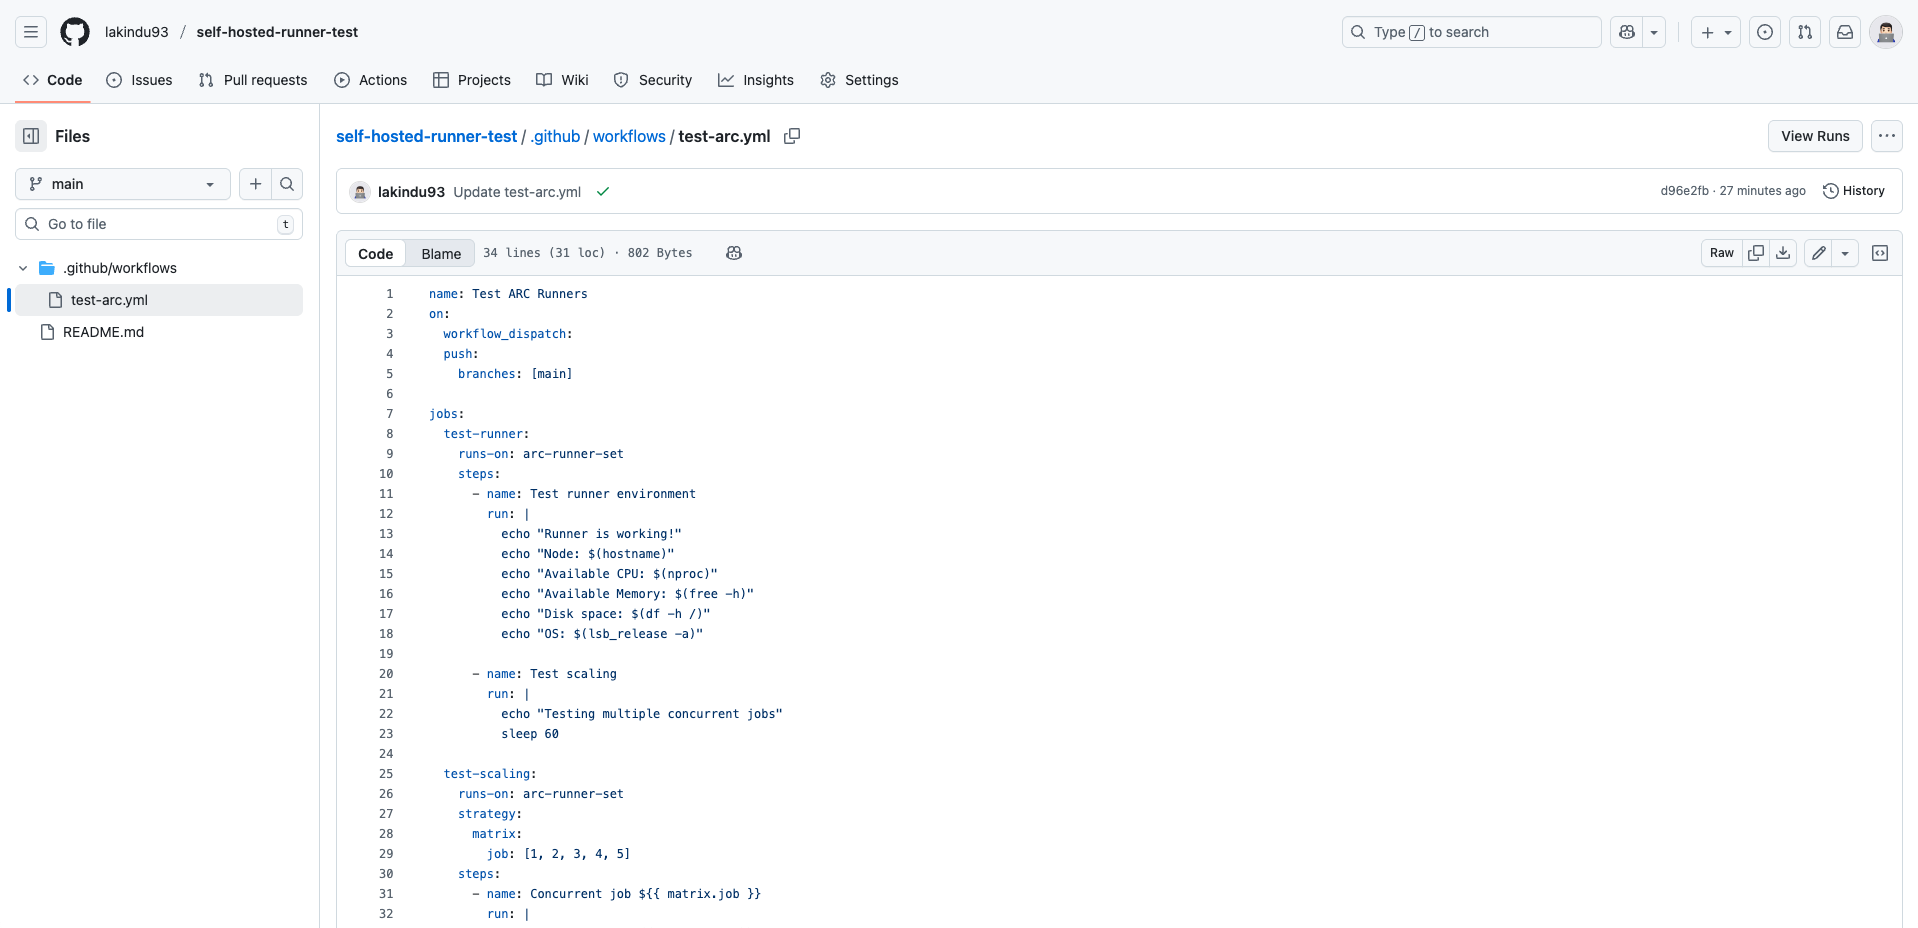
In the YAML file, paste the following testing code snippet.
This code will simulate a long-running job by pausing for 60 seconds, which helps test the ARC autoscaling behavior. It allows you to observe whether new runner pods are automatically created when multiple jobs are queued and to confirm that those runners are properly terminated once the jobs are completed.
name: Test ARC Runners
on:
  workflow_dispatch:
  push:
    branches: [main]

jobs:
  test-runner:
    runs-on: arc-runner-set
    steps:
      - name: Test runner environment
        run: |
          echo "Runner is working!"
          echo "Node: $(hostname)"
          echo "Available CPU: $(nproc)"
          echo "Available Memory: $(free -h)"
          echo "Disk space: $(df -h /)"
          echo "OS: $(lsb_release -a)"

      - name: Test scaling
        run: |
          echo "Testing multiple concurrent jobs"
          sleep 60

  test-scaling:
    runs-on: arc-runner-set
    strategy:
      matrix:
        job: [1, 2, 3, 4, 5]
    steps:
      - name: Concurrent job ${{ matrix.job }}
        run: |
          echo "Running job ${{ matrix.job }}"
          sleep 30
Create a GitHub App For Secure Authentication
Navigate to your GitHub Account Settings > Developer Settings > GitHub Apps and then create a new GitHub App with the following details.
- GitHub App name – arc-app-demo
- Homepage URL – https://github.com/your-org/your-repo
- Webhook URL – https://<your-arc-controller-endpoint>/githubapp/webhook (This is optional, uncheck if not required)
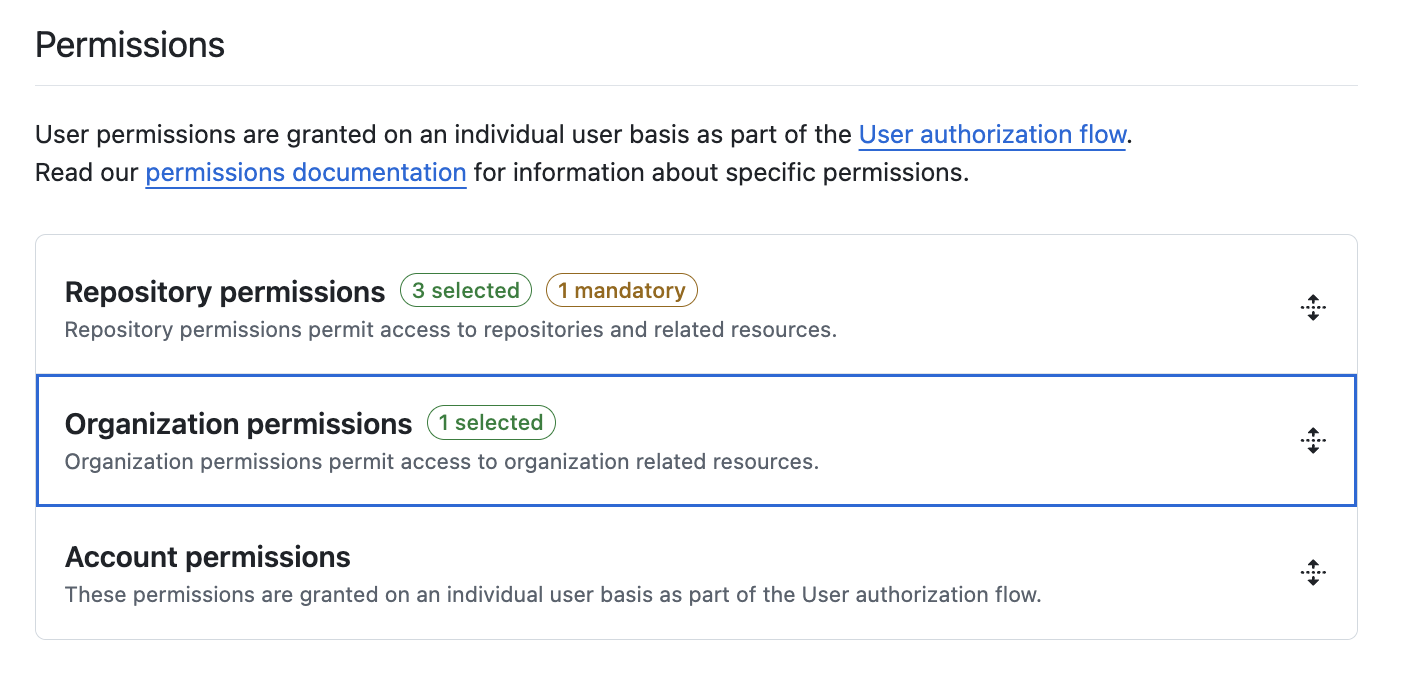
Under the permissions section, select the following permissions under the “Repository permissions” and the “Organization permissions”.
Repository permissions: Actions (R/W), Administration (R/W), Contents (R/O)
Organization permissions: Self-hosted runners (R/W)
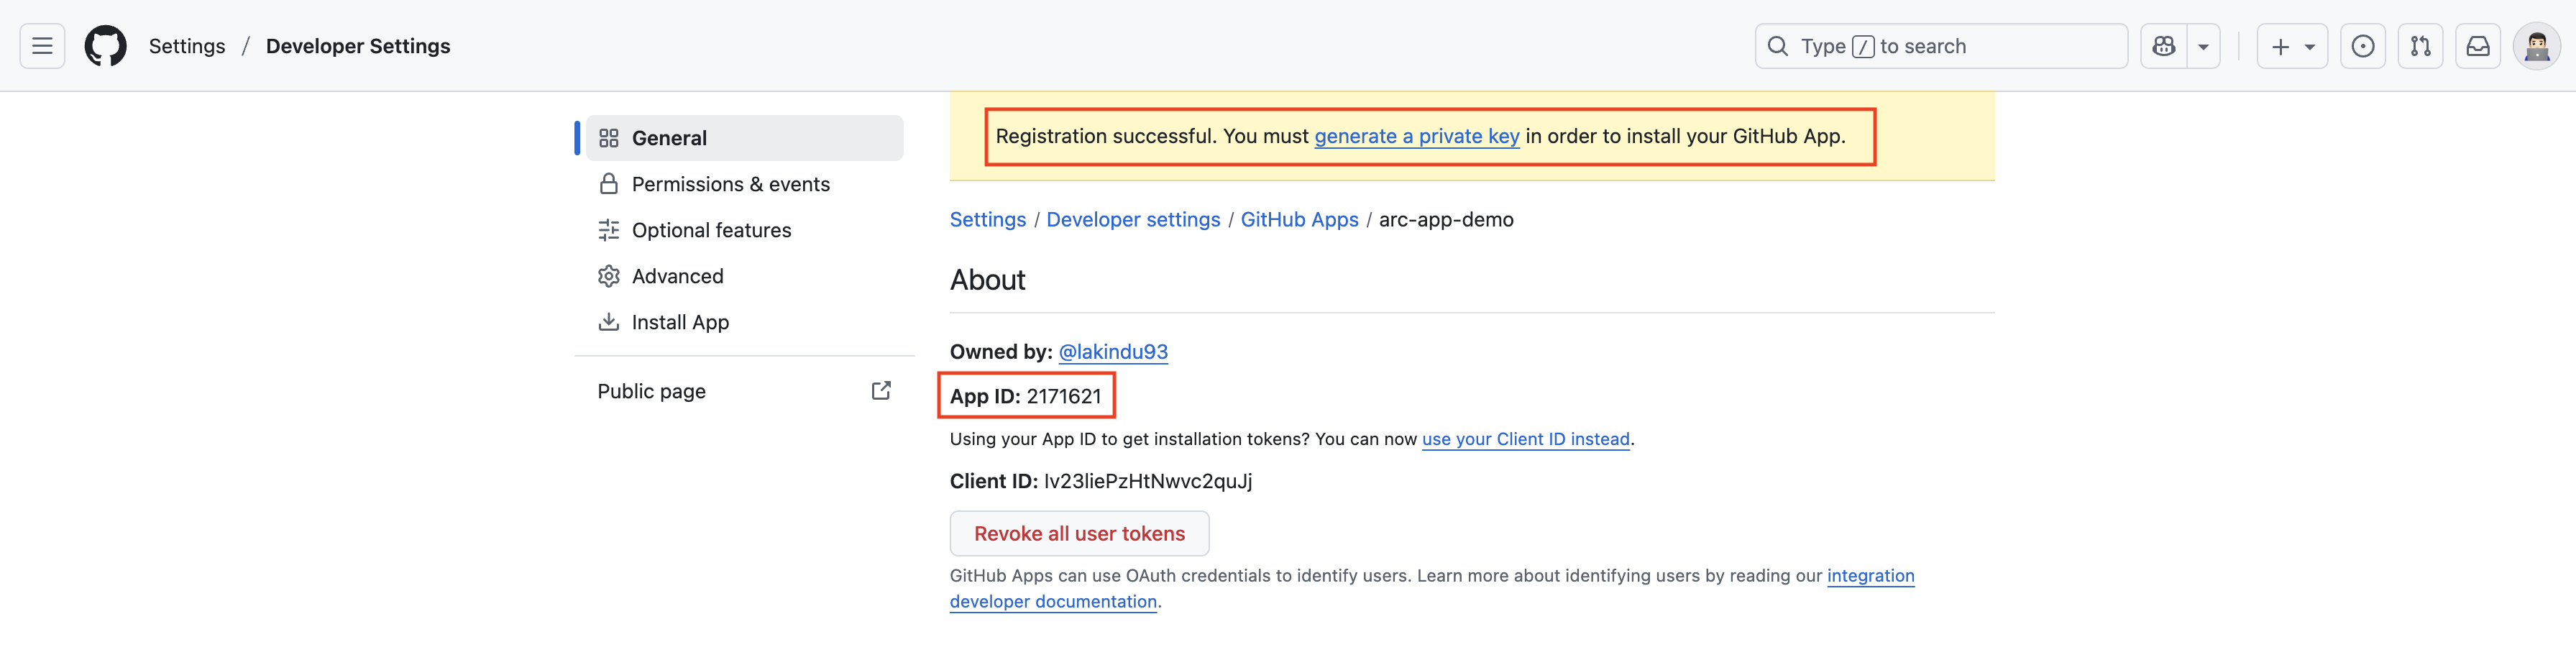
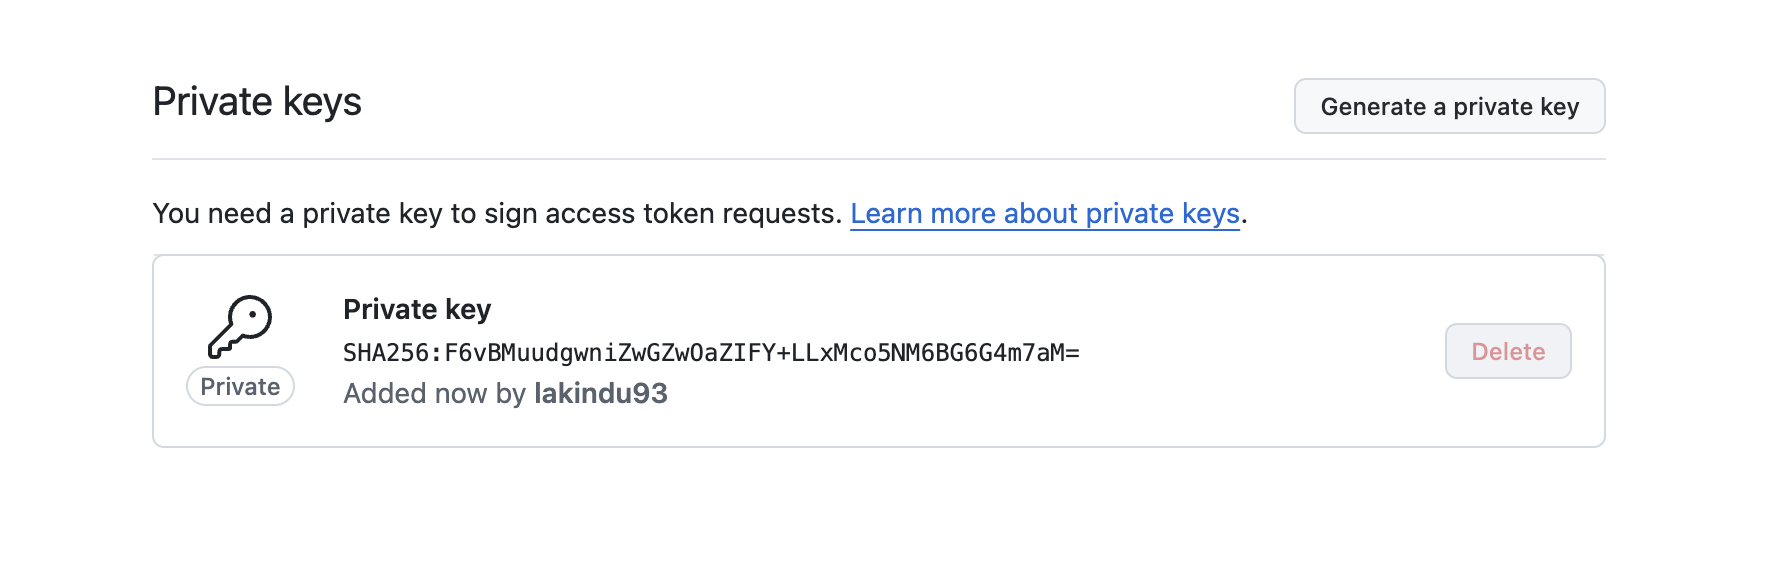
Once you successfully create the app, you’ll see the App ID details displayed — make sure to note down the App ID for later use. Next, generate a private key for the app under the Private Keys section. You’ll be prompted to download and save the generated private key file to your machine. Keep this file stored securely, as it will be required when creating the Kubernetes secret for the runner scale sets.
Generate Private Key:
Install the GitHub App
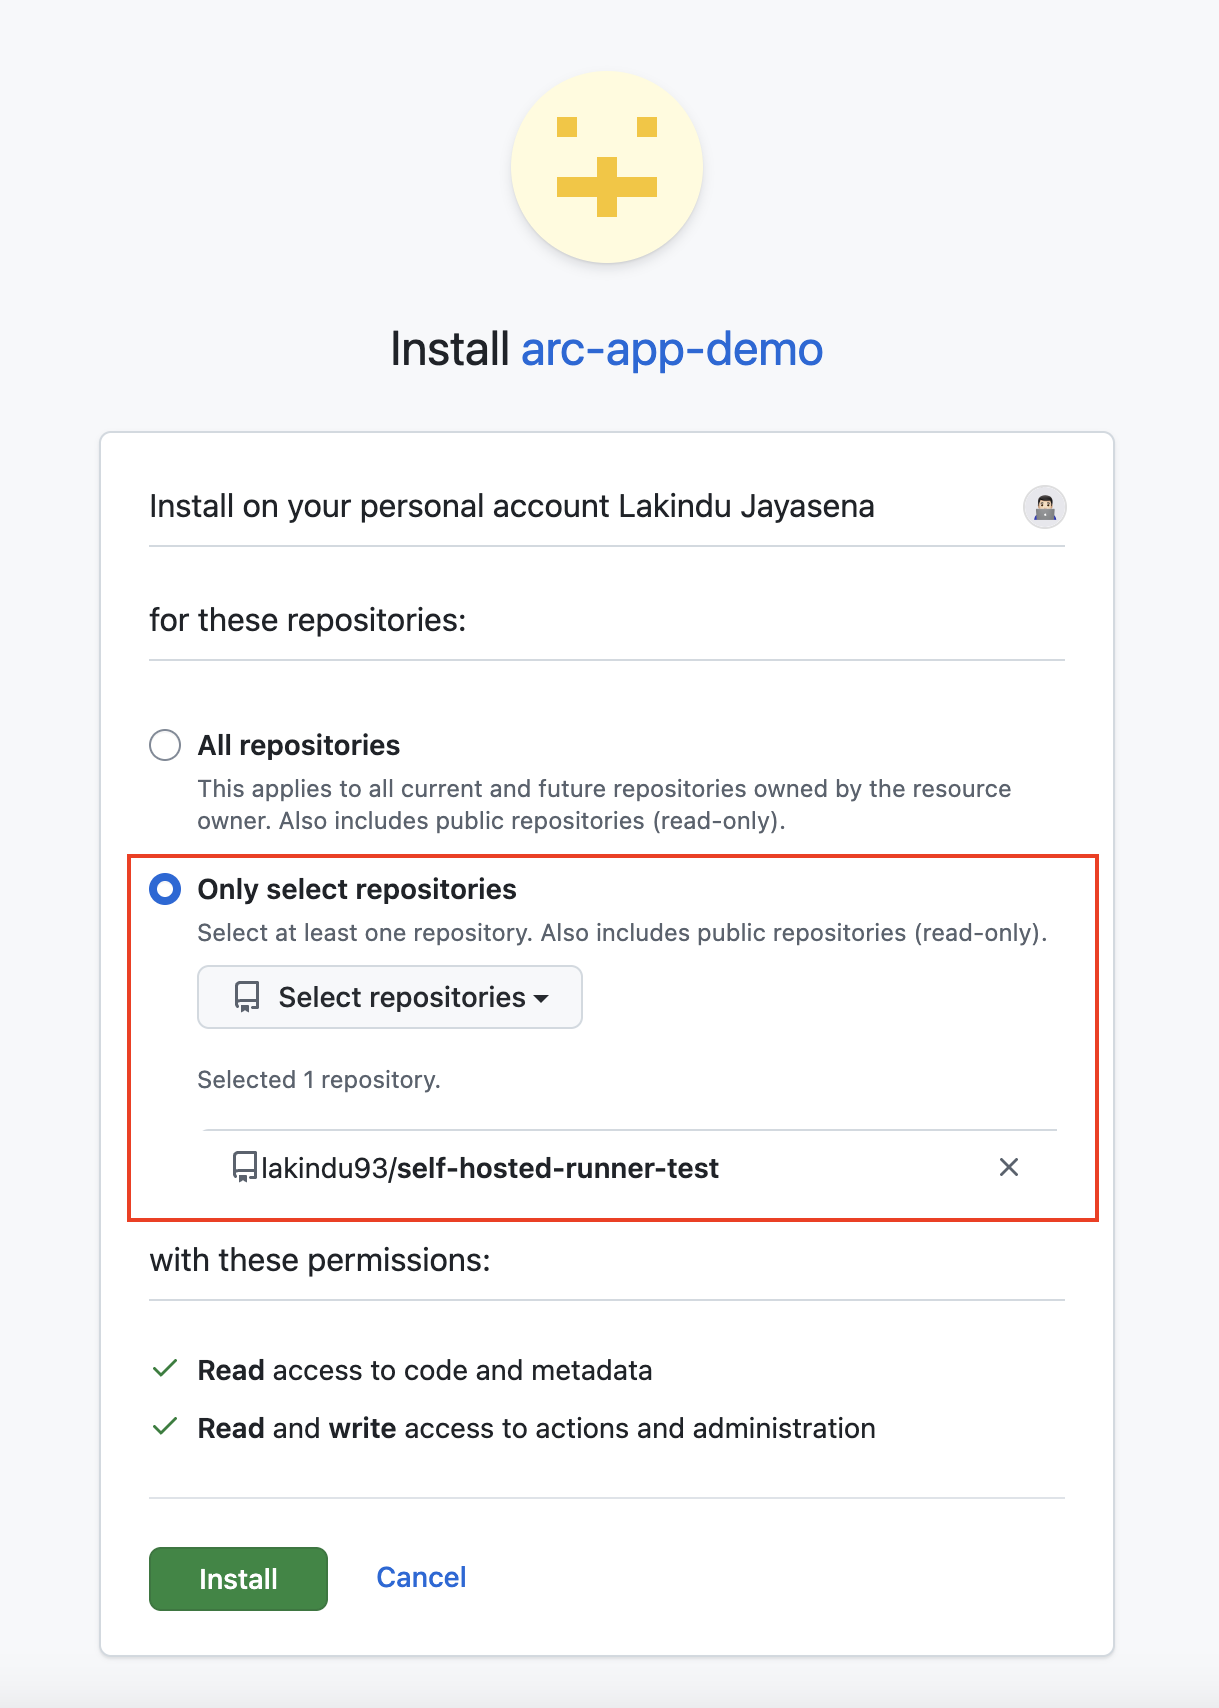
Now it’s time to install the GitHub App you just created. Open the app settings, navigate to the Install App section in the left-hand menu, and proceed to install the app on your account.

During the installation process, you’ll be prompted to select which repositories the app can access. You can either grant access to all repositories or choose only specific ones. In this example, I’ll select the “Only select repositories” option and choose the repository where my workflows are configured.
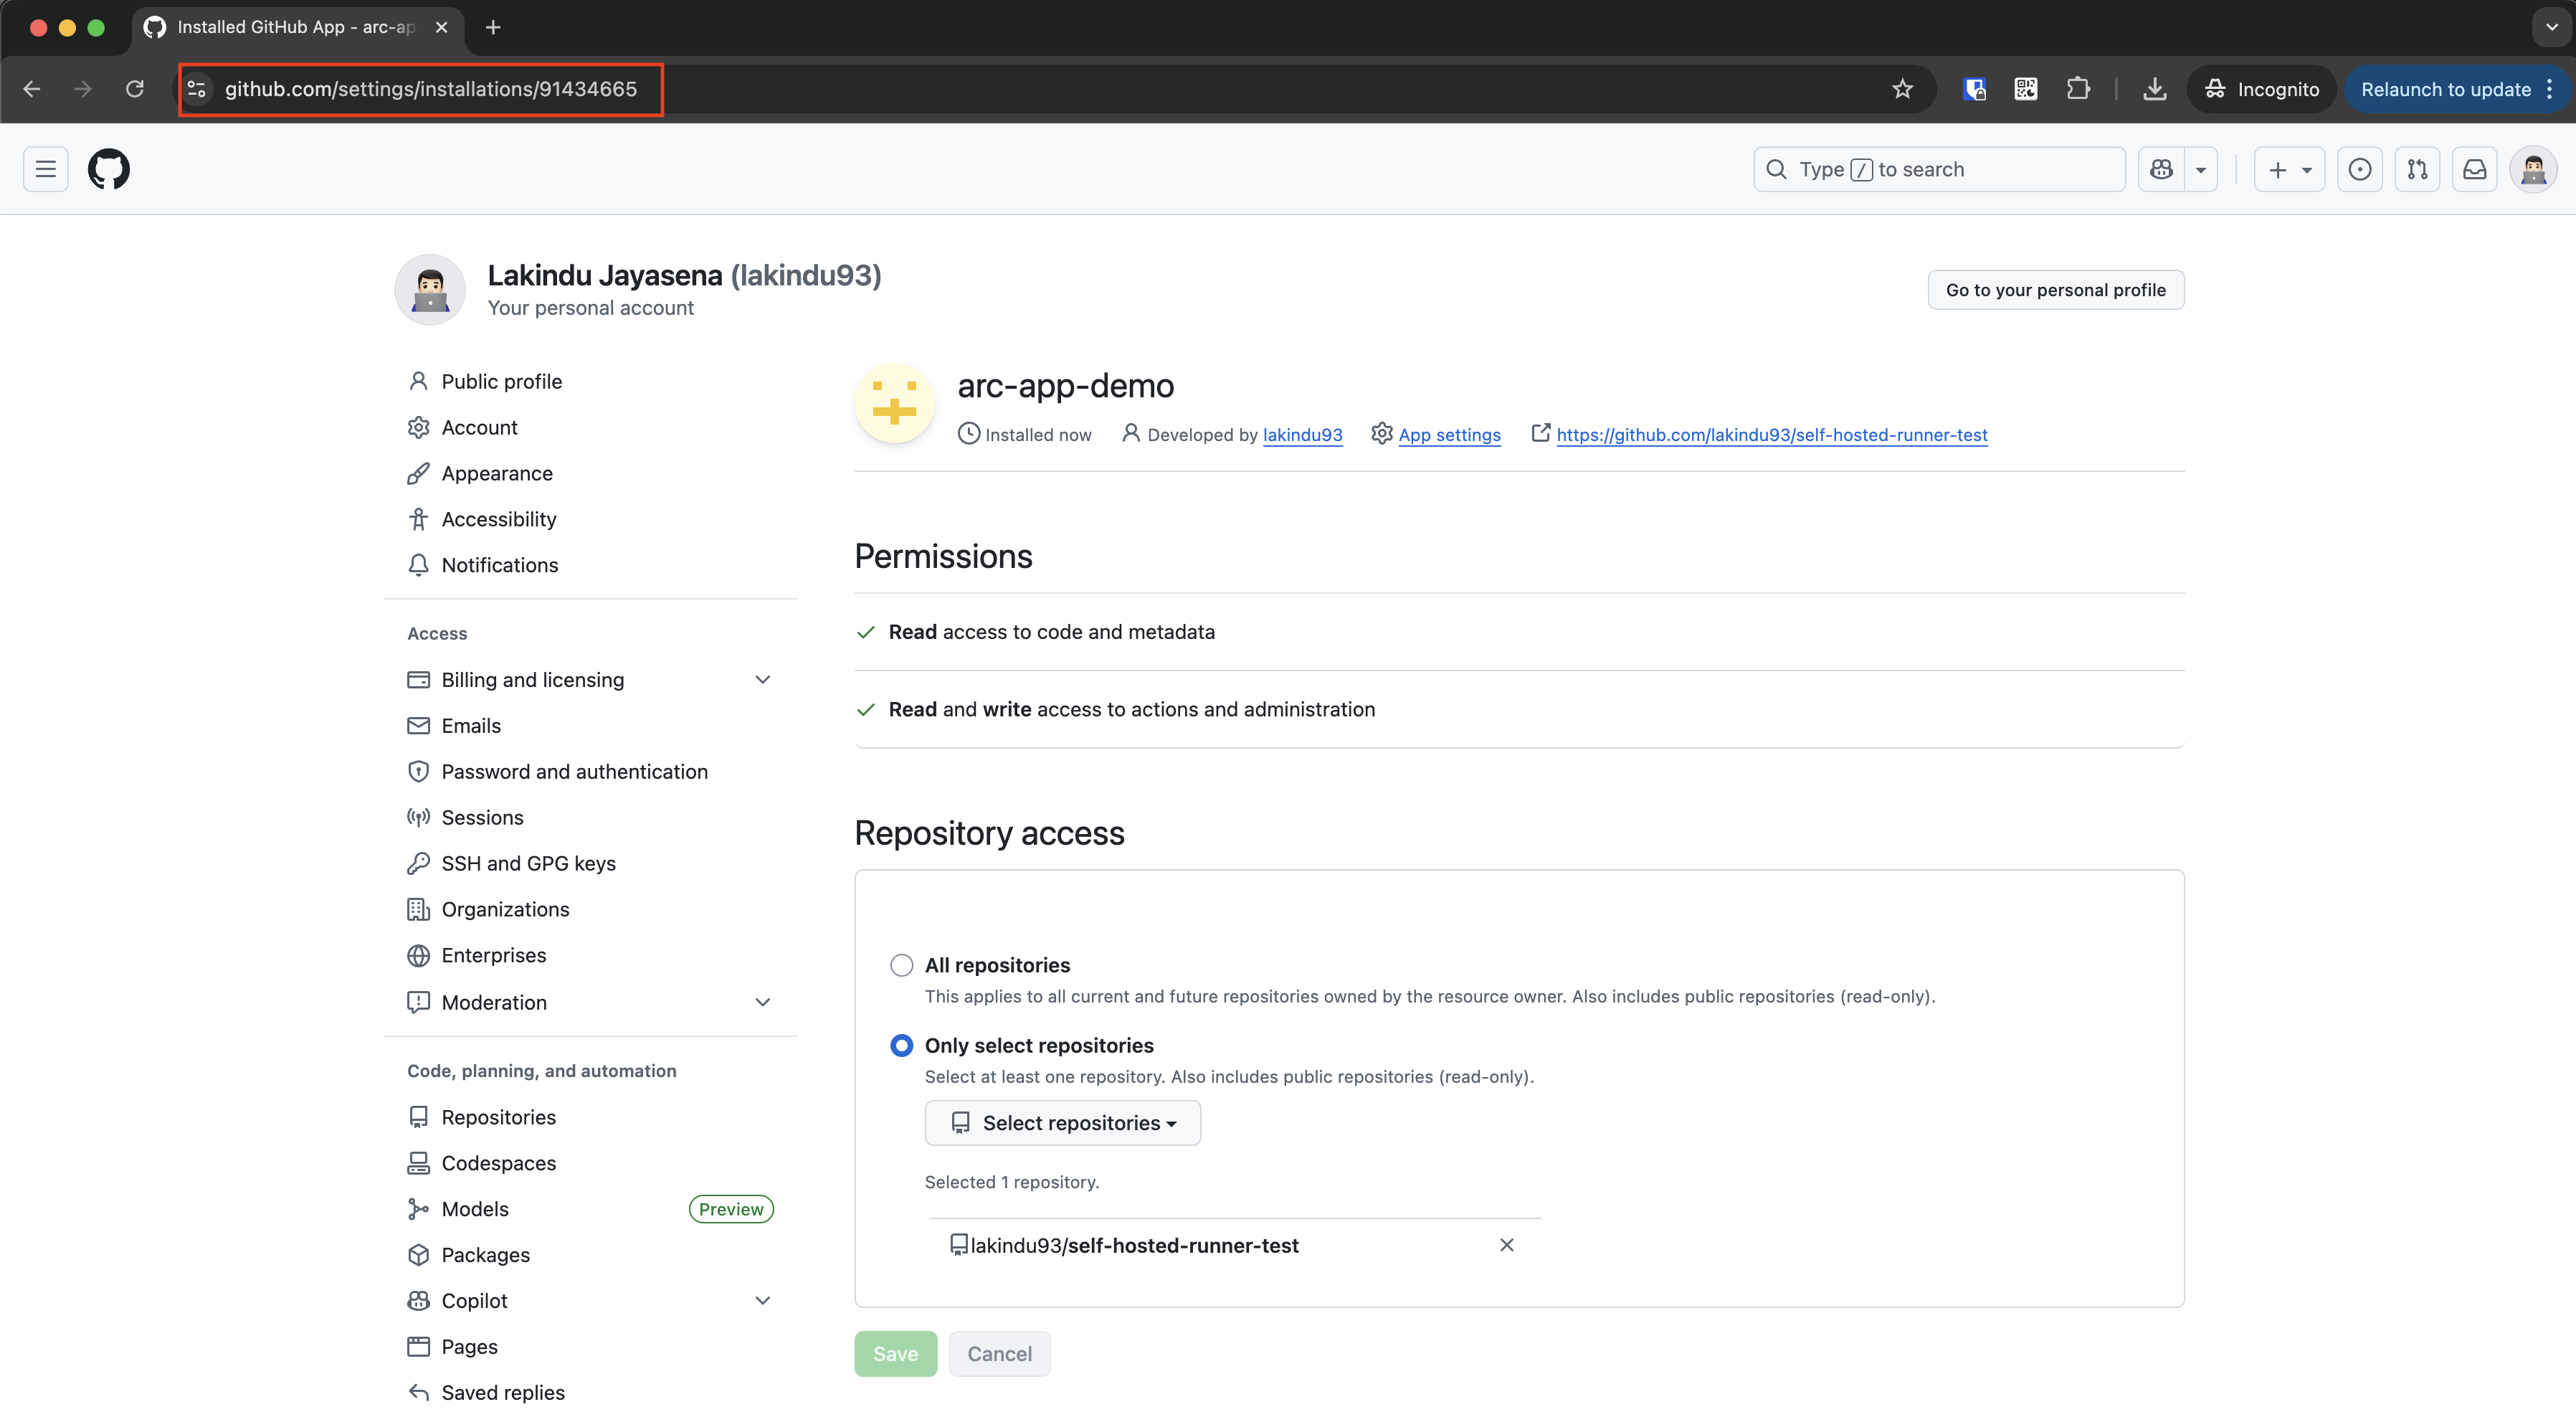
Once the installation is complete, you’ll see the Installation ID in the browser’s address bar. Make sure to note it down, as it will be required in a later section.
Prepare Custom Runner Image
Create AWS Elastic Container Register
Let’s start by creating an AWS Elastic Container Registry (ECR) to store your custom GitHub runner images. I’ll be using the AWS CLI to create the container registry. Before you proceed, make sure your AWS account has the required administrative privileges to create repositories and push images to them.
aws ecr create-repository \
    --repository-name github-actions-runner \
    --region us-east-1 \
    --image-scanning-configuration scanOnPush=true
Create the Custom Docker Image
Create a new directory and navigate into it, then create a Dockerfile with the following content.
mkdir custom-runner-image
cd custom-runner-image
vim Dockerfile
FROM ghcr.io/actions/actions-runner:latest

# Switch to root to install packages
USER root

# Install essential system packages
RUN add-apt-repository universe && apt-get update && apt-get install -y \
    # Core utilities
    curl \
    wget \
    unzip \
    zip \
    tar \
    gzip \
    git \
    xvfb \
    # Build tools
    build-essential \
    make \
    cmake \
    # System essentials
    ca-certificates \
    gnupg \
    lsb-release \
    software-properties-common \
    apt-transport-https \
    # Useful utilities
    jq \
    tree \
    nano \
    openssh-client \
    && apt-get clean \
    && rm -rf /var/lib/apt/lists/*

# Install OpenJDK 17 (Ubuntu default)
RUN apt-get update \
    && apt-get install -y openjdk-17-jdk \
    && apt-get clean \
    && rm -rf /var/lib/apt/lists/*

ENV JAVA_HOME_17_X64=/usr/lib/jvm/java-17-openjdk-amd64
ENV JAVA_HOME=/usr/lib/jvm/java-17-openjdk-amd64
ENV PATH=$JAVA_HOME/bin:$PATH

# Switch back to runner user
USER runner
Build the Image & Push to ECR
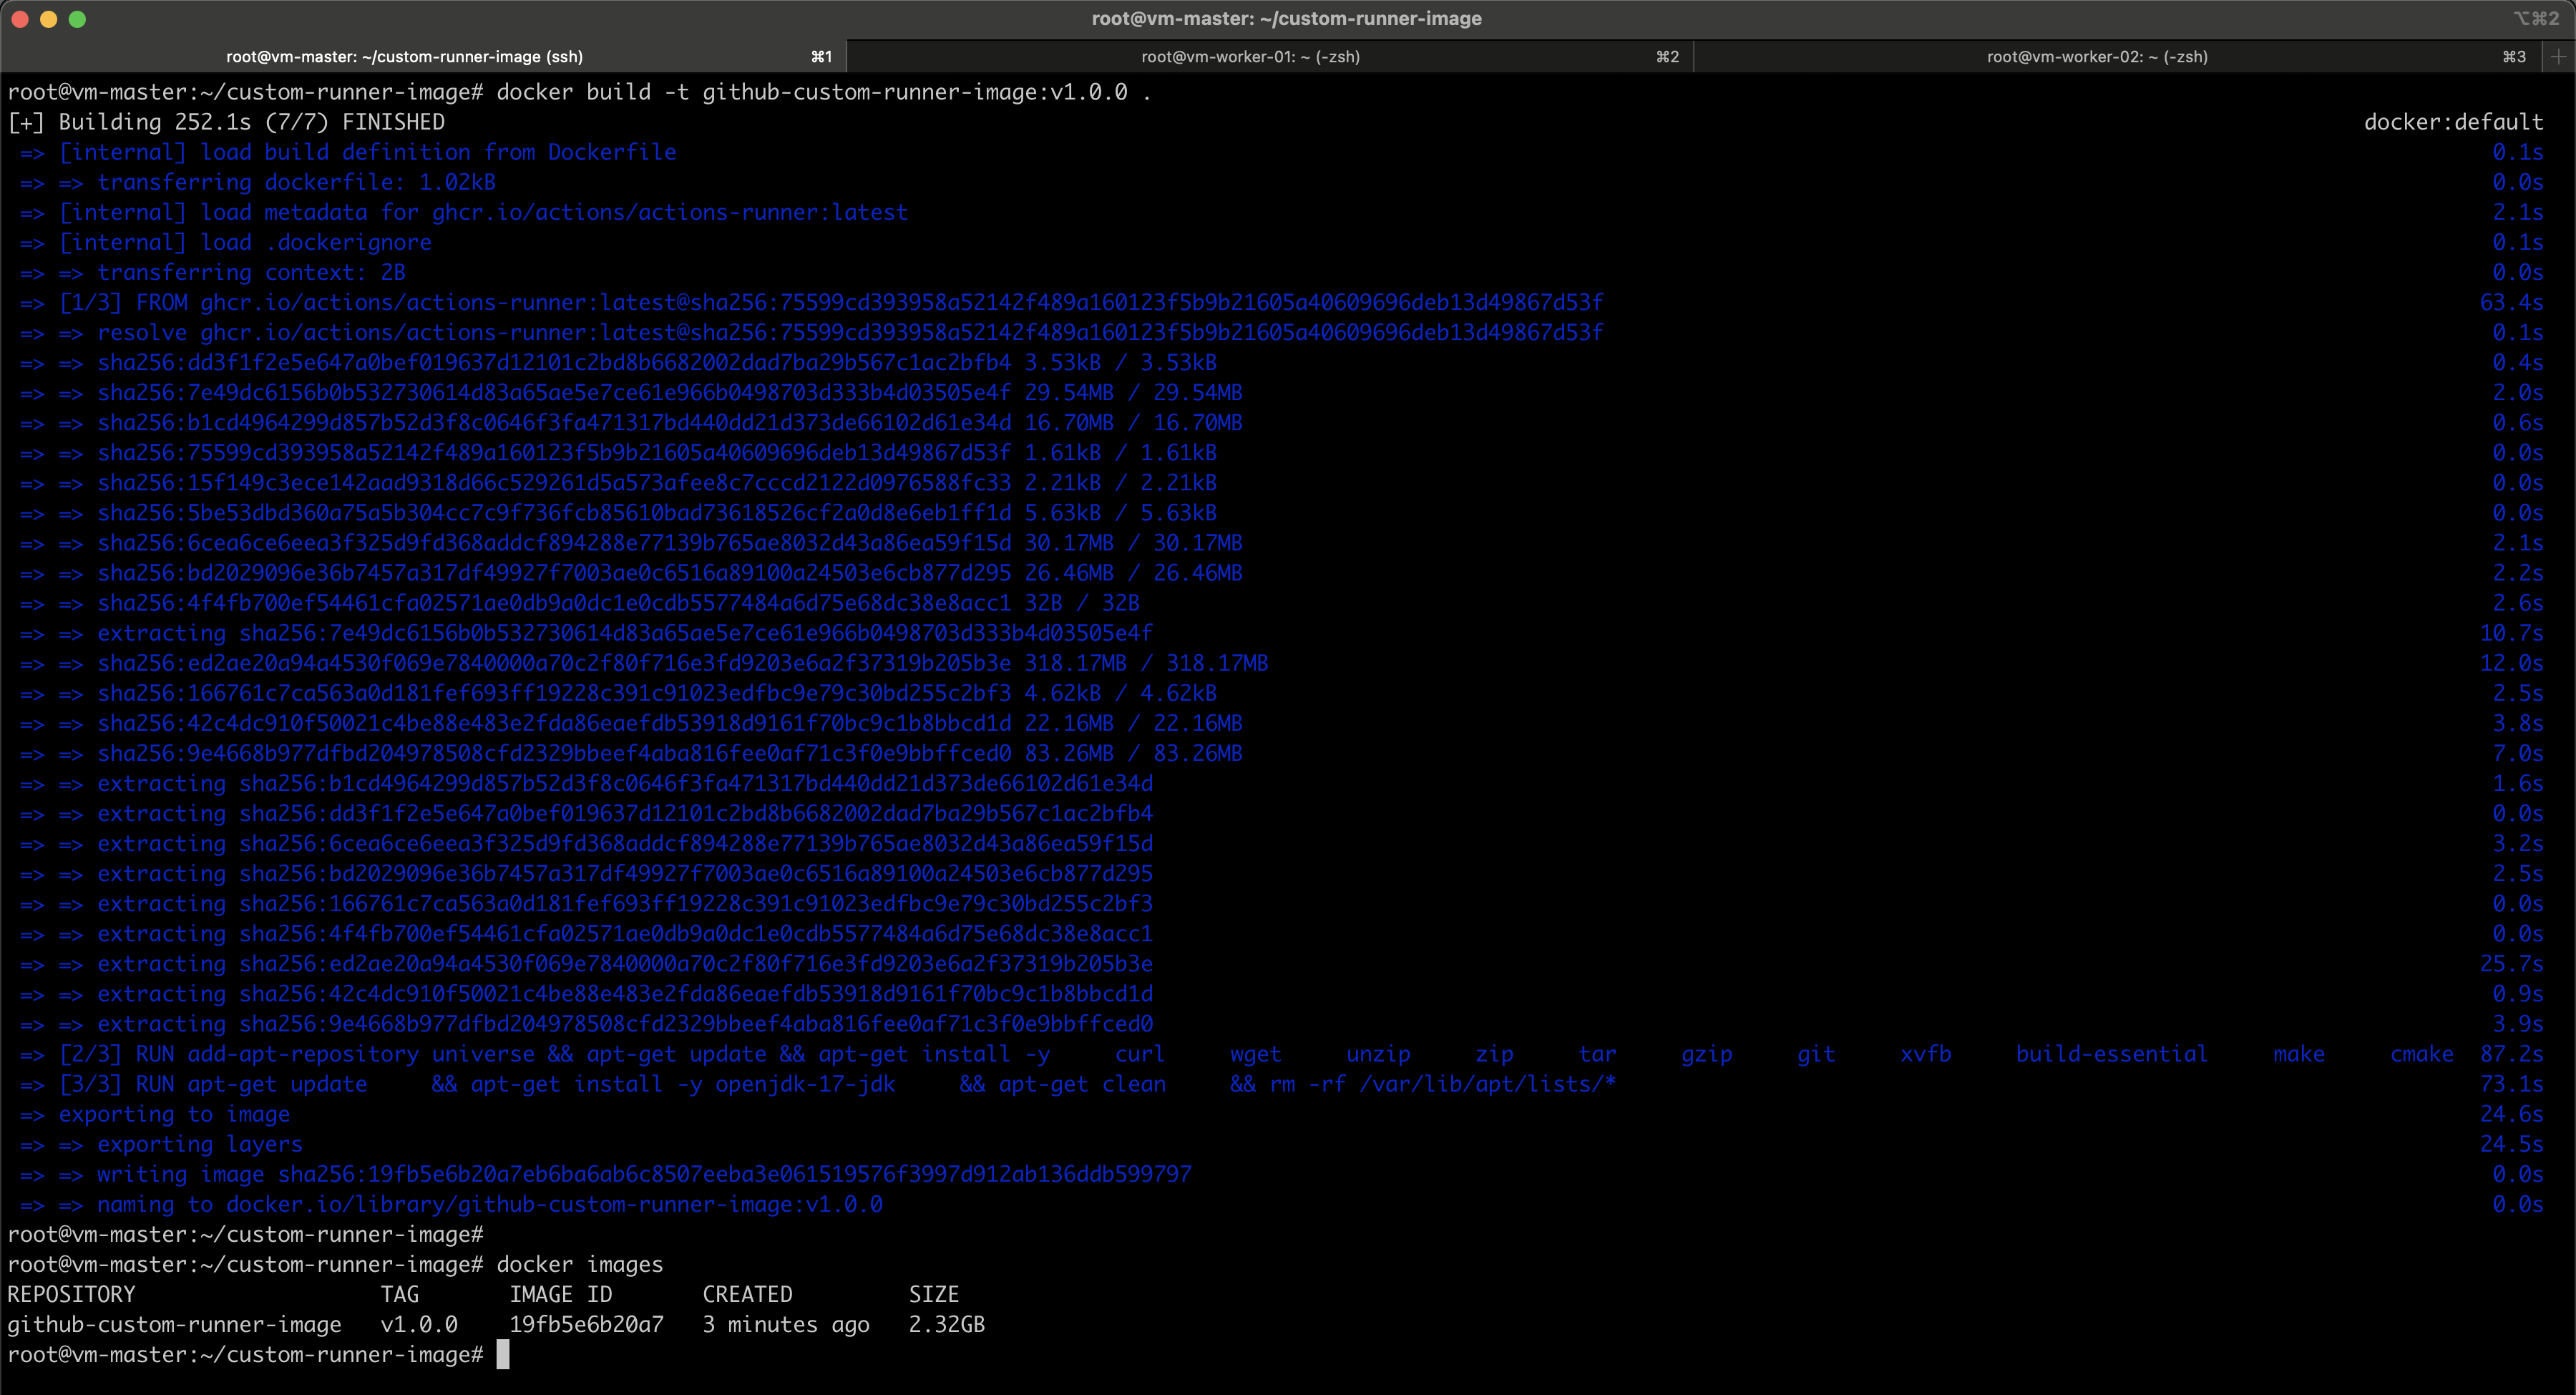
# Build the custom image
docker build -t github-custom-runner-image:v1.0.0 .
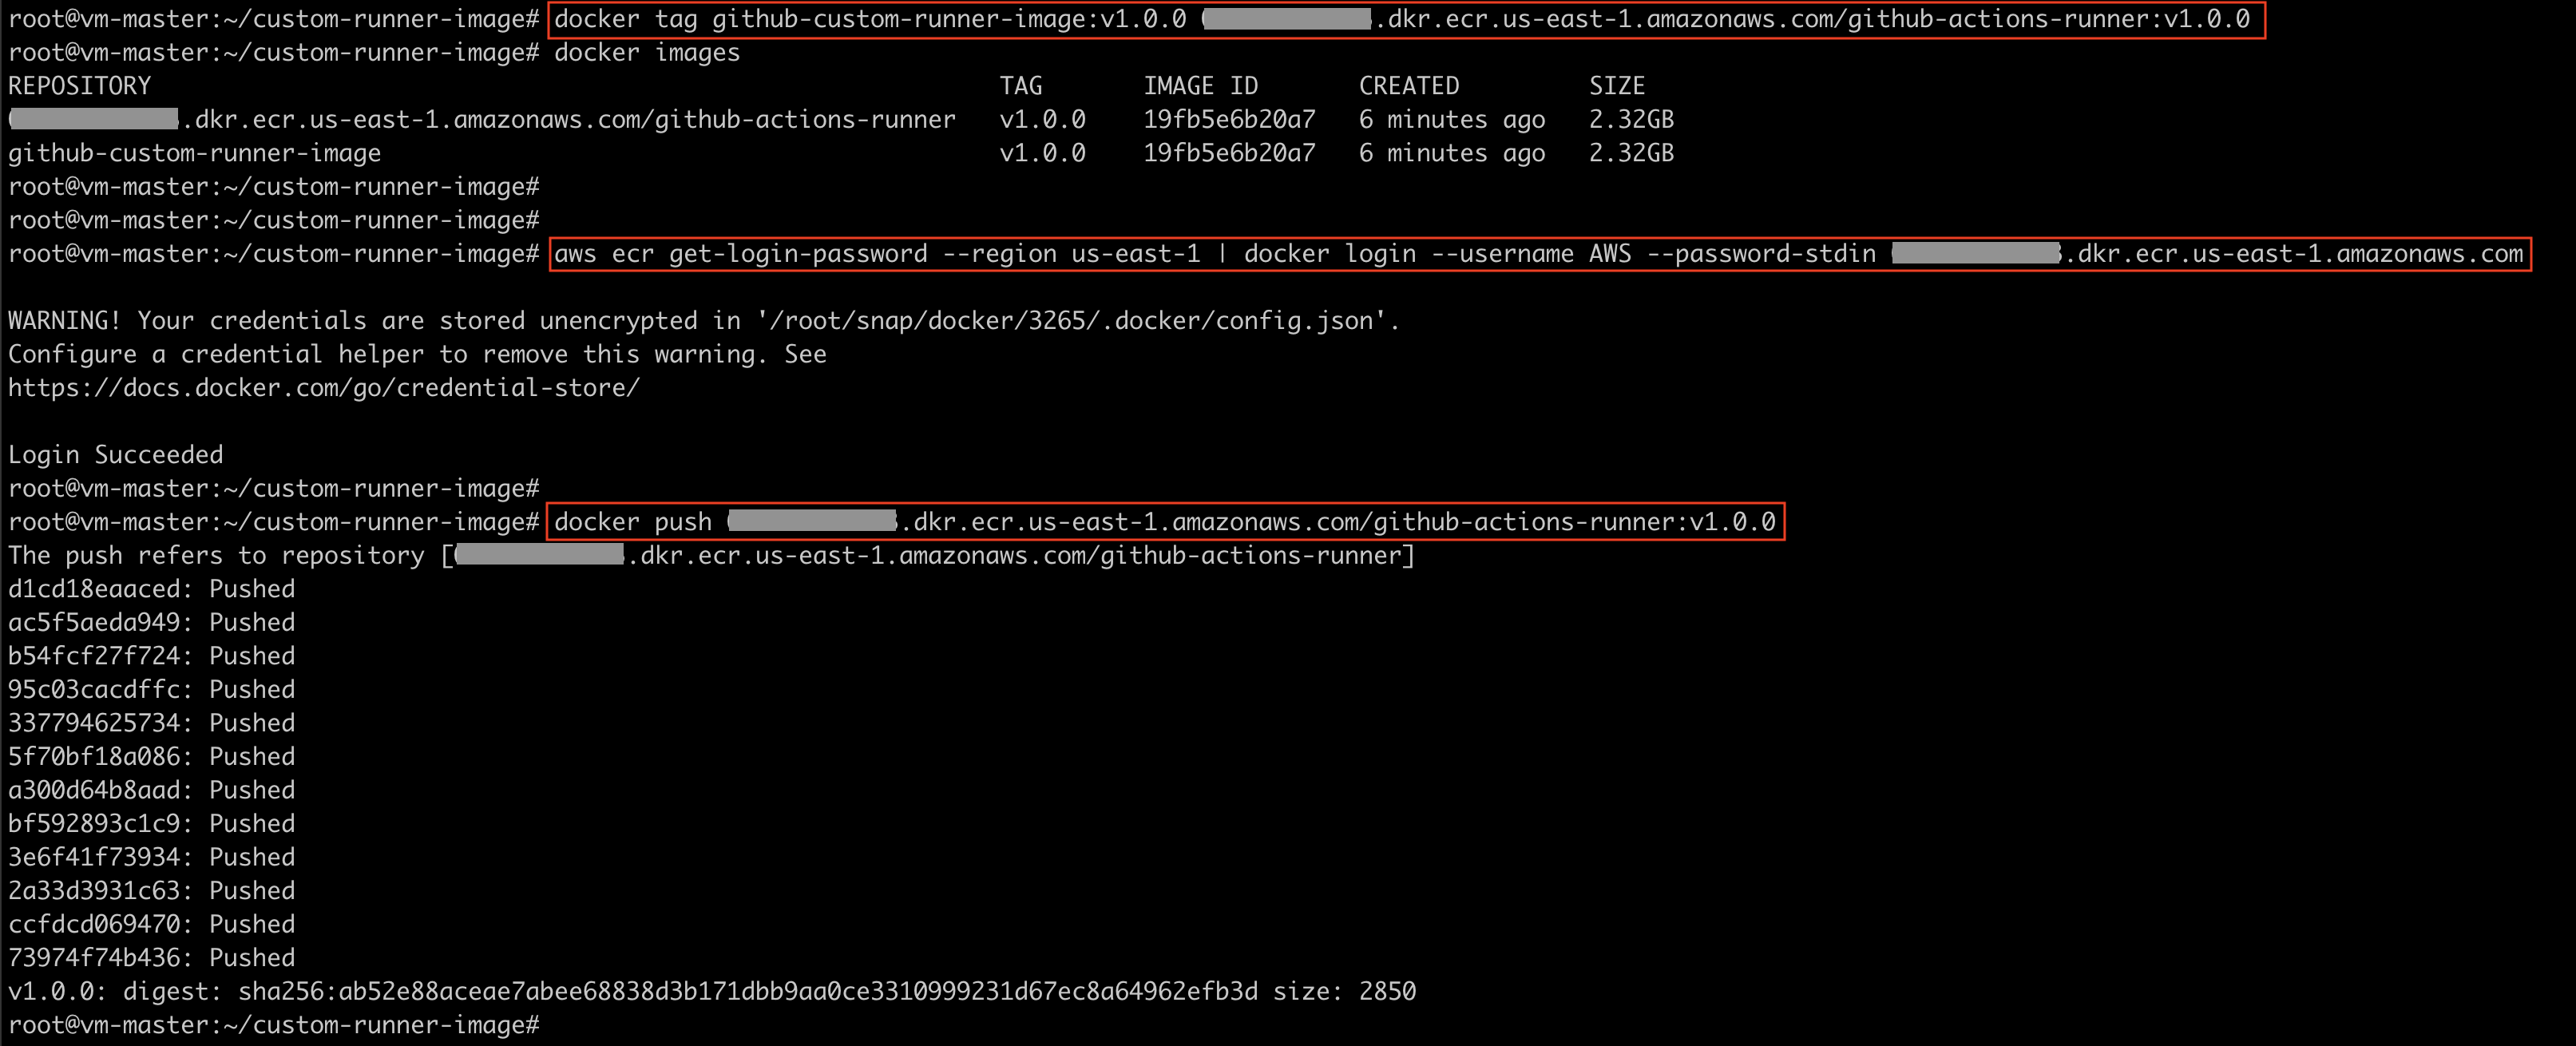
Before pushing the custom image to ECR, you need to tag it using the format that matches your ECR repository.
#This command creates a new tag for an existing local Docker image, associating it with your ECR repository URL then Docker knows where to push it.

docker tag github-custom-runner-image:v1.0.0 <aws_account_id>.dkr.ecr.us-east-1.amazonaws.com/github-actions-runner:v1.0.0

#Authenticate to ECR
aws ecr get-login-password --region us-east-1 | docker login --username AWS --password-stdin <aws_account_id>.dkr.ecr.us-east-1.amazonaws.com

# Push the image to ECR
docker push <aws_account_id>.dkr.ecr.us-east-1.amazonaws.com/github-actions-runner:v1.0.0
You can verify the image push status via AWS console or CLI:
aws ecr describe-images \
    --repository-name github-actions-runner \
    --region us-east-1

Set up the Actions Runner Controller (ARC)
Install Helm Repositories
helm repo add actions-runner-controller https://actions-runner-controller.github.io/actions-runner-controller
helm repo update
Install cert-manager (optional)
In older ARC versions, cert-manager was required to generate and manage webhook TLS certificates.
From ARC v0.8.0+, it became optional because the Helm chart can now auto-generate self-signed certificates during installation using a built-in job or init container — allowing ARC to run securely without cert-manager.
kubectl apply -f https://github.com/cert-manager/cert-manager/releases/download/v1.13.0/cert-manager.yaml
Create a namespace for ARC
Namespaces provide logical isolation between different Kubernetes components. In this setup, we’ll create two separate namespaces: arc-systems, where the ARC runs, and arc-runners, which hosts the runner pods responsible for executing your workflows. This separation ensures that the management logic (controller) and execution workloads (runners) remain isolated and do not interfere with each other.
kubectl create namespace arc-systems
kubectl create namespace arc-runners
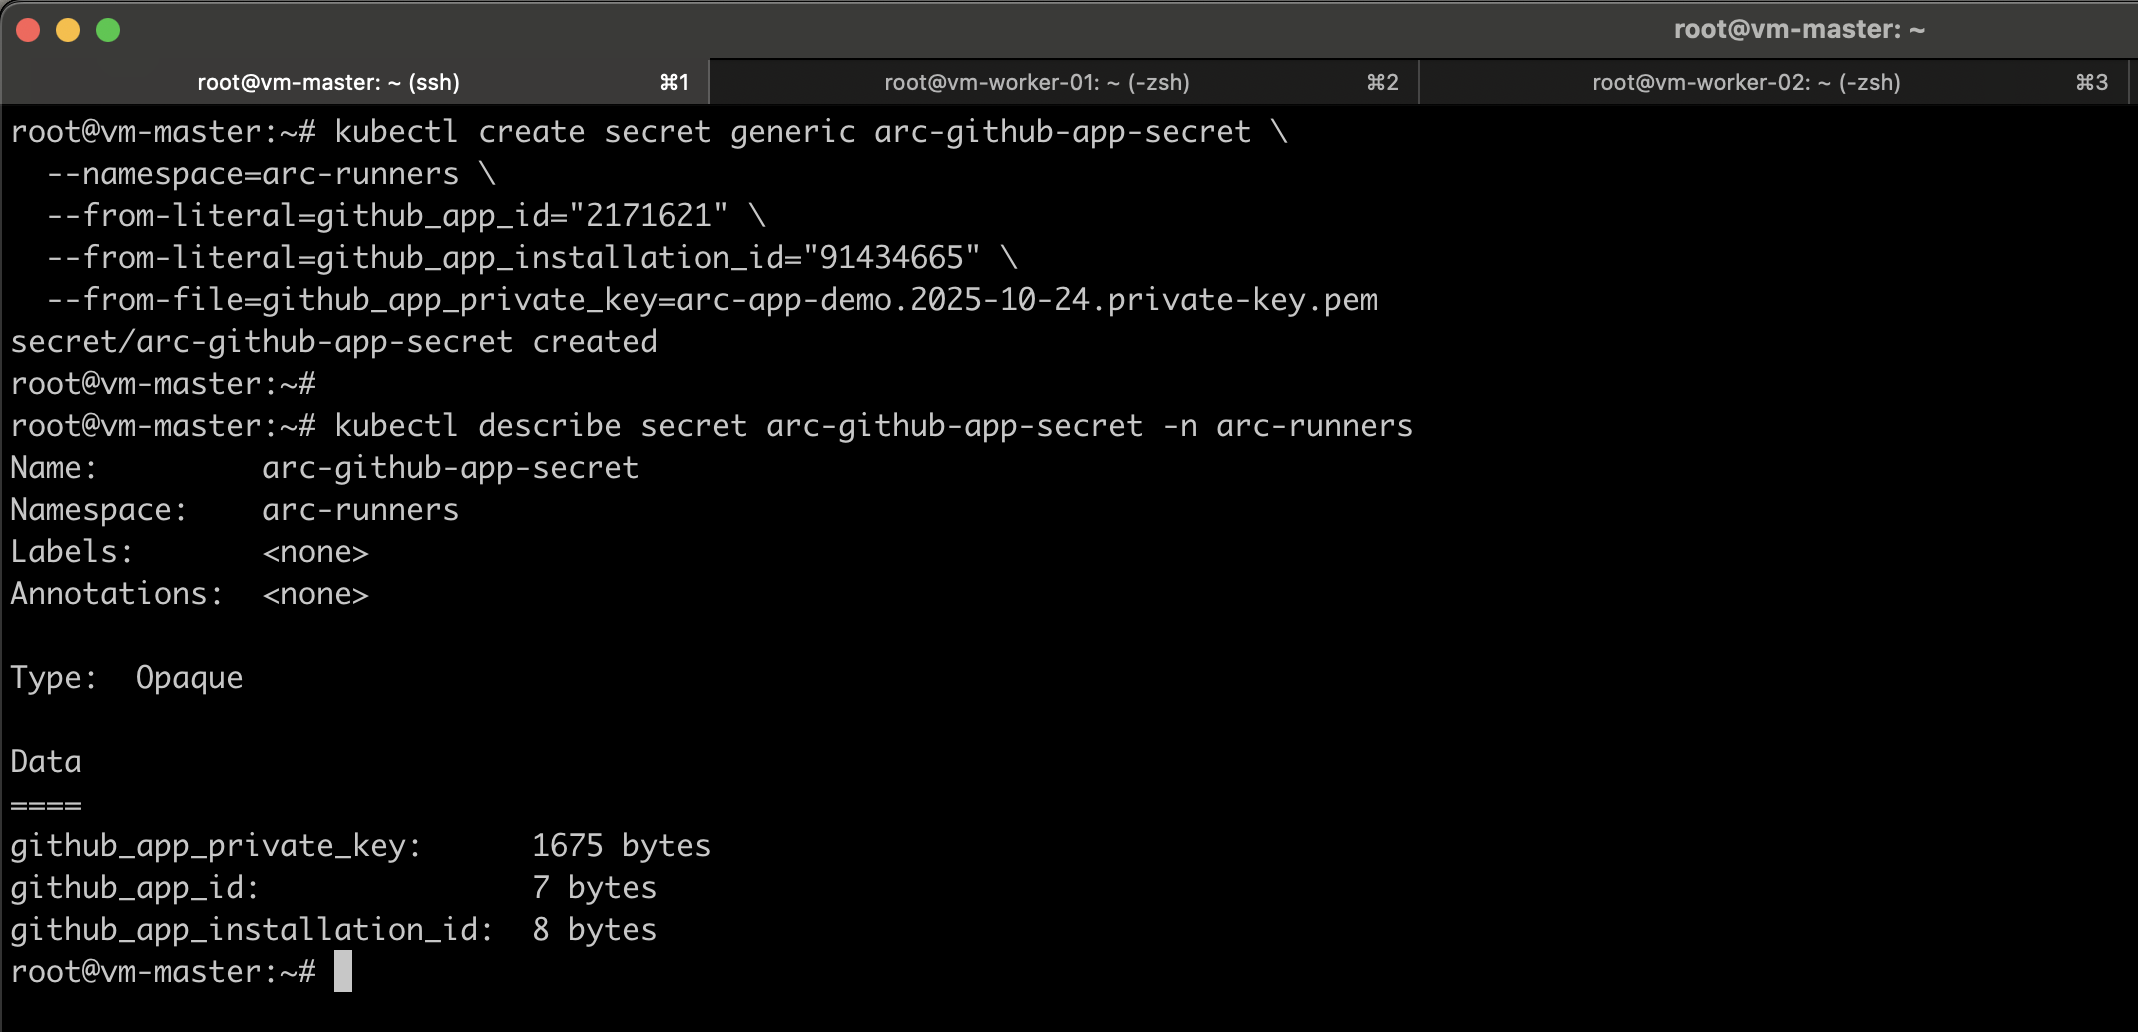
Create the K8S Secret for Runners
This secret is required to authenticate the runners with GitHub, so make sure it is created in the arc-runners namespace. When you create the runner scale set, ARC will automatically provision the arc-runner-set-listener in the arc-systems namespace using this secret.
The secret must include the previously generated github_app_id, github_app_installation_id, and github_app_private_key values.
kubectl create secret generic arc-github-app-secret \
  --namespace=arc-runners \
  --from-literal=github_app_id="2171621" \
  --from-literal=github_app_installation_id="91434665" \
  --from-file=github_app_private_key=arc-app-demo.2025-10-24.private-key.pem
kubectl describe secret arc-github-app-secret -n arc-runners
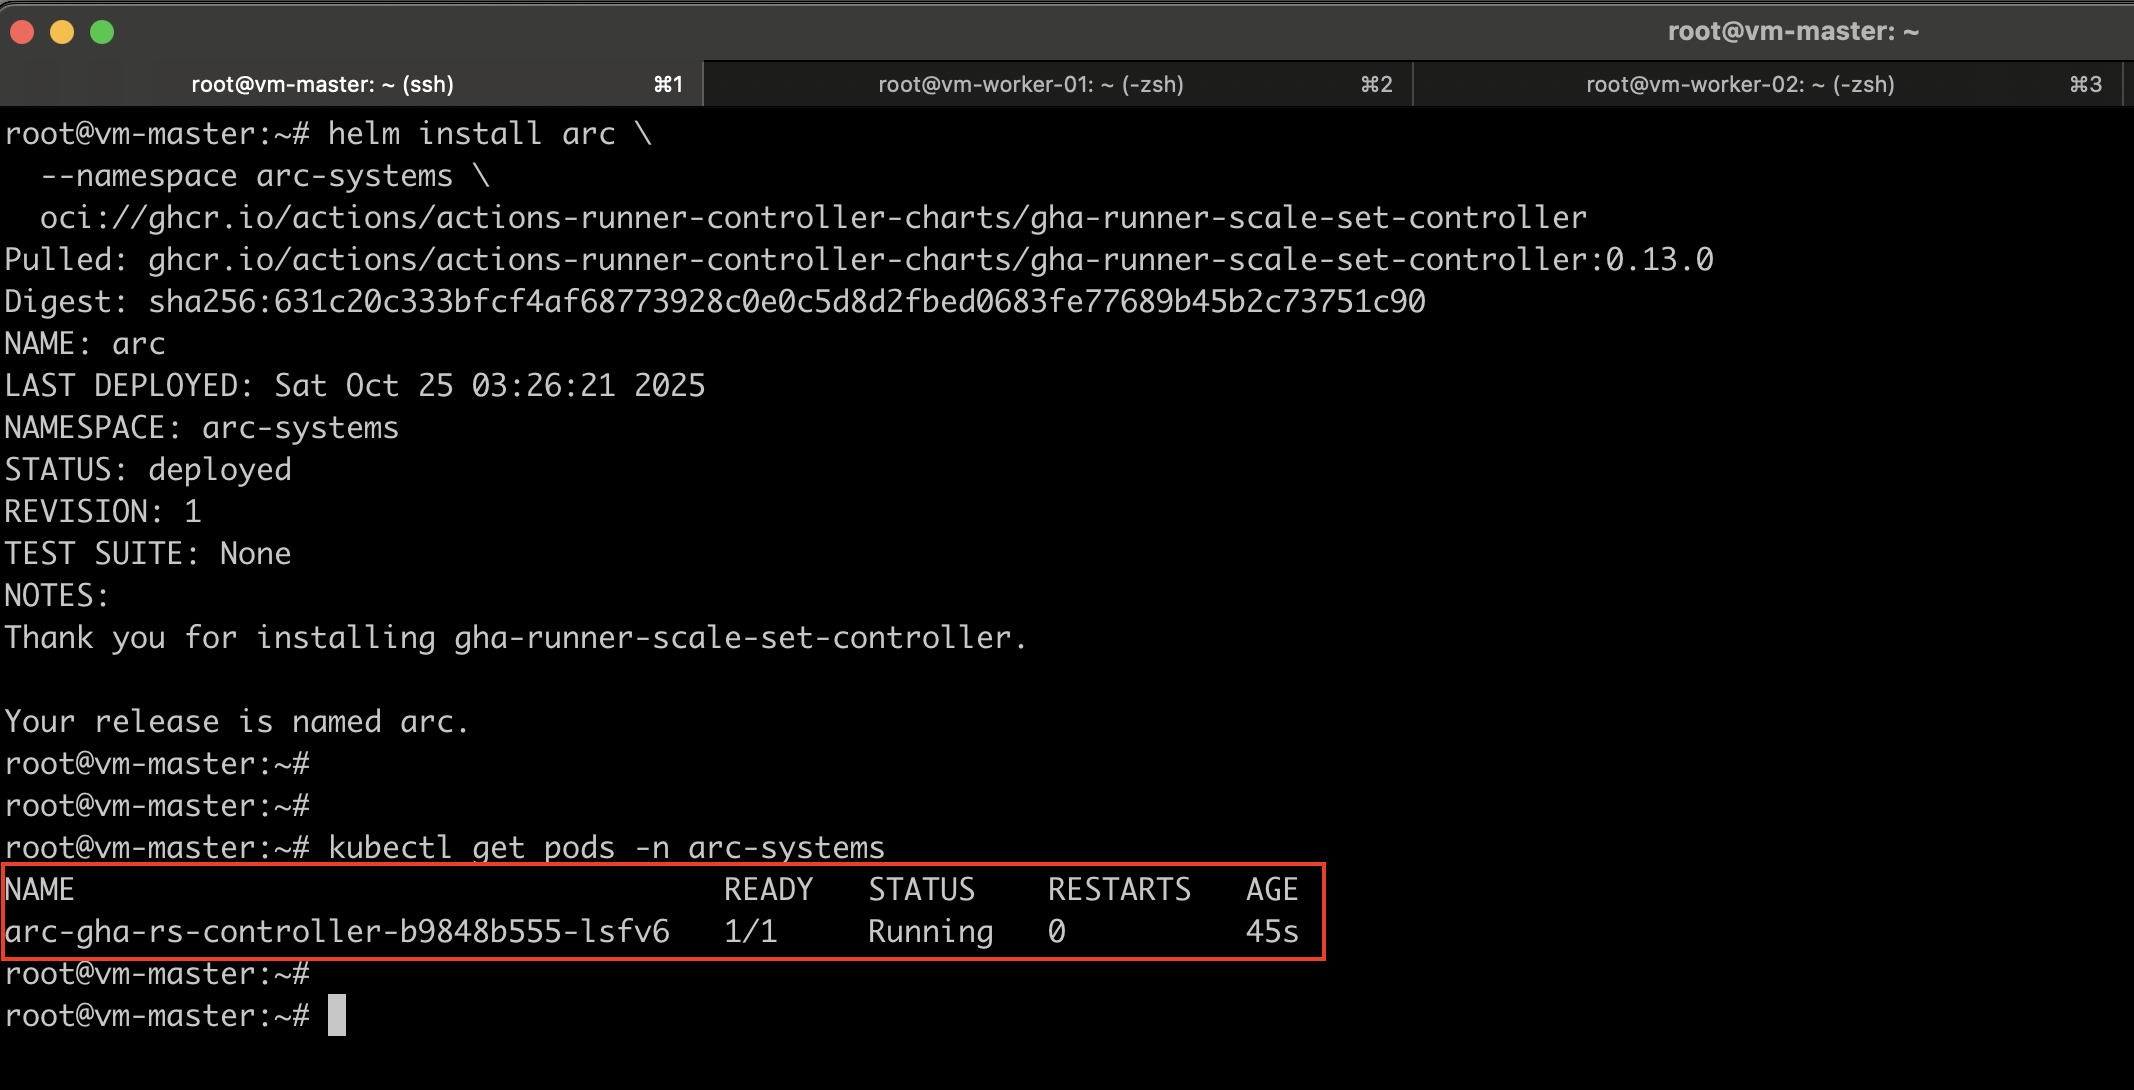
Install Actions Runner Controller (ARC)
helm install arc \
  --namespace arc-systems \
  oci://ghcr.io/actions/actions-runner-controller-charts/gha-runner-scale-set-controller
Verify the installation
kubectl get pods -n arc-systems
kubectl logs -n arc-systems -l app.kubernetes.io/name=gha-rs-controller
Prepare the Runner Scale Set Configuration
Create IAM Account for ECR Access
Since this is an on-premises cluster, you’ll need to create an AWS IAM user with ECR read-only permissions. Use the following IAM policy to grant the required access, and then attach this policy to a dedicated ECR read-only user.
{
  "Version": "2012-10-17",
  "Statement": [
    {
      "Effect": "Allow",
      "Action": [
        "ecr:GetAuthorizationToken",
        "ecr:BatchCheckLayerAvailability",
        "ecr:GetDownloadUrlForLayer",
        "ecr:BatchGetImage"
      ],
      "Resource": "*"
    }
  ]
}
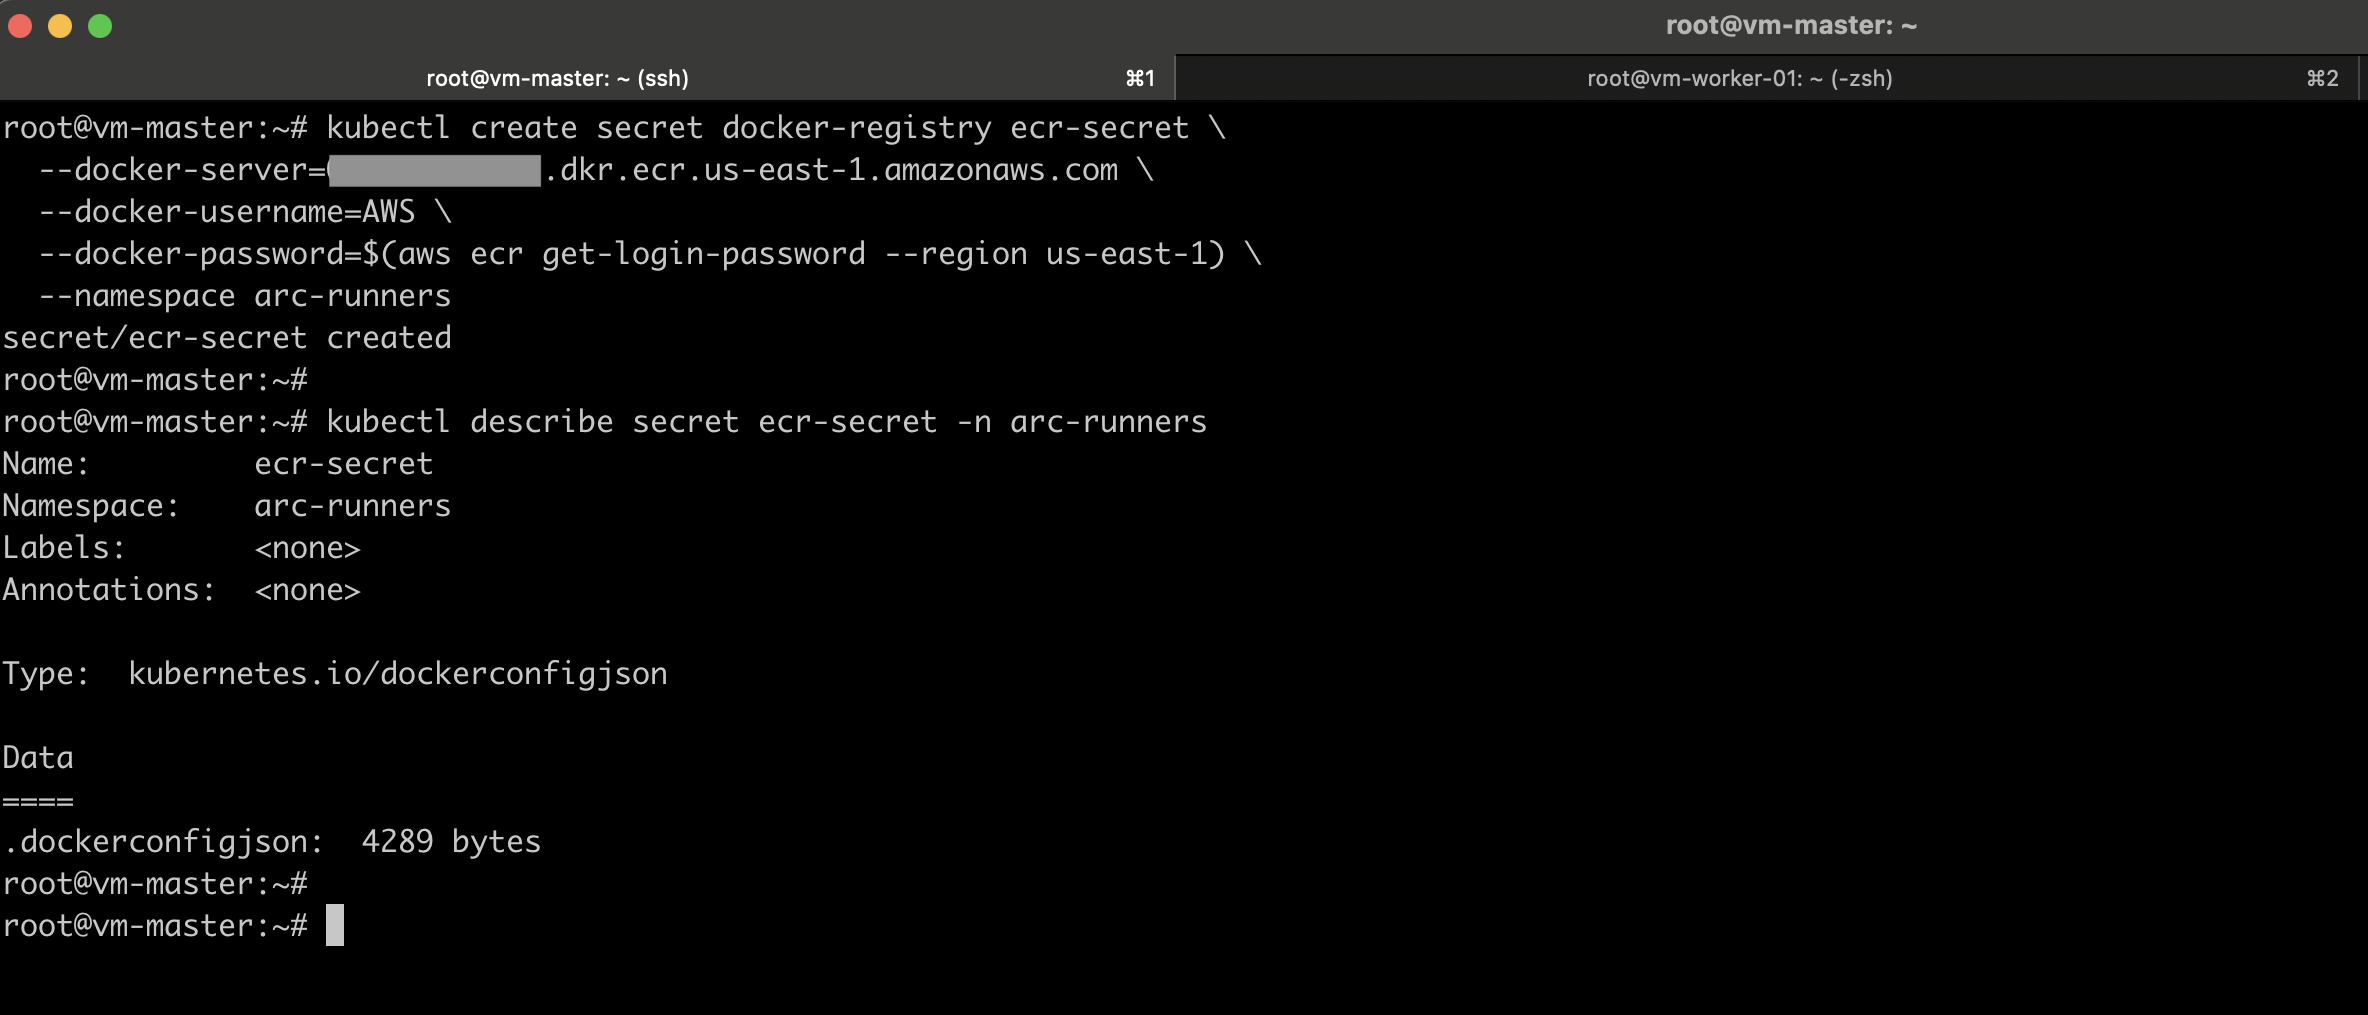
Create a Kubernetes Docker Registry Secret for ECR
You’ll need to create a Kubernetes image pull secret that your runner pods can use to authenticate with ECR.
First, log in to ECR from your CLI to get the token:
aws ecr get-login-password --region <aws-region> \
  | docker login --username AWS \
  --password-stdin <aws_account_id>.dkr.ecr.<aws-region>.amazonaws.com
Then, create the secret inside your runner namespace (arc-runners):
kubectl create secret docker-registry ecr-secret \
  --docker-server=<aws_account_id>.dkr.ecr.<aws-region>.amazonaws.com \
  --docker-username=AWS \
  --docker-password=$(aws ecr get-login-password --region <aws-region>) \
  --namespace arc-runners
Create Values File for Github Runner Scale Set
Create a new YAML configuration file for the GitHub Actions Runner Controller (ARC) to automatically manage self-hosted GitHub Actions runners on your Kubernetes cluster. Below is a detailed explanation of each section:
GitHub Integration Configuration
- githubConfigUrl: Points to your GitHub organization or specific repository
- githubConfigSecret: Contains GitHub App credentials needed for the runner to authenticate with GitHub and receive job assignments
Autoscaling Configuration
- minRunners: Minimum number of idle runners (0 = scale to zero when no jobs)
- maxRunners: Maximum concurrent runners (prevents resource exhaustion)
Runner Pod Configuration
- This section, located under the
template.specof your RunnerScaleSet defines the configuration for each runner pod — such as the container image, startup command, and resource limits.
ECR Configuration
- imagePullSecrets: This ensures that every runner pod can securely pull the image from ECR when it’s created by ARC.
This is the full configuration file.
#runner-scale-set.yaml

# GitHub configuration - REQUIRED
githubConfigUrl: "https://github.com/lakindu93/self-hosted-runner-test"

# Authentication - REQUIRED (choose one option)
# Option A: Using GitHub App (recommended)
githubConfigSecret: arc-github-app-secret

# Option B: Using Personal Access Token (alternative)
# githubConfigSecret:
#   github_token: "YOUR_PAT_HERE"

# Scaling configuration - REQUIRED
minRunners: 1
maxRunners: 10

template:
  spec:
    containers:
    - command:
      - /home/runner/run.sh
      image: <aws_account_id>.dkr.ecr.us-east-1.amazonaws.com/github-actions-runner:v1.8.0
      name: runner
      resources:
        requests:
          cpu: "800m"
          memory: "1Gi"
        limits:
          cpu: "1000m"
          memory: "4Gi"

    # Reference the image pull secret
    imagePullSecrets:
      - name: ecr-secret
Install the Runner Scale Set
Once the configuration is prepared, provide the configuration file during the installation of the runner scale set.
helm install arc-runner-set \
  --namespace arc-runners \
  --create-namespace \
  -f runner-scale-set.yaml \
  oci://ghcr.io/actions/actions-runner-controller-charts/gha-runner-scale-set
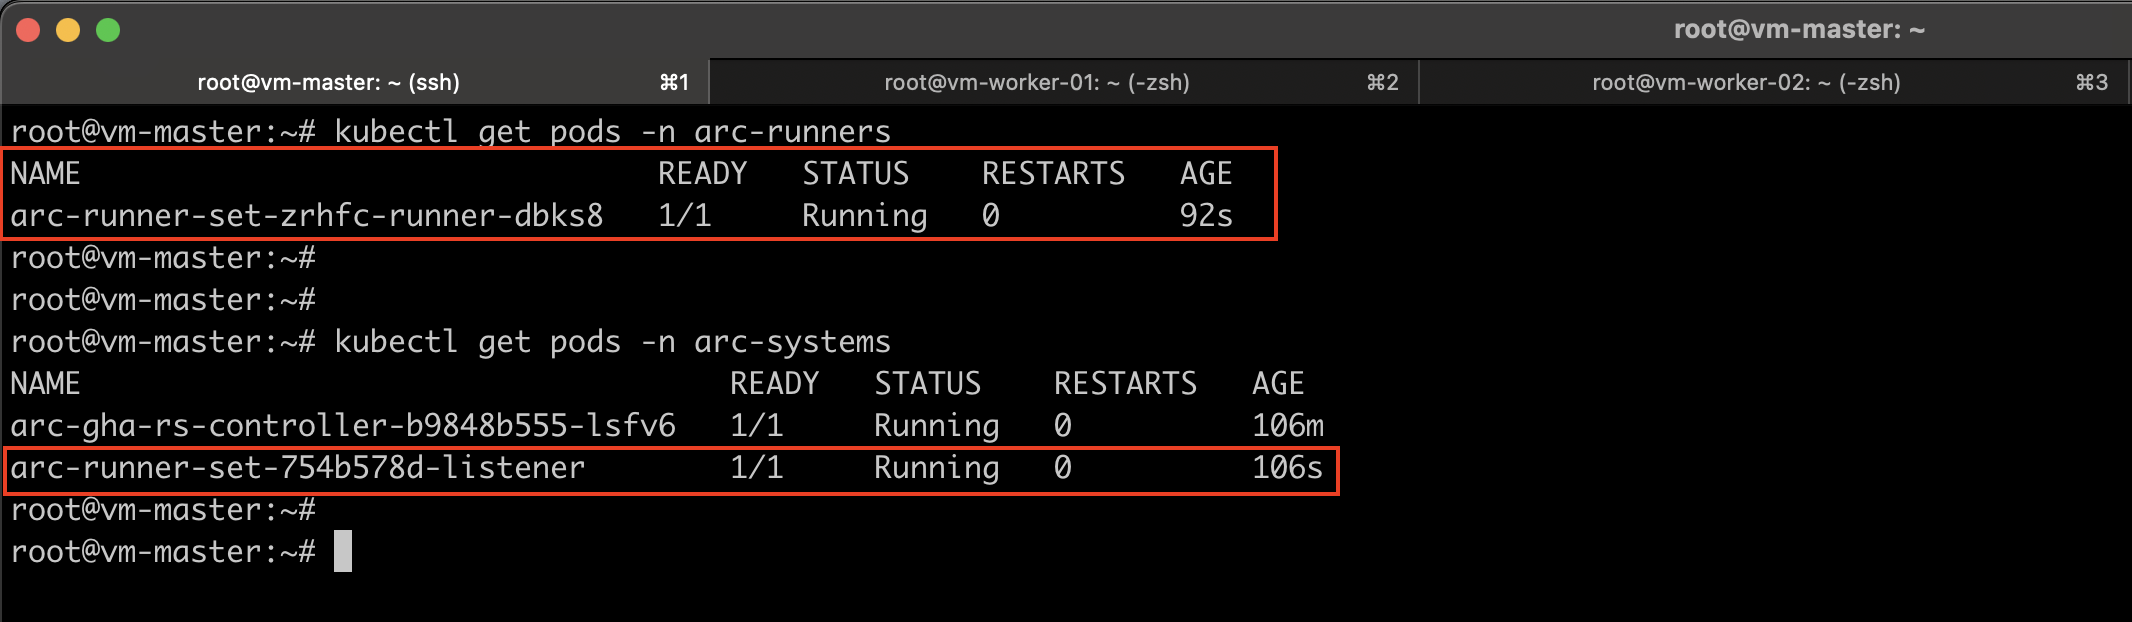
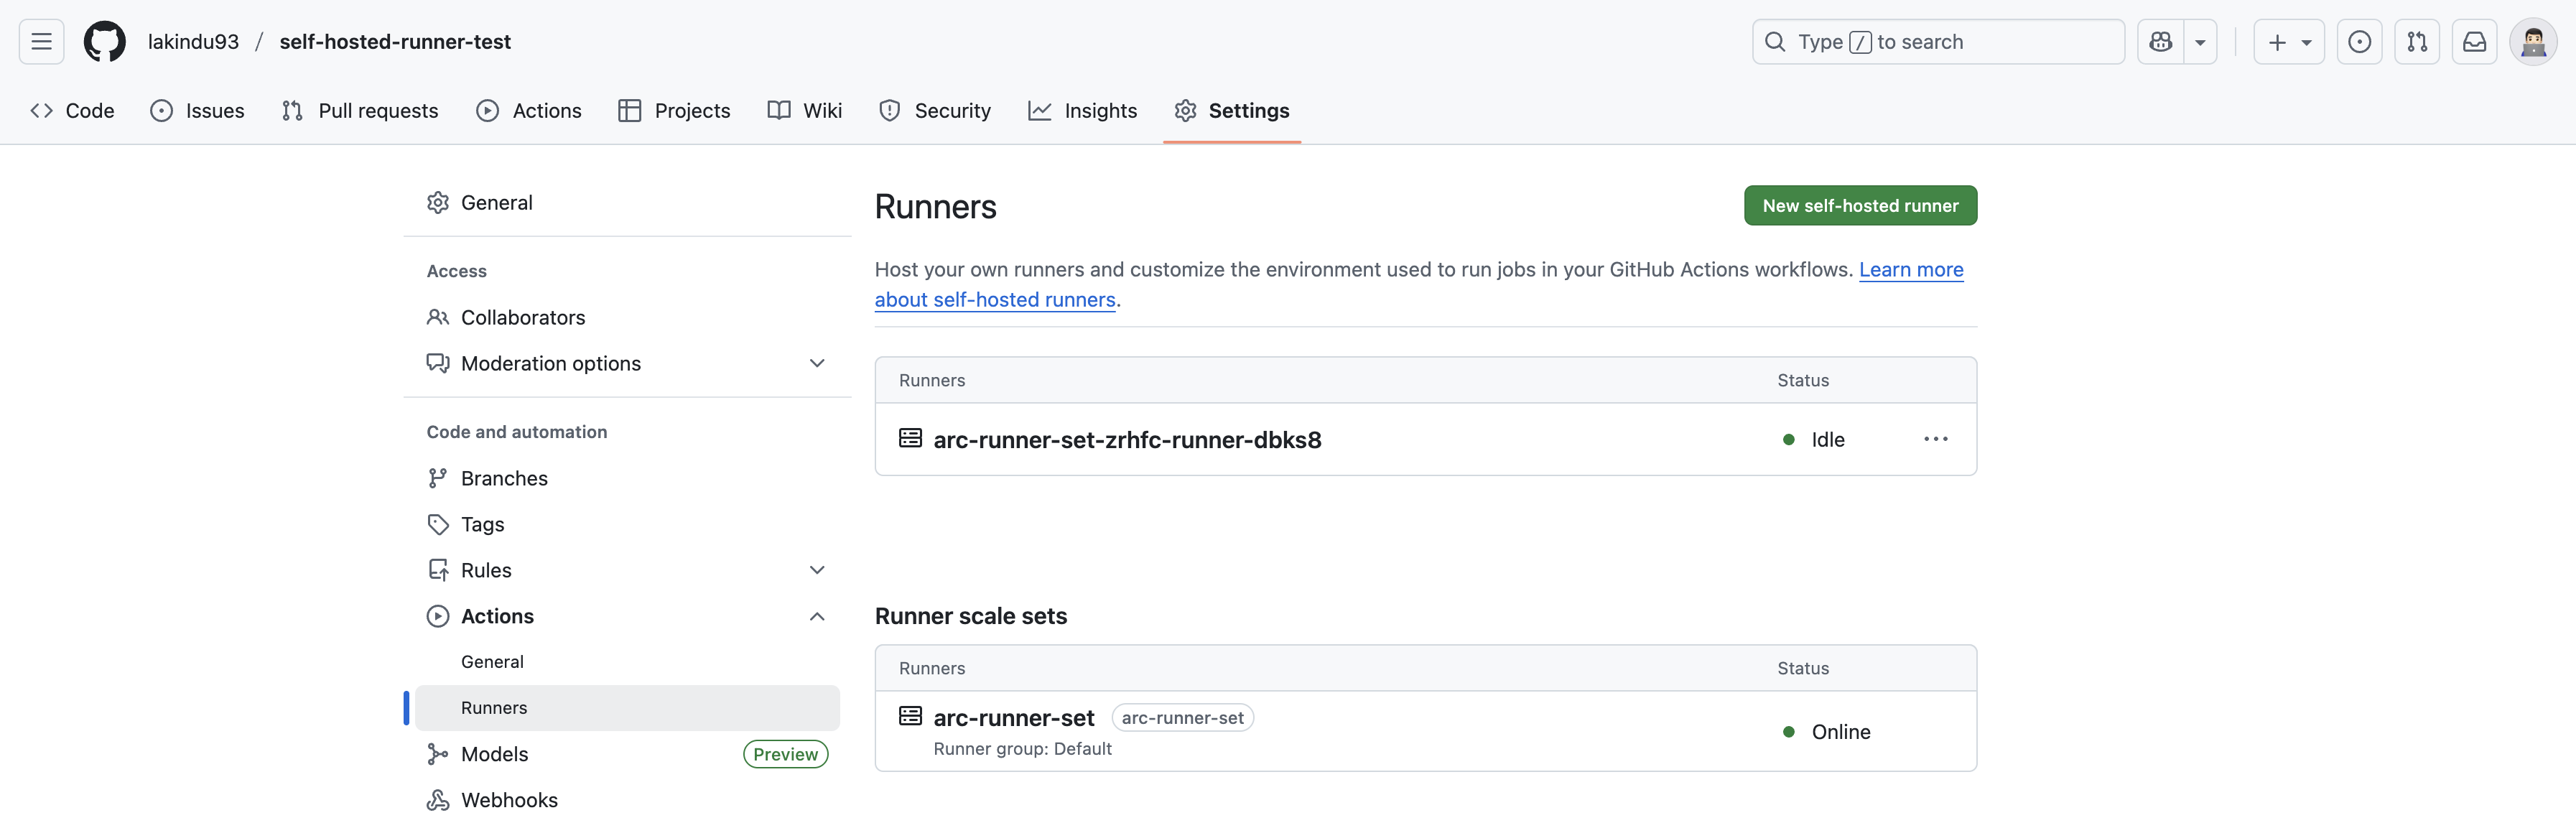
After a successful installation, you’ll see the arc-runner-set-listener in the arc-systems namespace, along with a single runner pod in the arc-runners namespace, as we configured the minimum number of runners to be one.
Verify Runner Registration
You can verify the runner registration on GitHub by navigating to Settings → Actions → Runners in your repository. You should now see your on-premises runners listed and ready for use!
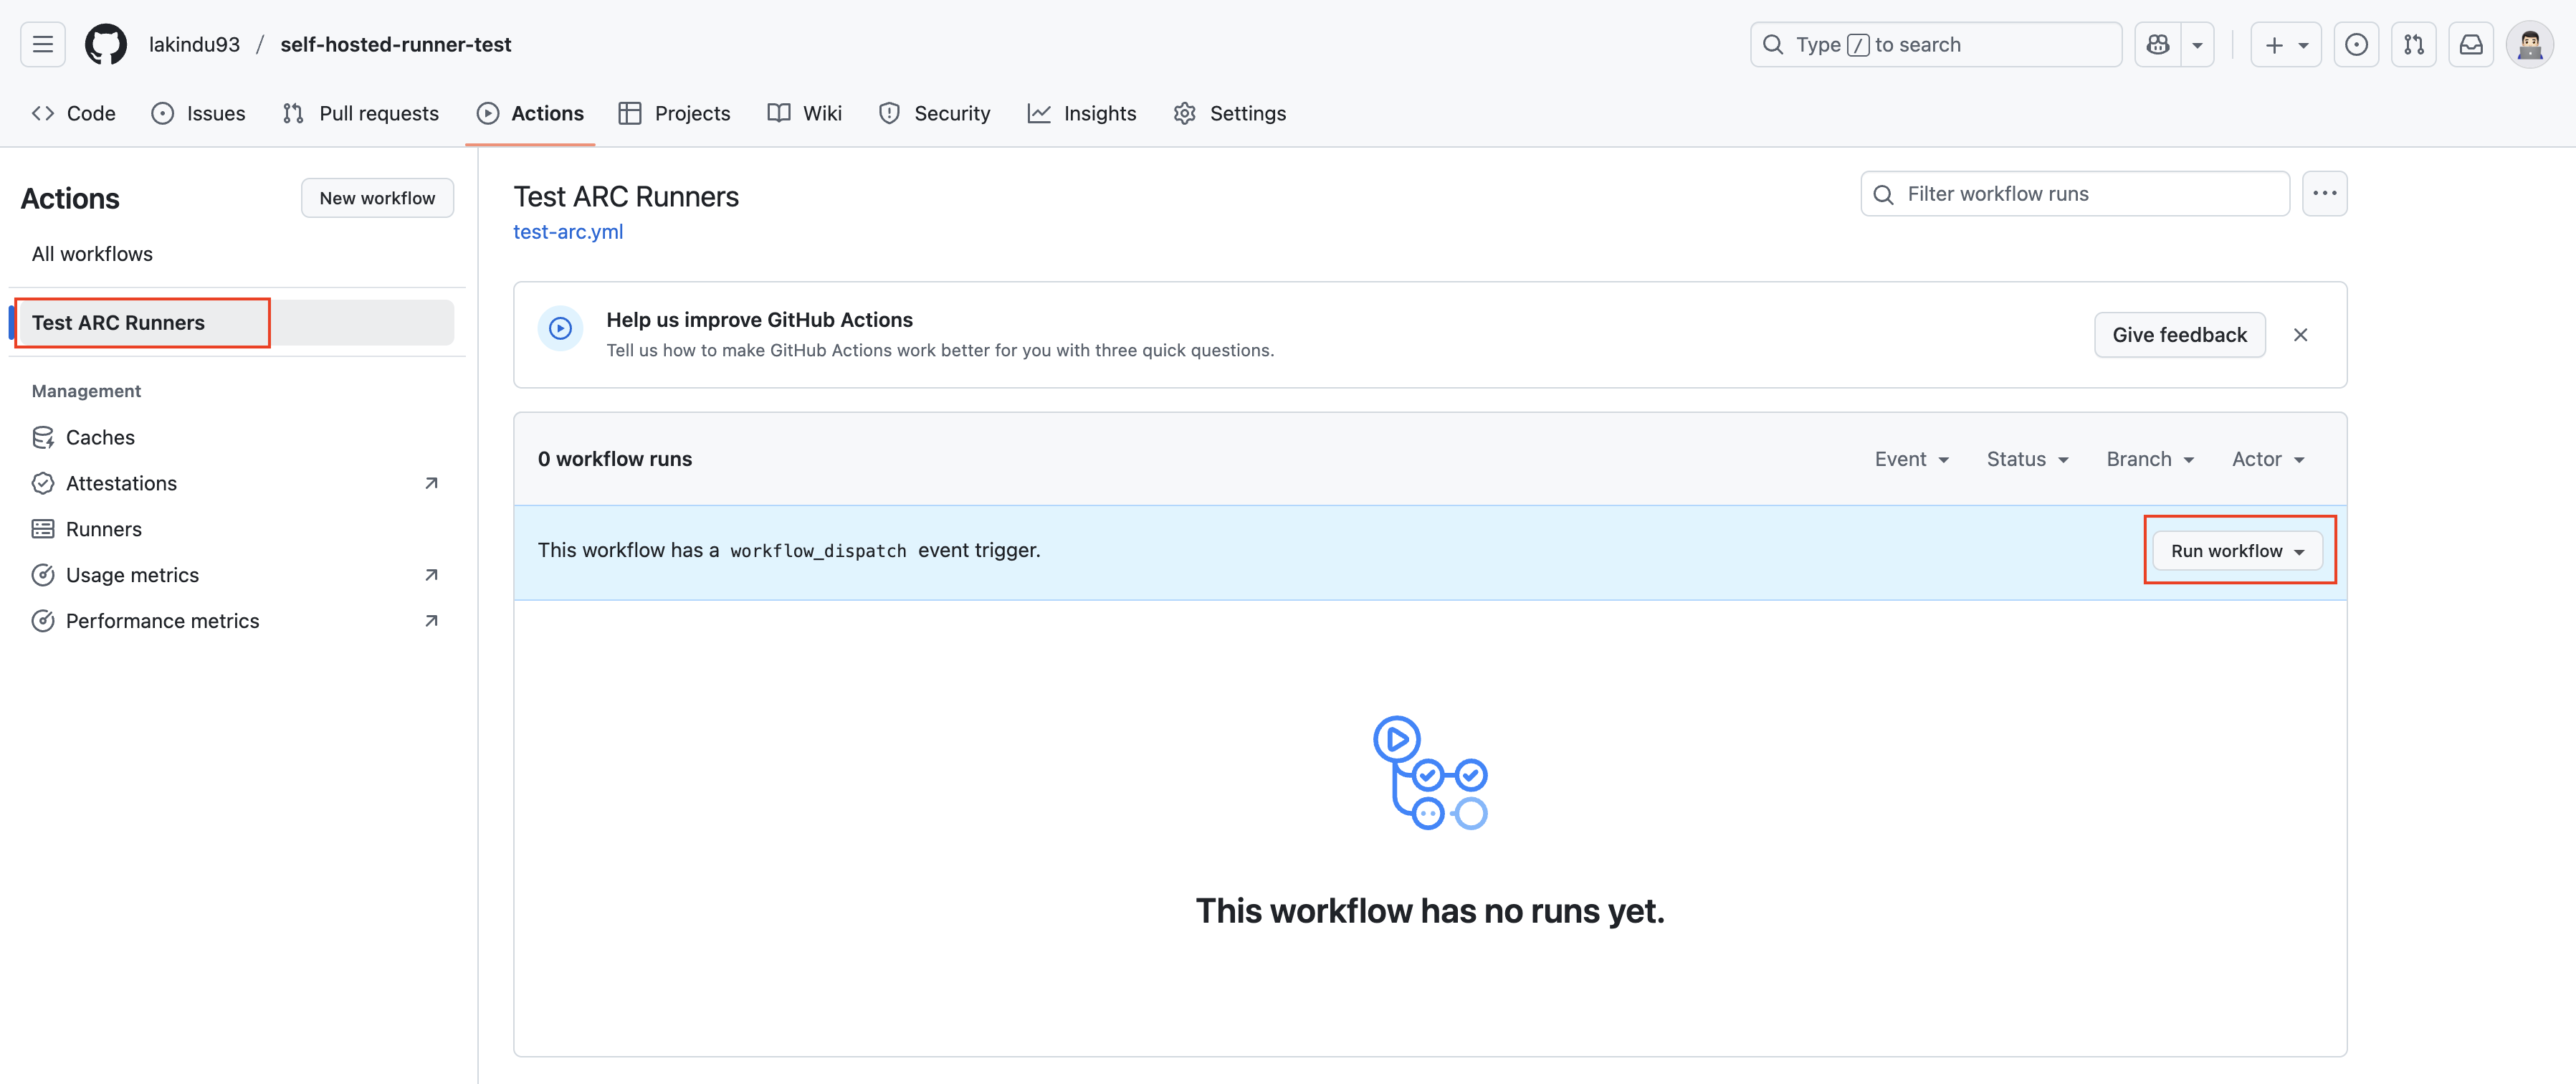
Test the GitHub Workflow
Now, navigate to the Actions tab in your GitHub repository. From the left-hand panel, select the workflow you created earlier, and then click Run workflow to trigger it manually.
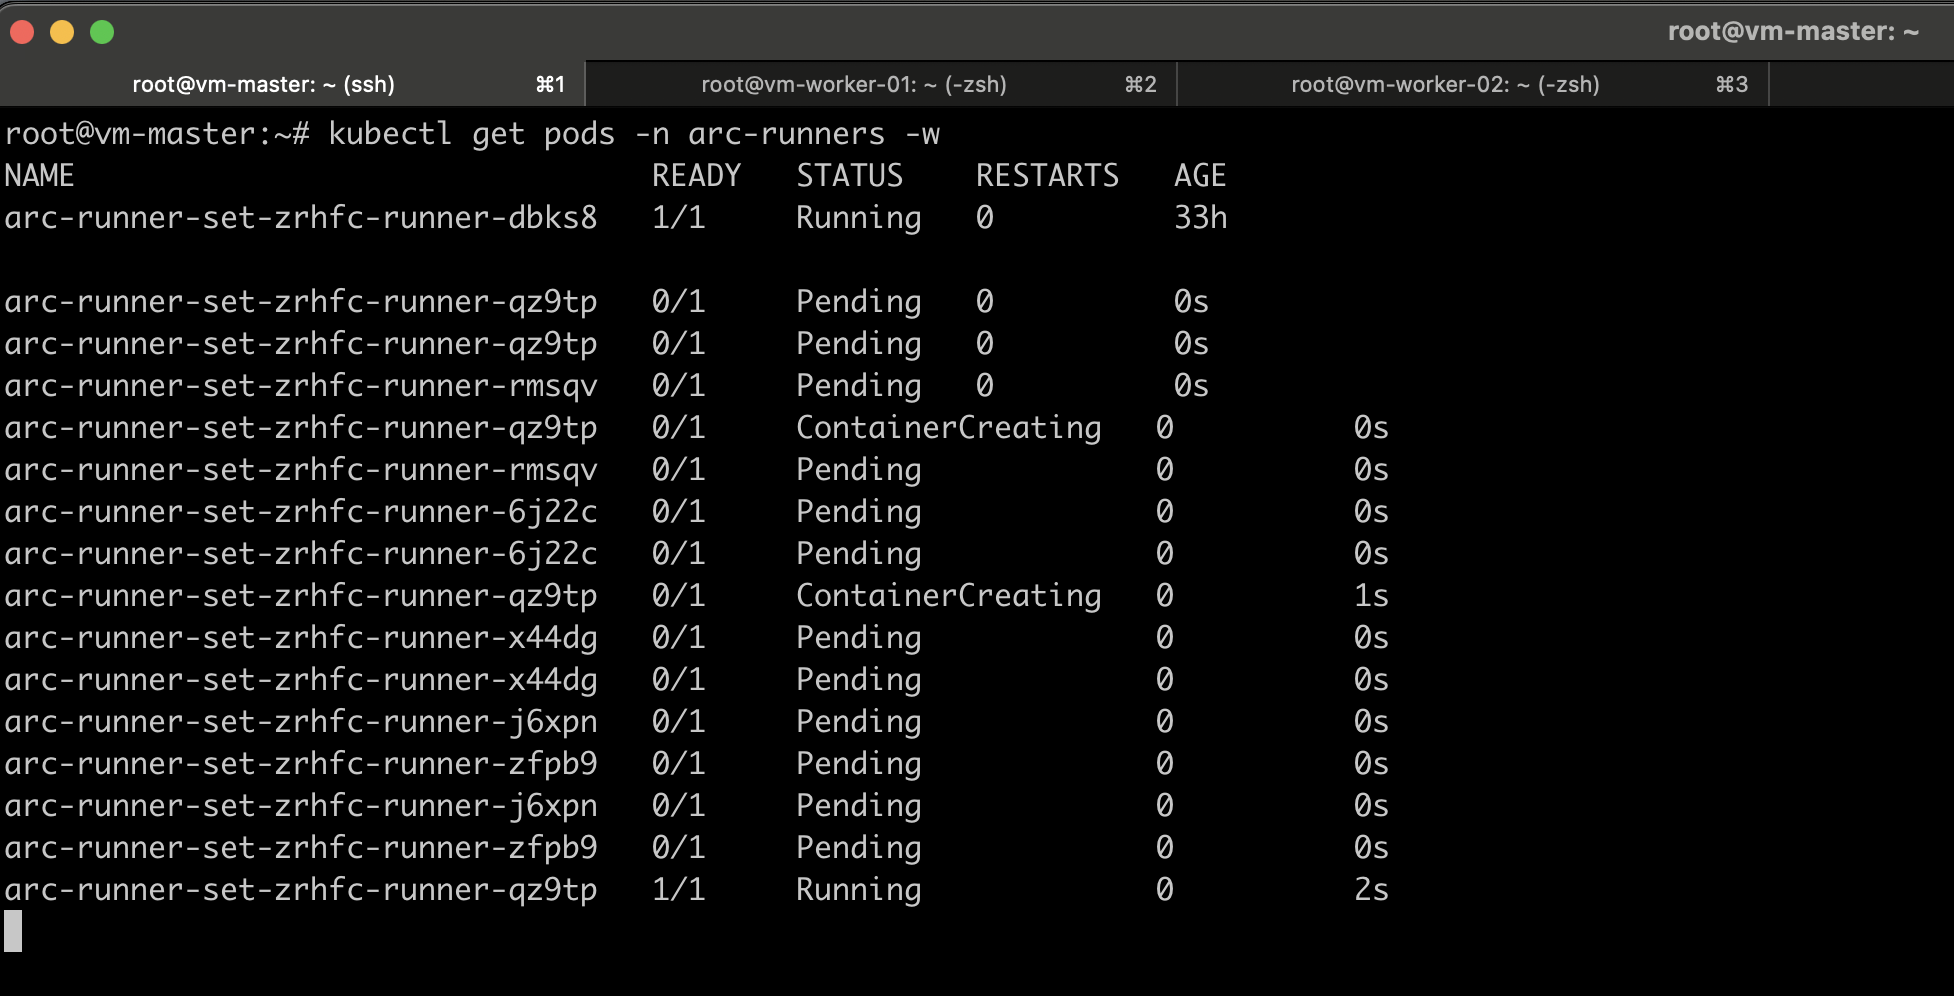
Once the job starts in your Kubernetes environment, you’ll notice that the runner pods automatically scale based on your workflow requirements. You can verify this by running the following command:
kubectl get pods -n arc-runners -w
You can also verify the job’s execution directly on GitHub to see where it’s running:
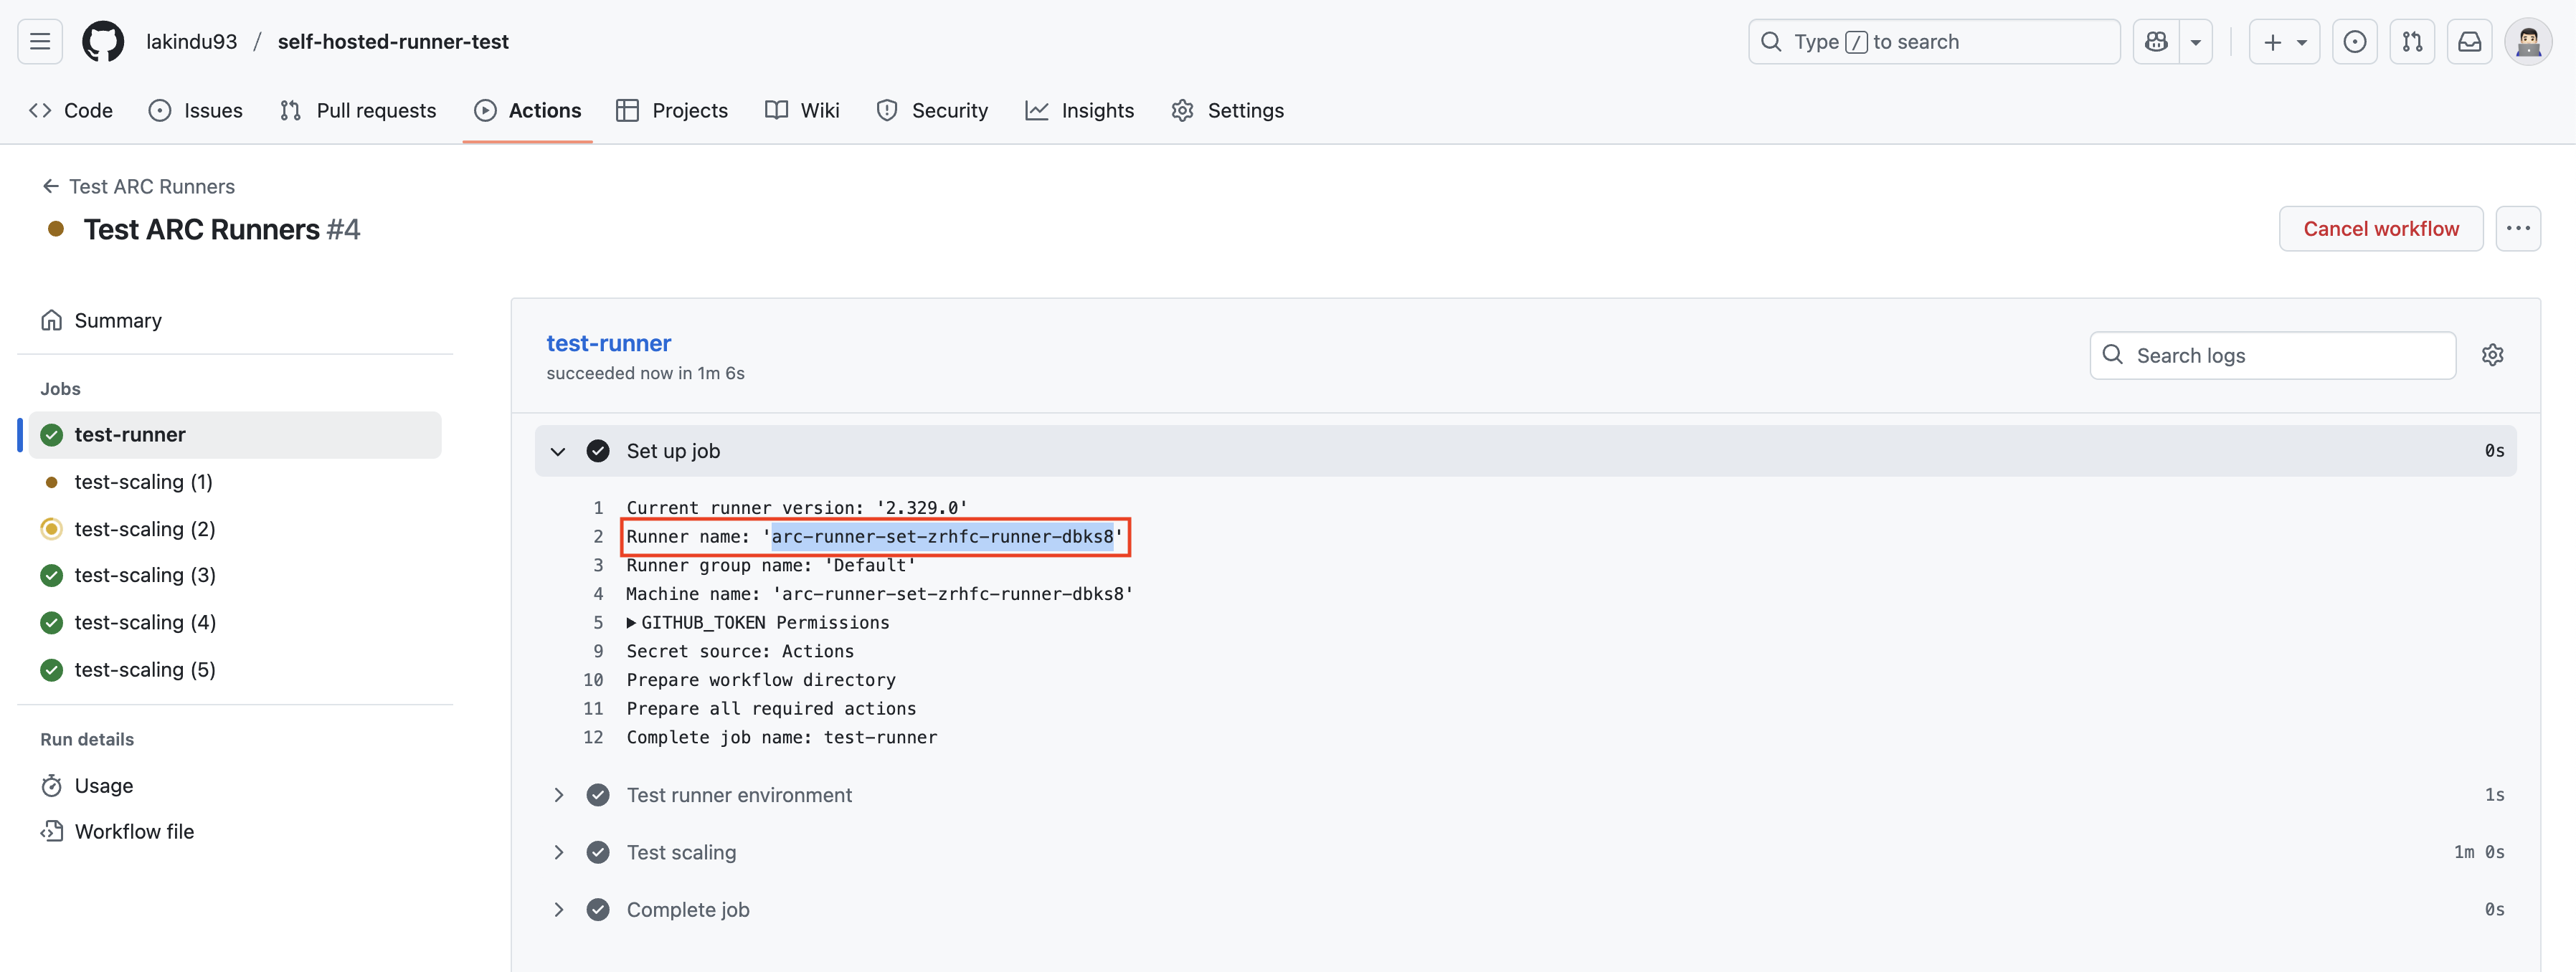
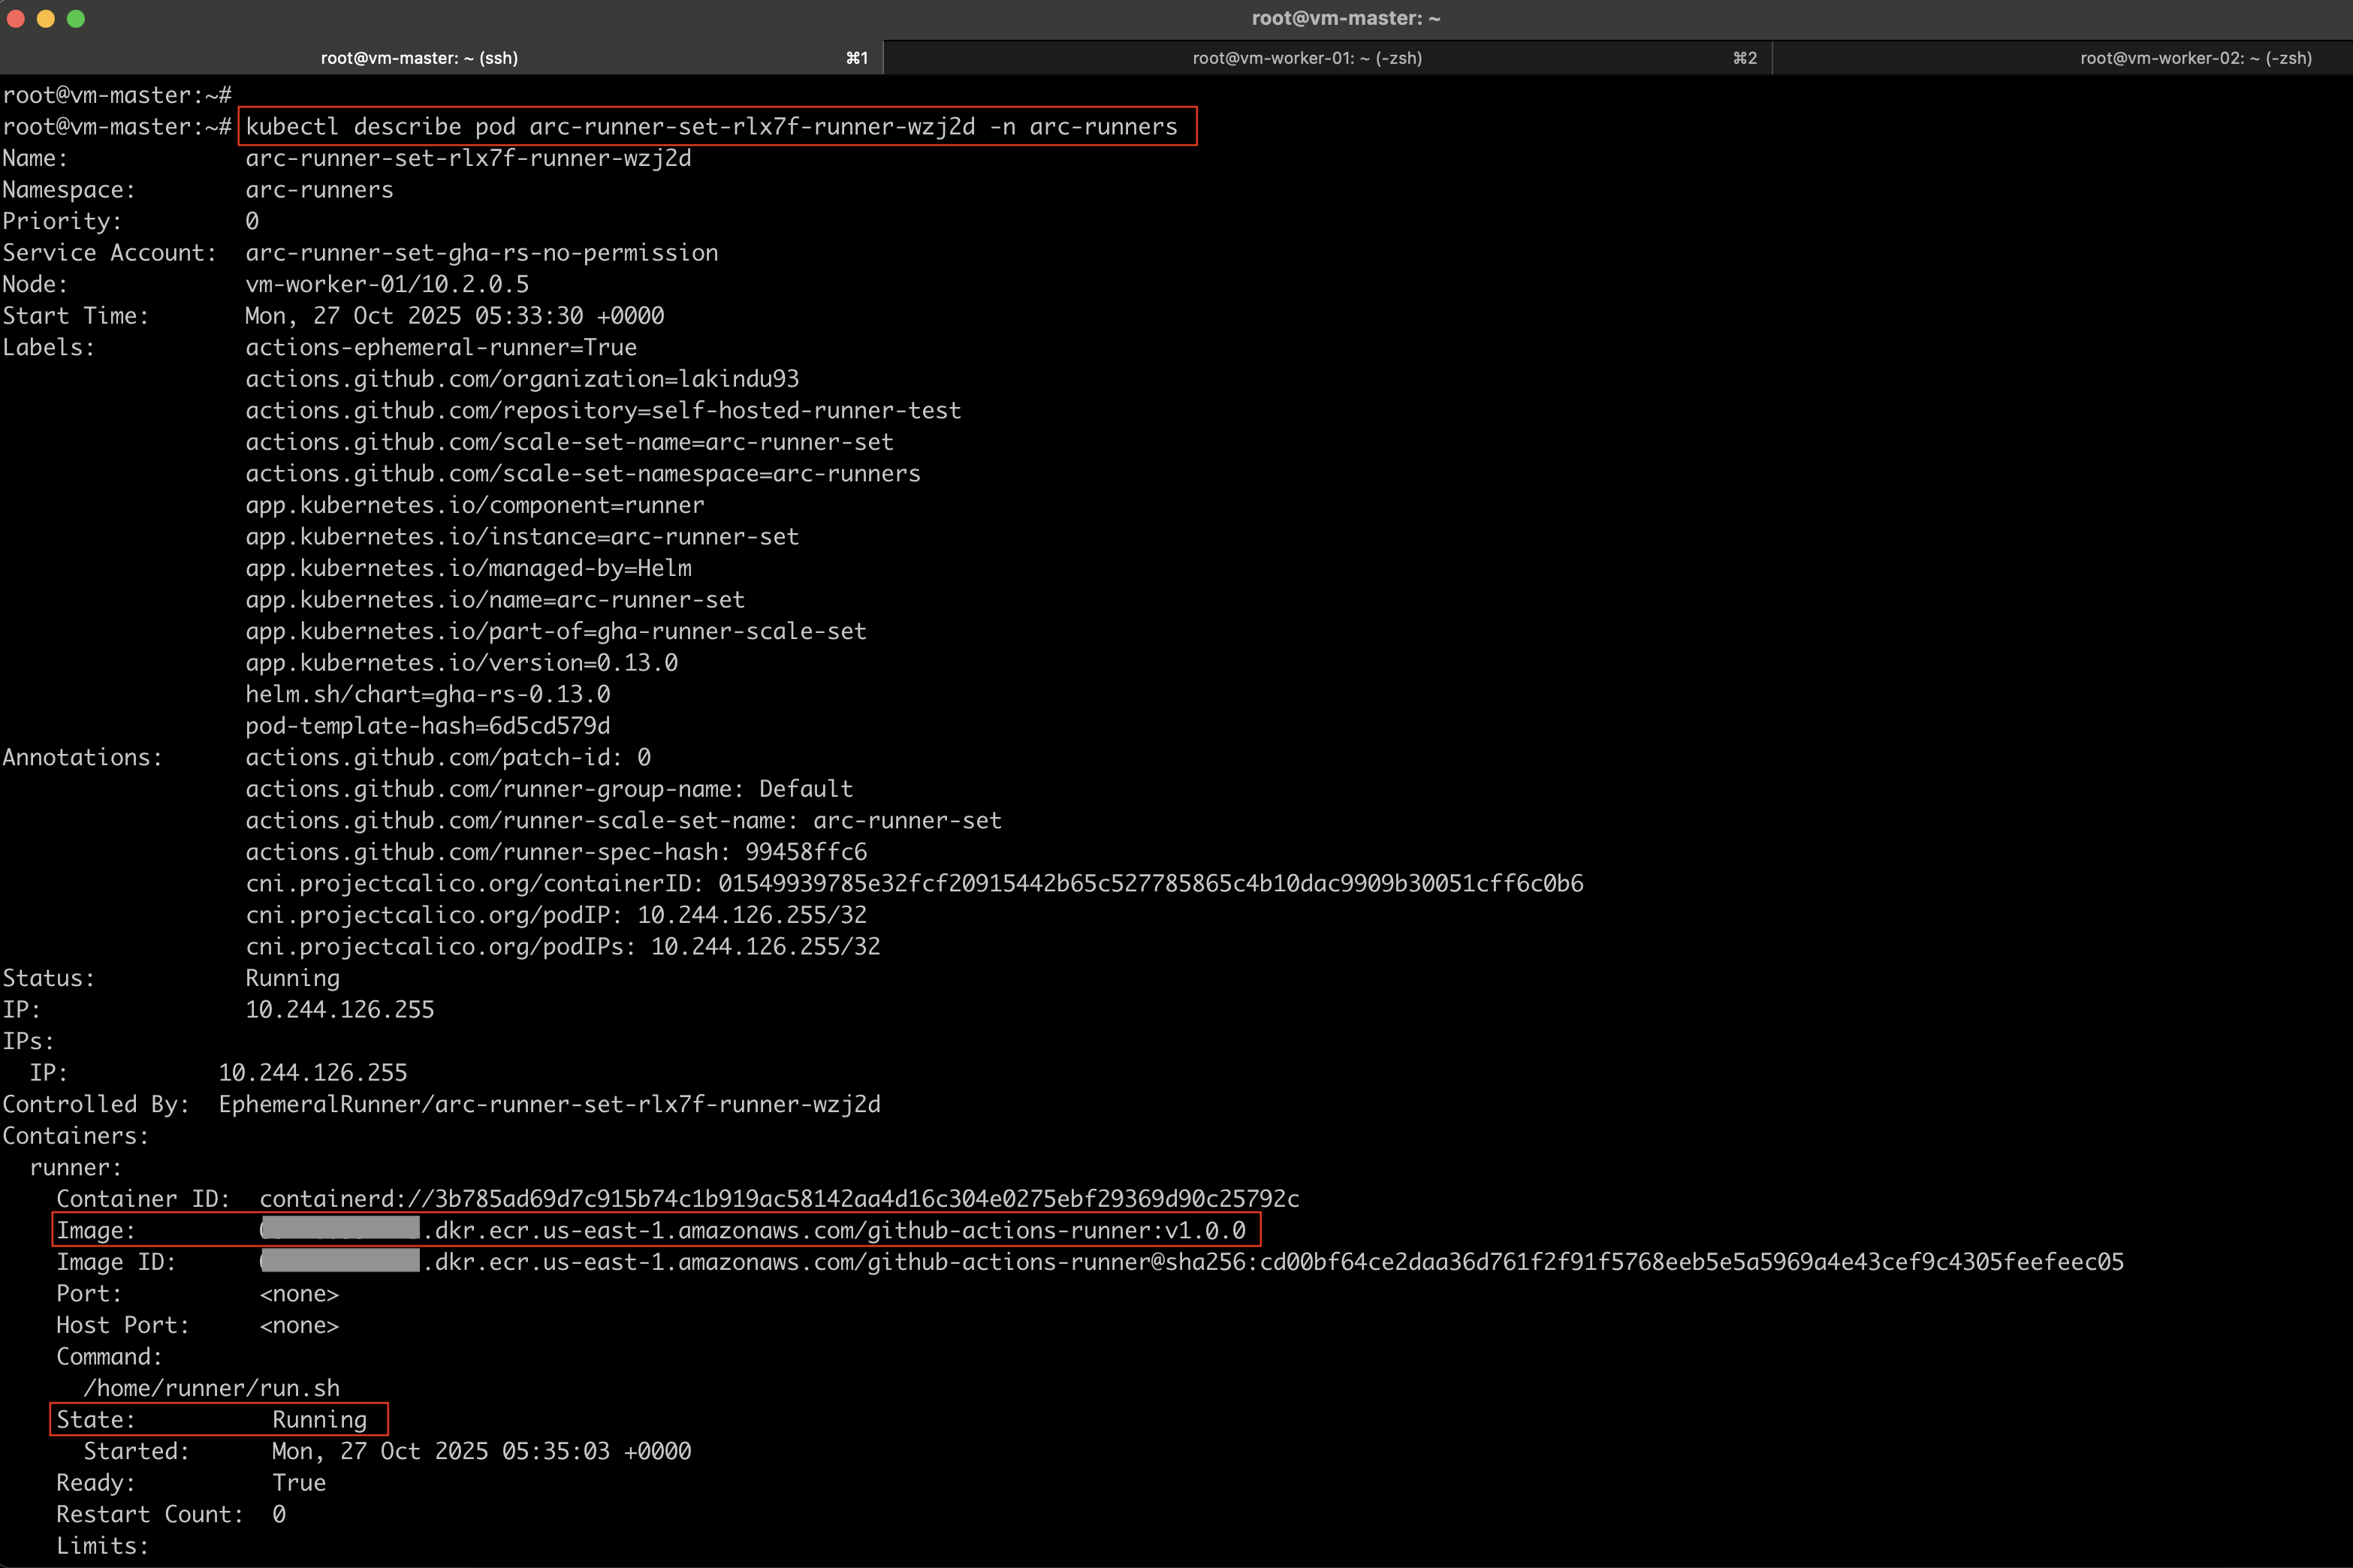
If you want to verify that the runner image is being pulled from the configured ECR registry, you can describe one of the pods to view its image details.
kubectl describe pod arc-runner-set-zrhfc-runner-dbks8 -n arc-runners
Conclusion
Using GitHub Self-Hosted Runners with Kubernetes ARC allows you to take full control of your CI/CD pipeline, combining the scalability of Kubernetes with the flexibility of self-managed environments.
By integrating AWS ECR for hosting your custom runner images, you achieve a secure, high-performance, and hybrid-friendly setup that scales with your organization’s needs.