
Kubernetes (K8S) has become the industry standard for container orchestration, enabling DevOps teams to automate deployment, scaling, and management of containerized applications. While there are many ways to deploy a Kubernetes cluster, one of the easiest and most flexible methods is using kubeadm.
In this article, I’ll walk you through the easy steps to deploy a Kubernetes cluster using kubeadm on self-managed Ubuntu VMs. This guide is beginner-friendly, yet detailed enough for system administrators and DevOps engineers who want to set up a production-ready cluster.
What is kubeadm?
kubeadm is a tool provided by the Kubernetes project that simplifies the process of setting up a Kubernetes cluster. It helps bootstrap a cluster by:
- Initializing the control plane node
- Joining worker nodes to the cluster
- Handling certificates and basic configurations
Prerequisites for Deploying Kubernetes with kubeadm
Node Specification
- At least 2 or 3 Linux servers (Ubuntu 24.04), one for the master node and one or more for worker nodes
- Minimum specs – 2 CPUs, 4GB RAM per node
Disabled Swap (all nodes)
Kubernetes requires swap to be turned off.
sudo swapoff -a
sudo sed -i '/ swap / s/^/#/' /etc/fstab
Kernel & sysctl tuning (all nodes)
Make sure these kernel modules are loaded:
lsmod | grep -E 'br_netfilter|overlay|iscsi_tcp|nbd'
If missing:
sudo modprobe br_netfilter
sudo modprobe overlay
sudo modprobe iscsi_tcp
sudo modprobe nbd
And make those persistent:
echo -e "br_netfilter\noverlay\niscsi_tcp\nnbd" | sudo tee /etc/modules-load.d/k8s-prod.conf
Required for container networking and routing.
cat <<EOF | sudo tee /etc/sysctl.d/99-kubernetes-cri.conf >/dev/null
# Allow iptables to see bridged traffic
net.bridge.bridge-nf-call-iptables  = 1
net.bridge.bridge-nf-call-ip6tables = 1

# Enable IP forwarding
net.ipv4.ip_forward = 1

# Reduce swap tendency (recommended by kubeadm too)
vm.swappiness = 0

# Recommended to avoid conntrack table overflow
net.netfilter.nf_conntrack_max = 131072
EOF
# Apply sysctl params without reboot
sudo sysctl --system
Once you enable it, you can verify it by following the commands.
sysctl net.bridge.bridge-nf-call-iptables
sysctl net.bridge.bridge-nf-call-ip6tables
sysctl net.ipv4.ip_forward
sysctl vm.swappiness
sysctl net.netfilter.nf_conntrack_max
Install Container Runtime (all nodes)
Install a container runtime is required to manage containers. In here, I’m using containerd as you wish; you can go ahead with either Docker or containerd. The container runtime is required on both master and worker nodes, as all control plane components run as pods or containers.
apt update && apt upgrade -y
apt install -y containerd
Configuring cgroup Drivers (all nodes)
Control Groups (cgroups) is a Linux kernel feature that enables you to define and enforce resource limits such as CPU, memory, and I/O for containers. This capability is fundamental to containerization technologies like Docker and Kubernetes.
When configuring the container runtime (for example, containerd), two types of cgroup drivers are available: cgroupfs and systemd.
You can choose either driver, but it’s critical that both the Kubelet and the container runtime use the same cgroup driver to ensure proper resource management and stability.
If your Linux distribution uses systemd as its init system, it’s recommended to set the cgroup driver to systemd. To verify it, you need to enter the following command.
#verify  which init system is using
ps -p 1
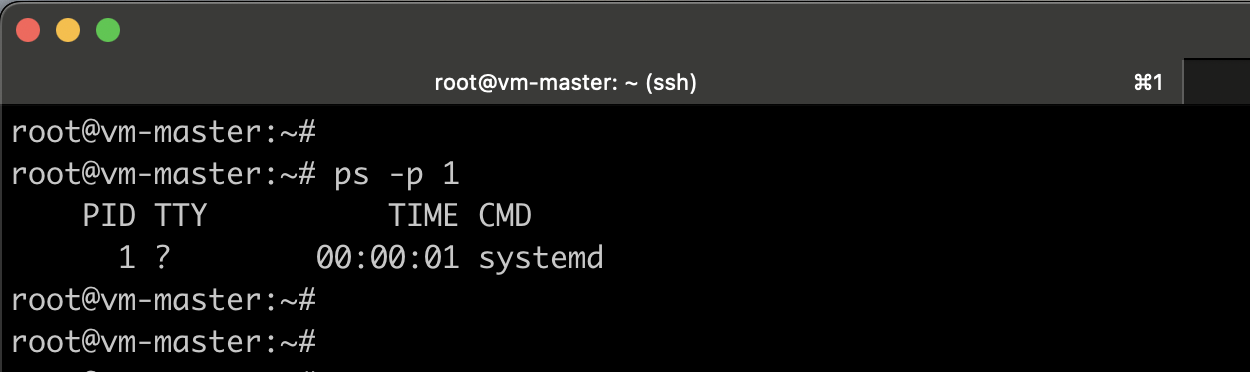
If the output shows systemd, it indicates that your system is using systemd as the init system and the systemd cgroup driver is active.
Note: Starting with v1.22 and later, when creating a cluster with kubeadm, if the user does not set the cgroupDriver field under KubeletConfiguration, kubeadm defaults it to systemd.
Therefore, there’s no need to modify the Kubelet process. However, you must ensure that the container runtime is configured to use the correct Cgroup driver.
Configure the systemd cgroup driver for containerd
Make sure to configure this on all nodes.
#Create a configuration location if it is not exists
mkdir -p /etc/containerd
#Get the default config of the containerd and make the modifications
containerd config default | sed 's/SystemdCgroup = false/SystemdCgroup = true/' | tee /etc/containerd/config.toml
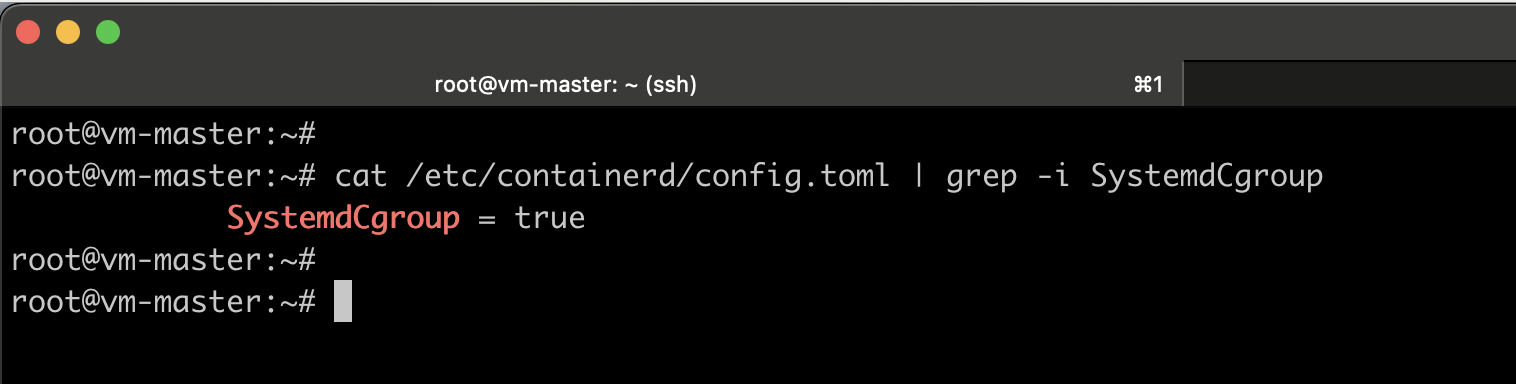
#Verify the modification
cat /etc/containerd/config.toml | grep -i SystemdCgroup
#restart the containerd service
systemctl restart containerd
Installing kubeadm and Prerequisites (all nodes)
Download the public signing keys for the Kubernetes package repositories, add the Kubernetes repository, update the package list, and install kubeadm, kubelet, and kubectl on all nodes.
Note: In this setup, I’ll be installing Kubernetes v1.33. If you prefer to install a different version, update the release key URL and package download URL to match the desired version.
apt install -y apt-transport-https ca-certificates curl gpg

# If the directory `/etc/apt/keyrings` does not exist, it should be created before the curl command.
# sudo mkdir -p -m 755 /etc/apt/keyrings
curl -fsSL https://pkgs.k8s.io/core:/stable:/v1.33/deb/Release.key | sudo gpg --dearmor -o /etc/apt/keyrings/kubernetes-apt-keyring.gpg

echo 'deb [signed-by=/etc/apt/keyrings/kubernetes-apt-keyring.gpg] https://pkgs.k8s.io/core:/stable:/v1.33/deb/ /' | sudo tee /etc/apt/sources.list.d/kubernetes.list
Installing kubeadm, kubelet, and kubectl (all nodes)
Next, install kubeadm along with the required packages by running the following commands on all nodes:
apt update
apt install -y kubeadm kubelet kubectl
apt-mark hold kubeadm kubelet kubectl

#Verify installations
kubeadm version
kubelet --version
kubectl version

Kubernetes components are version-sensitive.
Each of these packages has a specific role:
kubeadm→ Used to bootstrap and upgrade the cluster.kubelet→ Runs on every node; it’s the node agent that actually runs Pods.kubectl→ Command-line tool to interact with the cluster.
If any of these components are upgraded automatically, while others remain on older versions, which can lead to version mismatches or cluster compatibility issues. The apt-mark hold command prevents such automatic upgrades, ensuring all critical Kubernetes components remain on consistent versions.
Initializing Control-Plane Node
The first node we’ll initialize in the Kubernetes cluster will serve as the control plane node. Ensure that this initialization of the control plane commands is run in the elected master node only.
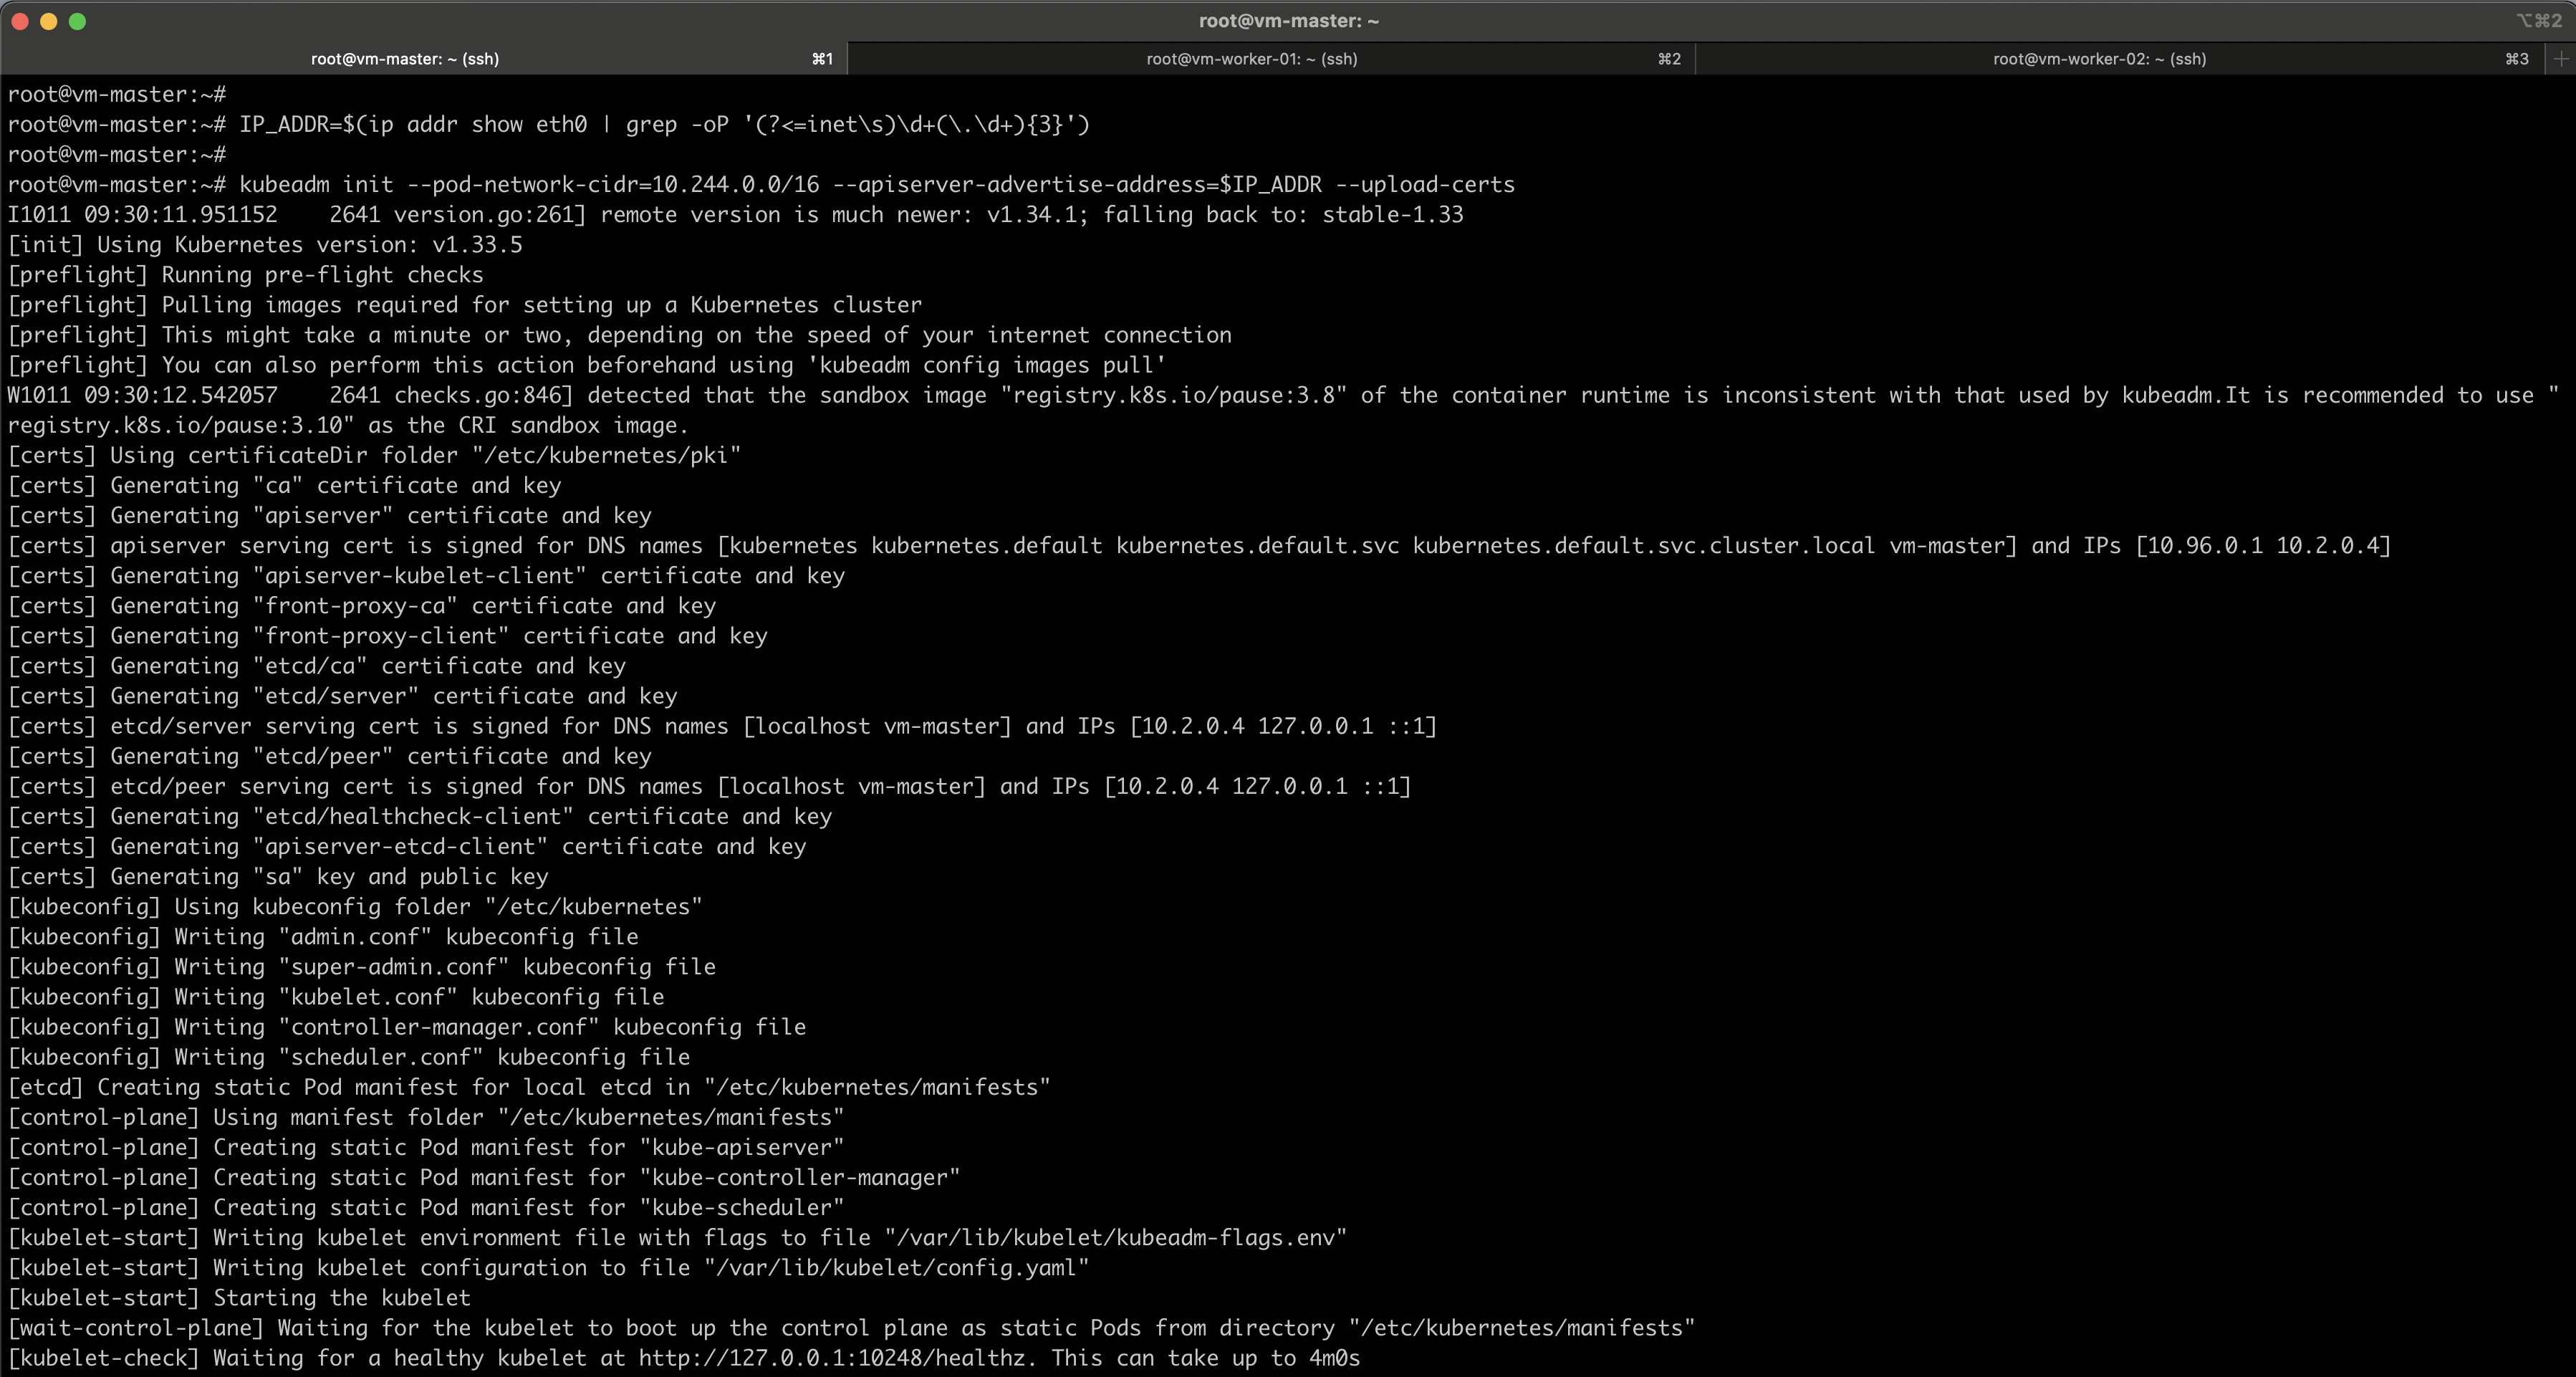
#Get the Master node IP address
IP_ADDR=$(ip addr show eth0 | grep -oP '(?<=inet\s)\d+(\.\d+){3}')

kubeadm init --pod-network-cidr=10.244.0.0/16 --apiserver-advertise-address=$IP_ADDR --upload-certs
The --pod-network-cidr=10.244.0.0/16 flag defines the subnet from which pod IP addresses will be allocated. All pods in the cluster will receive their IPs from this 10.244.0.0/16 range.
The --apiserver-advertise-address=$IP_ADDR flag specifies the IP address that the Kubernetes API server will advertise to the cluster. This should be set to the IP address of the control plane (master) node.
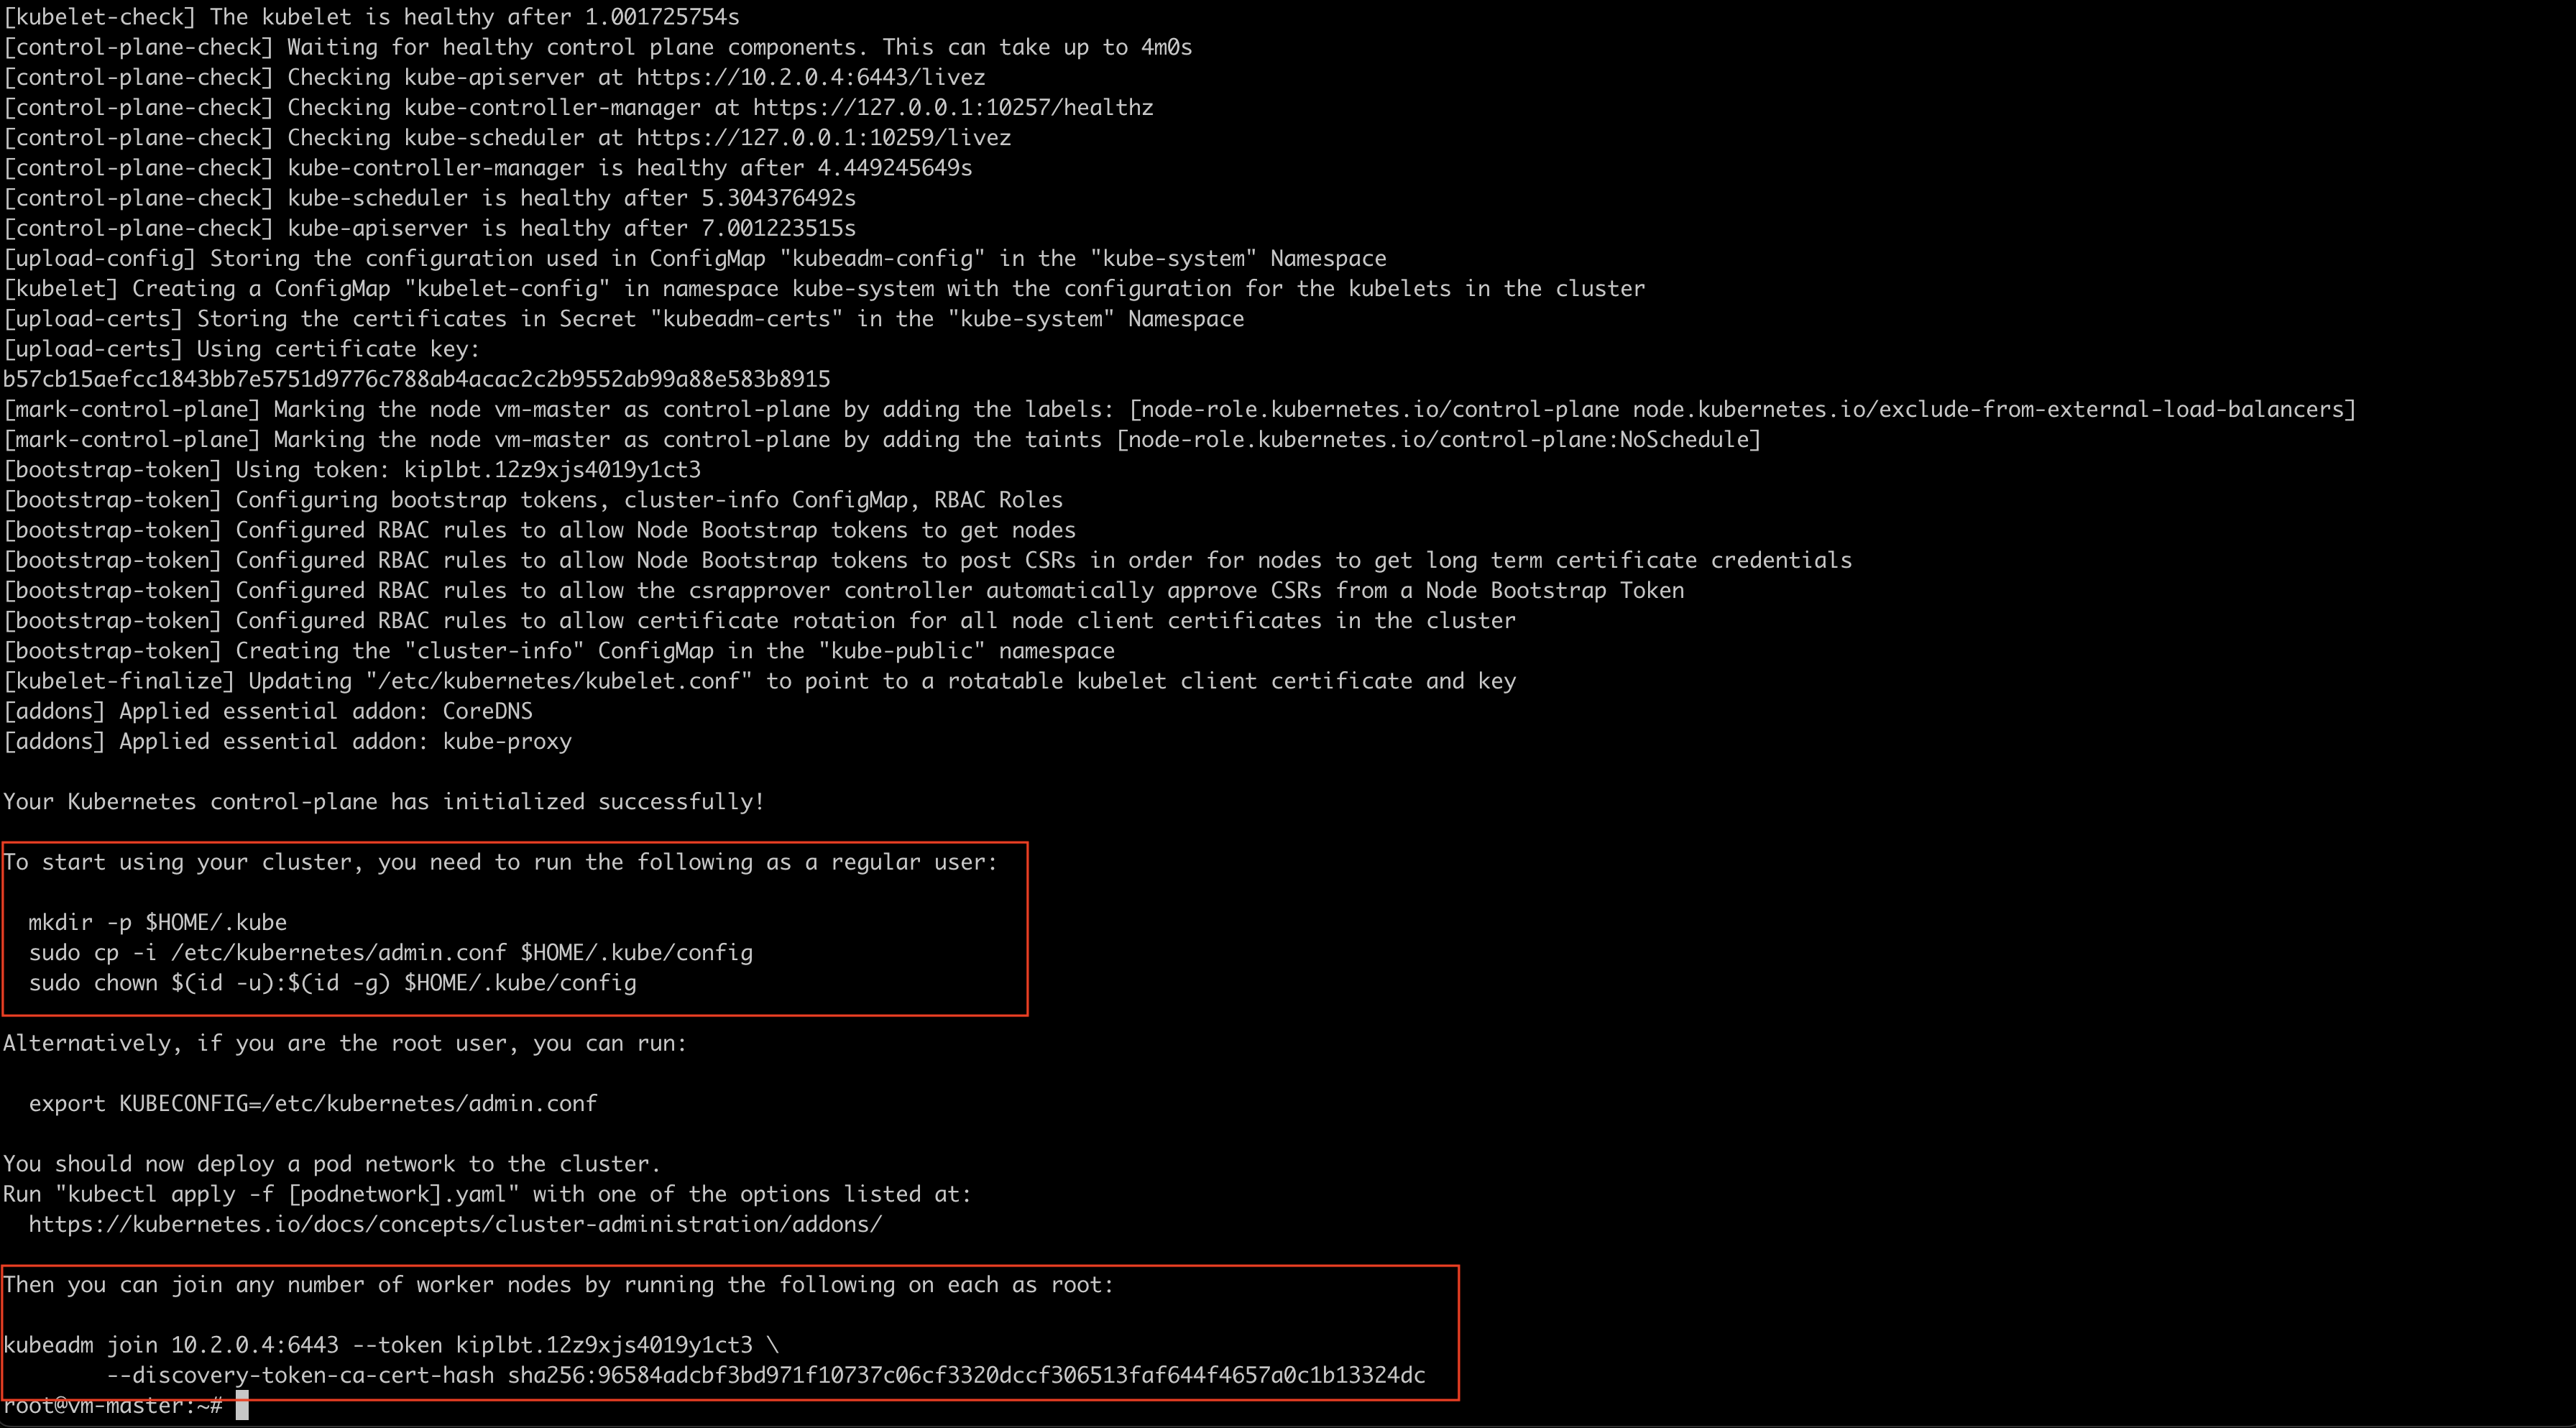
Note: Make sure to copy the kubeadm join command to join the workers later.
After the initialization completes, Kubernetes will generate a kubeconfig file that allows you to connect to the cluster. Once connected, you can run the following command to view the list of nodes in the cluster.
kubectl get nodes
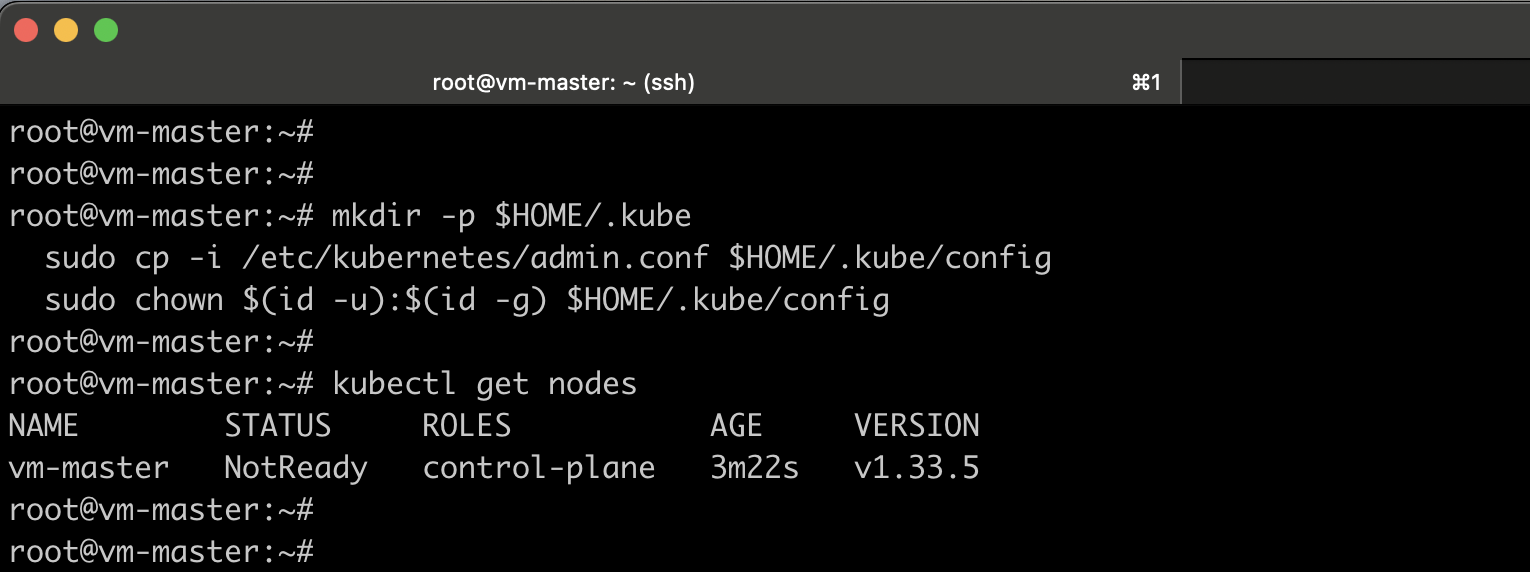
You can see I have listed the nodes and it’s currently in a NotReady state. That’s not a problem. We expect it to be in a not-ready state because we haven’t set up the network plugin that we’re going to use.
Installing CNI – Calico
You must deploy a Container Network Interface (CNI) based Pod network add-on so that your Pods can communicate with each other. Here’s a list of the different add-ons that we can utilize.
I’m going to use Calico in this case.
Calico CNI (Container Network Interface) is an open-source networking and network security solution for Kubernetes. This gives your Kubernetes cluster fast, secure, and policy-driven networking making it one of the most popular CNIs for production environments.
Install the Tigera Operator and custom resource definitions
kubectl create -f https://raw.githubusercontent.com/projectcalico/calico/v3.30.3/manifests/operator-crds.yaml
kubectl create -f https://raw.githubusercontent.com/projectcalico/calico/v3.30.3/manifests/tigera-operator.yaml
Download the custom resources necessary to configure Calico
curl https://raw.githubusercontent.com/projectcalico/calico/v3.30.3/manifests/custom-resources.yaml -O
Edit the relevant section of the custom-resources.yaml file.
Note:
- If you are using a custom pod CIDR (i.e., different from Calico’s default
192.168.0.0/16), download the manifest first and update the network configuration to match your pod CIDR. - By default, Calico’s IP pool uses VXLANCrossSubnet encapsulation, which only encapsulates traffic between nodes in different subnets. If your VMs are on the same subnet, inter-node pod-to-pod traffic will not be encapsulated, causing connectivity issues. You must modify the VXLAN settings to encapsulate traffic between all nodes to ensure proper pod communication.
# This section includes base Calico installation configuration.
# For more information, see: https://docs.tigera.io/calico/latest/reference/installation/api#operator.tigera.io/v1.Installation
apiVersion: operator.tigera.io/v1
kind: Installation
metadata:
  name: default
spec:
  # Configures Calico networking.
  calicoNetwork:
    ipPools:
    - name: default-ipv4-ippool
      blockSize: 26
      cidr: 10.244.0.0/16  #Change the pod CIDR network according to your one
      encapsulation: VXLAN #Changed from VXLANCrossSubnet to VXLAN
      natOutgoing: Enabled
      nodeSelector: all()
Once the configuration changes are done, create the manifest to install Calico.
kubectl create -f custom-resources.yaml
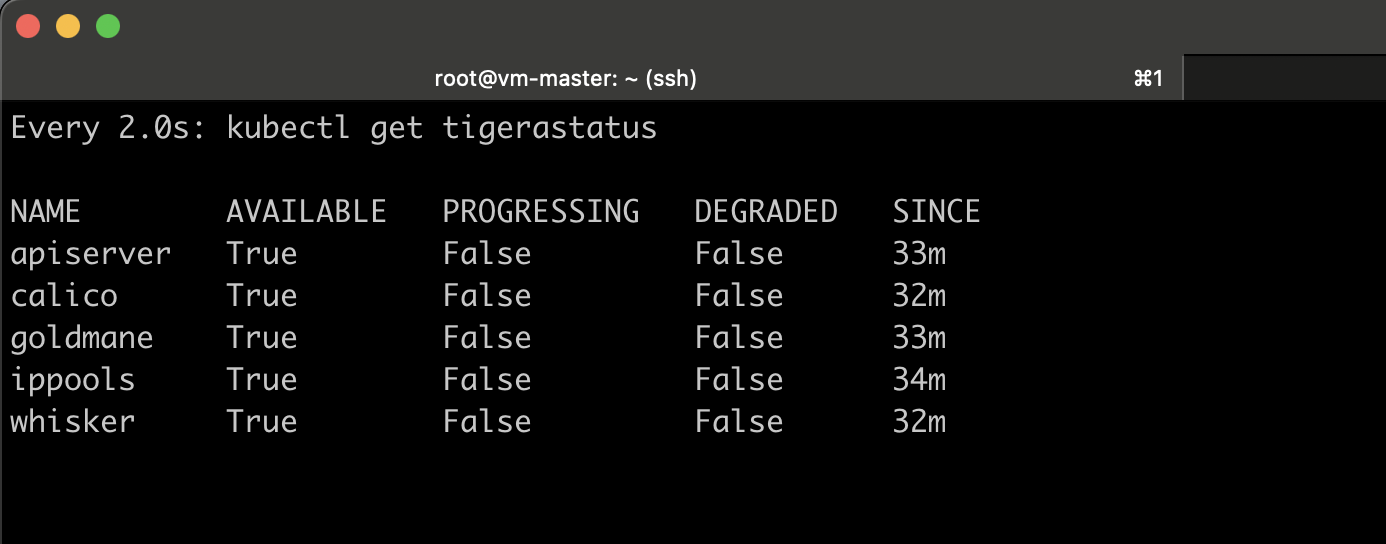
Monitor the deployment by running the following command:
watch kubectl get tigerastatus
#or
kubectl get pods -n calico-system -w
After a few minutes, all the Calico components display True in the AVAILABLE column.
Note: You can also monitor Calico network traffic using Calico Whisker. For detailed instructions, refer to the official documentation: Monitor network traffic in Calico Whisker
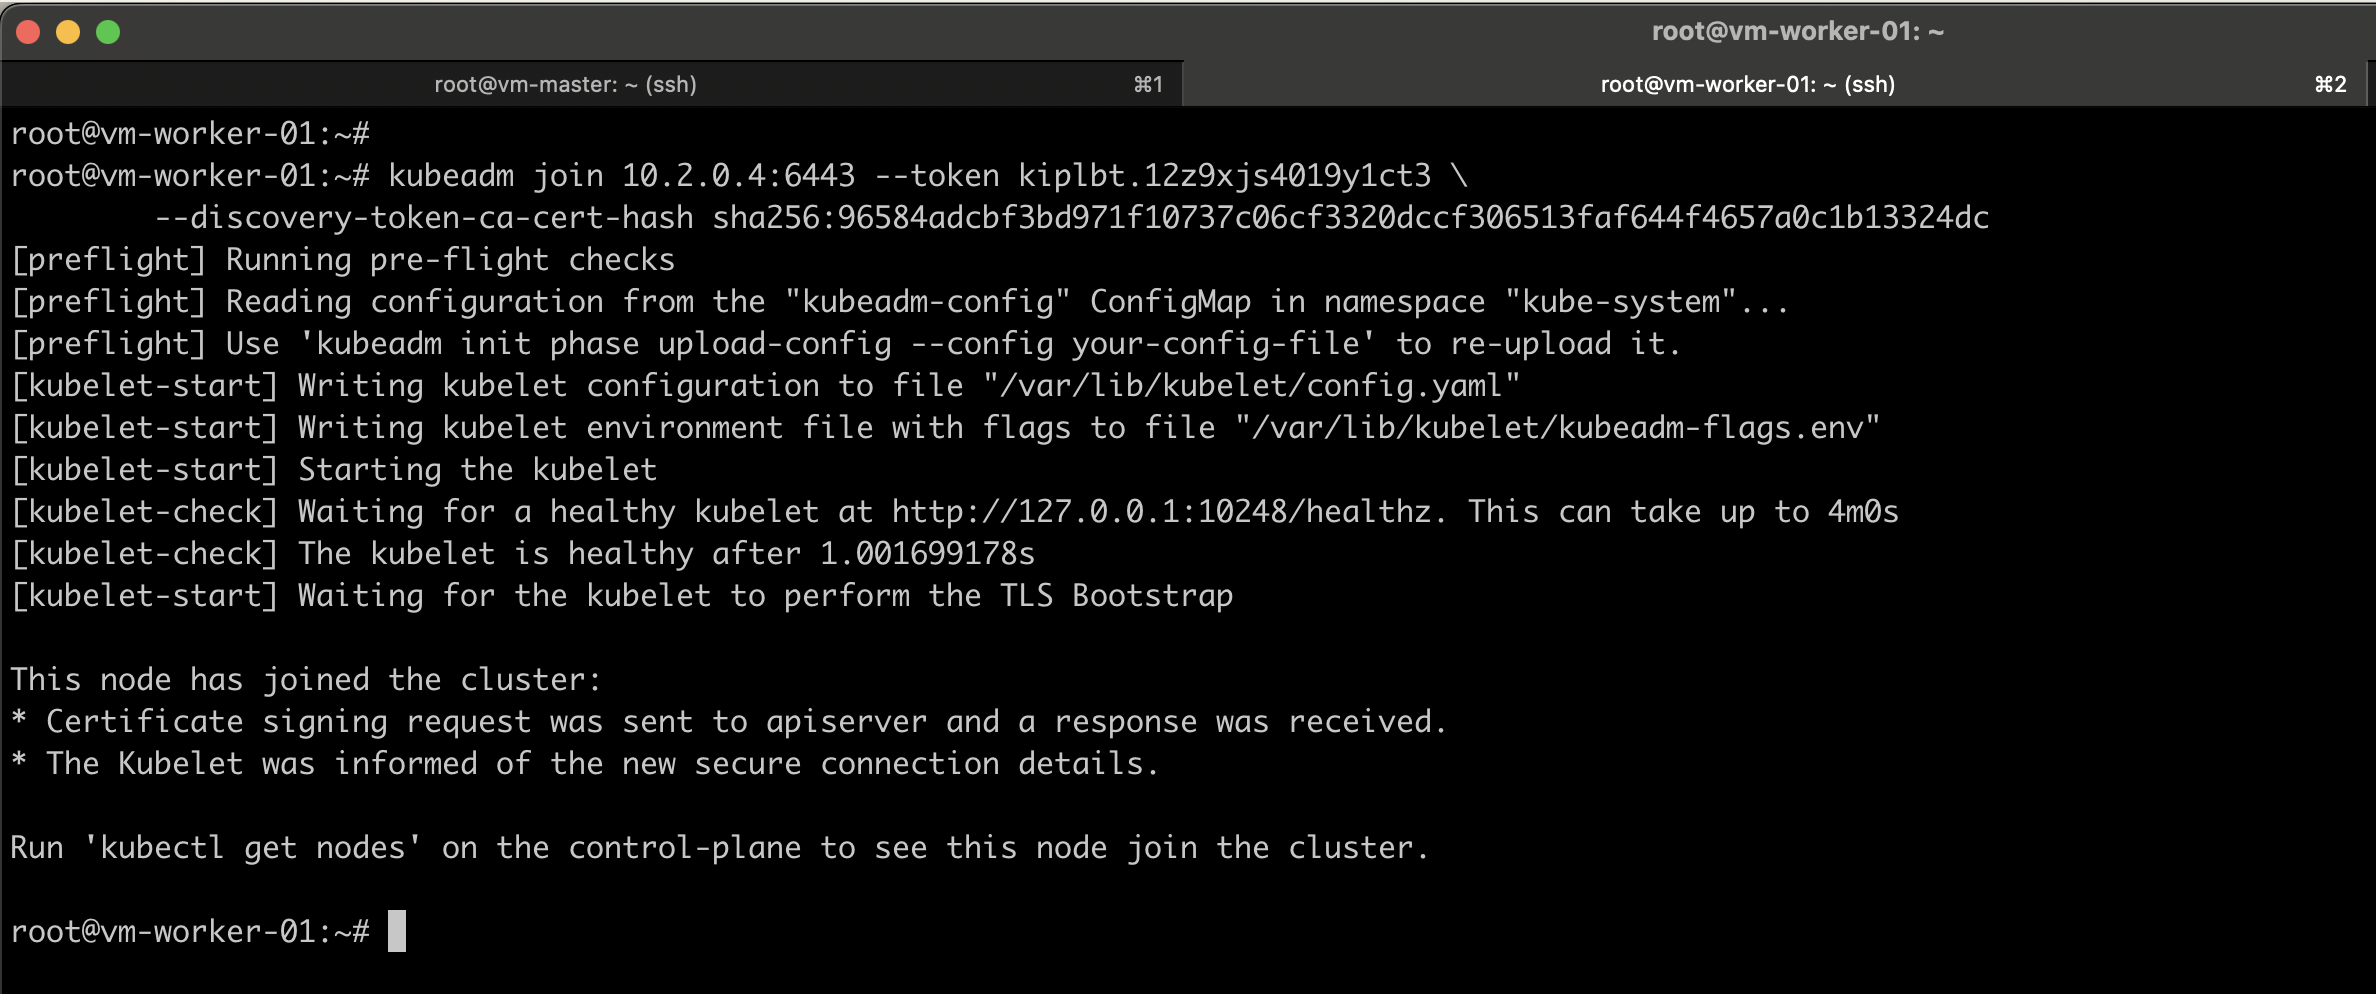
Join Worker Nodes to the Kubernetes Cluster
The final step is to join the worker nodes to the cluster. You can either use the kubeadm join command provided at the end of the control plane initialization or generate a new join command as shown below.
#Get the token (On the master node, run:)
kubeadm token list

#Get the Discovery Token CA Cert Hash
openssl x509 -pubkey -in /etc/kubernetes/pki/ca.crt | openssl rsa -pubin -outform der 2>/dev/null | sha256sum | awk '{print $1}'

#Then Genarate the Command and ron it on all worker nodes

sudo kubeadm join --token <token> <control-plane-host>:<control-plane-port> --discovery-token-ca-cert-hash sha256:<hash>
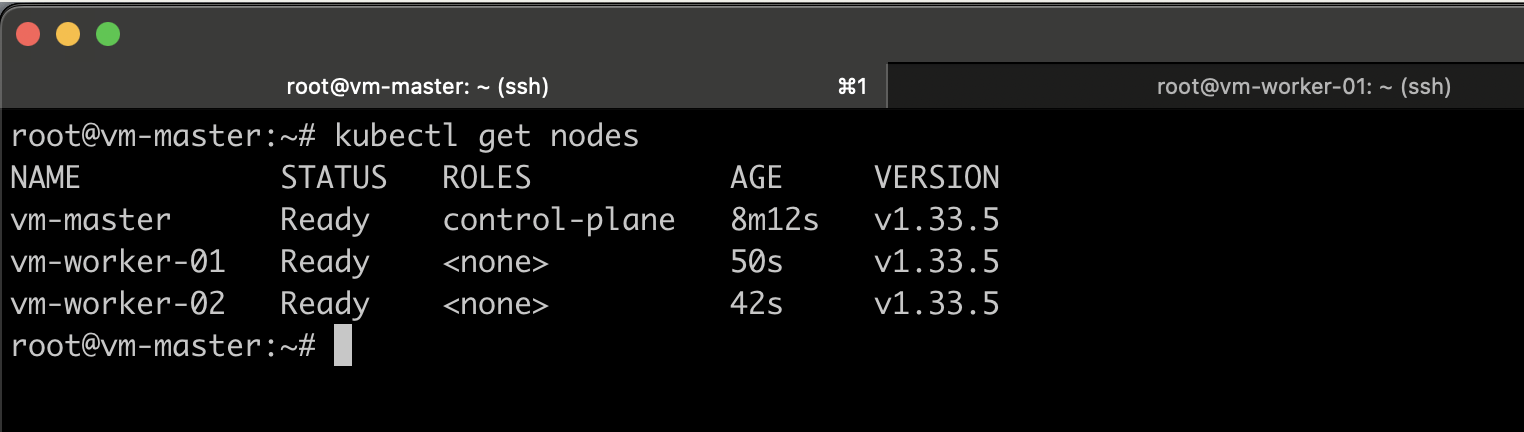
Similarly, do the same for other worker nodes as well.
By listing all nodes, you can see now all nodes are now in the ready state.
Verify the Network Connectivity
Test Pod-to-Pod Connectivity in Cross Nodes
Create a simple test namespace and pods:
kubectl create namespace net-test
kubectl run pod-a --image=busybox -n net-test \
--overrides='{"spec": {"nodeSelector": {"kubernetes.io/hostname": "vm-worker-01"}}}' \
-- sleep 3600
kubectl run pod-b --image=busybox -n net-test \
--overrides='{"spec": {"nodeSelector": {"kubernetes.io/hostname": "vm-worker-02"}}}' \
-- sleep 3600
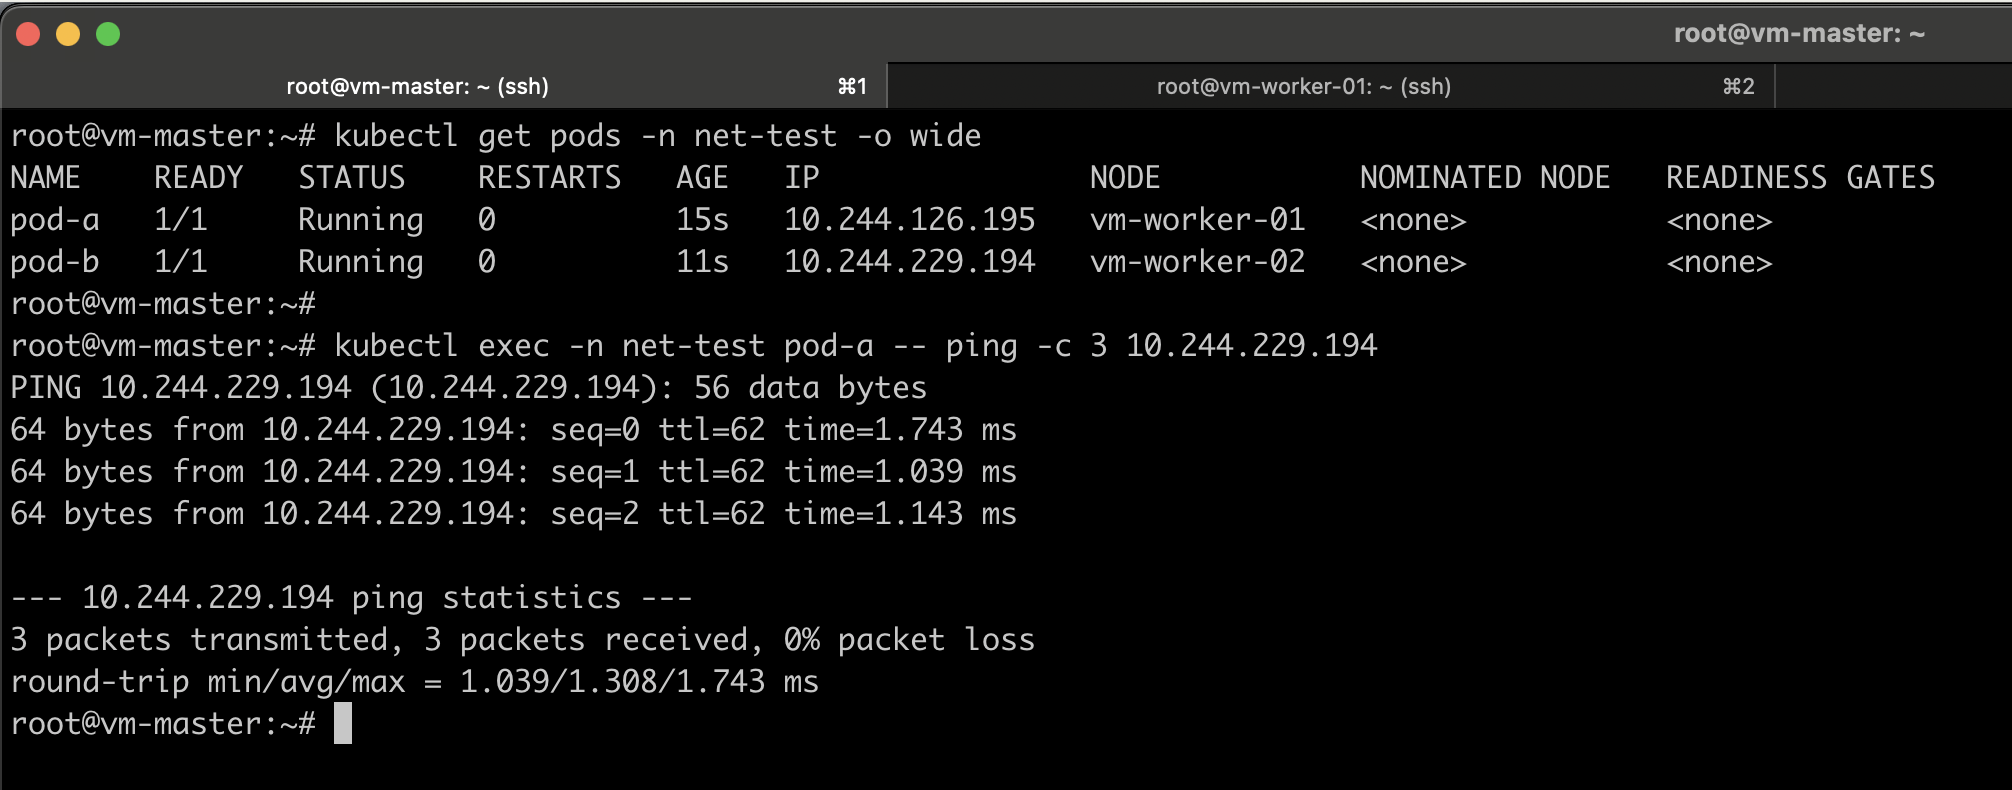
#Get the IPs of the pods:
kubectl get pods -n net-test -o wide
Now test connectivity:
kubectl exec -n net-test pod-a -- ping -c 3 10.244.229.194
If pings succeed, Pod-to-Pod networking works.
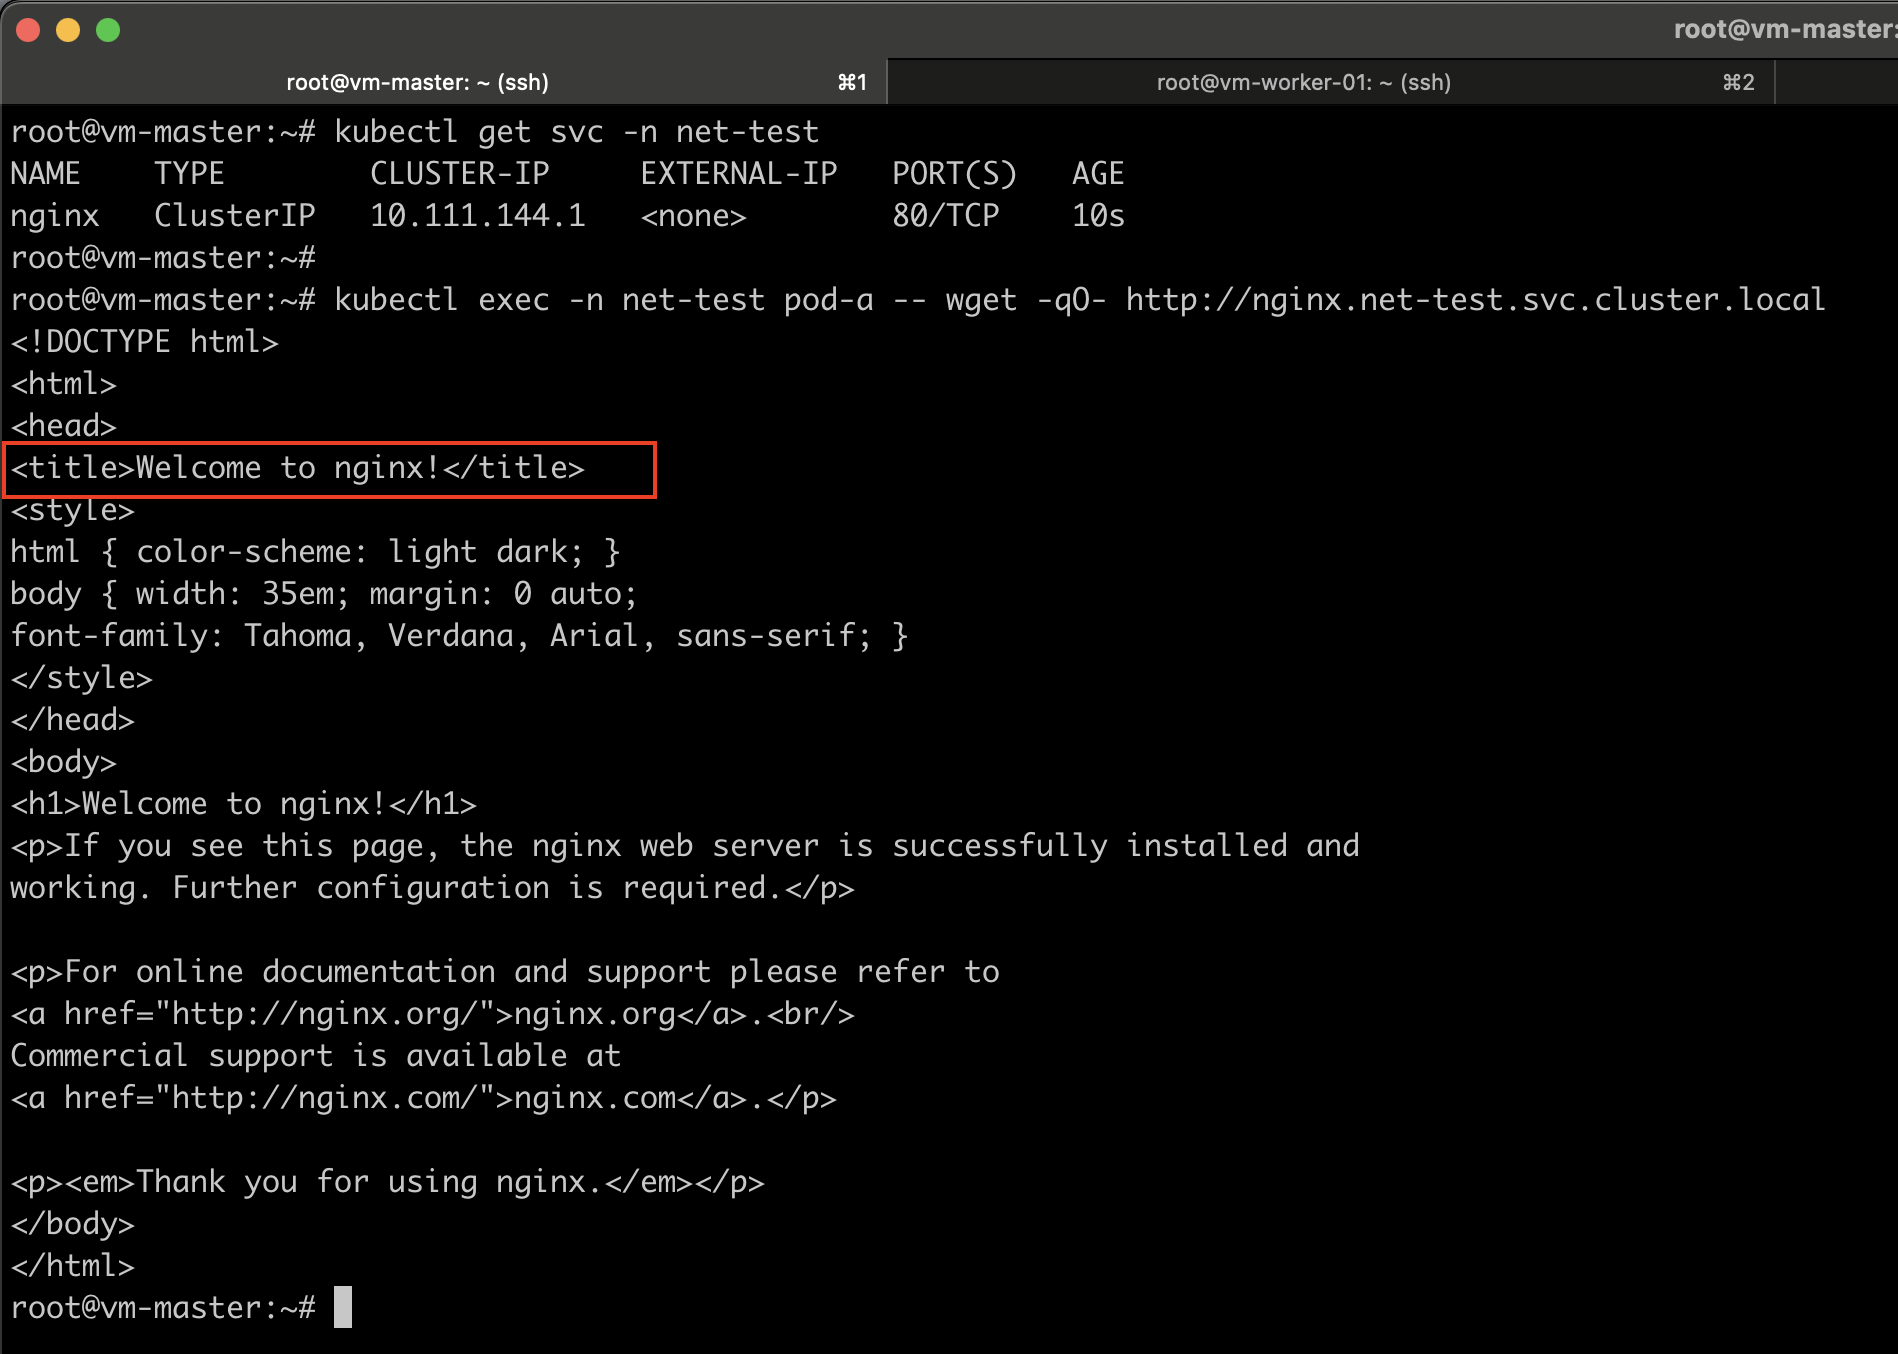
Test Pod-to-Service Connectivity
Create a service (e.g., nginx) and get the service cluster IP.
kubectl create deployment nginx --image=nginx -n net-test
kubectl expose deployment nginx --port=80 --target-port=80 -n net-test

kubectl get svc -n net-test
Test from a pod:
kubectl exec -n net-test pod-a -- wget -qO- http://nginx.net-test.svc.cluster.local
Install CSI – Longhorn
Longhorn is a lightweight, reliable, and easy-to-use distributed block storage system for Kubernetes. Install Longhorn after CNI is ready and nodes show Ready. You can use either Helm or kubectl to deploy it in production.
Install Longhorn on any Kubernetes Cluster
kubectl apply -f https://raw.githubusercontent.com/longhorn/longhorn/v1.10.0/deploy/longhorn.yaml
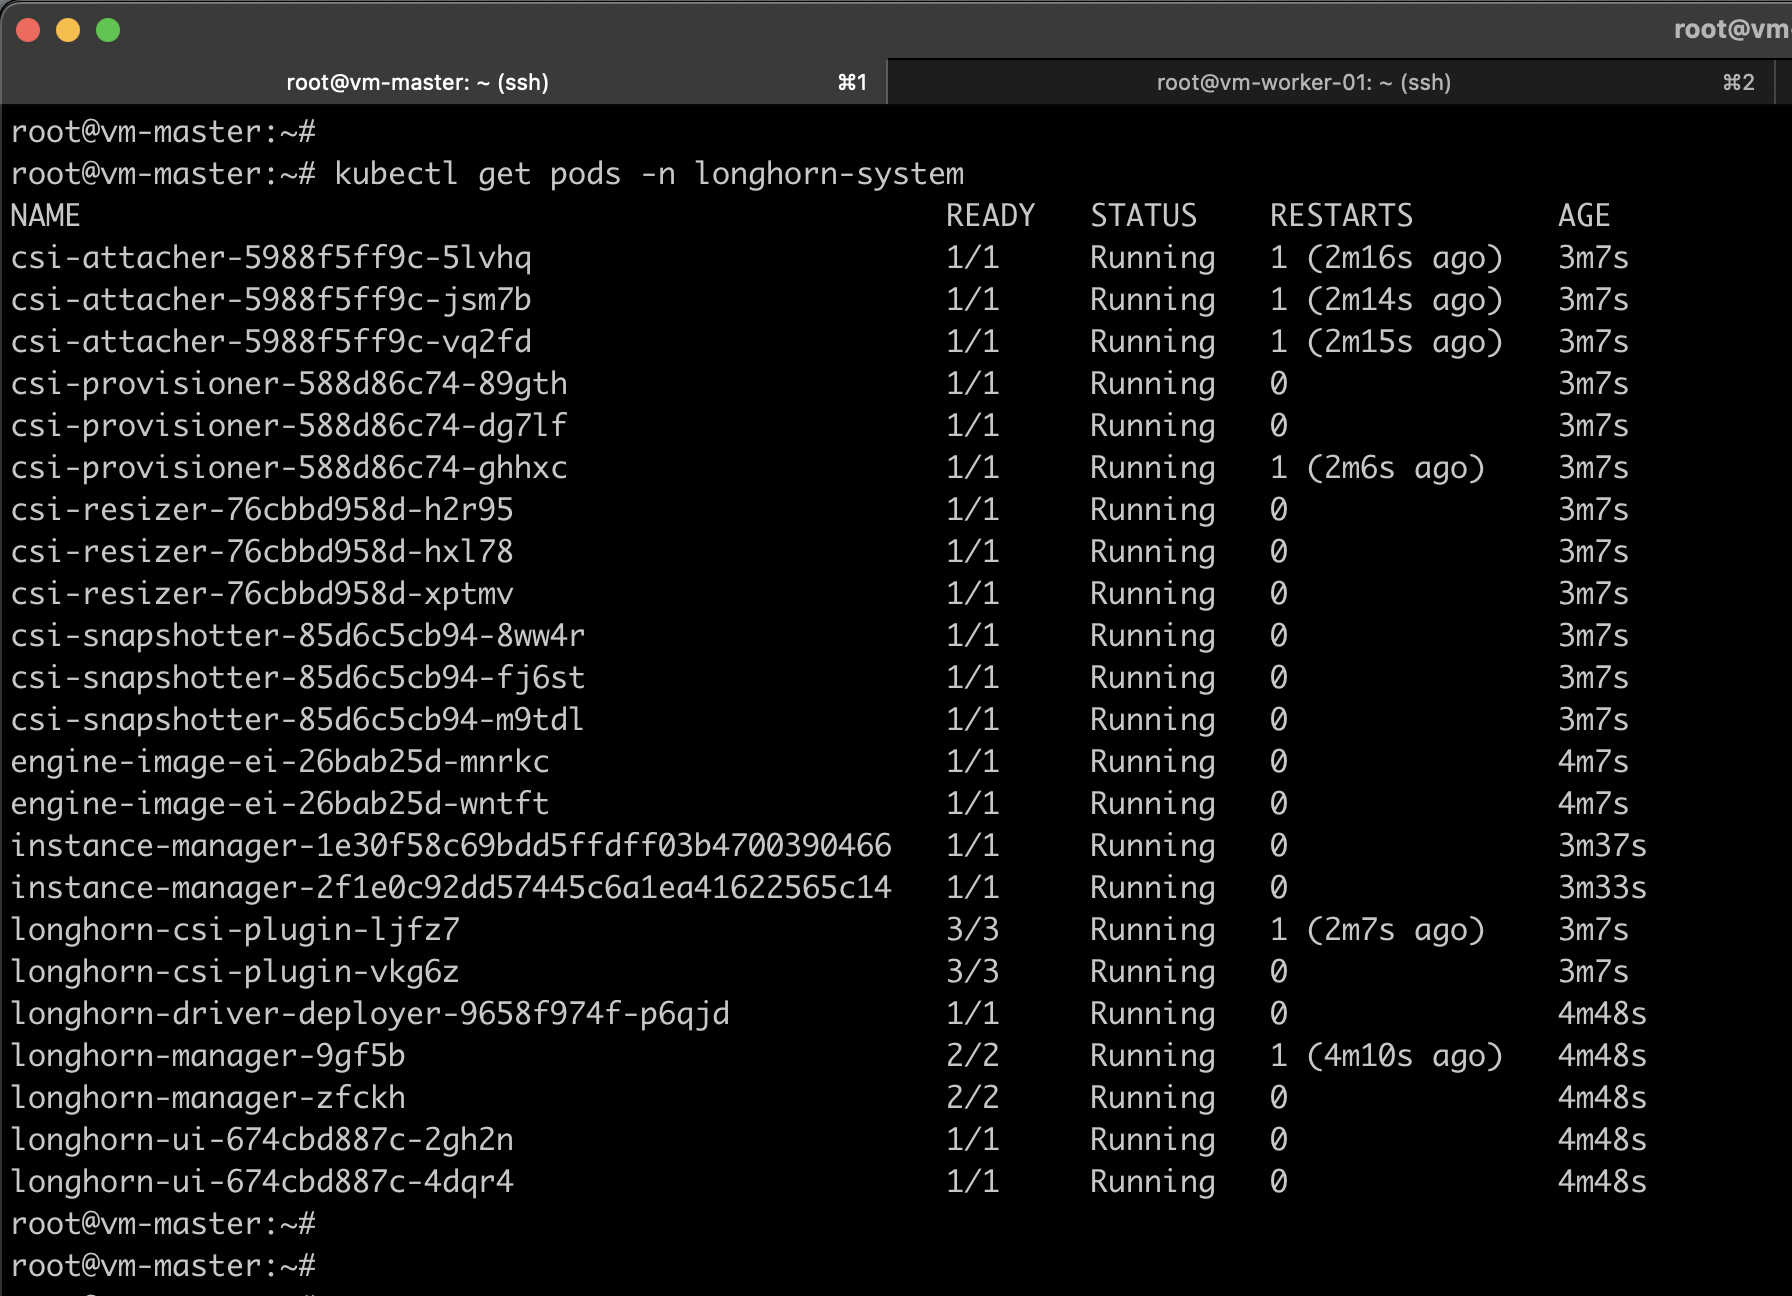
Monitoring the progress of the installation involves watching pods being created in the longhorn-system namespace:
kubectl get pods -n longhorn-system -w
Once the longhorn is successfully deployed, you can see all pods should be in the Running state.
kubectl get pod -n longhorn-system
Access the Longhorn UI Simple and Secured Way
Check the Longhorn UI Service:
kubectl get svc -n longhorn-system
By default, the longhorn-frontend service is of type ClusterIP, which means it’s only accessible inside the cluster.
If you are accessing the Kubernetes cluster from the master node (ssh to master and access the Kubernetes cluster), you first need to connect to the master node via SSH and create a secure tunnel.
Run the following command from your laptop terminal. This command creates an SSH tunnel that forwards your local port 8080 to port 8080 on the master node.
ssh -L 8080:localhost:8080 <username>@<master-node-ip>
Once connected to the master node, run the following command to temporarily forward the Longhorn frontend service to your local machine:
kubectl port-forward -n longhorn-system svc/longhorn-frontend 8080:80
After running this, you can open your web browser on your local machine and access the Longhorn UI at: http://localhost:8080.
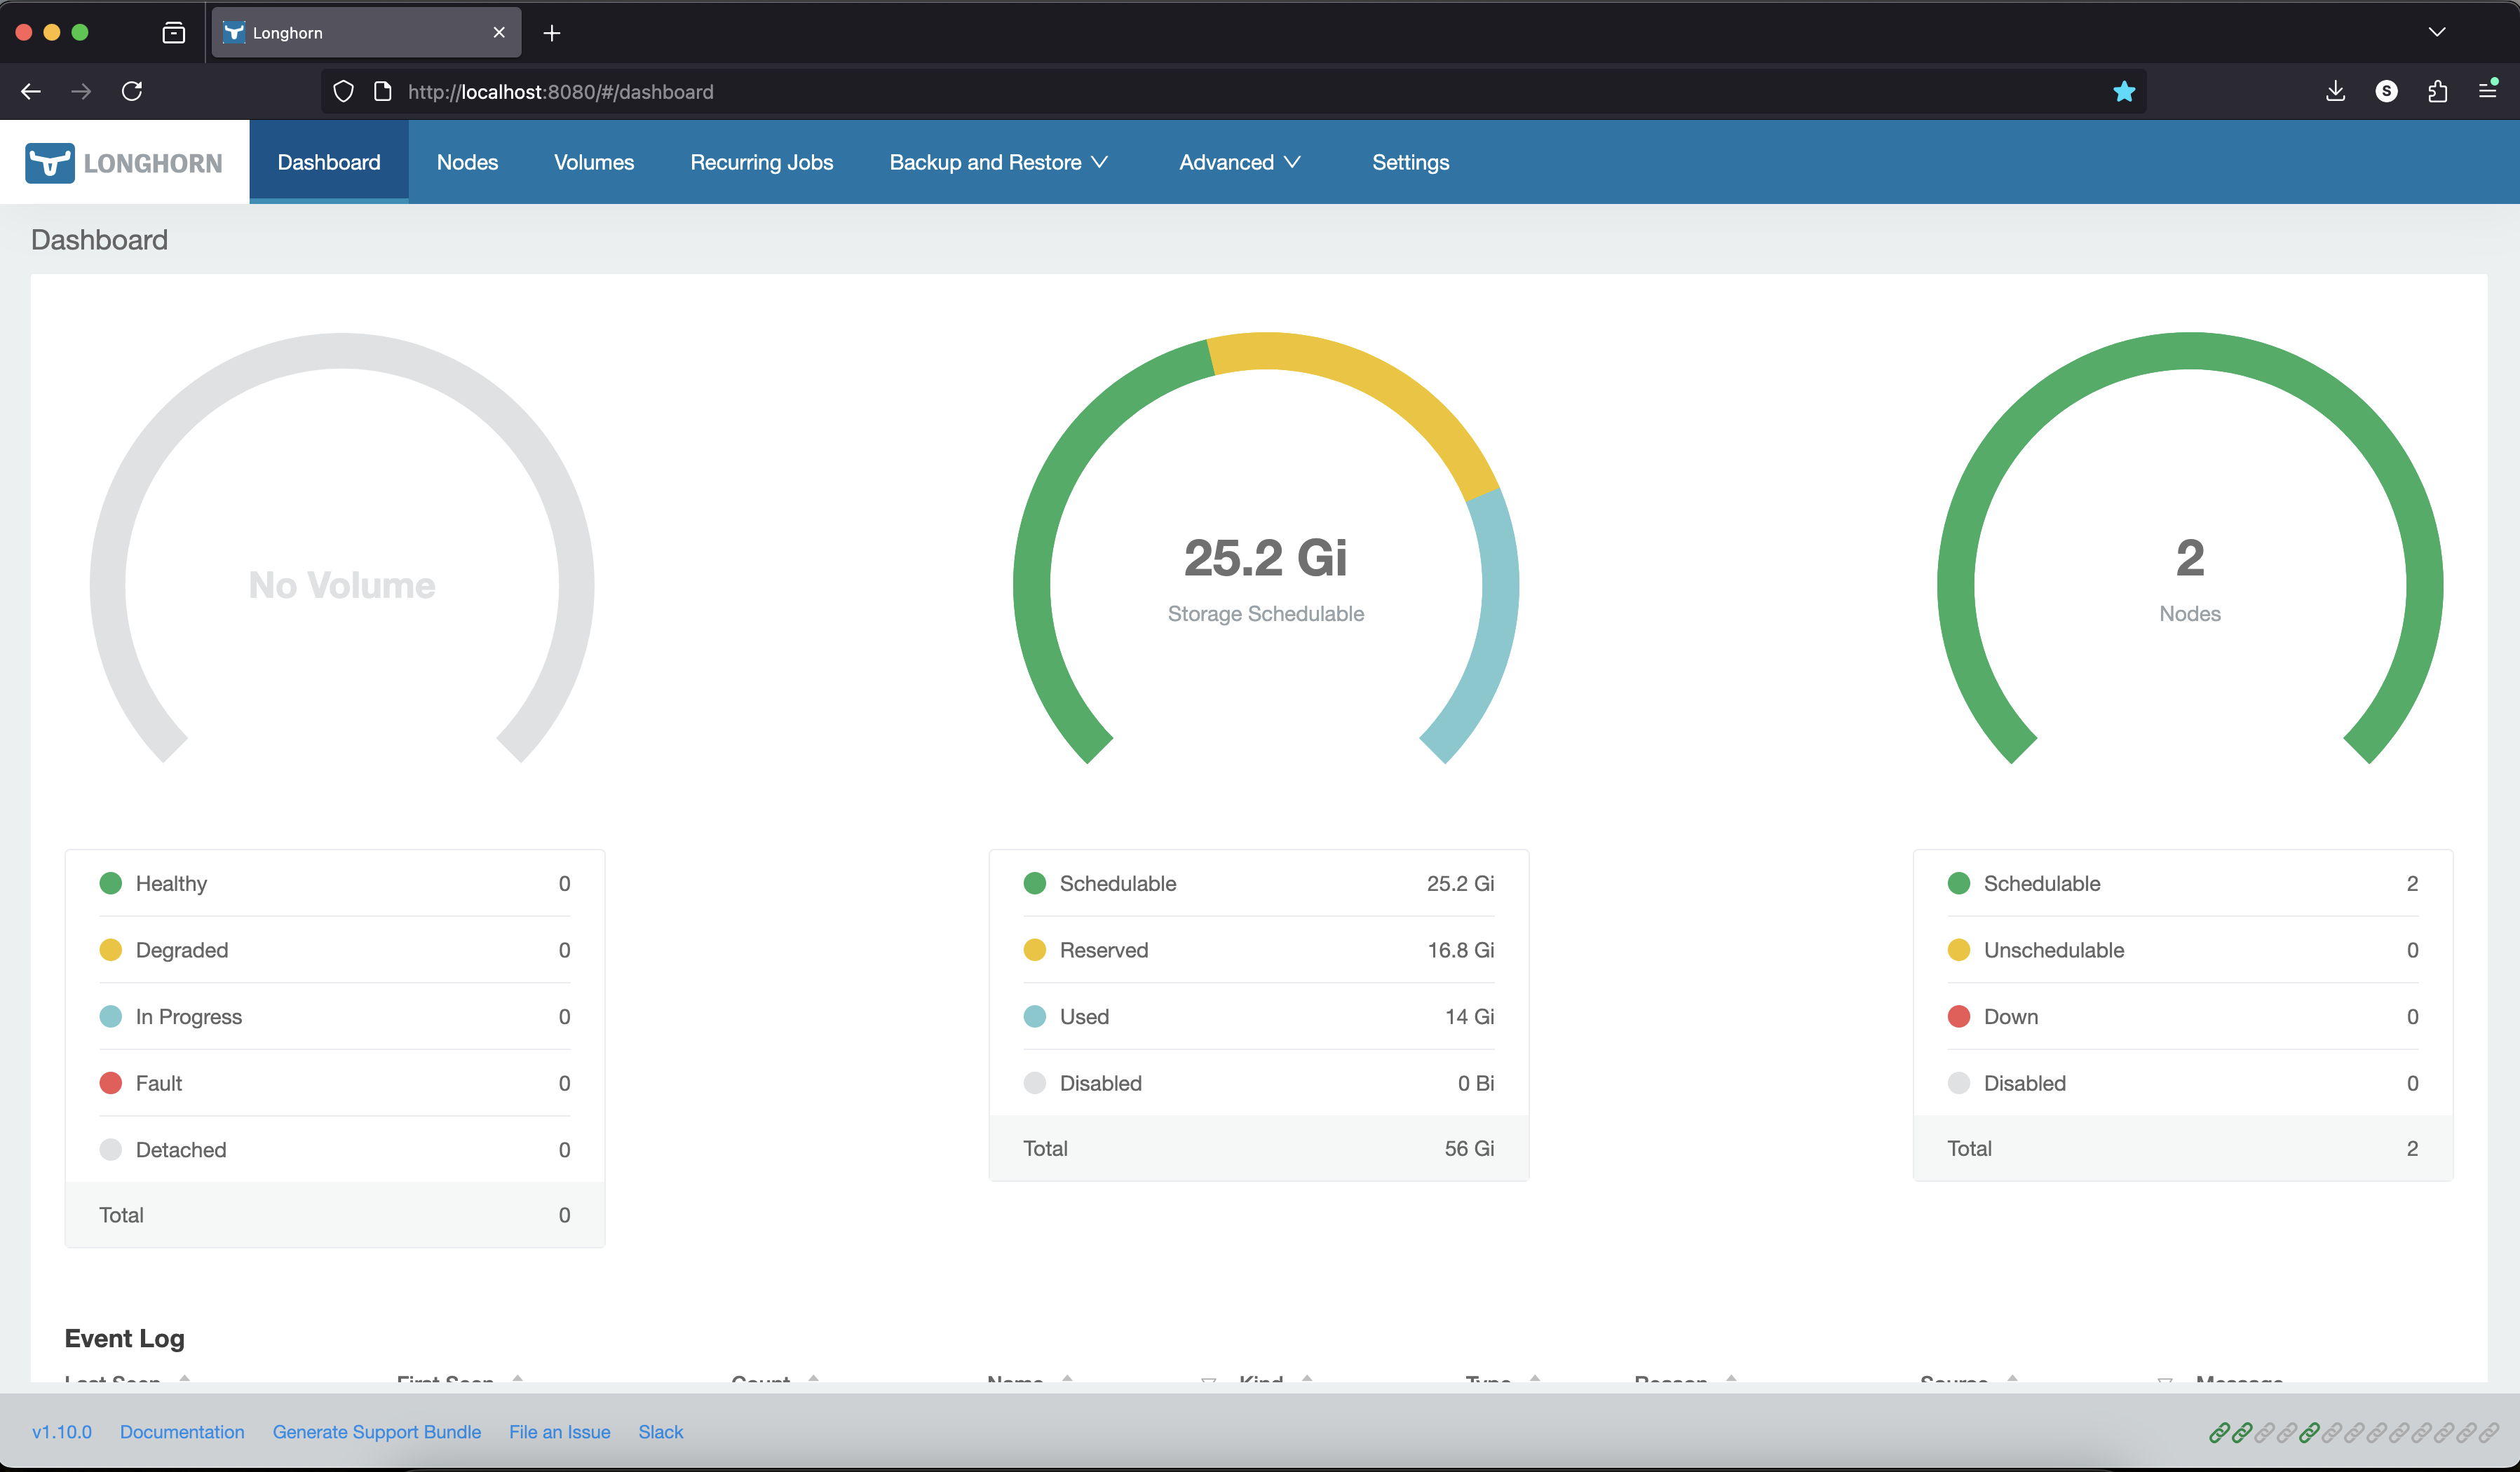
At this stage, the Kubernetes cluster is ready. Now you can test it by deploying workloads on it.
Conclusion
Deploying a Kubernetes cluster doesn’t have to be complicated. With kubeadm, you can quickly bootstrap a production-ready K8S cluster while retaining flexibility and control. Whether you’re a DevOps engineer setting up a real-world cluster or a beginner experimenting with Kubernetes, kubeadm offers the easiest way to get started.
If you want to learn more about Kubernetes best practices, container networking, or scaling clusters, stay tuned for our upcoming guides.